Microsoft Entra ID (SAML)
Microsoft Entra ID can be configured as a SAML provider for use with Amazon Cognito. Integrating Entra ID enables you to sign in with your existing enterprise users, and maintain profiles unique to the Amplify Auth resource for use within your Amplify app. To learn more, visit the Azure documentation for SAML authentication with Microsoft Entra ID.
Start your personal cloud sandbox
To get started, define your auth resource with the appropriate redirect URIs:
import { defineAuth } from "@aws-amplify/backend"
/** * Define and configure your auth resource * @see https://docs.amplify.aws/gen2/build-a-backend/auth */export const auth = defineAuth({  loginWith: {    email: true,    externalProviders: {      logoutUrls: ["http://localhost:3000/come-back-soon"],      callbackUrls: ["http://localhost:3000/profile"],    },  },})
Deploy to your personal cloud sandbox with npx ampx sandbox. This will generate a domain you can use to configure your new Entra ID App. After deploying your changes successfully, copy the generated domain value from amplify_outputs.json
{ "auth": { "aws_region": "us-east-1", "user_pool_id": "<your-cognito-user-pool-id>", "user_pool_client_id": "<your-cognito-user-pool-client-id>", "identity_pool_id": "<your-cognito-identity-pool-id>", "mfa_methods": [], "standard_required_attributes": [ "email" ], "username_attributes": [ "email" ], "user_verification_types": [ "email" ], "mfa_configuration": "OFF", "password_policy": { "min_length": 8, "require_numbers": true, "require_lowercase": true, "require_uppercase": true, "require_symbols": true }, "oauth": { "identity_providers": [], "redirect_sign_in_uri": [ "http://localhost:3000/profile" ], "redirect_sign_out_uri": [ "http://localhost:3000/come-back-soon" ], "response_type": "code", "scopes": [ "phone", "email", "openid", "profile", "aws.cognito.signin.user.admin" ], "domain": "<some-hash>.auth.us-east-1.amazoncognito.com" }, }, "version": "1"}Set up Microsoft Entra ID
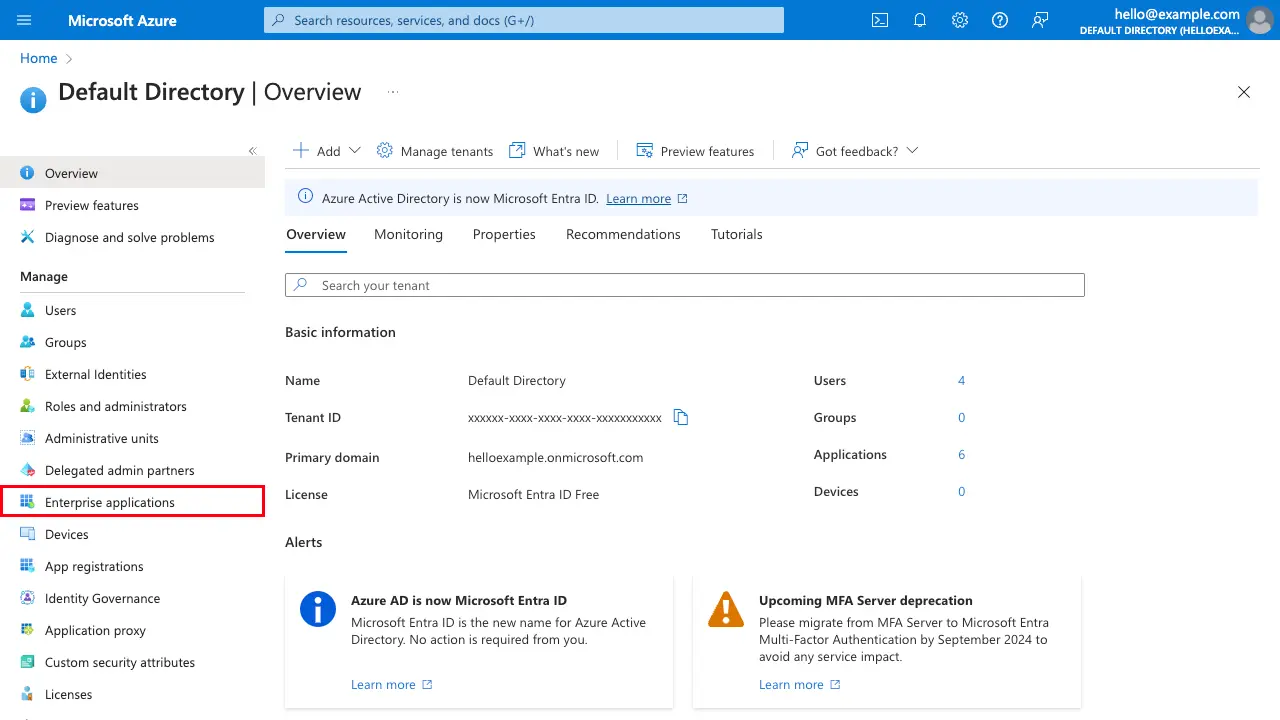
Next, navigate to portal.azure.com, select Entra ID. In your default directory, or company's existing directory, under Manage, select Enterprise Applications
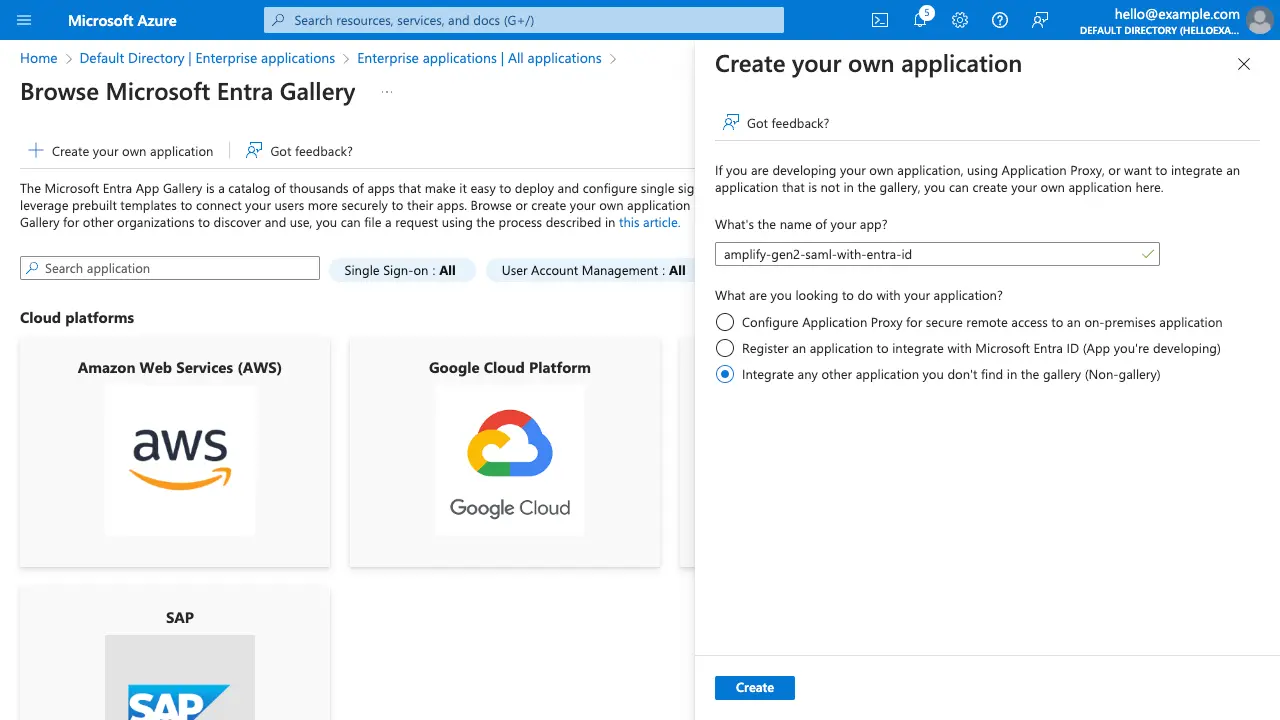
Afterwards, select New application, then select Create your own application. Specify a name for the application and choose Integrate any other application you don't find in the gallery (Non-gallery)
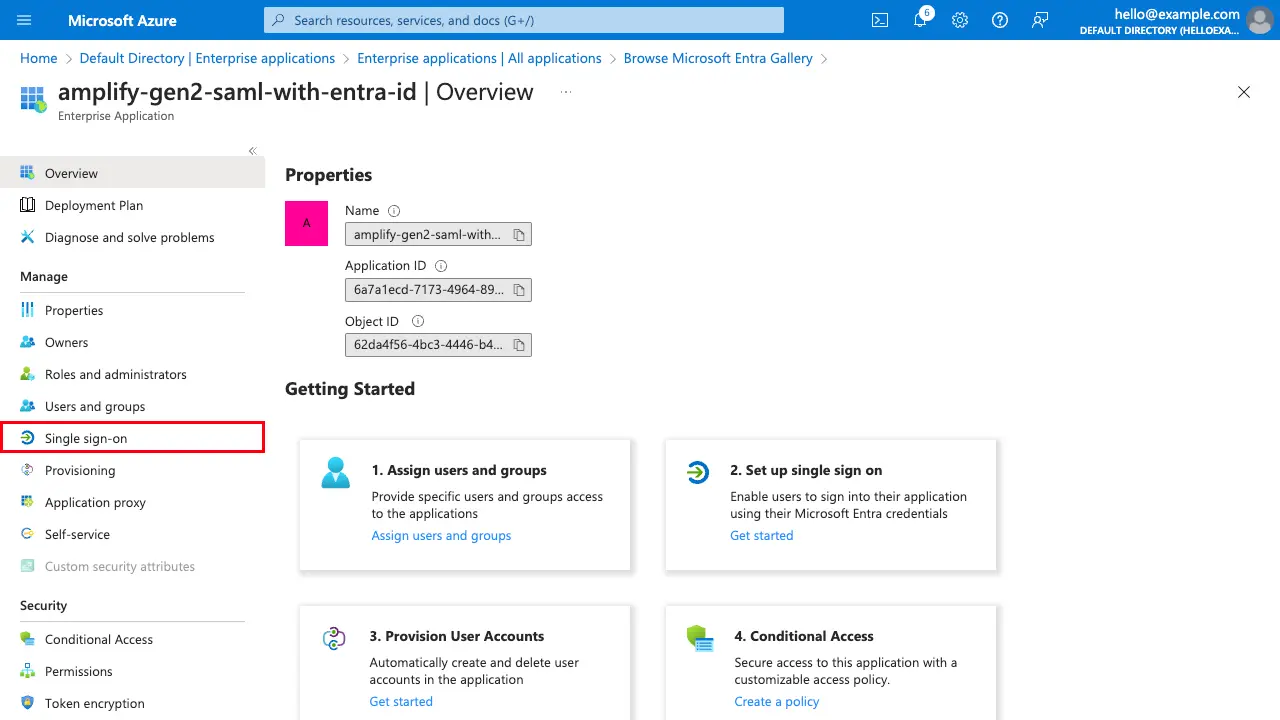
Now that you have created the new enterprise application you can begin to configure Single Sign-on with SAML. Select Single sign-on
Then select SAML
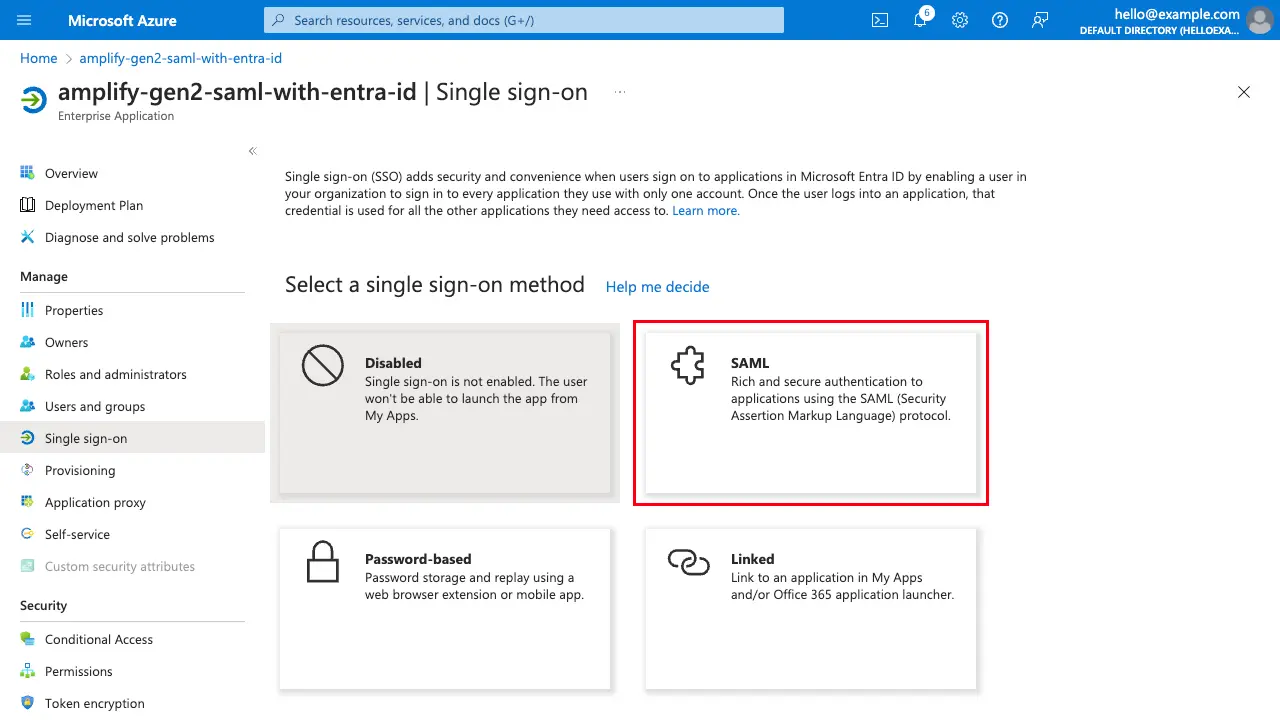
You will be directed to a page to set up single sign-on with SAML, which needs a few pieces of information from your Amplify Auth resource.

In the Basic SAML Configuration step, select Edit and populate with the appropriate values.
| Label | Value |
|---|---|
| Identifier (Entity ID) | urn:amazon:cognito:sp:<your-cognito-user-pool-id> |
| Reply URL (Assertion Consumer Service URL) | https://<your-cognito-domain>/saml2/idpresponse |
| Logout Url (Optional) | https://<your-cognito-domain>/saml2/logout |
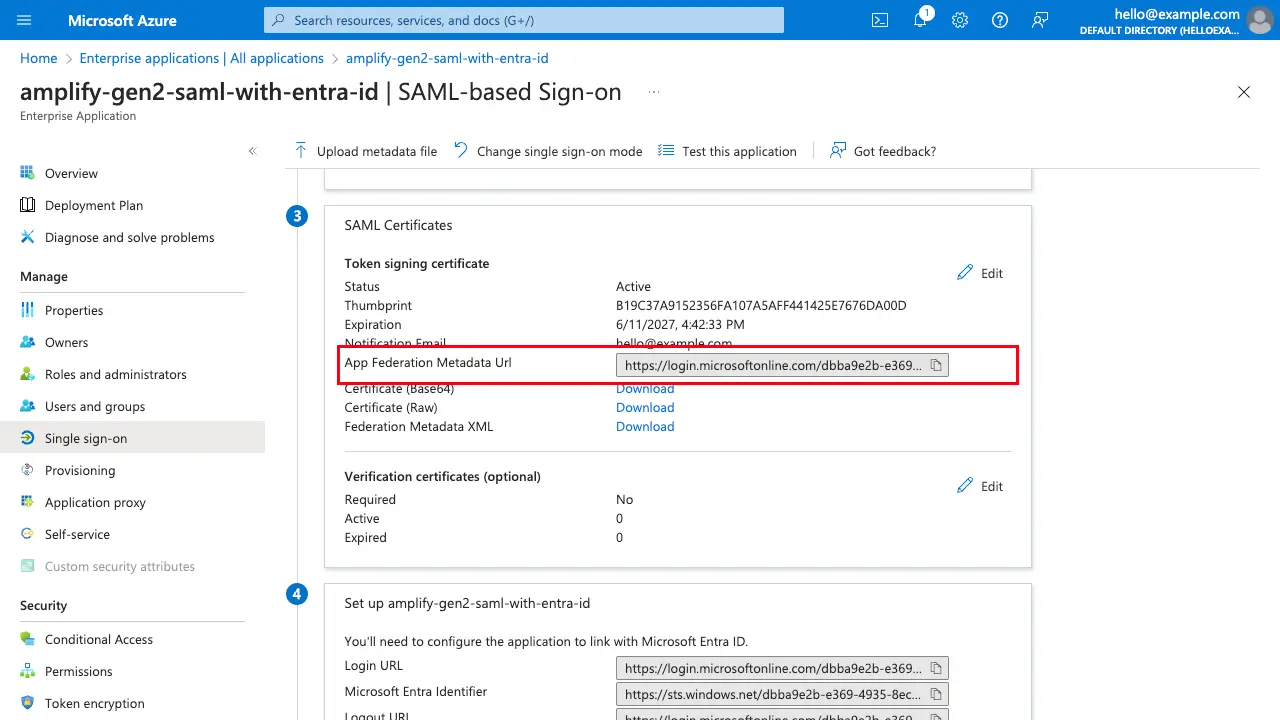
Save the configuration and proceed to Step 3's SAML Certificates section. Copy the App Federation Metadata Url
Configure your backend with Entra ID
Now that you've configured your SAML provider with Microsoft Entra ID and copied the App Federation Metadata Url, configure your auth resource with the new SAML provider and paste the URL value into the metadataContent property:
import { defineAuth } from "@aws-amplify/backend"
/** * Define and configure your auth resource * @see https://docs.amplify.aws/gen2/build-a-backend/auth */export const auth = defineAuth({  loginWith: {    email: true,    externalProviders: {      saml: {        name: "MicrosoftEntraIDSAML",        metadata: {          metadataType: "URL",          metadataContent: "<your-metadata-content-url>",        },        attributeMapping: {          email: "http://schemas.xmlsoap.org/ws/2005/05/identity/claims/emailaddress",        },      },      logoutUrls: ["http://localhost:3000/come-back-soon"],      callbackUrls: ["http://localhost:3000/profile"],    },  },})
User attributes can be found in Step 2's Attributes & Claims section, and are prefixed with a namespace by default. The example above shows mapping the default claim for the SAML user's email address, however additional attributes can be mapped.
Optionally upload the Cognito Signing Certificate
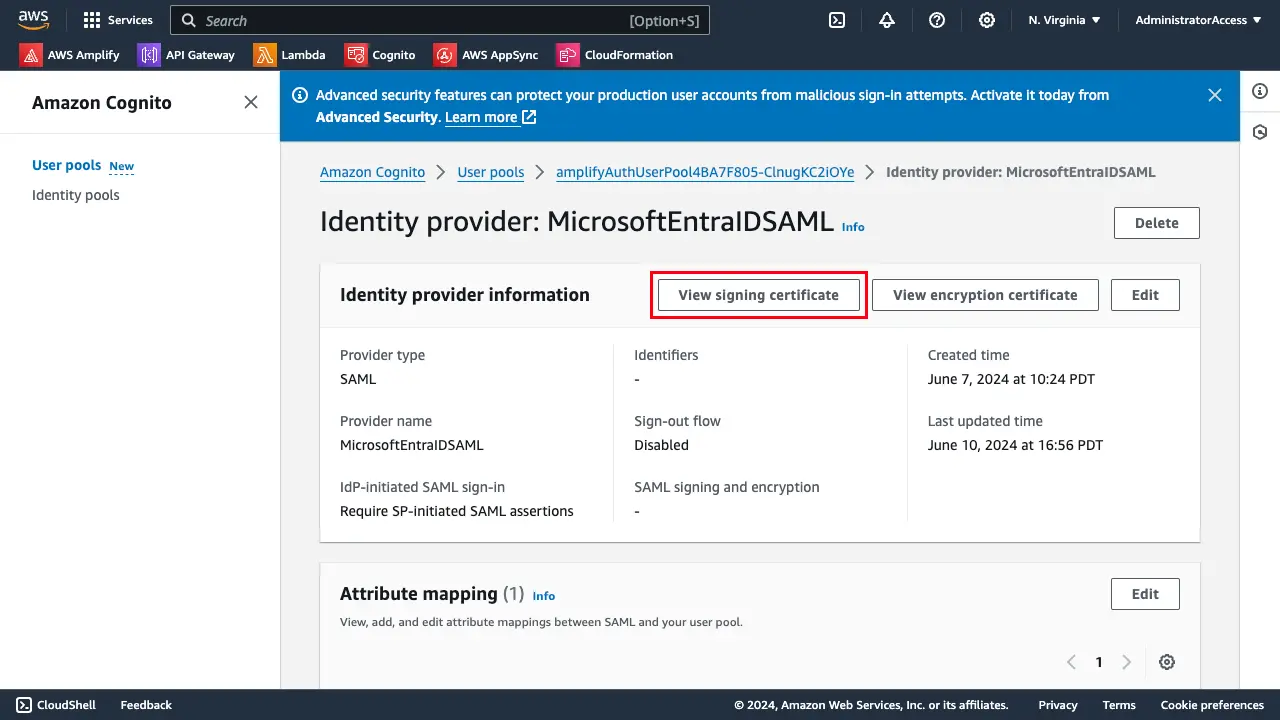
In the AWS Console, navigate to your Cognito User Pool. Select the identity provider, MicrosoftEntraIDSAML, created after configuring Amplify Auth with the Entra ID SAML provider. Select View signing certificate and download as .crt
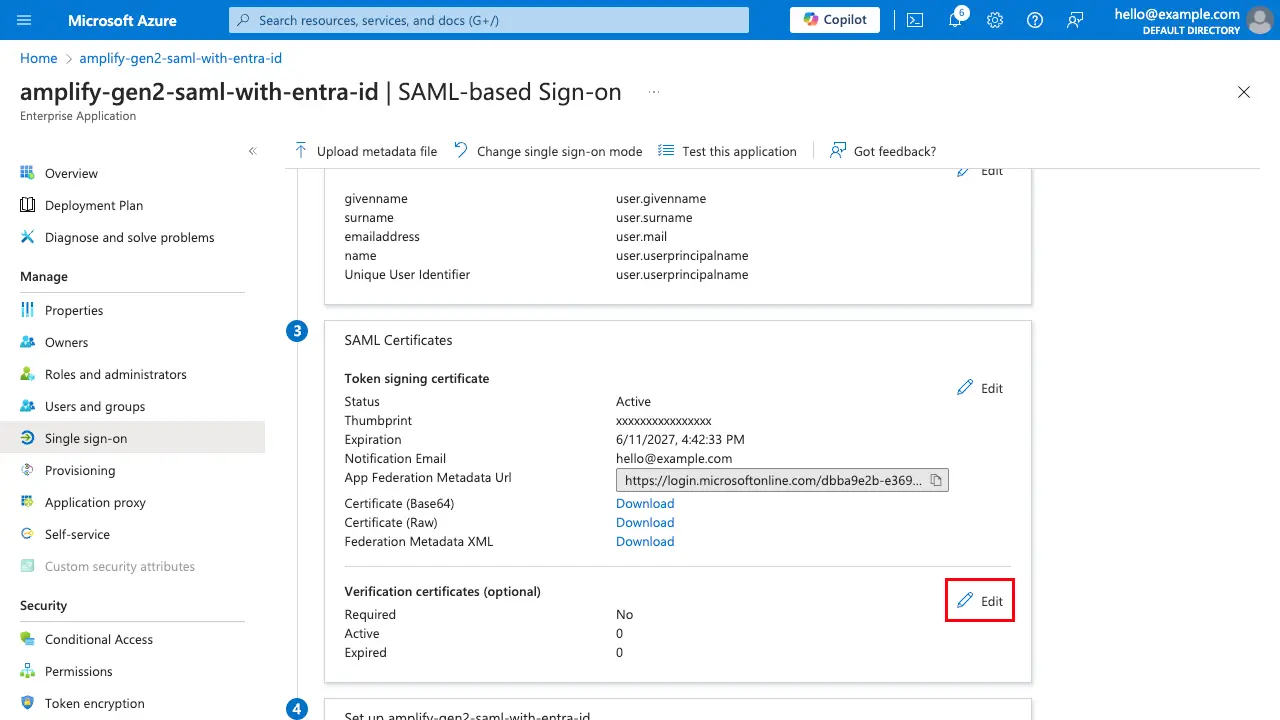
Rename the file extension to .cer in order to upload to Azure. On the Single sign-on page, scroll down to Step 3 (SAML Certificates), and under Verification Certificates (optional), select Edit.
Select Require verification certificates and upload the certificate.
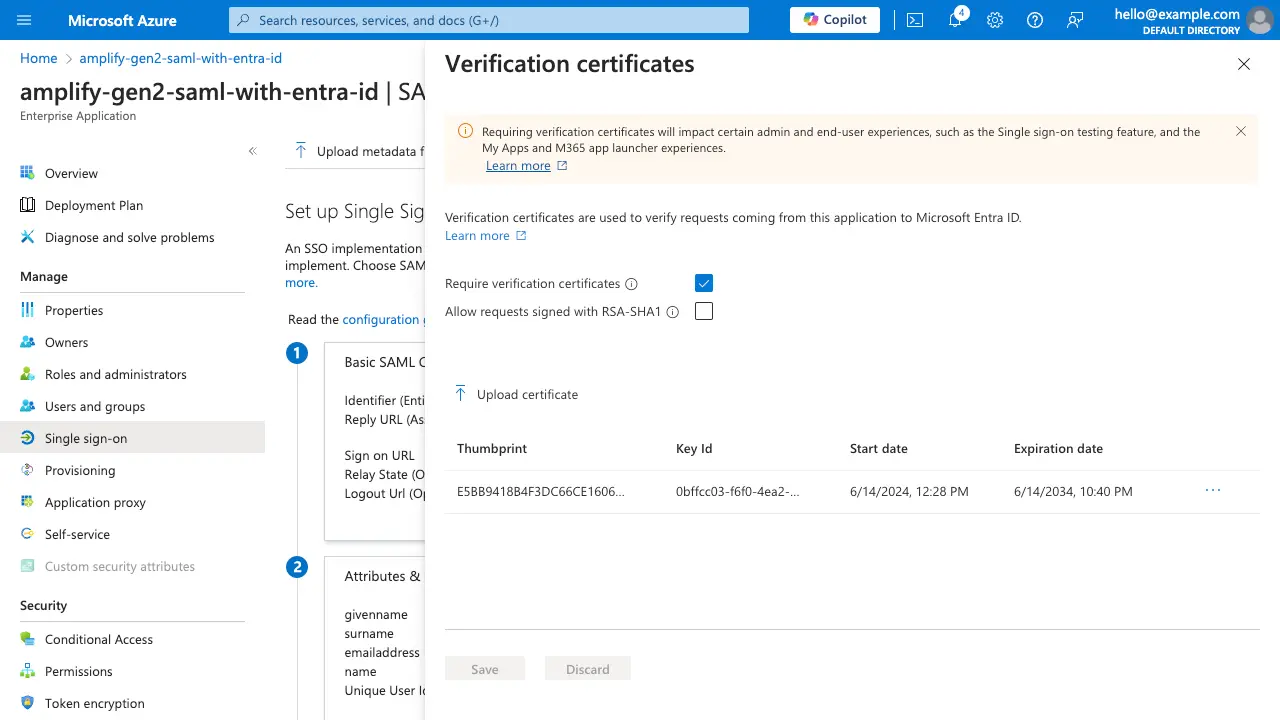
Save your changes, and now requests to Entra ID from your Cognito User Pool will be verified.
Connect your frontend
Now your users are ready to sign in with Microsoft Entra ID. To sign in with this custom provider, specify the provider name as the name specified in your auth resource definition: MicrosoftEntraIDSAML
import { signInWithRedirect } from "aws-amplify/auth"
signInWithRedirect({  provider: { custom: "MicrosoftEntraIDSAML" }})