Quickstart
👋 Welcome to AWS Amplify! In this quickstart guide, you will:
- Deploy a React and Vite app
- Build and connect to a database with real-time data updates
- Configure authentication and authorization rules
Deploy a fullstack app to AWS
We've created a starter "To-do" application to help get started faster. First, you will create a repository in your GitHub account using our starter React template.
1. Create the repository
Use our starter template to create a repository in your GitHub account. This template scaffolds create-vite-app with Amplify backend capabilities.
Create repository from template
Use the form in GitHub to finalize your repo's creation.
2. Deploy the starter app
Now that the repository has been created, deploy it with Amplify.
Deploy to AWS
Select GitHub. After you give Amplify access to your GitHub account via the popup window, pick the repository and main branch to deploy. Make no other changes and click through the flow to Save and deploy.
3. View deployed app
While you are waiting for your app to deploy (~5 mins)Learn about the project structure
Let's take a tour of the project structure in this starter repository by opening it on GitHub. The starter application has pre-written code for a to-do list app. It gives you a real-time database with a feed of all to-do list items and the ability to add new items.
├── amplify/ # Folder containing your Amplify backend configuration│ ├── auth/ # Definition for your auth backend│ │ └── resource.tsx│ ├── data/ # Definition for your data backend│ │ └── resource.ts| ├── backend.ts│ └── tsconfig.json├── src/ # React UI code│ ├── App.tsx # UI code to sync todos in real-time│ ├── index.css # Styling for your app│ └── main.tsx # Entrypoint of the Amplify client library├── package.json└── tsconfig.jsonWhen the build completes, visit the newly deployed branch by selecting "Visit deployed URL". Since the build deployed an API, database, and authentication backend, you will be able to create new to-do items.
In the Amplify console, click into the deployment branch (in this case main) > select Data in the left-hand menu > Data manager to see the data entered in your database.
Make frontend updates
Let's learn how to enhance the app functionality by creating a delete flow for to-do list items.
4. Set up local environment
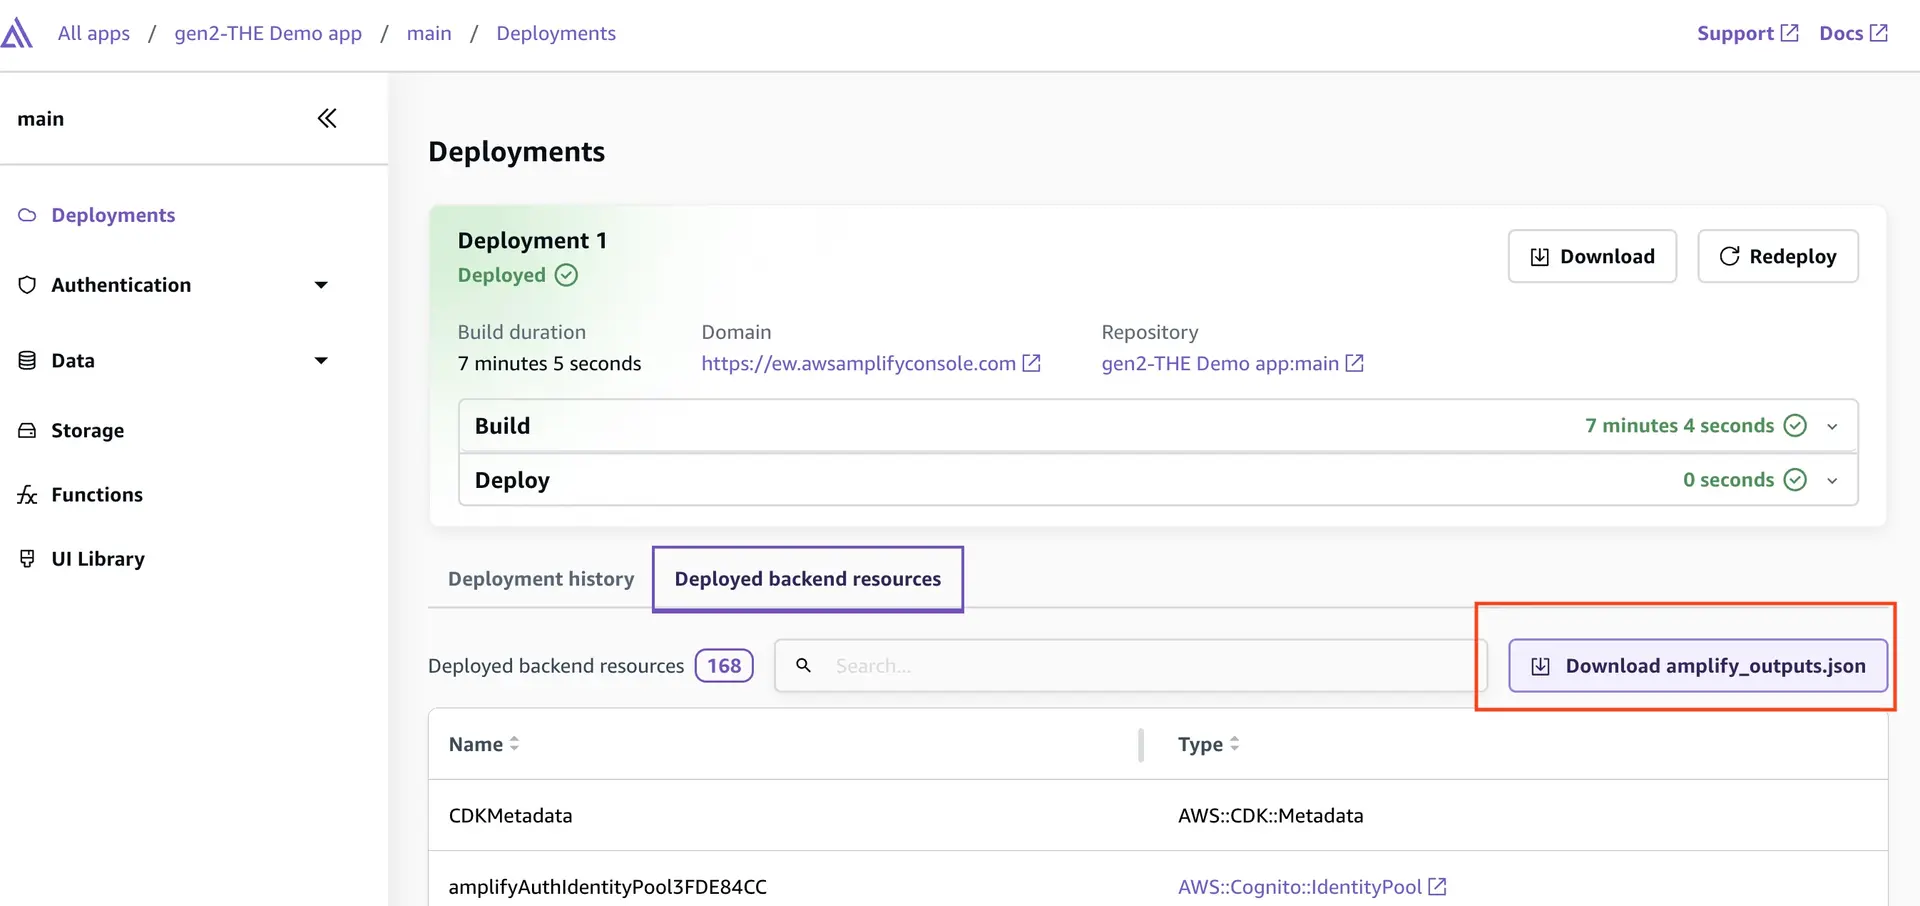
Now let's set up our local development environment to add features to the frontend. Click on your deployed branch and you will land on the Deployments page which shows you your build history and a list of deployed backend resources.
At the bottom of the page you will see a tab for Deployed backend resources. Click on the tab and then click the Download amplify_outputs.json file button.
Clone the repository locally.
git clone https://github.com/<github-user>/amplify-vite-react-template.gitcd amplify-vite-react-template && npm installNow move the amplify_outputs.json file you downloaded above to the root of your project.
├── amplify├── src├── amplify_outputs.json <== backend outputs file├── package.json└── tsconfig.jsonLearn moreamplify_outputs.json
The amplify_outputs.json file contains backend endpoint information, publicly-viewable API keys, authentication flow information, and more. The Amplify client library uses this outputs file to connect to your Amplify Backend. You can review how the outputs file is imported within the main.tsx file and then passed into the Amplify.configure(...) function of the Amplify client library.
5. Implement delete functionality
Go to the src/App.tsx file and add in a new deleteTodo functionality and pass function into the <li> element's onClick handler.
function App() { // ... function deleteTodo(id: string) { client.models.Todo.delete({ id }) }
return ( <main> <h1>My todos</h1> <button onClick={createTodo}>+ new</button> <ul> {todos.map(todo => <li onClick={() => deleteTodo(todo.id)} key={todo.id}> {todo.content} </li>)} </ul> <div> 🥳 App successfully hosted. Try creating a new todo. <br /> <a href="https://docs.amplify.aws/react/start/quickstart/">Review next step of this tutorial.</a> </div> </main> )}Try out the deletion functionality now by starting the local dev server:
npm run devThis should start a local dev server at http://localhost:5173.
6. Implement login UI
The starter application already has a pre-configured auth backend defined in the amplify/auth/resource.ts file. We've configured it to support email and password login but you can extend it to support a variety of login mechanisms, including Google, Amazon, Sign In With Apple, and Facebook.
The fastest way to get your login experience up and running is to use our Authenticator UI component. In your src/main.tsx file, import the Authenticator UI component and wrap your <App> component.
import React from 'react';import ReactDOM from 'react-dom/client';import { Authenticator } from '@aws-amplify/ui-react';import { Amplify } from 'aws-amplify';import App from './App.tsx';import outputs from '../amplify_outputs.json';import './index.css';import '@aws-amplify/ui-react/styles.css';
Amplify.configure(outputs);
ReactDOM.createRoot(document.getElementById('root')!).render( <React.StrictMode> <Authenticator> <App /> </Authenticator> </React.StrictMode>);The Authenticator component auto-detects your auth backend settings and renders the correct UI state based on the auth backend's authentication flow.
In your src/App.tsx file, add a button to enable users to sign out of the application. Import the useAuthenticator hook from the Amplify UI library to hook into the state of the Authenticator.
import type { Schema } from '../amplify/data/resource';import { useAuthenticator } from '@aws-amplify/ui-react';import { useEffect, useState } from 'react';import { generateClient } from 'aws-amplify/data';
const client = generateClient<Schema>();
function App() { const { signOut } = useAuthenticator();
// ...
return ( <main> {/* ... */} <button onClick={signOut}>Sign out</button> </main> );}
export default App;Try out your application in your localhost environment again. You should be presented with a login experience now.
To get these changes to the cloud, commit them to git and push the changes upstream.
git commit -am "added authenticator"git pushAmplify automatically deploys the latest version of your app based on your git commits. In just a few minutes, when the application rebuilds, the hosted app will be updated to support the deletion functionality.
Make backend updates
Let's update our backend to implement per-user authorization rules, allowing each user to only access their own to-dos.
7. Set up local AWS credentials
To make backend updates, we are going to require AWS credentials to deploy backend updates from our local machine.
Skip ahead to step 8, if you already have an AWS profile with credentials on your local machine, and your AWS profile has the AmplifyBackendDeployFullAccess permission policy.
Otherwise, set up local AWS credentials that grant Amplify permissions to deploy backend updates from your local machine.
8. Deploy cloud sandbox
To update your backend without affecting the production branch, use Amplify's cloud sandbox. This feature provides a separate backend environment for each developer on a team, ideal for local development and testing.
To start your cloud sandbox, run the following command in a new Terminal window:
npx ampx sandboxOnce the cloud sandbox has been fully deployed (~5 min), you'll see the amplify_outputs.json file updated with connection information to a new isolated authentication and data backend.
9. Implement per-user authorization
The to-do items in the starter are currently shared across all users, but, in most cases, you want data to be isolated on a per-user basis.
To isolate the data on a per-user basis, you can use an "owner-based authorization rule". Let's apply the owner-based authorization rule to your to-do items:
import { type ClientSchema, a, defineData } from '@aws-amplify/backend';
const schema = a.schema({ Todo: a.model({ content: a.string(), }).authorization(allow => [allow.owner()]),});
export type Schema = ClientSchema<typeof schema>;
export const data = defineData({ schema, authorizationModes: { // This tells the data client in your app (generateClient()) // to sign API requests with the user authentication token. defaultAuthorizationMode: 'userPool', },});In the application client code, let's also render the username to distinguish different users once they're logged in. Go to your src/App.tsx file and render the user property from the useAuthenticator hook.
// ... imports
function App() { const { user, signOut } = useAuthenticator();
// ...
return ( <main> <h1>{user?.signInDetails?.loginId}'s todos</h1> {/* ... */} </main> )}Now, let's go back to your local application and test out the user isolation of the to-do items.
You will need to sign up new users again because now you're working with the cloud sandbox instead of your production backend.
To get these changes to the cloud, commit them to git and push the changes upstream.
git commit -am "added per-user data isolation"git pushOnce your build completes in the Amplify Console, the main backend will update to support the changes made within the cloud sandbox. The data in the cloud sandbox is fully isolated and won't pollute your production database.
🥳 Success
That's it! You have successfully built a fullstack app on AWS Amplify. If you want to learn more about how to work with Amplify, here's the conceptual guide for how Amplify works.