Quickstart
Prerequisites
Before you get started, make sure you have the following installed:
- Node.js v18.17 or later
- npm v9 or later
- git v2.14.1 or later
- You will also need to create an AWS Account. Note that AWS Amplify is part of the AWS Free Tier.
- Configure your AWS account to use with Amplify instructions.
- You need to have Xcode and Developer Tooling installed on your machine.
Starting fresh?Create an XCode project
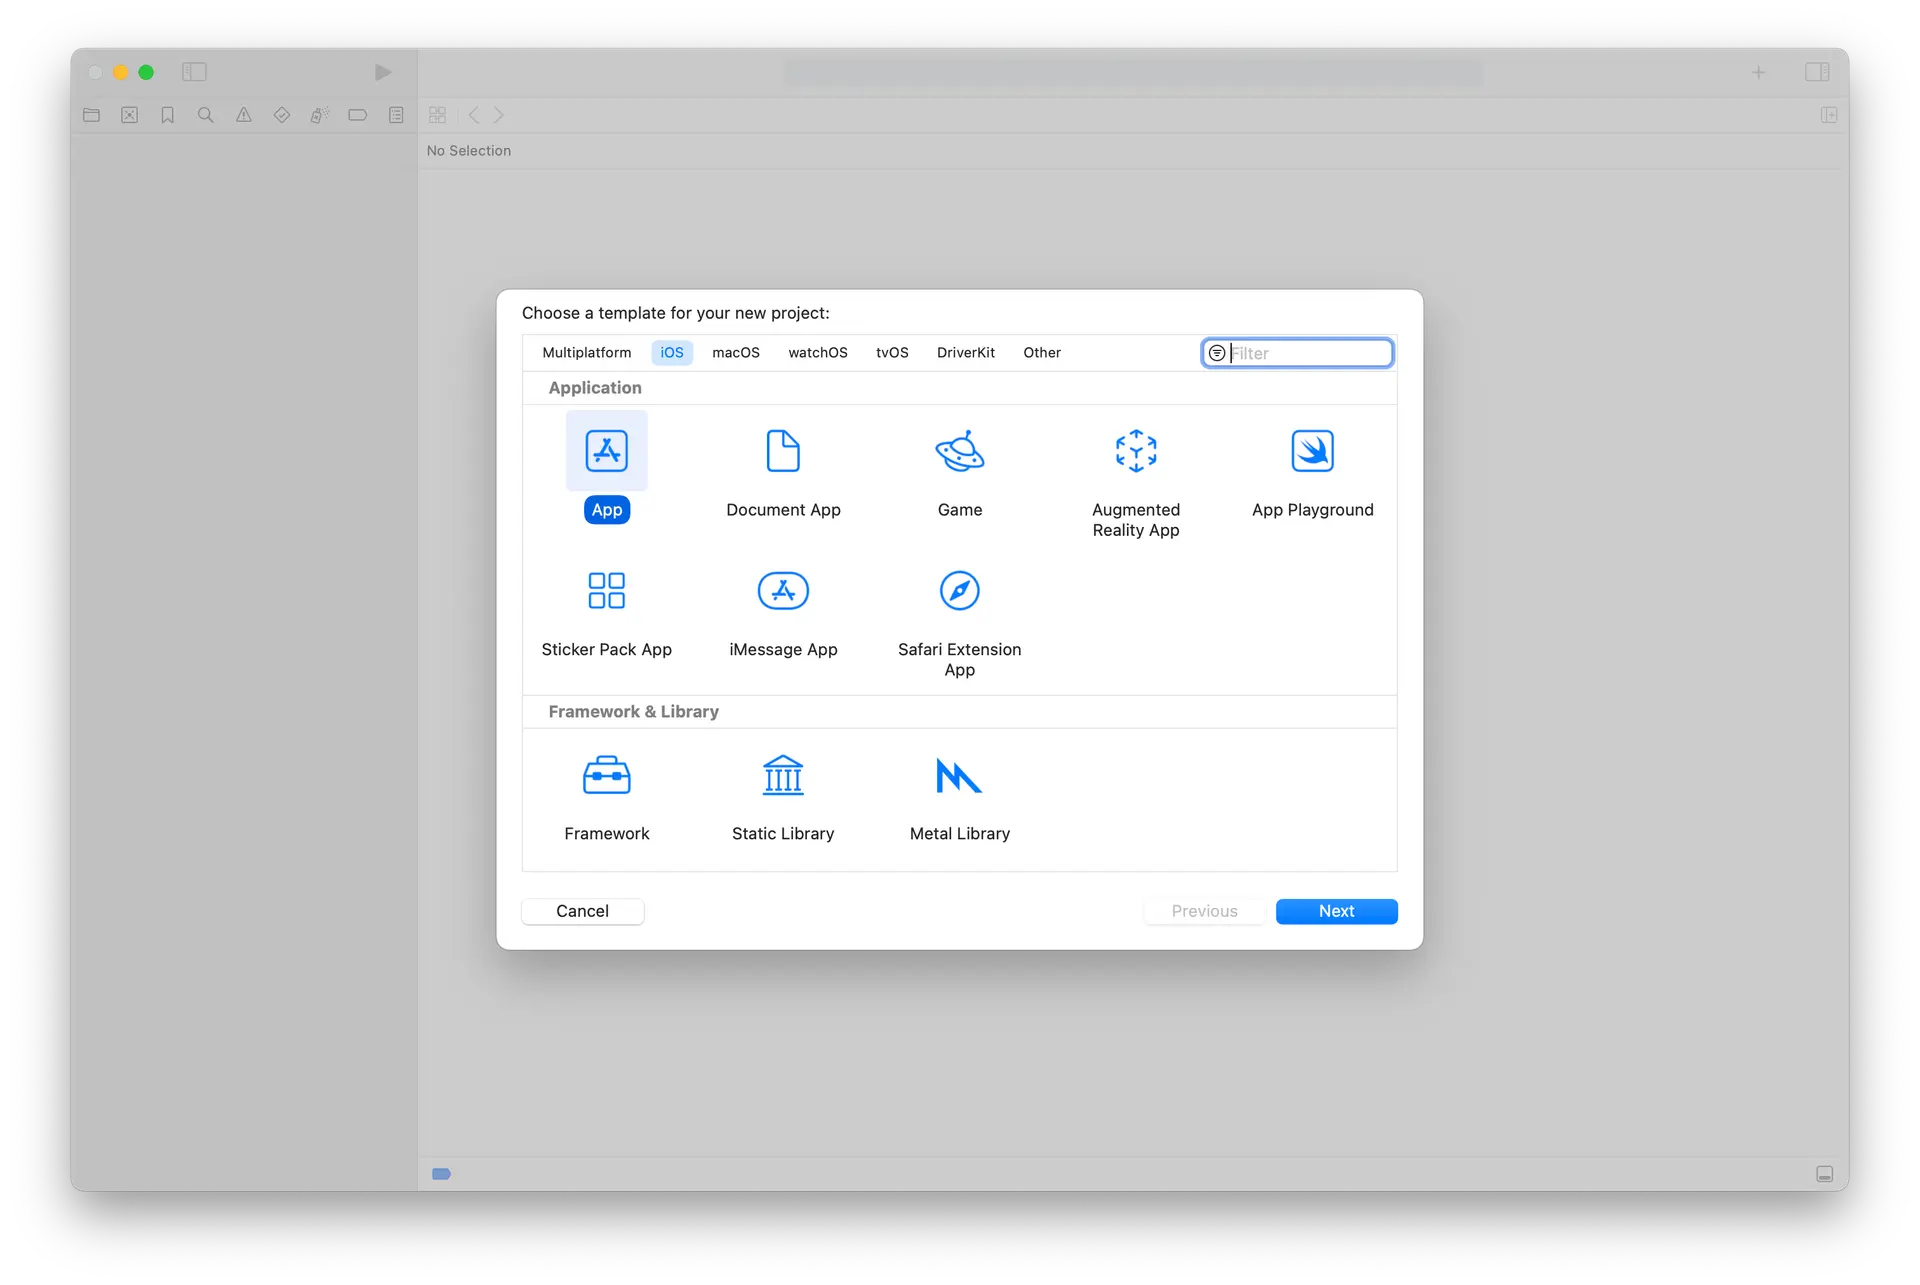
Open Xcode and select Create New Project...

In the next step select the App template under iOS. Click on next.
Next steps are:
- Adding a Product Name (e.g. MyAmplifyApp)
- Select a Team (e.g. None)
- Select a Organization Identifier (e.g. com.example)
- Select SwiftUI an Interface.
- Press Next

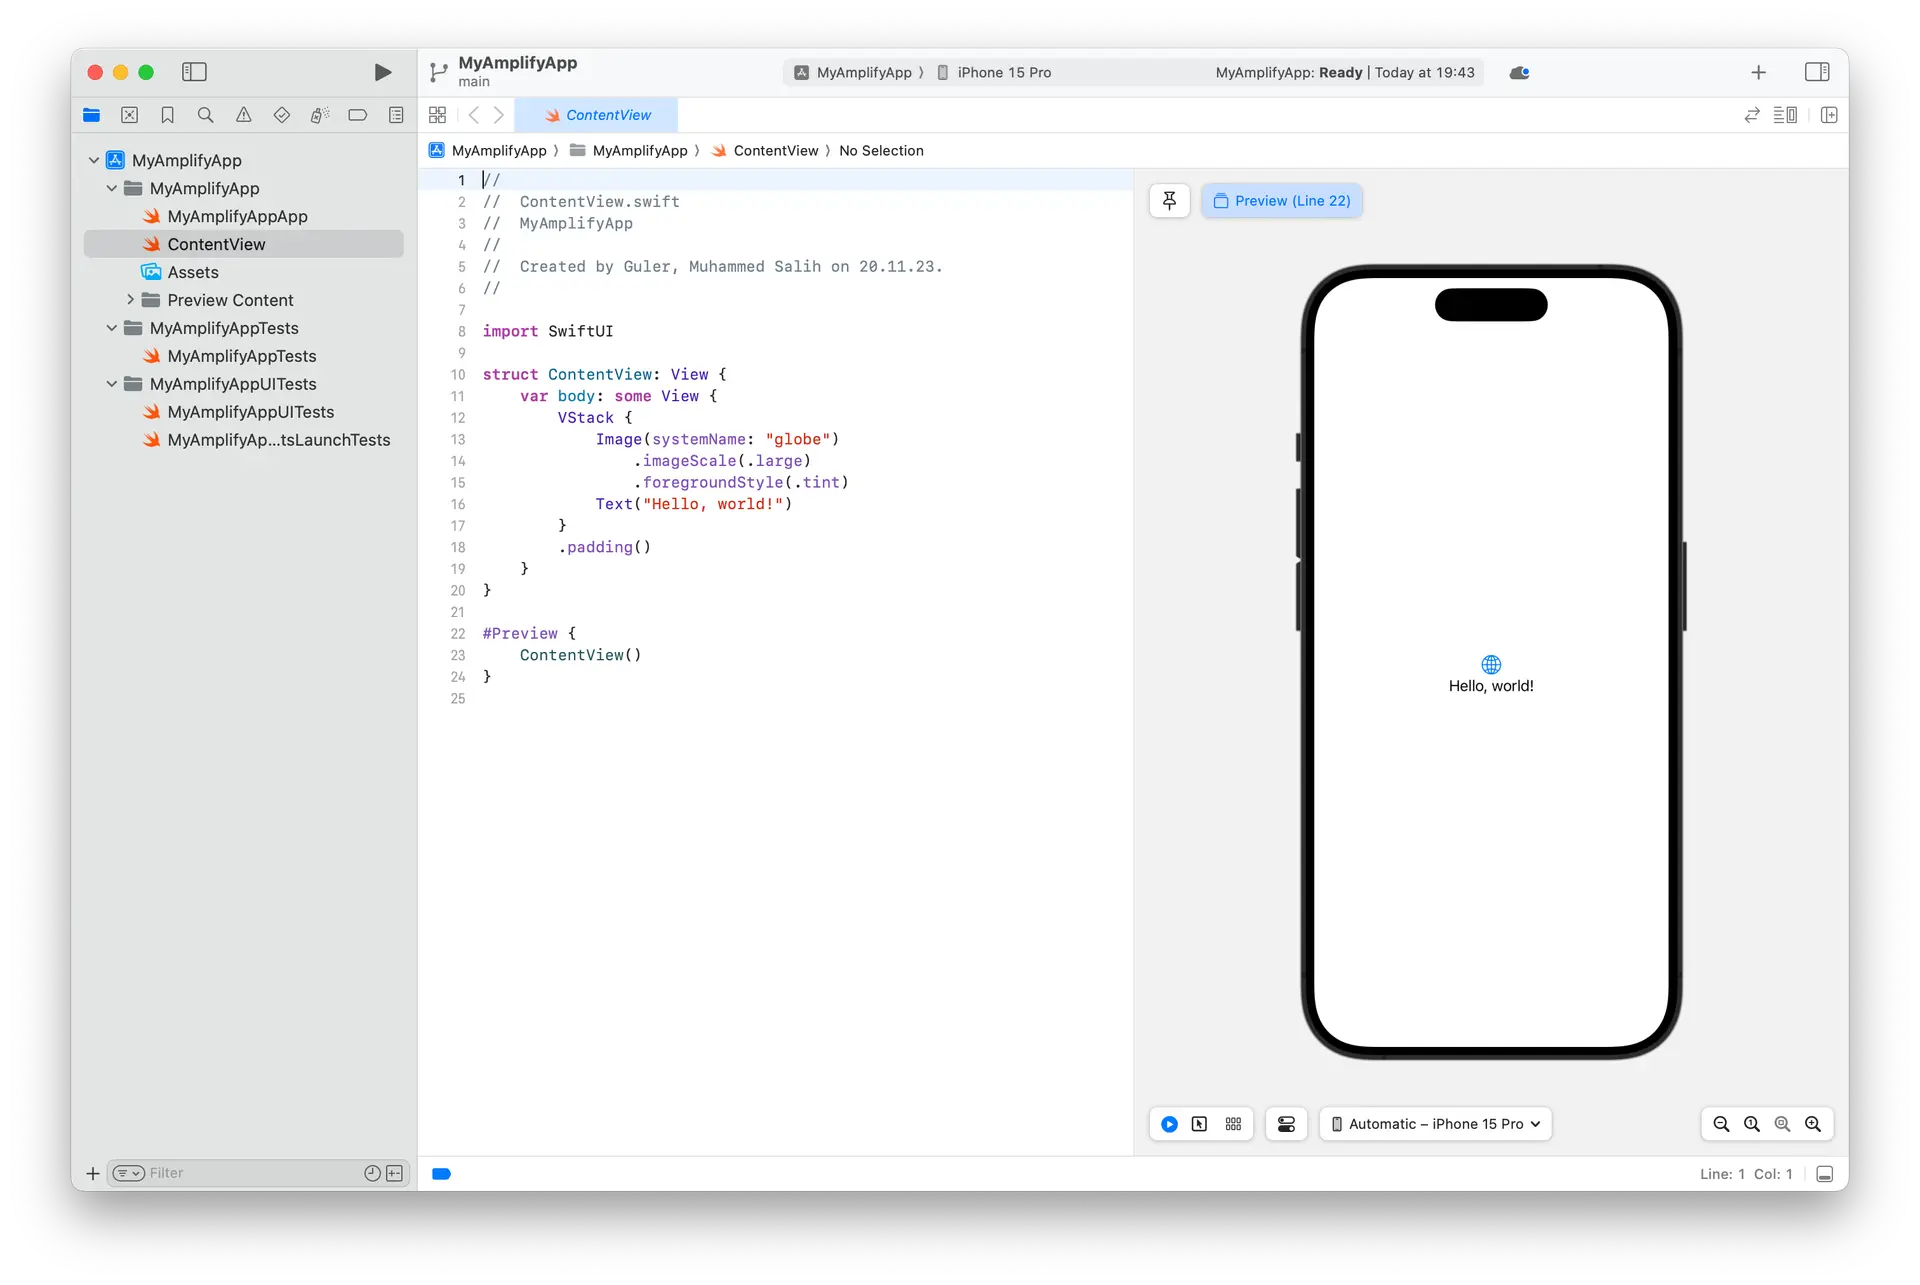
Now you should have your project created.
Create Backend
The easiest way to get started with AWS Amplify is through npm with create-amplify command. You can run it from your base project directory.
cd my_amplify_appnpm create amplify@latest? Where should we create your project? (.) # press enterRunning this command will scaffold Amplify backend files in your current project with the following files added:
├── amplify/│ ├── auth/│ │ └── resource.ts│ ├── data/│ │ └── resource.ts│ ├── backend.ts│ └── package.json├── node_modules/├── .gitignore├── package-lock.json├── package.json└── tsconfig.jsonTo deploy your backend use Amplify's per-developer cloud sandbox. This feature provides a separate backend environment for every developer on a team, ideal for local development and testing. To run your application with a sandbox environment, you can run the following command:
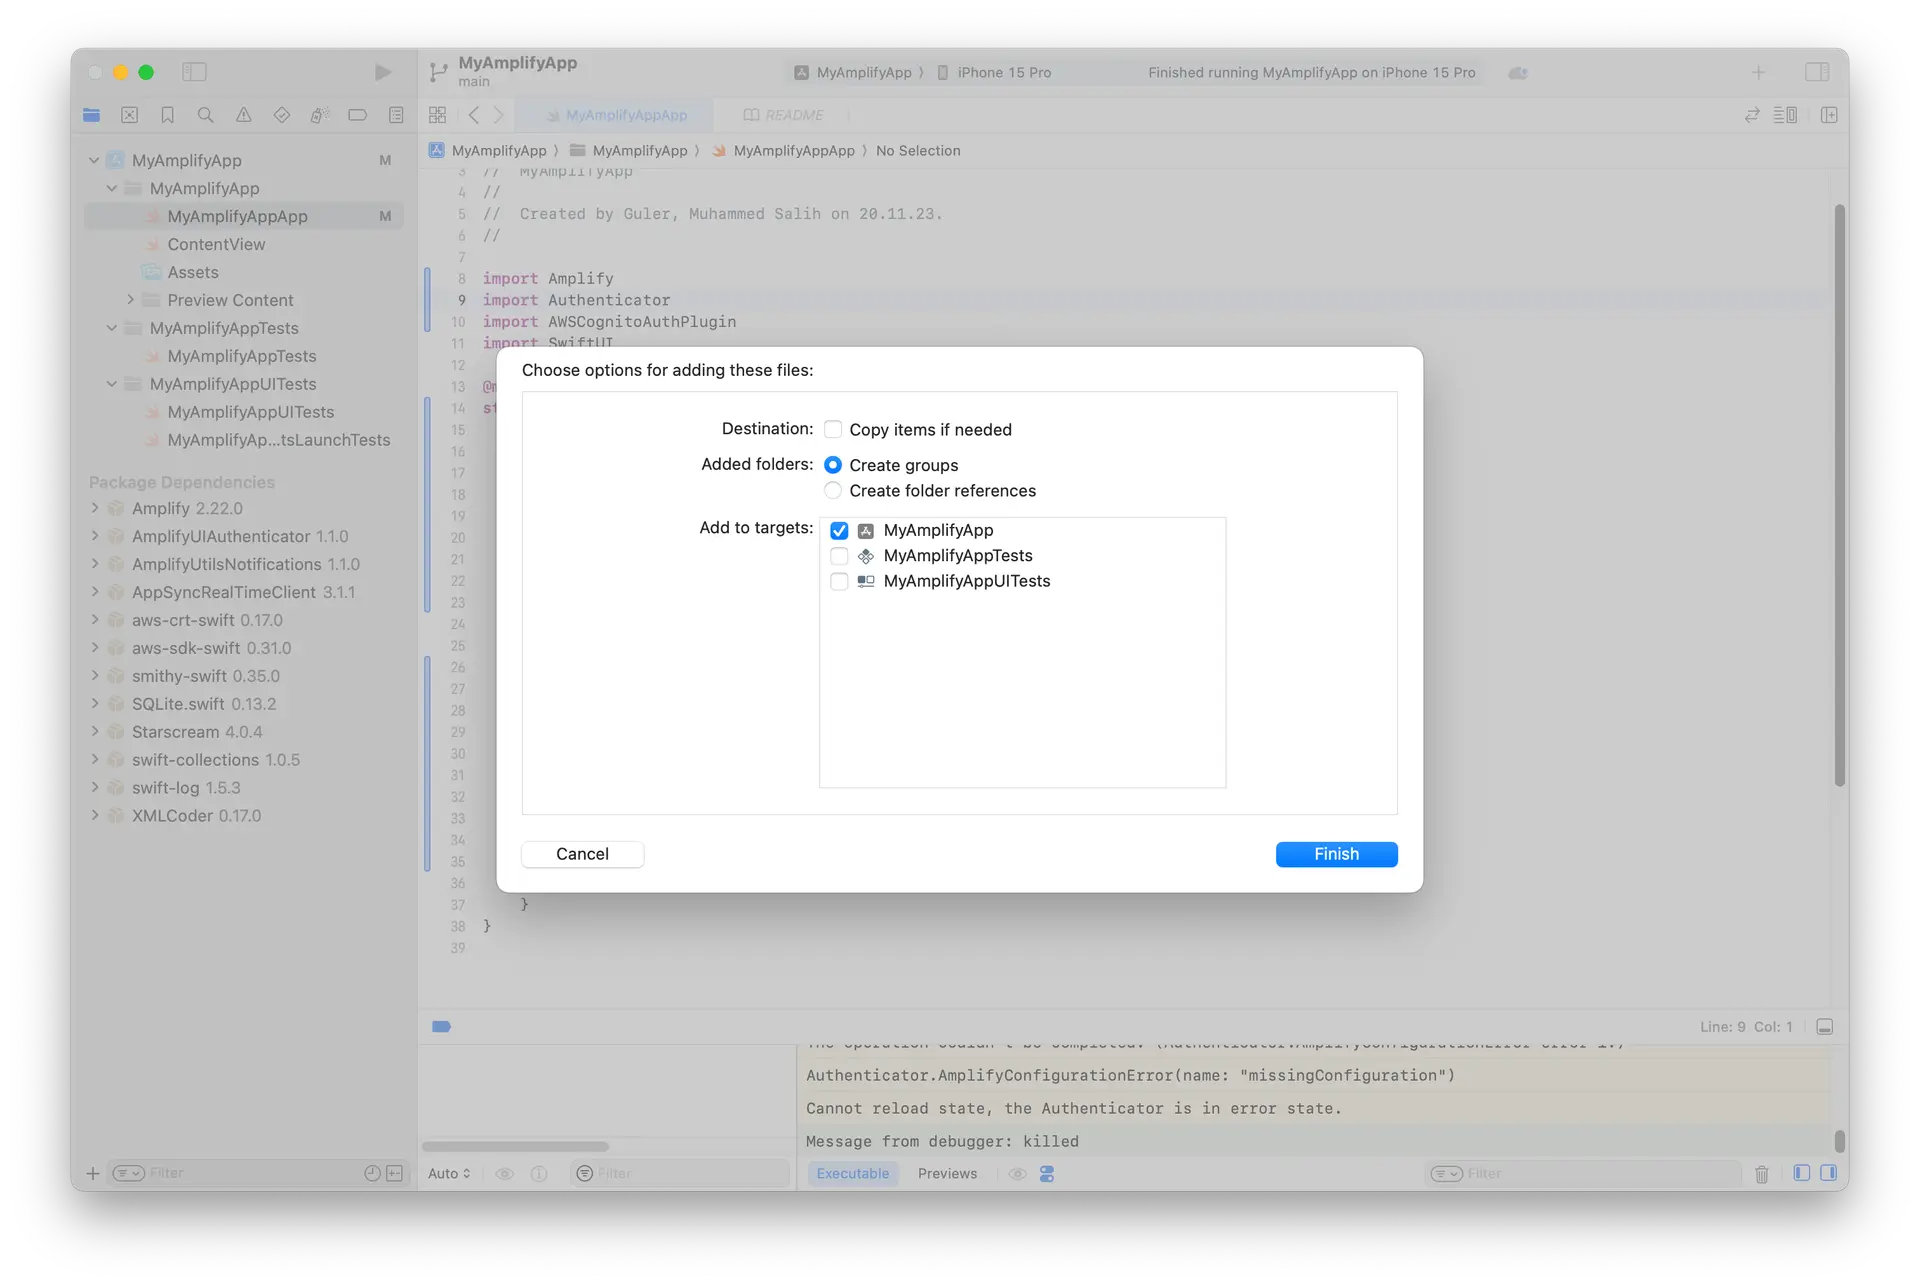
npx ampx sandboxOnce the sandbox environment is deployed, it will create an amplify_outputs.json. However, Xcode won't be able to recognize them. For recognizing the files, you need to drag and drop the generated files to your project.
Adding Authentication
The initial scaffolding already has a pre-configured auth backend defined in the amplify/auth/resource.ts file. We've configured it to support email and password login but you can extend it to support a variety of login mechanisms, including Google, Amazon, Sign In With Apple, and Facebook.
The fastest way to get your login experience up and running is to use our Authenticator UI component available in the Amplify UI library.
To use the Authenticator, open your project in Xcode and select File > Add Packages... and add the following dependencies:

-
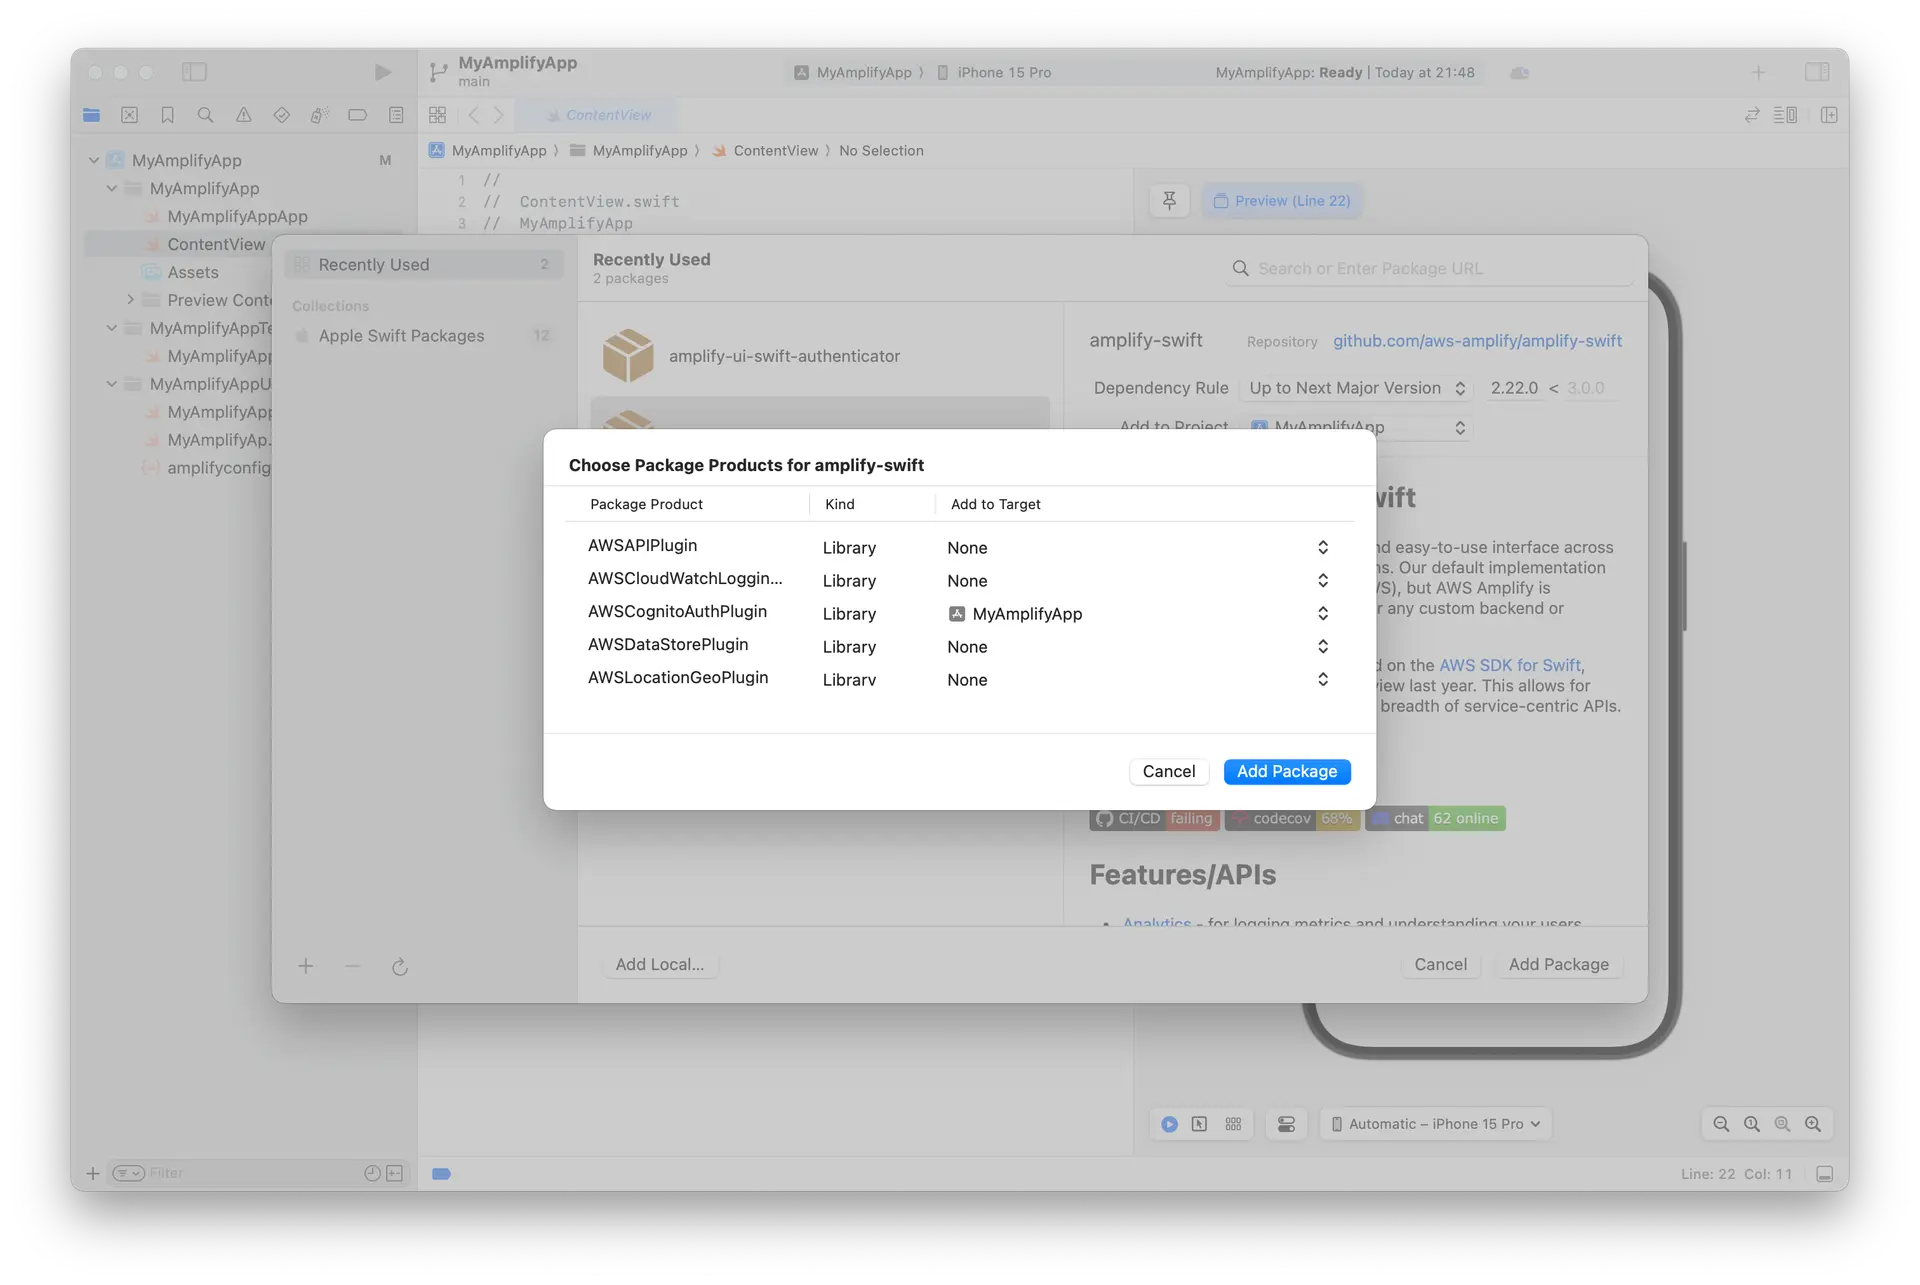
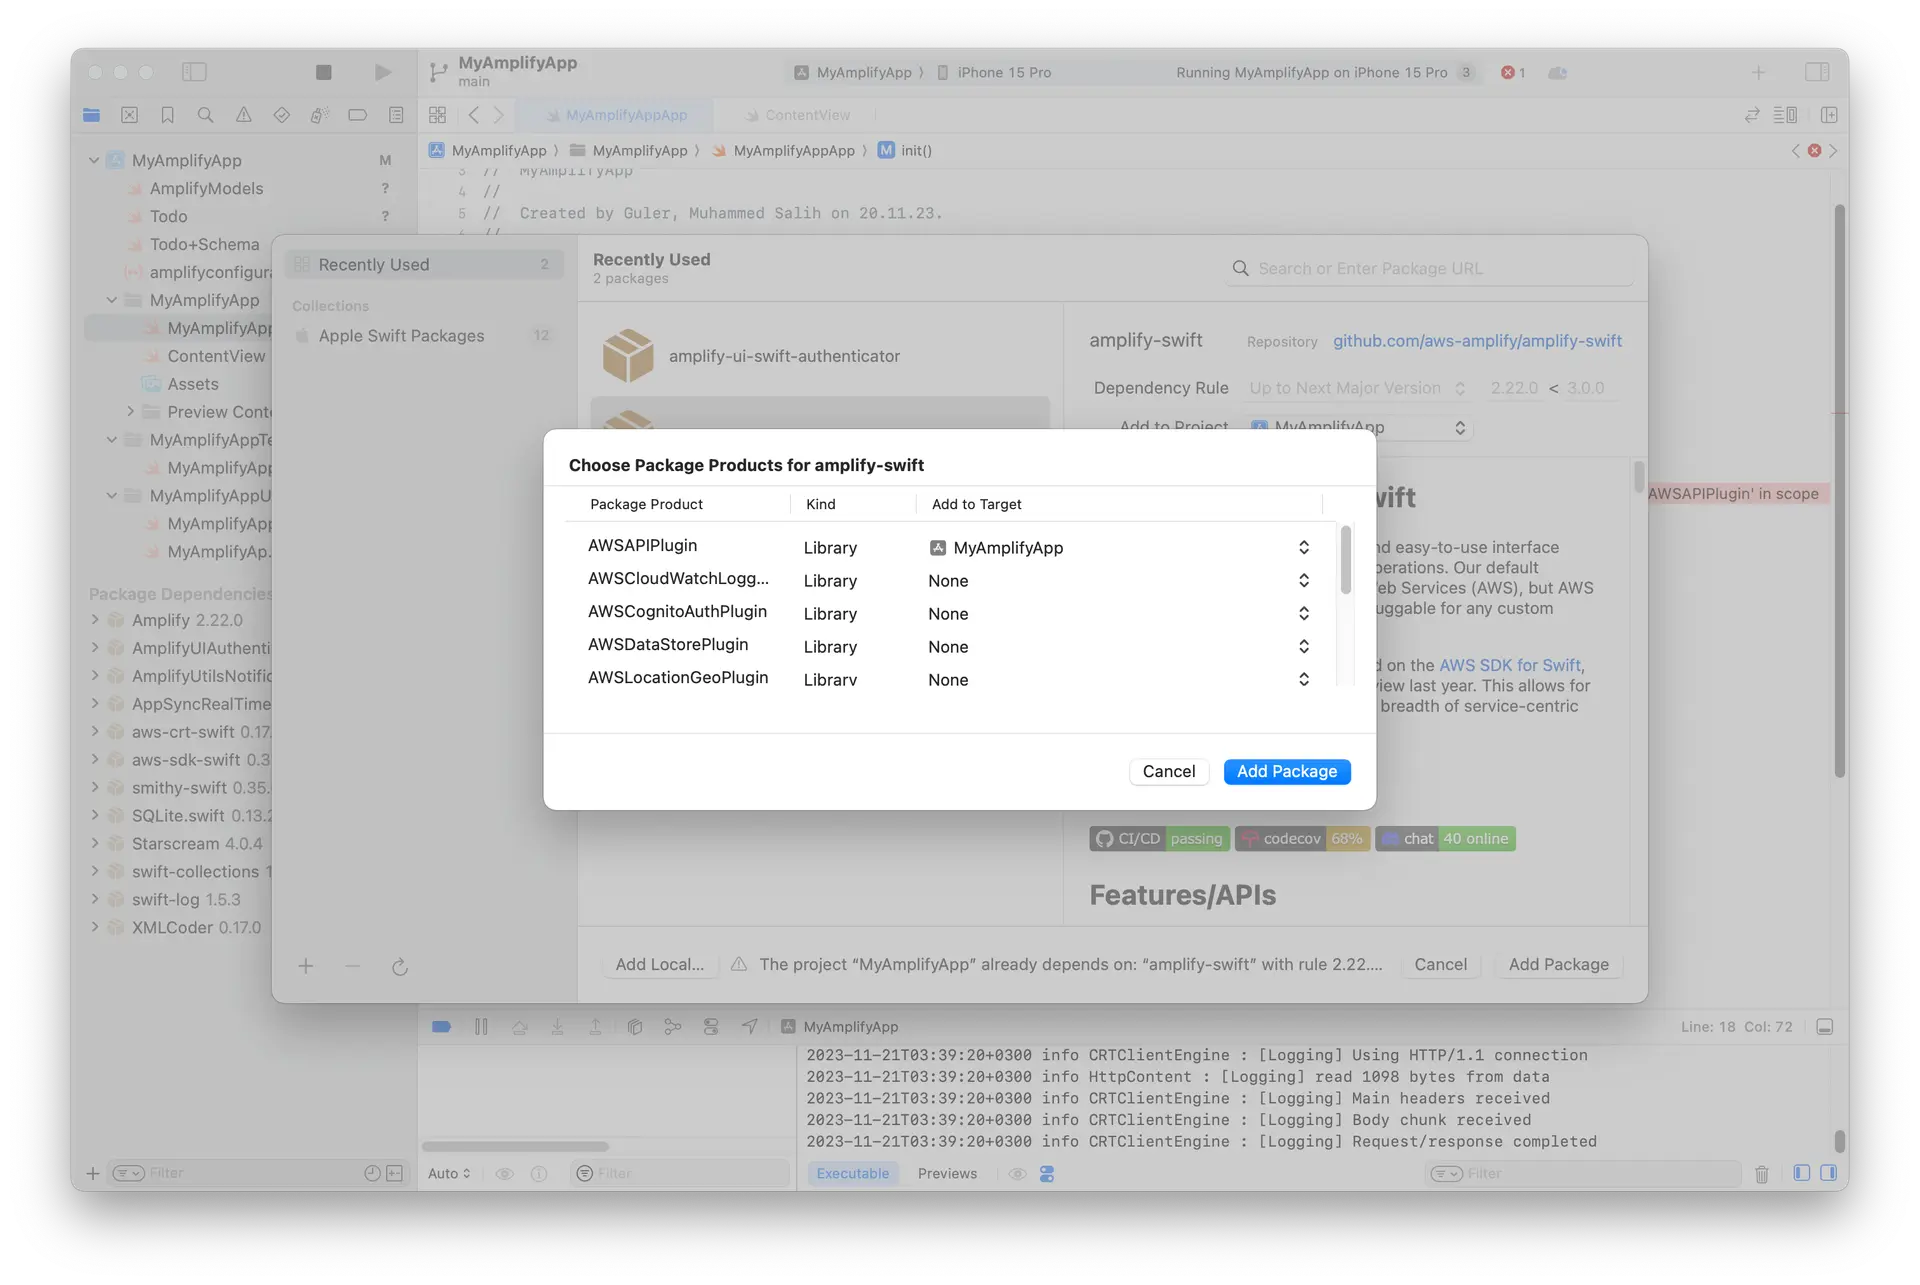
Amplify Library for Swift: Enter its GitHub URL (https://github.com/aws-amplify/amplify-swift), select Up to Next Major Version and click Add Package Dependencies... and select the following libraries:
- Amplify
- AWSCognitoAuthPlugin
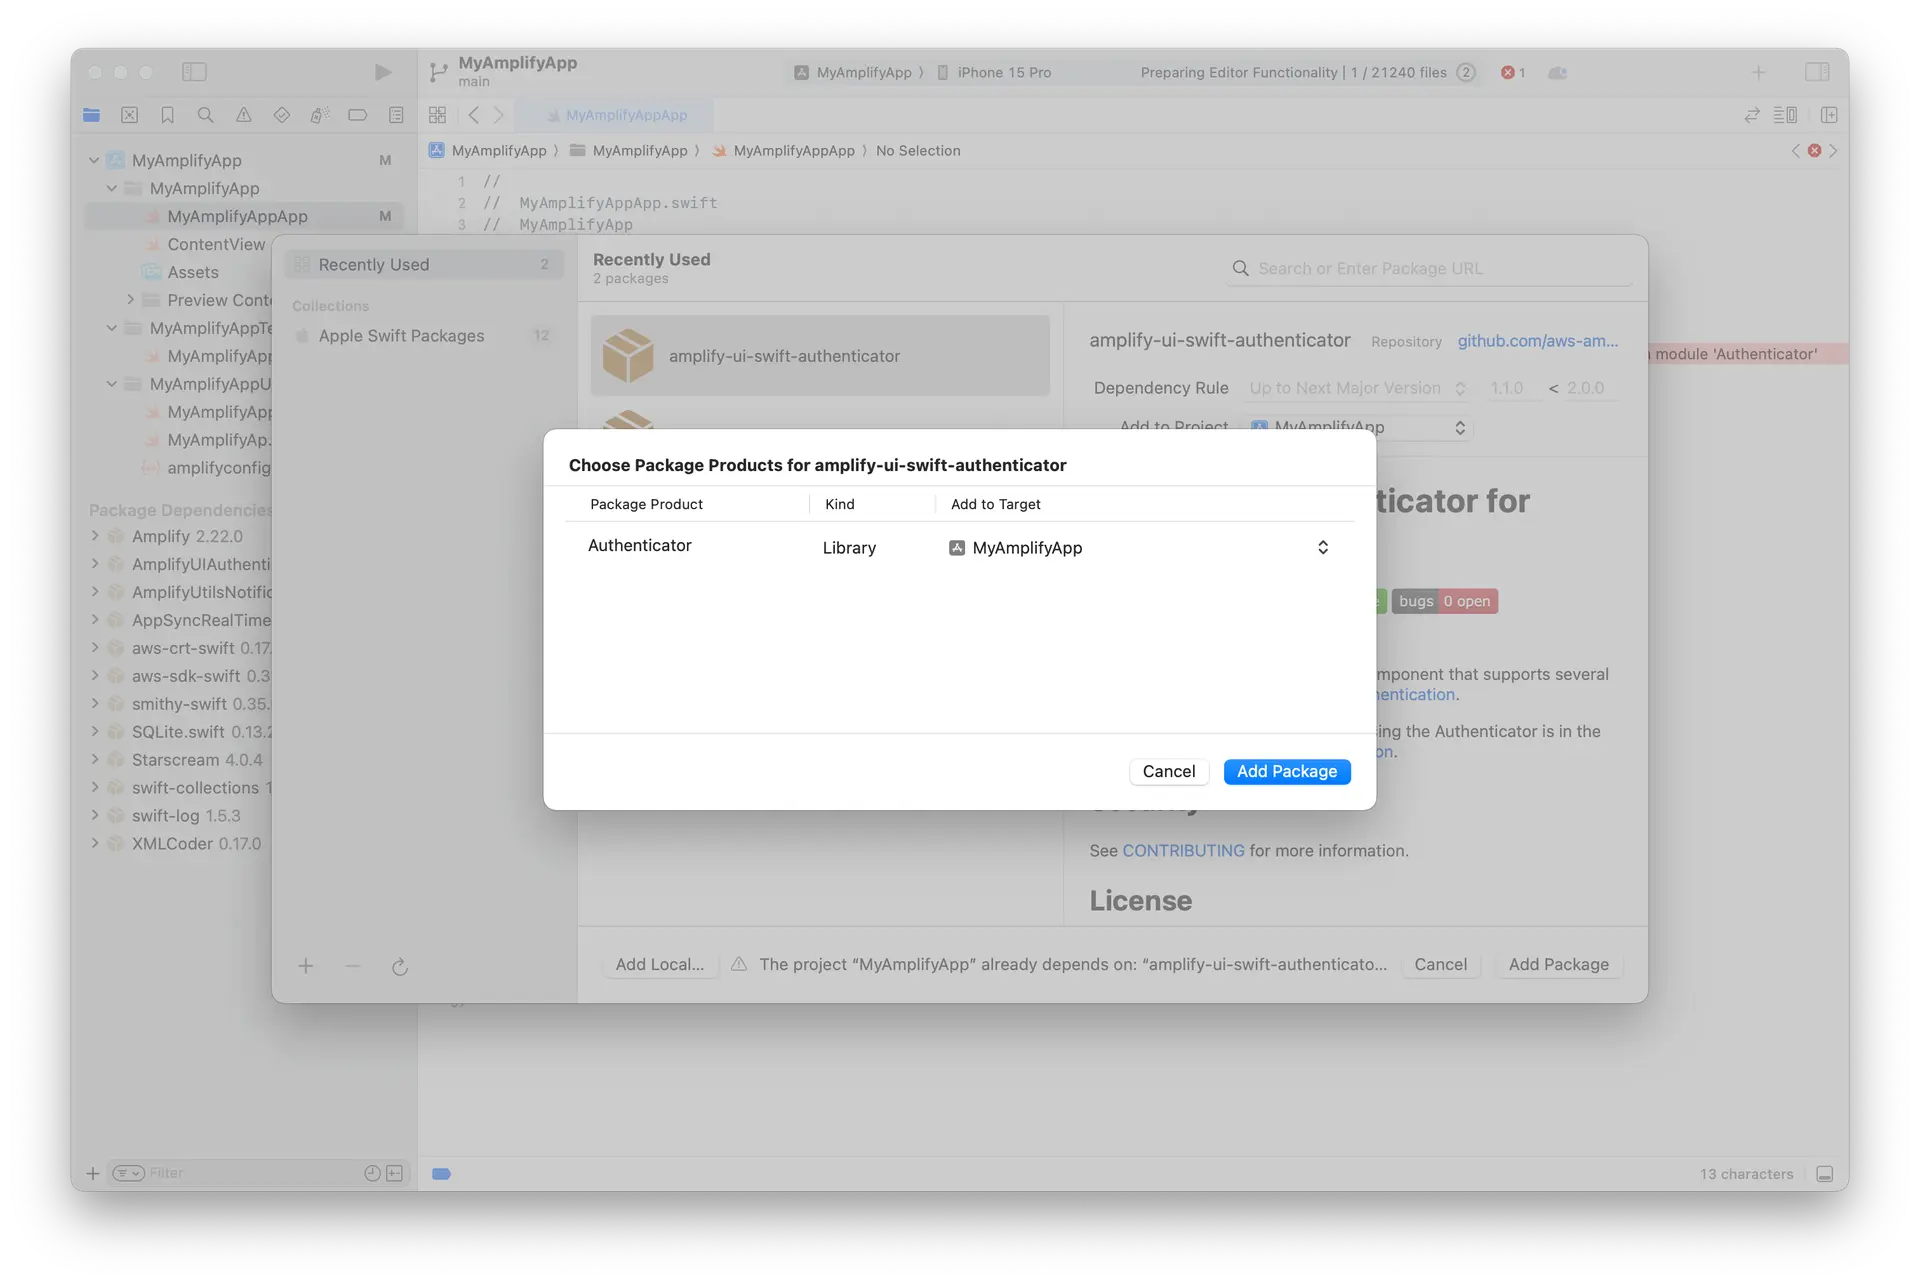
- Amplify UI Swift - Authenticator: Enter its GitHub URL (https://github.com/aws-amplify/amplify-ui-swift-authenticator), select Up to Next Major Version and click Add Package Dependencies... and select the following libraries:
- Authenticator
Now update the MyAmplifyAppApp class with the following code:
import Amplifyimport Authenticatorimport AWSCognitoAuthPluginimport SwiftUI
@mainstruct MyApp: App {    init() {        do {            try Amplify.add(plugin: AWSCognitoAuthPlugin())            try Amplify.configure(with: .amplifyOutputs)        } catch {            print("Unable to configure Amplify \(error)")        }    }
    var body: some Scene {        WindowGroup {            ContentView()        }    }}
Update ContentView with the following code:
import Amplifyimport Authenticator
struct ContentView: View {    var body: some View {        Authenticator { state in            VStack {                Button("Sign out") {                    Task {                        await state.signOut()                    }                }            }        }    }}
The Authenticator component auto-detects your auth backend settings and renders the correct UI state based on the auth backend's authentication flow.
Run your application in your local environment again. You should be presented with a login experience now.
Adding Data
The initial scaffolding already has a pre-configured data backend defined in the amplify/data/resource.ts file. The default example will create a Todo model with content field.
Let's modify this to add the following:
- A boolean
isDonefield. - An authorization rules specifying owners, authenticated via your Auth resource can "create", "read", "update", and "delete" their own records.
- Update the
defaultAuthorizationModeto sign API requests with the user authentication token.
import { type ClientSchema, a, defineData } from '@aws-amplify/backend';
const schema = a.schema({  Todo: a    .model({      content: a.string(),      isDone: a.boolean().required()    })    .authorization((allow) => [allow.owner()])});
export type Schema = ClientSchema<typeof schema>;
export const data = defineData({  schema,  authorizationModes: {    defaultAuthorizationMode: 'userPool'  }});
Next, let's implement UI to create, list, and delete the to-do items.
Amplify can automatically generate code for interacting with the backend API. The command below generates model classes from the Data schema:
npx ampx generate graphql-client-code --format modelgen --model-target swiftMove the generated files to your project. You can do this by dragging and dropping the files to your project.
Once you are done, add the API dependencies to your project. Select File > Add Package Dependencies... and add the AWSAPIPlugin.
After adding the dependencies, update the import part of your MyAmplifyAppApp.swift file with the following code:
import Amplifyimport AWSCognitoAuthPluginimport AWSAPIPluginThen, update the init() part of your MyAmplifyAppApp.swift file with the following code:
init() { do { try Amplify.add(plugin: AWSCognitoAuthPlugin()) try Amplify.add(plugin: AWSAPIPlugin(modelRegistration: AmplifyModels())) try Amplify.configure(with: .amplifyOutputs) } catch { print("Unable to configure Amplify \(error)") }}Create a new file called TodoViewModel.swift and the createTodo function with the following code:
import Amplifyimport SwiftUI
@MainActorclass TodoViewModel: ObservableObject {    func createTodo() async {        let creationTime = Temporal.DateTime.now()        let todo = Todo(            content: "Random Todo \(creationTime.iso8601String)",            isDone: false,            createdAt: creationTime,            updatedAt: creationTime        )        do {            let result = try await Amplify.API.mutate(request: .create(todo))            switch result {            case .success(let todo):                print("Successfully created todo: \(todo)")                todos.append(todo)            case .failure(let error):                print("Got failed result with \(error.errorDescription)")            }        } catch let error as APIError {            print("Failed to create todo: ", error)        } catch {            print("Unexpected error: \(error)")        }    }}
The code above will create a random todo with the current time.
Next, update the listTodos function in the TodoViewModel.swift for listing to-do items:
@MainActorclass TodoViewModel: ObservableObject {    @Published var todos: [Todo] = []
    func createTodo() {        /// ...    }
    func listTodos() async {        let request = GraphQLRequest<Todo>.list(Todo.self)        do {            let result = try await Amplify.API.query(request: request)            switch result {            case .success(let todos):                print("Successfully retrieved list of todos: \(todos)")                self.todos = todos.elements            case .failure(let error):                print("Got failed result with \(error.errorDescription)")            }        } catch let error as APIError {            print("Failed to query list of todos: ", error)        } catch {            print("Unexpected error: \(error)")        }    }}
This will assign the value of the fetched todos into a Published object.
Now let's update the UI code to observe the todos. Update the VStack in the ContentView.swift file with the following code:
struct ContentView: View {
    // Create an observable object instance.    @StateObject var vm = TodoViewModel()
var body: some View { Authenticator { state in VStack { Button("Sign out") { Task { await state.signOut() } } Button(action: { Task { await vm.createTodo() } }) { HStack { Text("Add a New Todo") Image(systemName: "plus") } } .accessibilityLabel("New Todo") } } }}The code will create a todo and update the todo list each time a todo is created.
Next step is to update and delete the todos. For that, create updateTodo and deleteTodo functions in the TodoViewModel.swift file with the following code:
@MainActorclass TodoViewModel: ObservableObject {    @Published var todos: [Todo] = []
    func createTodo() {        // ...    }
    func listTodos() {        // ...    }
    func deleteTodos(indexSet: IndexSet) async {        for index in indexSet {            do {                let todo = todos[index]                let result = try await Amplify.API.mutate(request: .delete(todo))                switch result {                case .success(let todo):                    print("Successfully deleted todo: \(todo)")                    todos.remove(at: index)                case .failure(let error):                    print("Got failed result with \(error.errorDescription)")                }            } catch let error as APIError {                print("Failed to deleted todo: ", error)            } catch {                print("Unexpected error: \(error)")            }        }    }
    func updateTodo(todo: Todo) async {        do {            let result = try await Amplify.API.mutate(request: .update(todo))            switch result {            case .success(let todo):                print("Successfully updated todo: \(todo)")            case .failure(let error):                print("Got failed result with \(error.errorDescription)")            }        } catch let error as APIError {            print("Failed to updated todo: ", error)        } catch {            print("Unexpected error: \(error)")        }    }}
Update the List in the ContentView.swift file with code to fetch the todos when the View is displayed and to call deleteTodos(indexSet:) when the user left-swipe a todo.
struct ContentView: View {    @StateObject var vm = TodoViewModel()
    var body: some View {        Authenticator { state in            VStack {                // ... Sign out Button                List {                    ForEach($vm.todos, id: \.id) { todo in                        TodoRow(vm: vm, todo: todo)                    }                    .onDelete { indexSet in                        Task { await vm.deleteTodos(indexSet: indexSet) }                    }                }                .task {                    await vm.listTodos()                }                // ... Add new Todo button            }        }    }}
Lastly, create a new file called TodoRow.swift with the following code:
import SwiftUI
struct TodoRow: View {    @ObservedObject var vm: TodoViewModel    @Binding var todo: Todo
    var body: some View {        Toggle(isOn: $todo.isDone) {            Text(todo.content ?? "")        }        .toggleStyle(.switch)        .onChange(of: todo.isDone) { _, newValue in            var updatedTodo = todo            updatedTodo.isDone = newValue            Task { await vm.updateTodo(todo: updatedTodo) }        }    }}
#Preview {    @State var todo = Todo(content: "Hello Todo World 20240706T15:23:42.256Z", isDone: false)    return TodoRow(vm: TodoViewModel(), todo: $todo)}
This will update the UI to show a toggle to update the todo isDone and a swipe to delete the todo. Now if you run the application you should see the following flow.
You can terminate the sandbox environment now to clean up the project.
Publishing changes to cloud
Publishing changes to the cloud requires a remote git repository. Amplify offers fullstack branch deployments that allow you to automatically deploy infrastructure and application code changes from feature branches. To learn more, visit the fullstack branch deployments guide.
🥳 Success
That's it! You have successfully built a fullstack app on AWS Amplify. If you want to learn more about how to work with Amplify, here's the conceptual guide for how Amplify works.