Custom pipelines
While building with Amplify CI/CD offers benefits such as zero-config setup, fullstack previews, centralized secrets management, Amplify Gen 2 makes it easy to integrate fullstack CI/CD into your custom pipelines (for example, AWS CodePipeline, Amazon CodeCatalyst, GitHub Actions, and more).
Set up backend deployments
You can set up your backend deployments using the following steps:
-
Create an Amplify app by connecting a fullstack Gen 2 branch from your Git repository. This is a one time setup as for subsequent deployments, we will be using a custom pipeline.
-
Disable Auto-build for your branch. This will ensure code commits to your branch will not trigger a build.
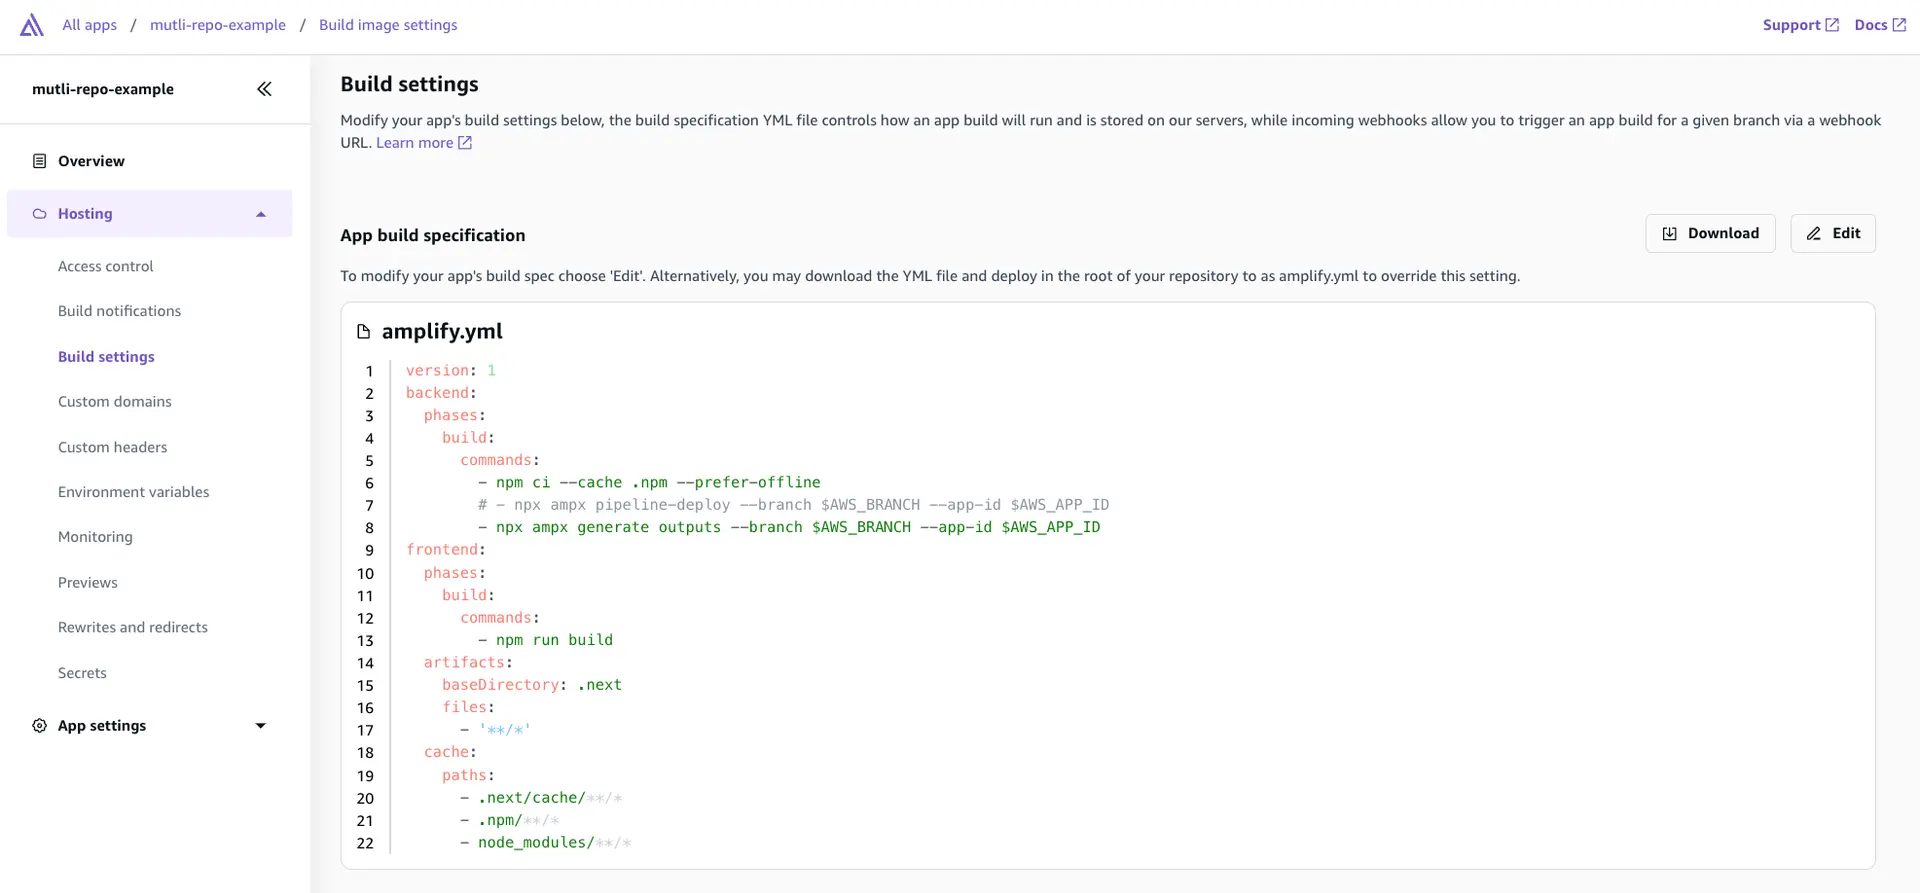
- Update the Amplify build specification file to add
npx ampx generate outputs --branch $AWS_BRANCH --app-id $AWS_APP_IDand comment out thepipeline-deployscript.ampx pipeline-deployruns a script to deploy backend updates, whileampx generate outputsfetches the latestamplify_outputs.jsonfor the specified environment.
- Now go to your pipeline provider and update the build settings to include the following:
- Run
npm ci. - Run
export CI=1to tell the deployment script that is a CI environment. - Run
npx ampx pipeline-deploy --branch BRANCH_NAME --app-id AMPLIFY_APP_ID.BRANCH_NAMErefers to the branch you're deploying.AMPLIFY_APP_IDis the Amplify App ID. To locate theApp IDfor your backend application, navigate to the Amplify console and select your backend-app. On the Overview page, theApp IDis displayed under the project name.
- Run
The example below demonstrates how you would set up the build-spec when using Amazon CodeCatalyst.
Actions: Build_82: # Identifies the action. Do not modify this value. Identifier: aws/build@v1.0.0 # Specifies the source and/or artifacts to pass to the action as input. Inputs: # Optional Sources: - WorkflowSource # This specifies that the action requires this Workflow as a source Variables: - Name: BRANCH_NAME Value: main - Name: AMPLIFY_APP_ID Value: ##### Configuration: # Required - Steps are sequential instructions that run shell commands Steps: - Run: export CI=1 - Run: npm ci - Run: npx ampx pipeline-deploy --branch $BRANCH_NAME --app-id $AMPLIFY_APP_ID- Trigger a
git pushto your branch. Your build logs should show that there is an AWS CloudFormation deployment underway.
Set up frontend deployments
If you want to complete the fullstack CI/CD setup, we have to build, deploy, and host the frontend in addition to the backend.
-
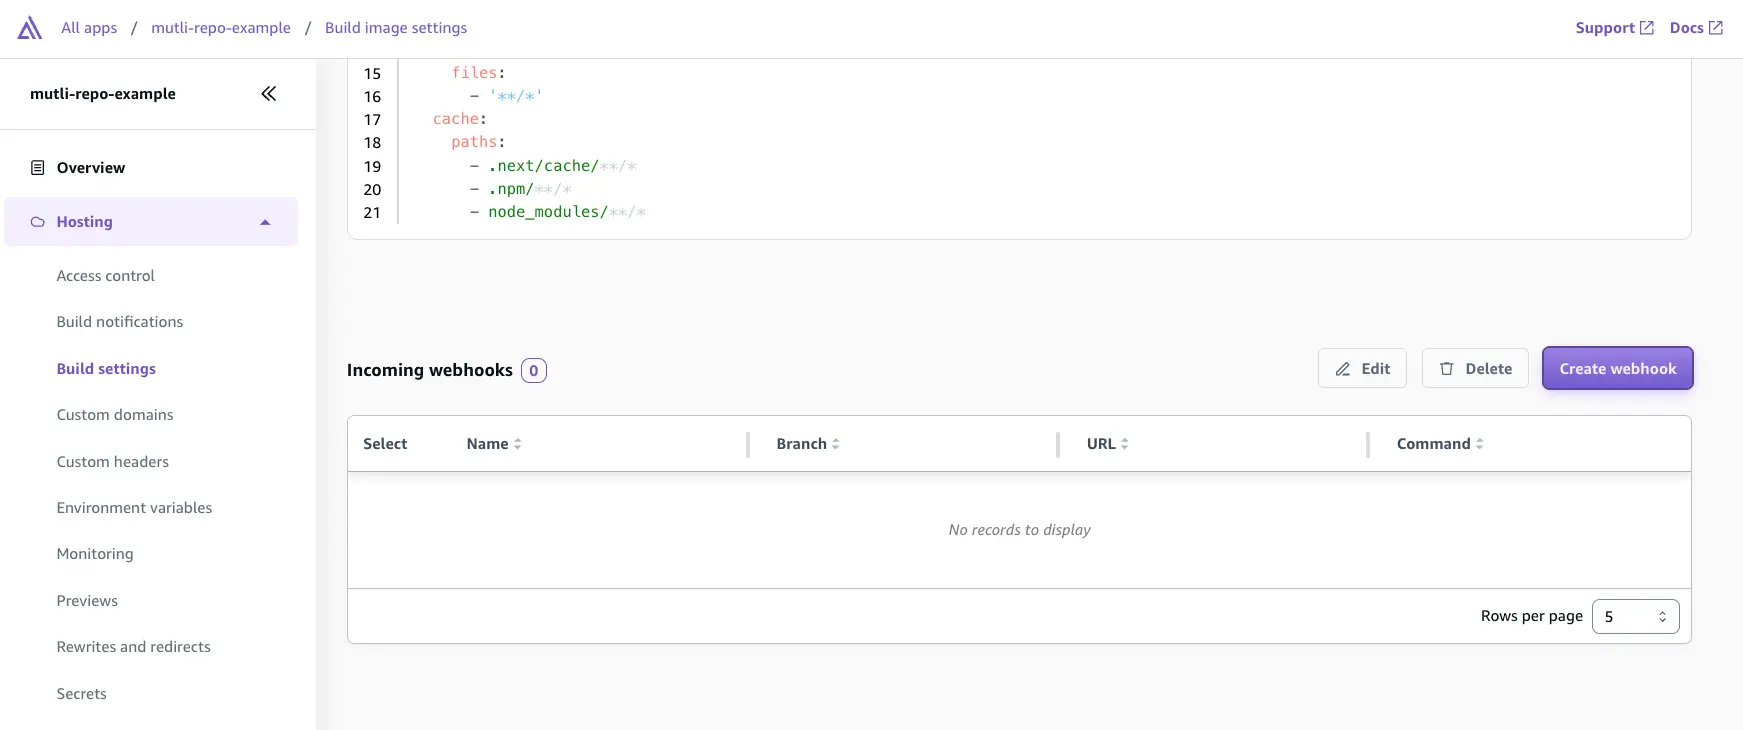
Use the Amplify Console to create an incoming webhook.
-
Navigate to the frontend app, under Hosting > Build settings select Create webhook. Provide a name for the webhook and select the target branch to build on incoming webhook requests.
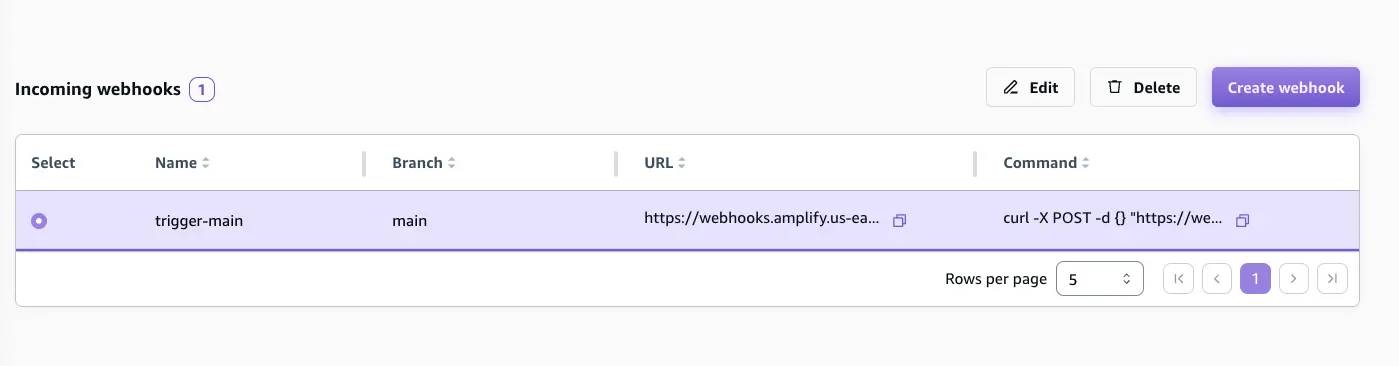
- Next, select the webhook and copy the
curlcommand which will be used to trigger a build for the frontend app.
- Now update your custom-pipeline build settings to include the
curlcommand to trigger a frontend build after thepipeline-deploysucceeds. Using the same Amazon CodeCatalyst example above, this step includes:
Configuration: # Required - Steps are sequential instructions that run shell commands Steps: - Run: export CI=1 - Run: npm ci - Run: npx ampx pipeline-deploy --branch $BRANCH_NAME --app-id $AMPLIFY_APP_ID - Run: if [ $BRANCH_NAME = "main" ]; then curl -X POST -d {} "https://webhooks.amplify.us-west-2.amazonaws.com/prod/webhooks?id=WEBHOOK-ID&token=TOKEN&operation=startbuild" -H "Content-Type:application/json"; fi- This should trigger a build in your Amplify app. Amplify CI will build and first generate the
amplify_outputs.jsonfor the branch and then build, deploy, and host the frontend.