Cross-account deployments
This guide walks you through how to create a trunk-based, multi-region deployment pipeline for applications built using AWS Amplify Gen 2. We will be using Amazon CodeCatalyst and AWS Amplify Hosting in this guide, but you can choose any CI/CD provider.
Step 1: Set up an Amazon CodeCatalyst space
Please refer to this Amazon CodeCatalyst guide for a detailed step-by-step walkthrough to set up your space.
Step 2: Deploy a fullstack Amplify Gen 2 app
- Sign in to the AWS Management Console.
- Navigate to the Amplify console and select Create new app.
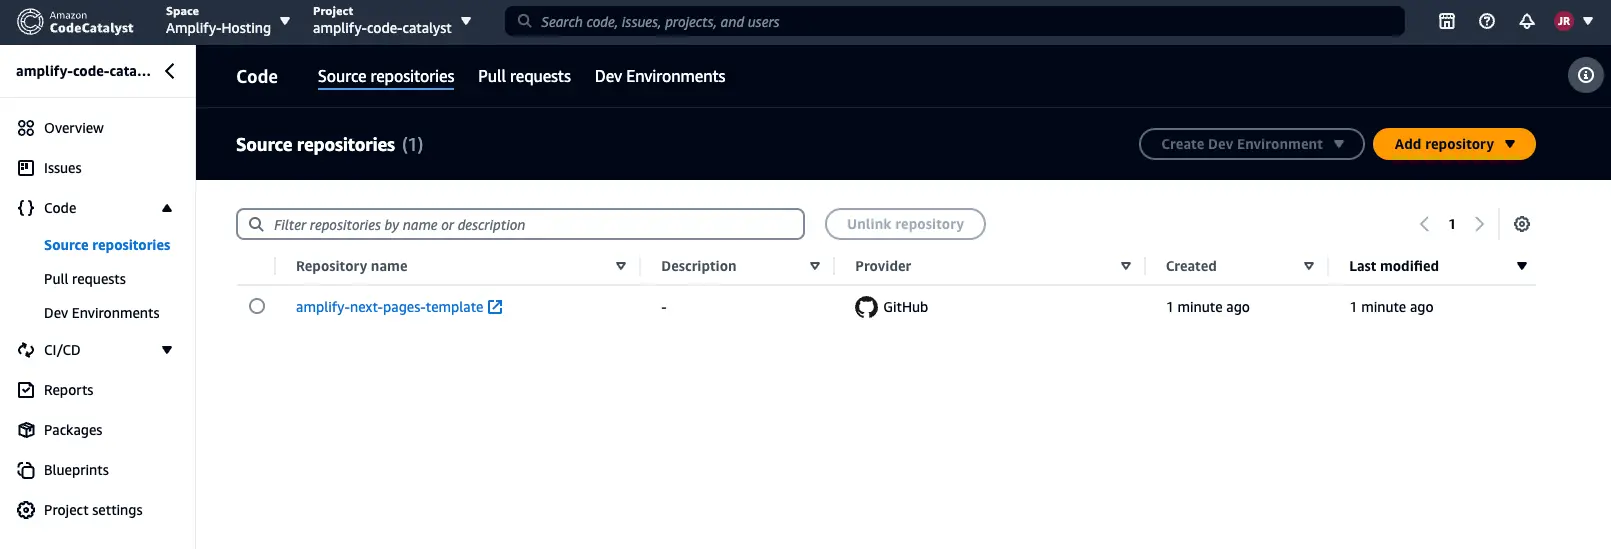
- Select the next-pages-template repository, then select Next.
- Review the details on the Create Git Repository page, then select Save and deploy.
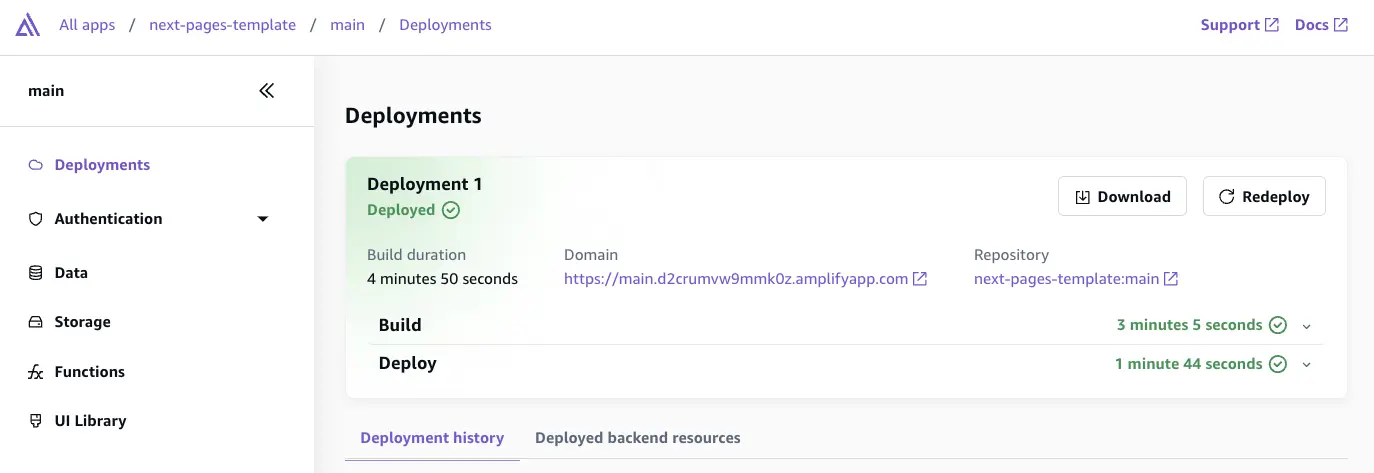
- Done! You have successfully deployed a fullstack Gen 2 app. You can review the status of the app deployment in the Amplify console.
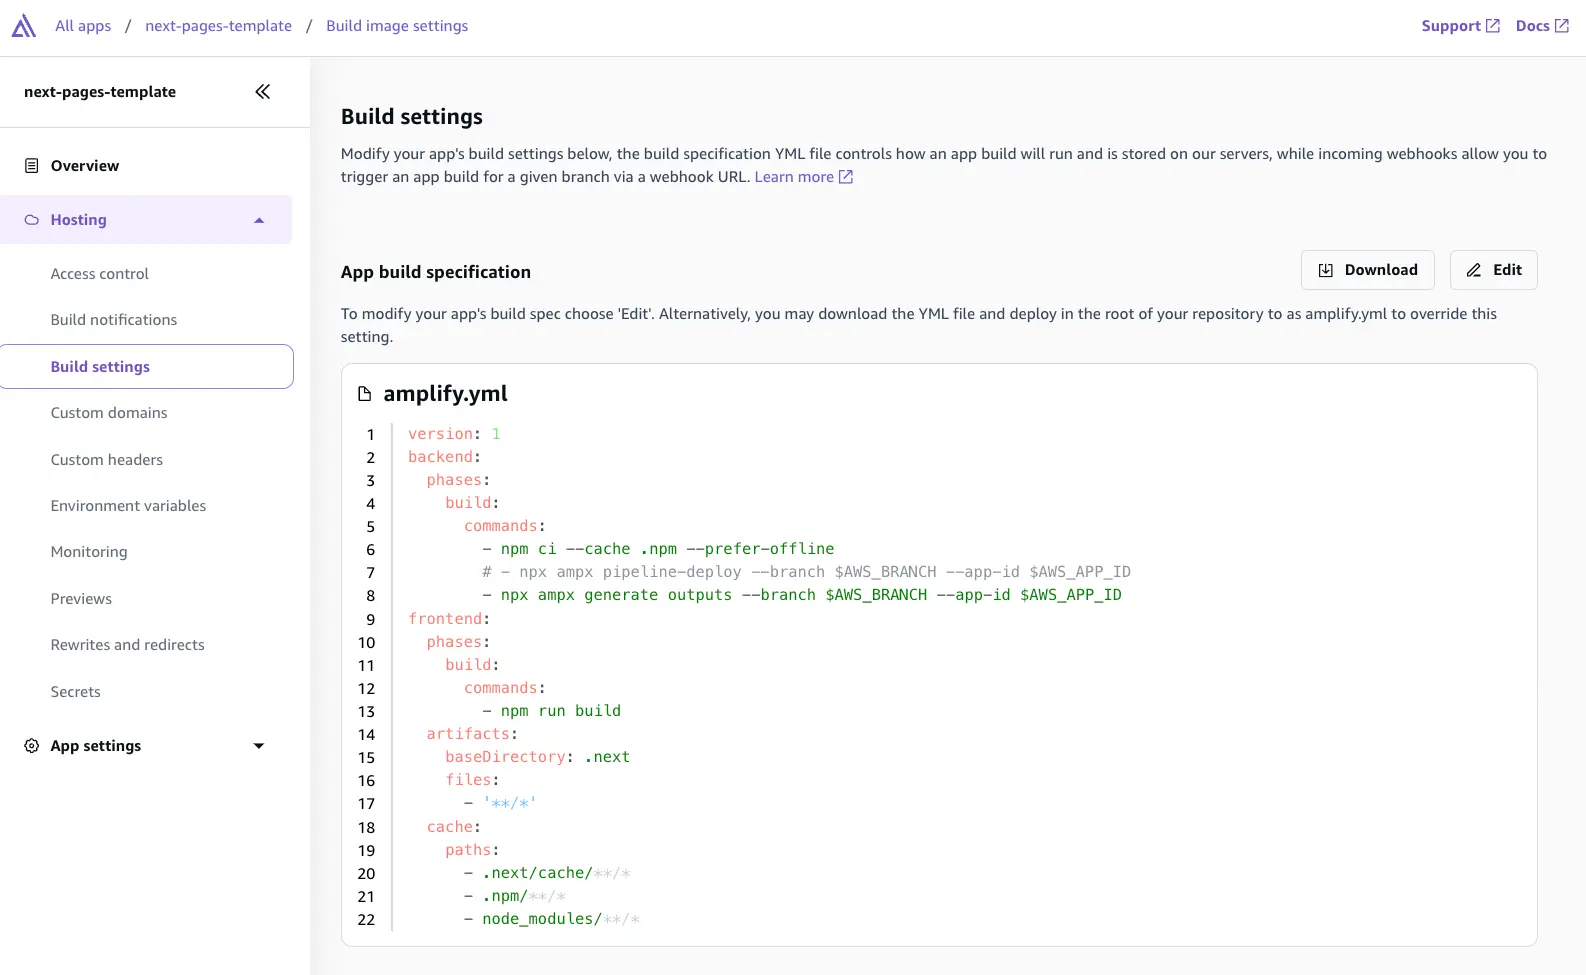
Step 3: Update build specification
Add the npx ampx generate outputs --branch $AWS_BRANCH --app-id $AWS_APP_ID command to the build spec and comment out the npx ampx pipeline-deploy --branch $AWS_BRANCH --app-id $AWS_APP_ID command. ampx pipeline-deploy runs a script to deploy backend updates, while ampx generate outputs fetches the latest amplify_outputs.json for the specified environment.
Step 4: Disable automatic builds on the branch
You can configure Amplify to disable automatic builds on every code commit. Navigate to the app in the Amplify console. Under App settings, select Branch settings. From the Branches section, select the branch and then choose Disable auto build from the Actions dropdown menu.
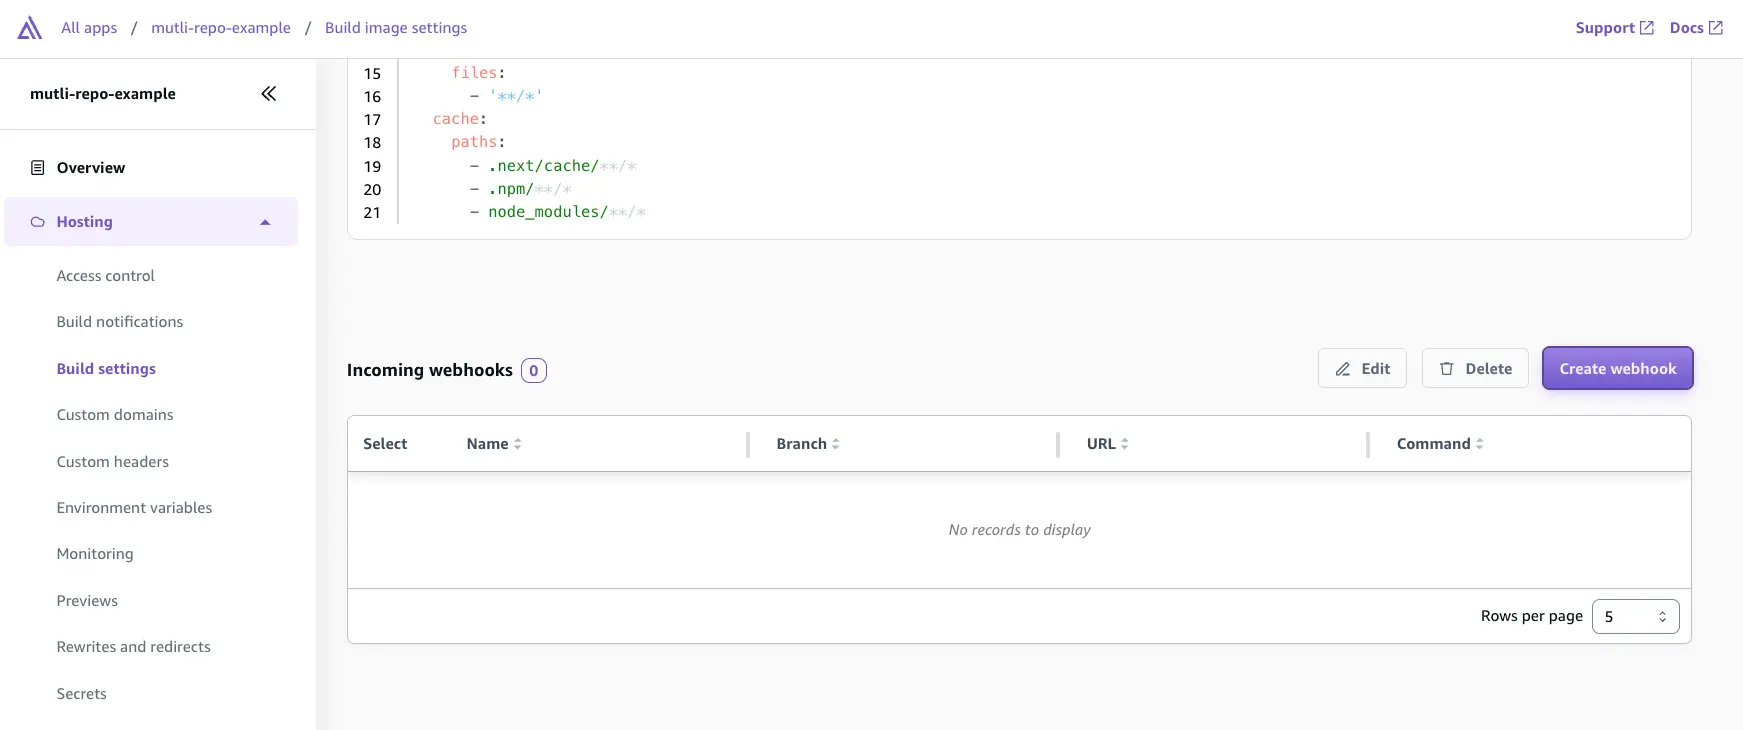
Step 5: Create an incoming webhook
You can set up an incoming webhook to trigger a build without committing code to your Git repository. Use the Amplify Console to create an incoming webhook.
Navigate to the app, under Hosting > Build settings select Create webhook. Provide a name for the webhook and select the target branch to build on incoming webhook requests.
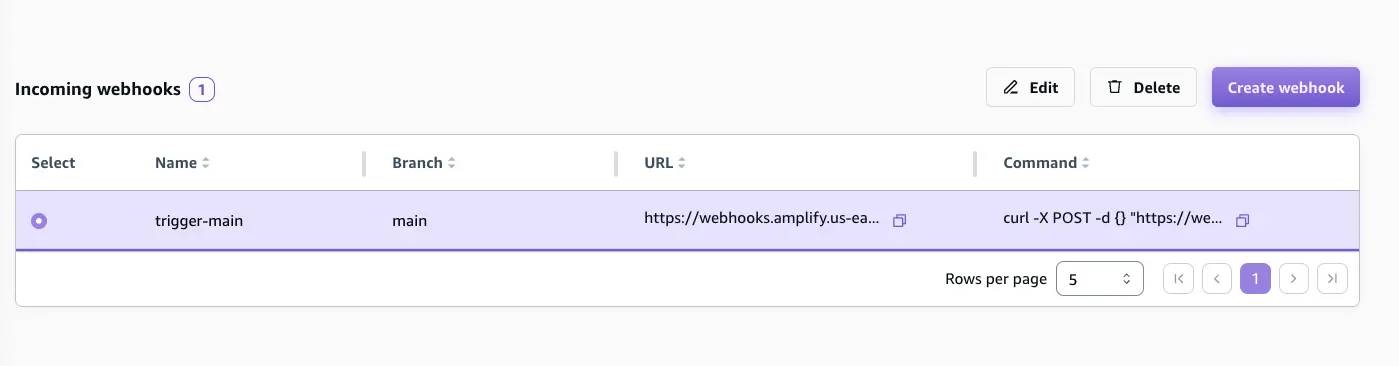
Next, select the webhook and copy the curl command which will be used to trigger a build for the app.
Step 6: Create a new Amazon CodeCatalyst project
Please refer to this Amazon CodeCatalyst guide for a detailed step-by-step walkthrough to create a new project.
Step 7: Set up the resources in a different or target AWS account
To achieve a cross-account deployment, you will need to implement Steps 1 through 6 outlined previously in this guide in a different AWS account (for example, production account).
Step 8: Add the target AWS account to the CodeCatalyst space
Navigate to the CodeCatalyst space created as part of Step 1, select Settings, and then select AWS accounts. Add the target AWS account ID (Step 7) to it and select Associate AWS account.
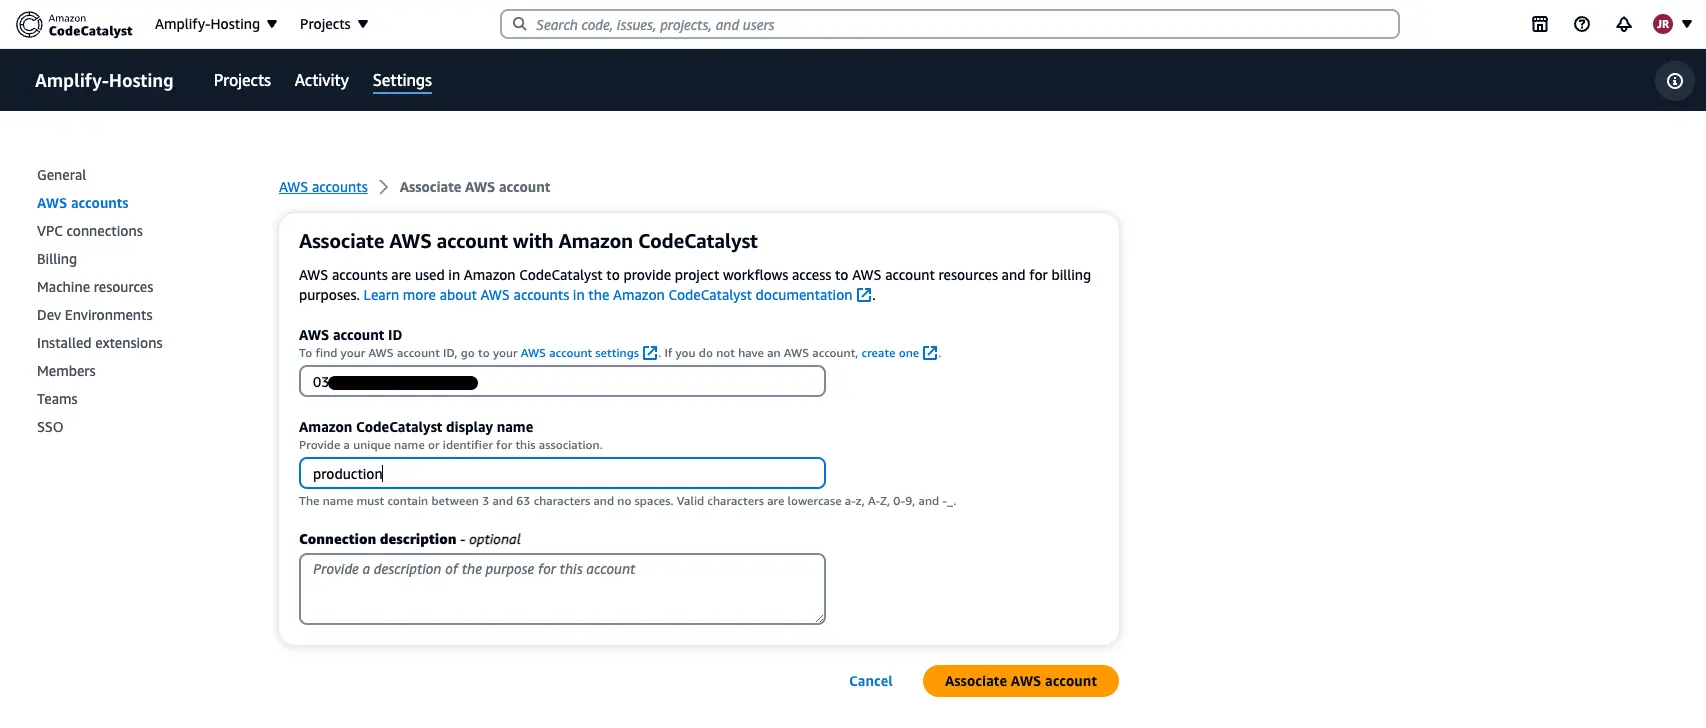
You will also need to create an IAM role in the target AWS account which will be assumed by the staging environment to perform actions and deploy resources in the production environment. As a best practice, we recommend attaching the AmplifyBackendDeployFullAccess AWS managed policy to the IAM role as it contains all the required permissions to deploy Gen 2 resources in your account. You can learn more about adding IAM roles to account connections in the CodeCatalyst documentation.
Step 9: Create a workflow in the Amazon CodeCatalyst project
A workflow is an automated procedure that describes how to build, test, and deploy your code as part of a continuous integration and continuous delivery (CI/CD) system. You can learn more about workflows in the Amazon CodeCatalyst User Guide.
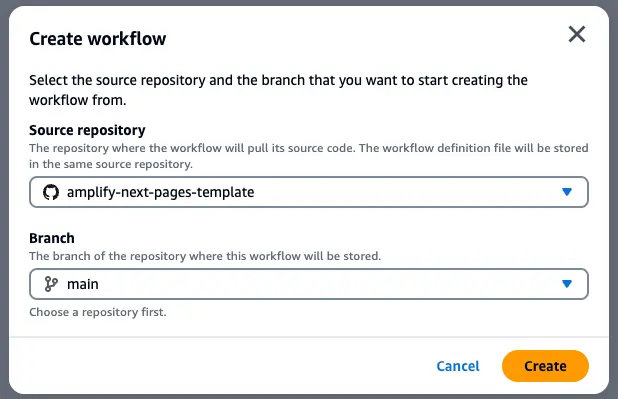
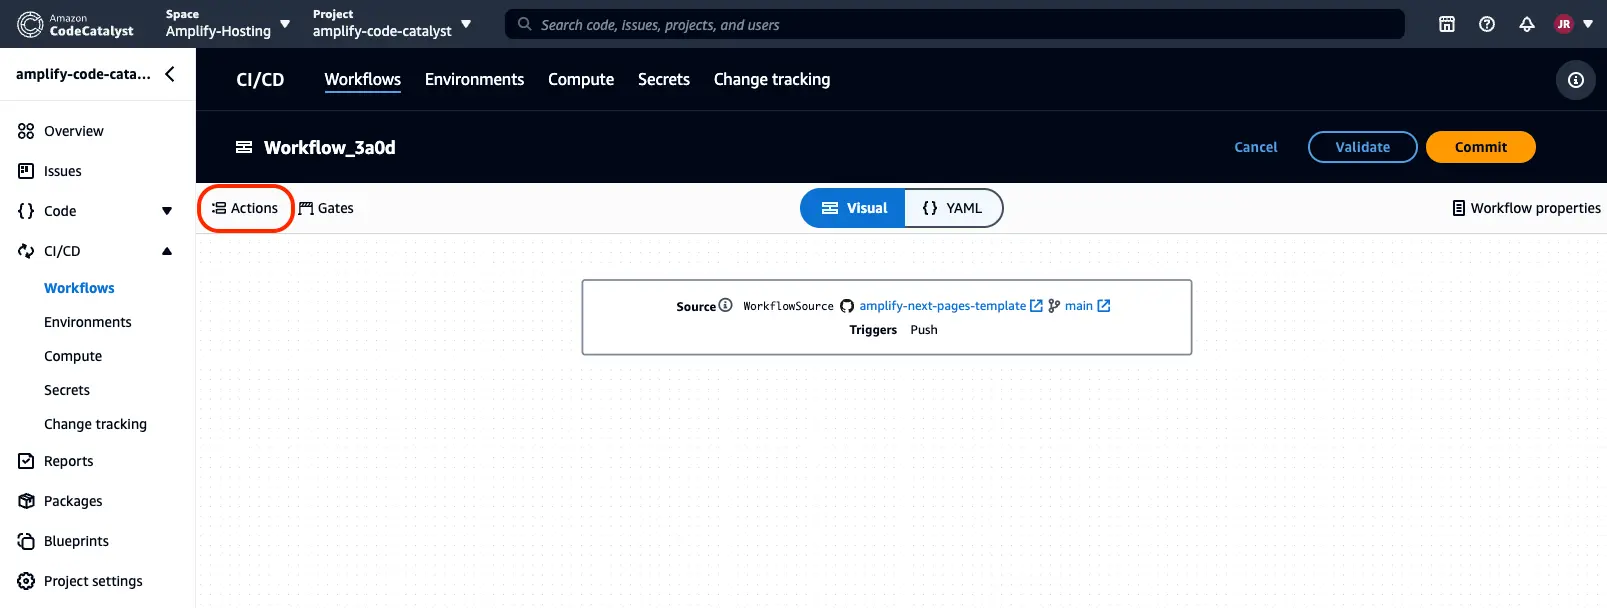
- Within the CodeCatalyst project, navigate to the CI/CD feature and select Workflows.
- Select Create workflow.
- Choose the next-pages-template GitHub repository and the branch main from the dropdown menu.
- Next, select Create.
Once you create the workflow, you should see a yaml editor in the CodeCatalyst console.
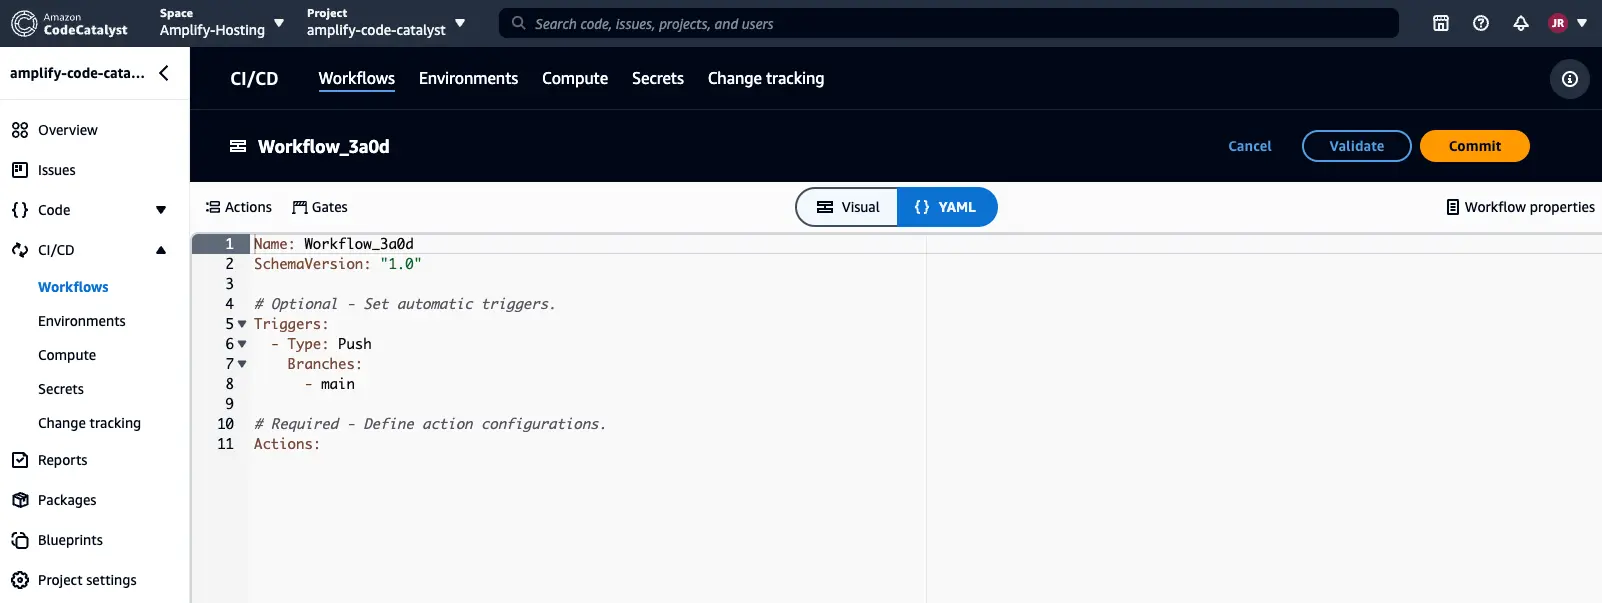
Switch the experience in the console to the Visual editor. Select the Actions button to see a list of workflow actions that you can add to your workflow.
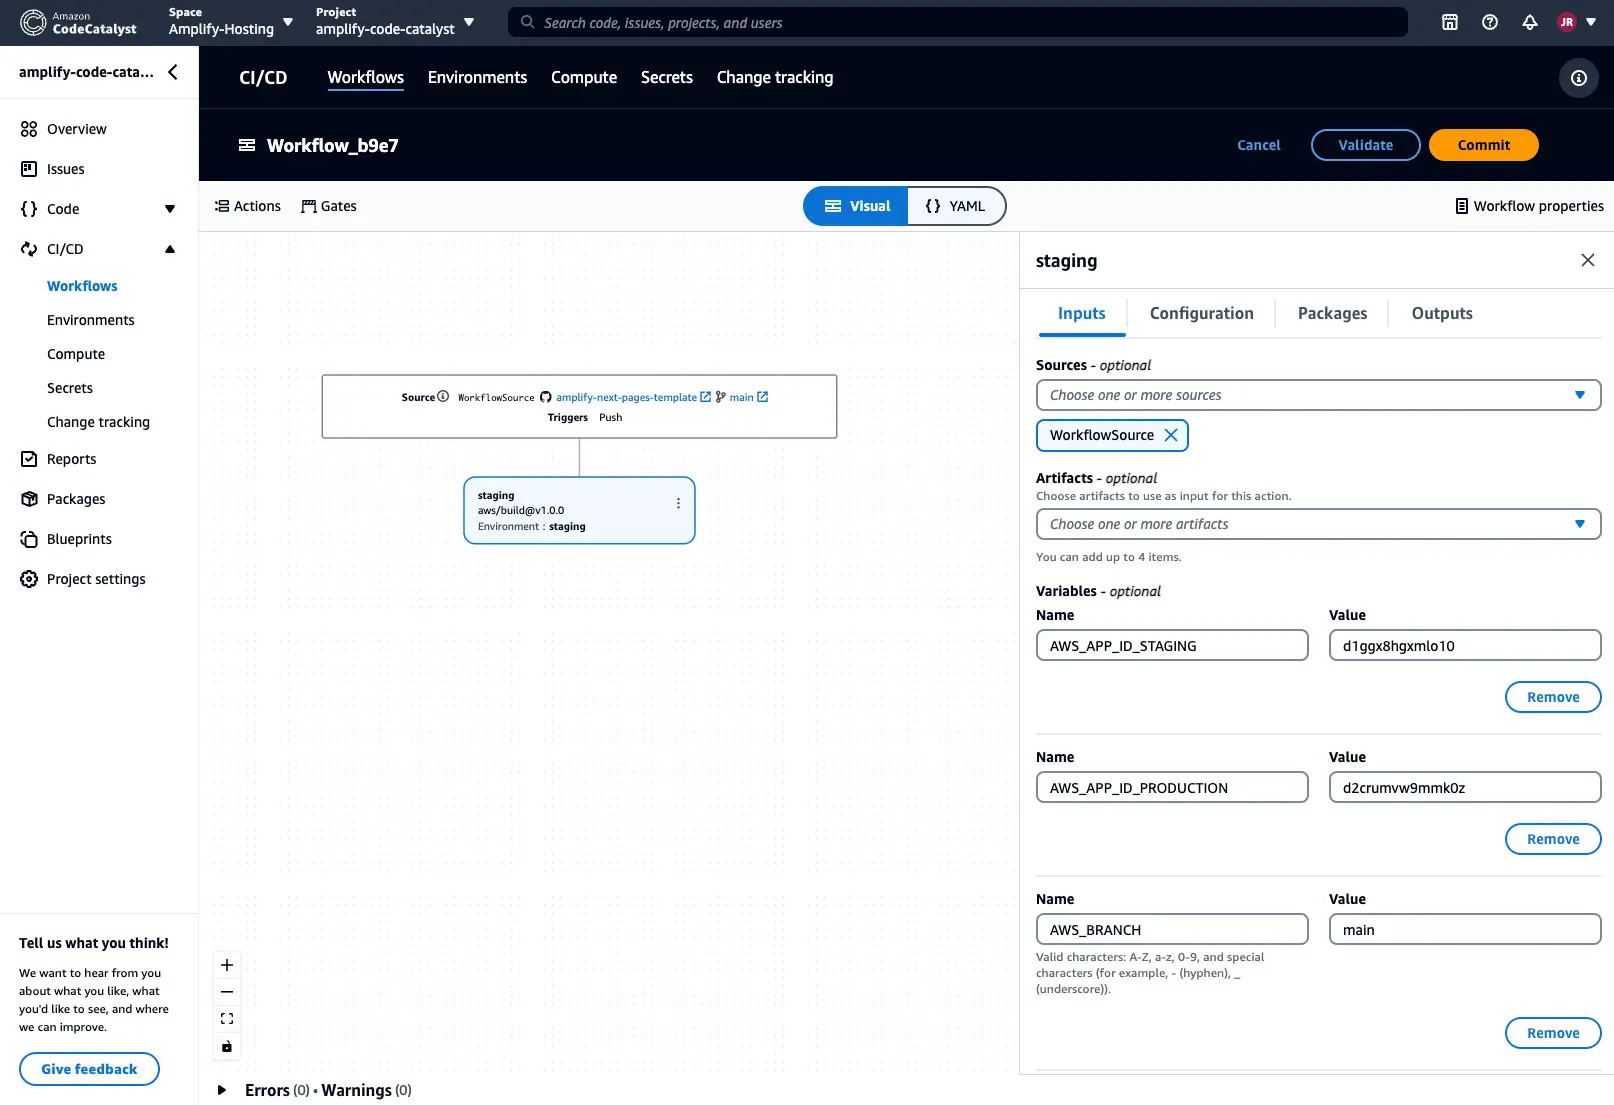
Add the Build action to the workflow and select the Add variable button in the Inputs section. Add the following environment variables to it:
- AWS_APP_ID_STAGING:
amplify app id for staging app - AWS_APP_ID_PRODUCTION:
amplify app id for production app - AWS_BRANCH:
git branch name
Add another Build action to the workflow and select the Depends on button in the Inputs section. From the dropdown menu, select the name of the previous build action to set up the pipeline.
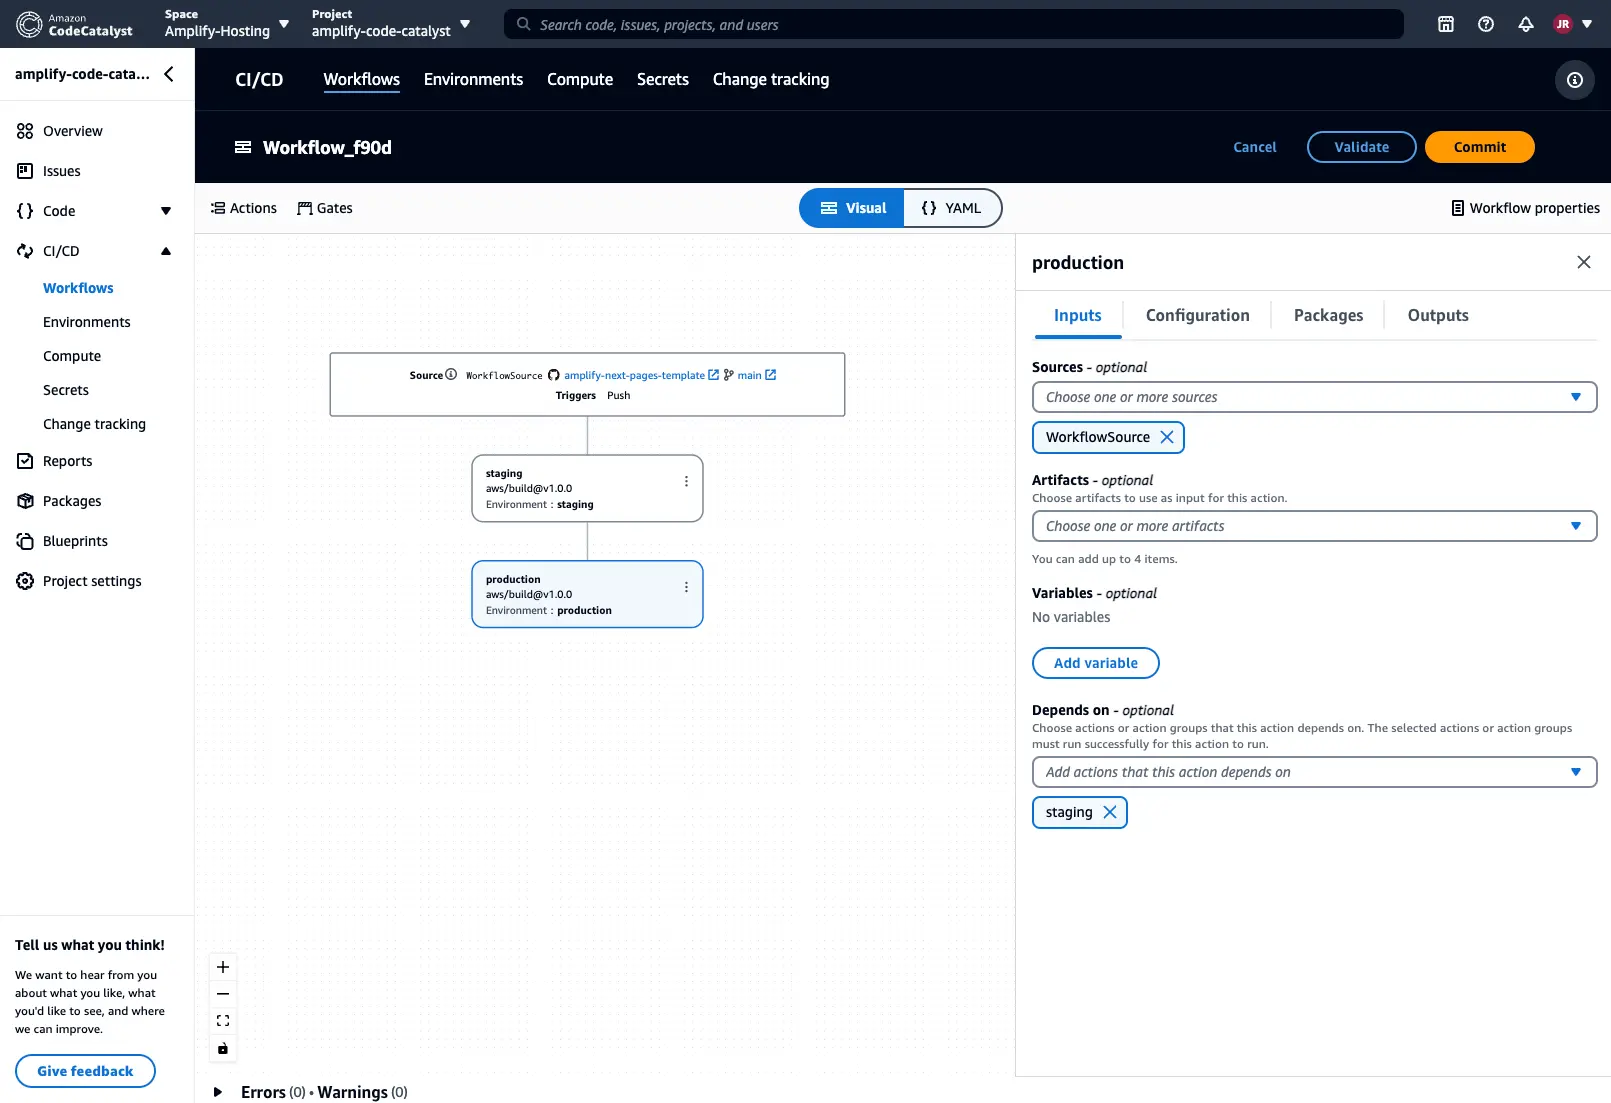
Next, select the Configuration section and add the following information to each of the build actions:
- Environment information (optional):
staging, production, etc. - AWS account connection:
your account connection - Role:
role setup with your account connection
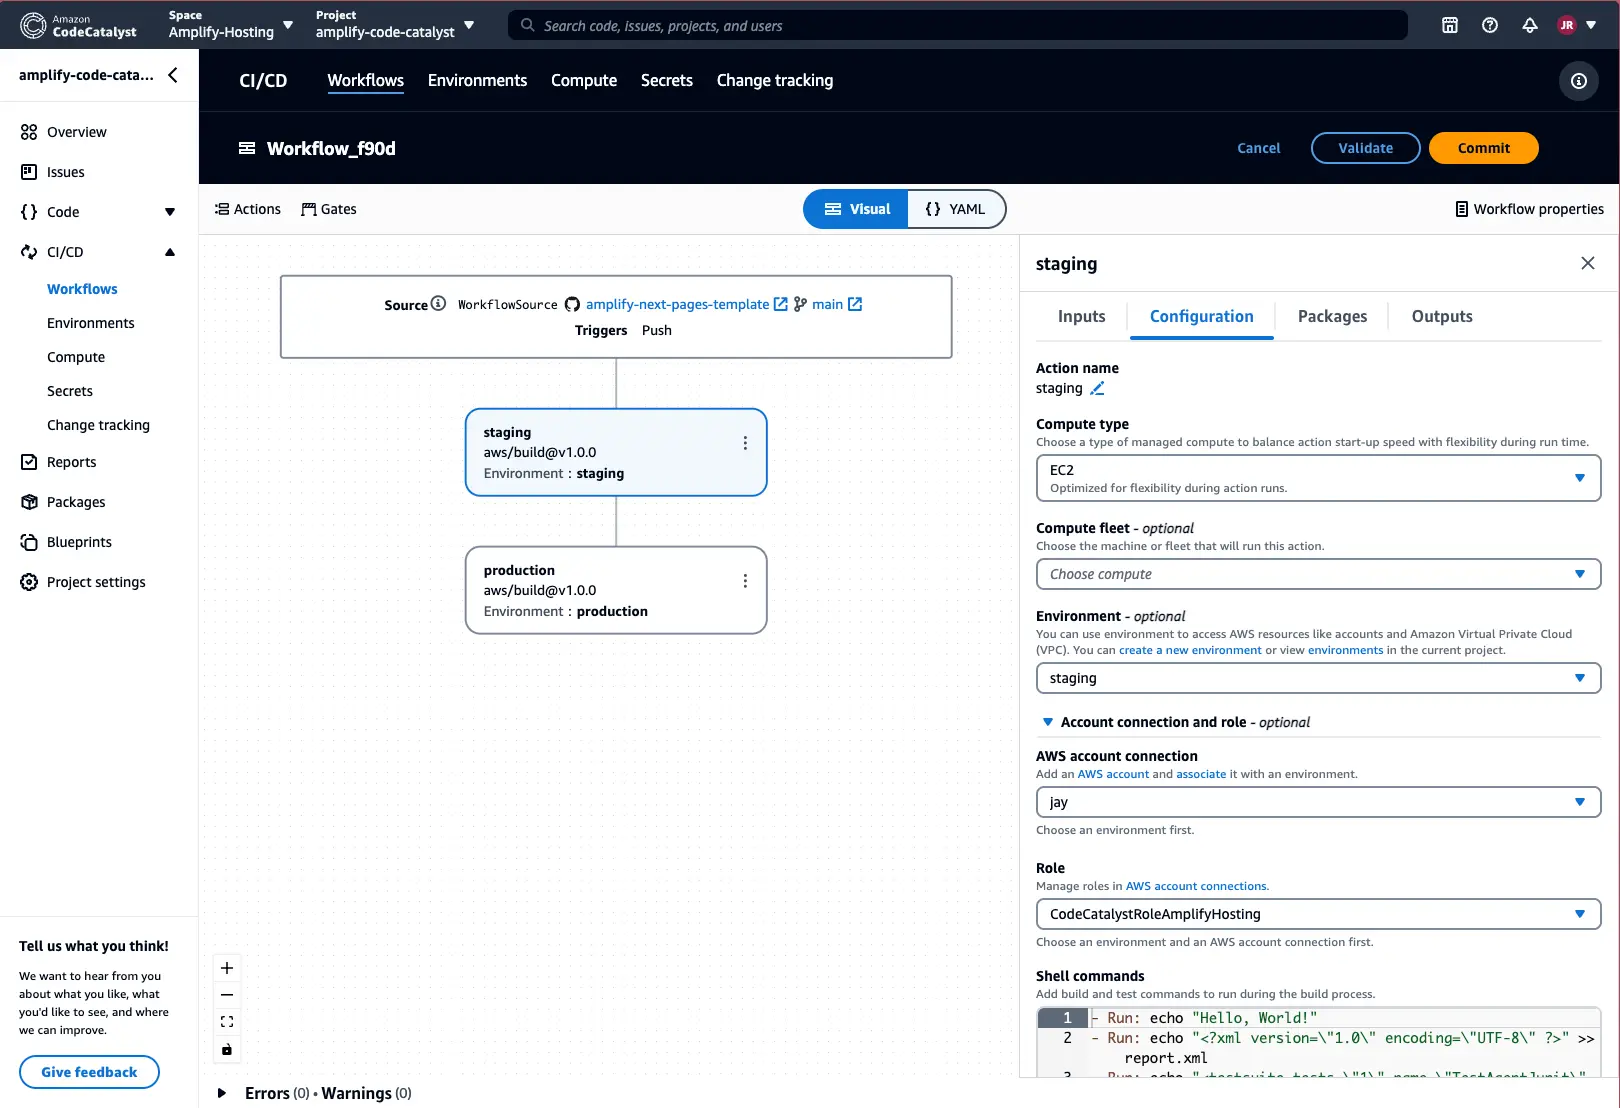
You will then need to add the following shell commands to each of the build actions:
// This environment variable is required to run the pipeline-deploy command in a non Amplify CI environment- Run: export CI=1
// Perform a clean install of the dependencies- Run: npm ci
// Deploy the backend for your Amplify Gen 2 app- Run: npx ampx pipeline-deploy --branch $AWS_BRANCH --app-id $AWS_APP_ID
// Trigger frontend build using incoming webhooks- Run: if [ $AWS_BRANCH = "main" ]; then curl -X POST -d {} "`webhookUrl`&operation=startbuild" -H "Content-Type:application/json"; fi
You can now run Validate to ensure your workflow definition yaml file is valid. Lastly, select Commit to save your changes.
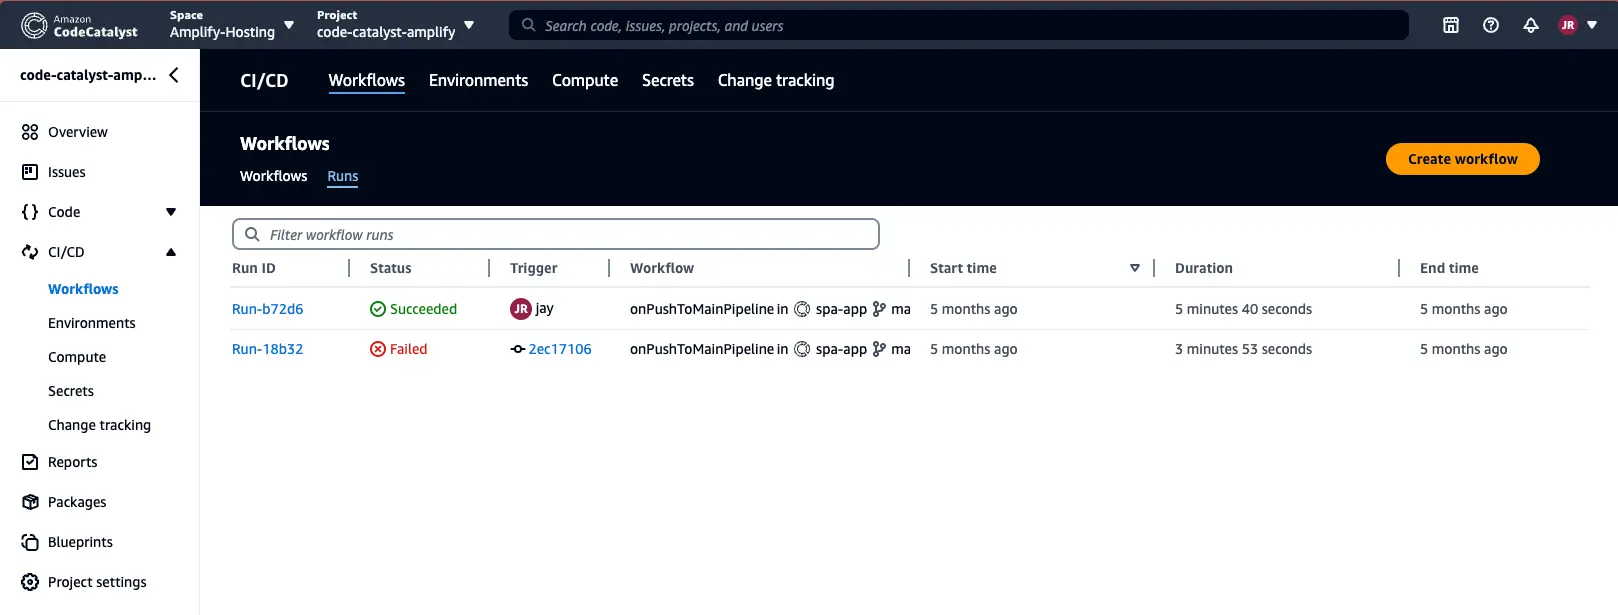
Next, you can review the result of the workflow run from the Runs tab:
Done! You have successfully set up a custom cross-account pipeline to deploy your frontend and backend for apps built using Amplify Gen 2. To summarize, this custom pipeline will enable you to deploy your backend initially with your staging environment using ampx pipeline-deploy in the CodeCatalyst workflow and ampx generate outputs will generate the amplify_outputs.json file for the main branch. Amplify Hosting will not deploy backend resources as part of the build and instead will use the deployed backend resources from the main branch. Once the staging environment deploys successfully, a similar process will be followed to deploy your production environment in a different AWS account.