Set up fullstack project
👋 Welcome! In this tutorial, you will:
- Set up an iOS application configured with Amplify
- Create a data model and persist data to Amplify DataStore
- Connect your local data to synchronize to a cloud backend
Prerequisites
- Xcode version 14.1 or later
- Amplify CLI version 10 or later. Install by running:
npm install -g @aws-amplify/clicurl -sL https://aws-amplify.github.io/amplify-cli/install | bash && $SHELLcurl -sL https://aws-amplify.github.io/amplify-cli/install-win -o install.cmd && install.cmdCreate a new iOS application
-
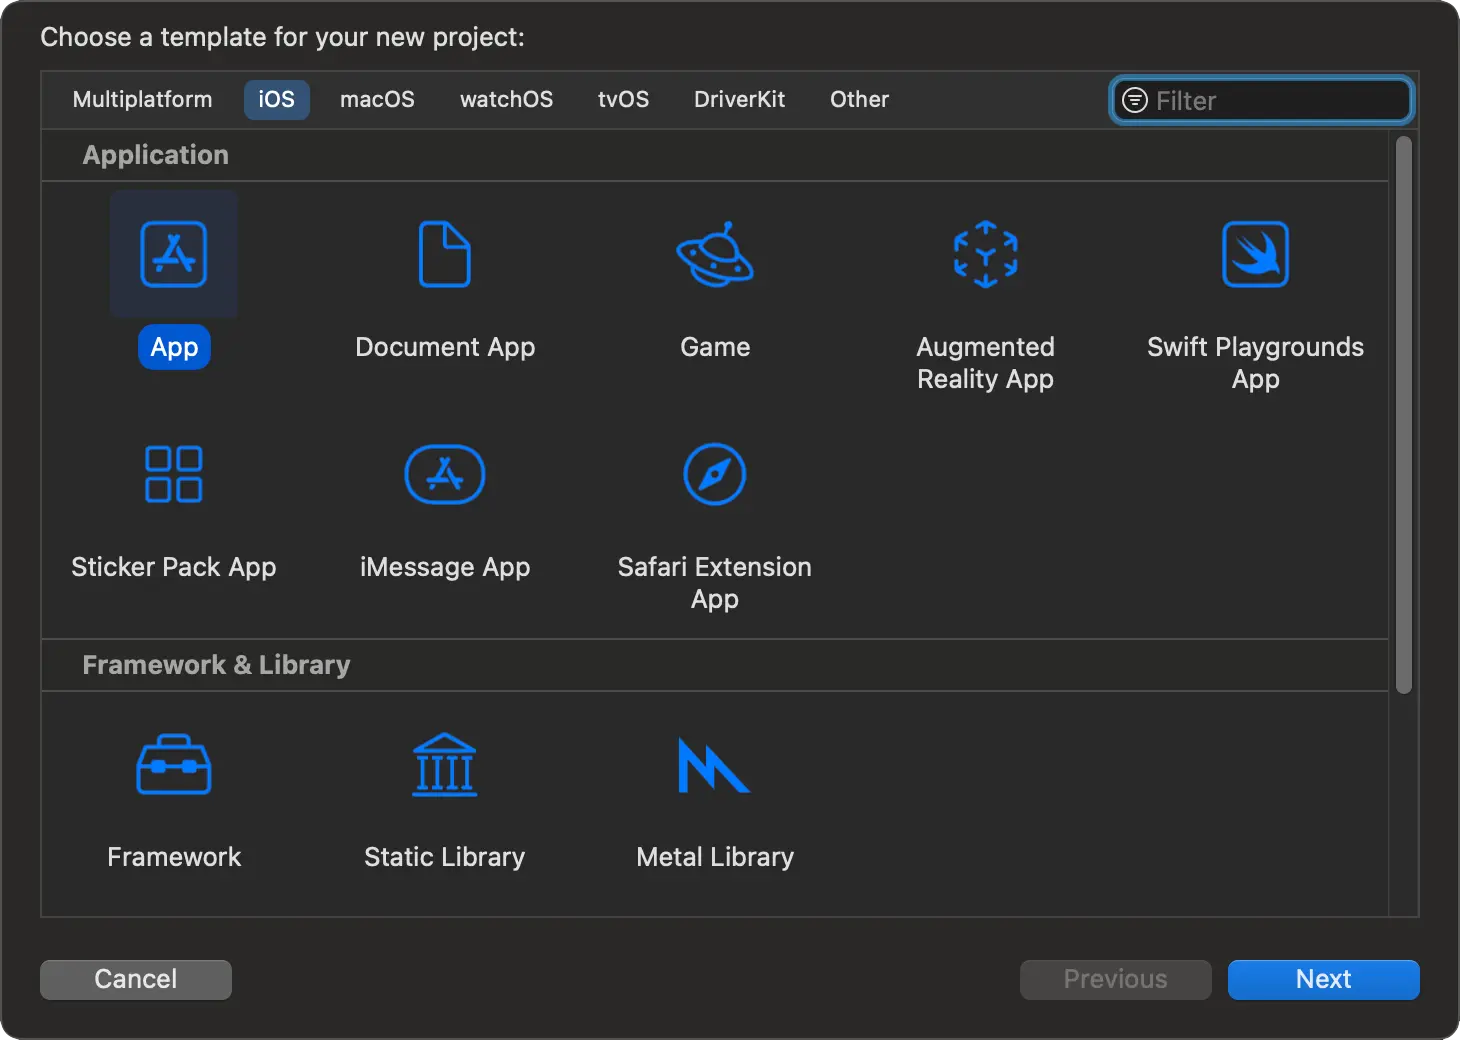
Open Xcode. From the menu bar, select "File -> New -> Project..."
-
Select iOS tab, choose Application type as App, and then click on Next.
-
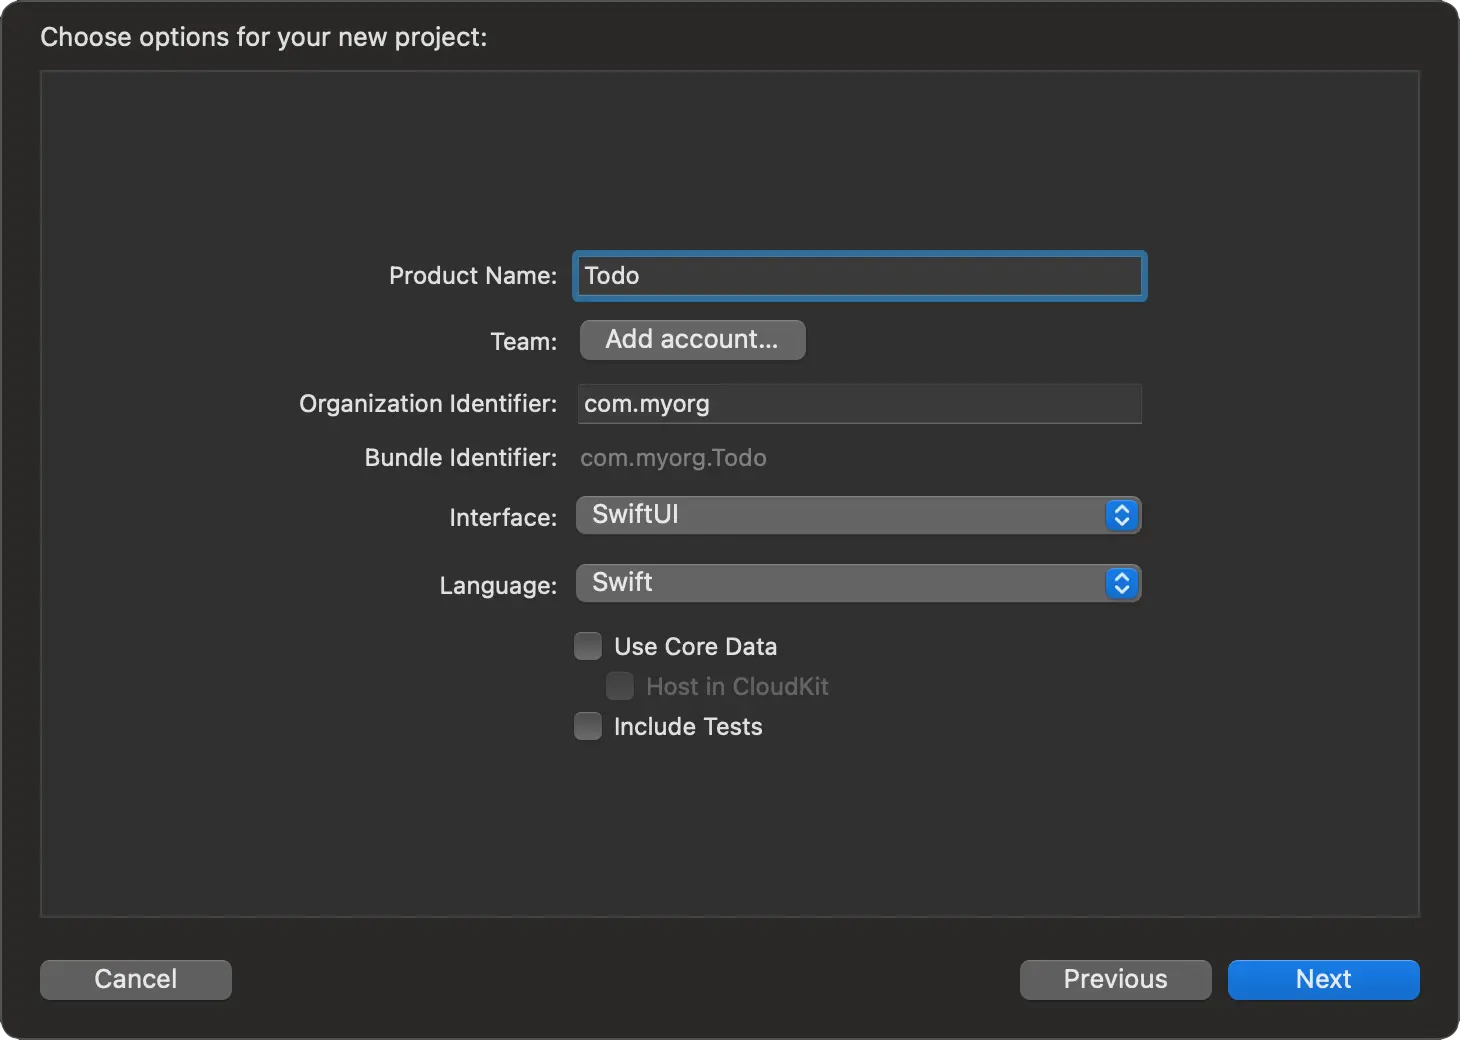
Fill in the following for your project:
- Product Name: Todo
- Interface: SwiftUI
- Language: Swift
- Select the Next button
After selecting Next, select where you would like to save your project, and then select Create. You should now have an empty iOS project without Amplify.
Add Amplify to your application
Amplify Library for Swift is distributed through Swift Package Manager, which is integrated into Xcode. In this section, you'll add the required Amplify packages.
- Open a terminal window and change to the directory for your application project. For example, if you created the previous Todo project in the folder
~/Developer, you can type the following:
cd ~/Developer/Todo- To create the Amplify project first you will need to use the
amplifyCLI you previously installed. Run the command:
amplify init --quickstart --frontend ios-
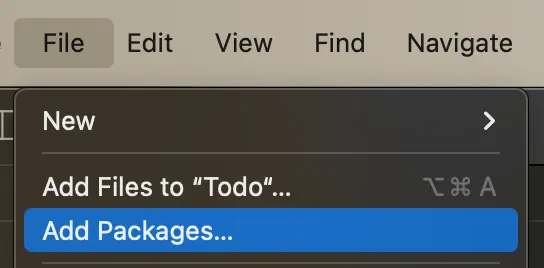
Switch back to Xcode. Select File > Add Packages...
-
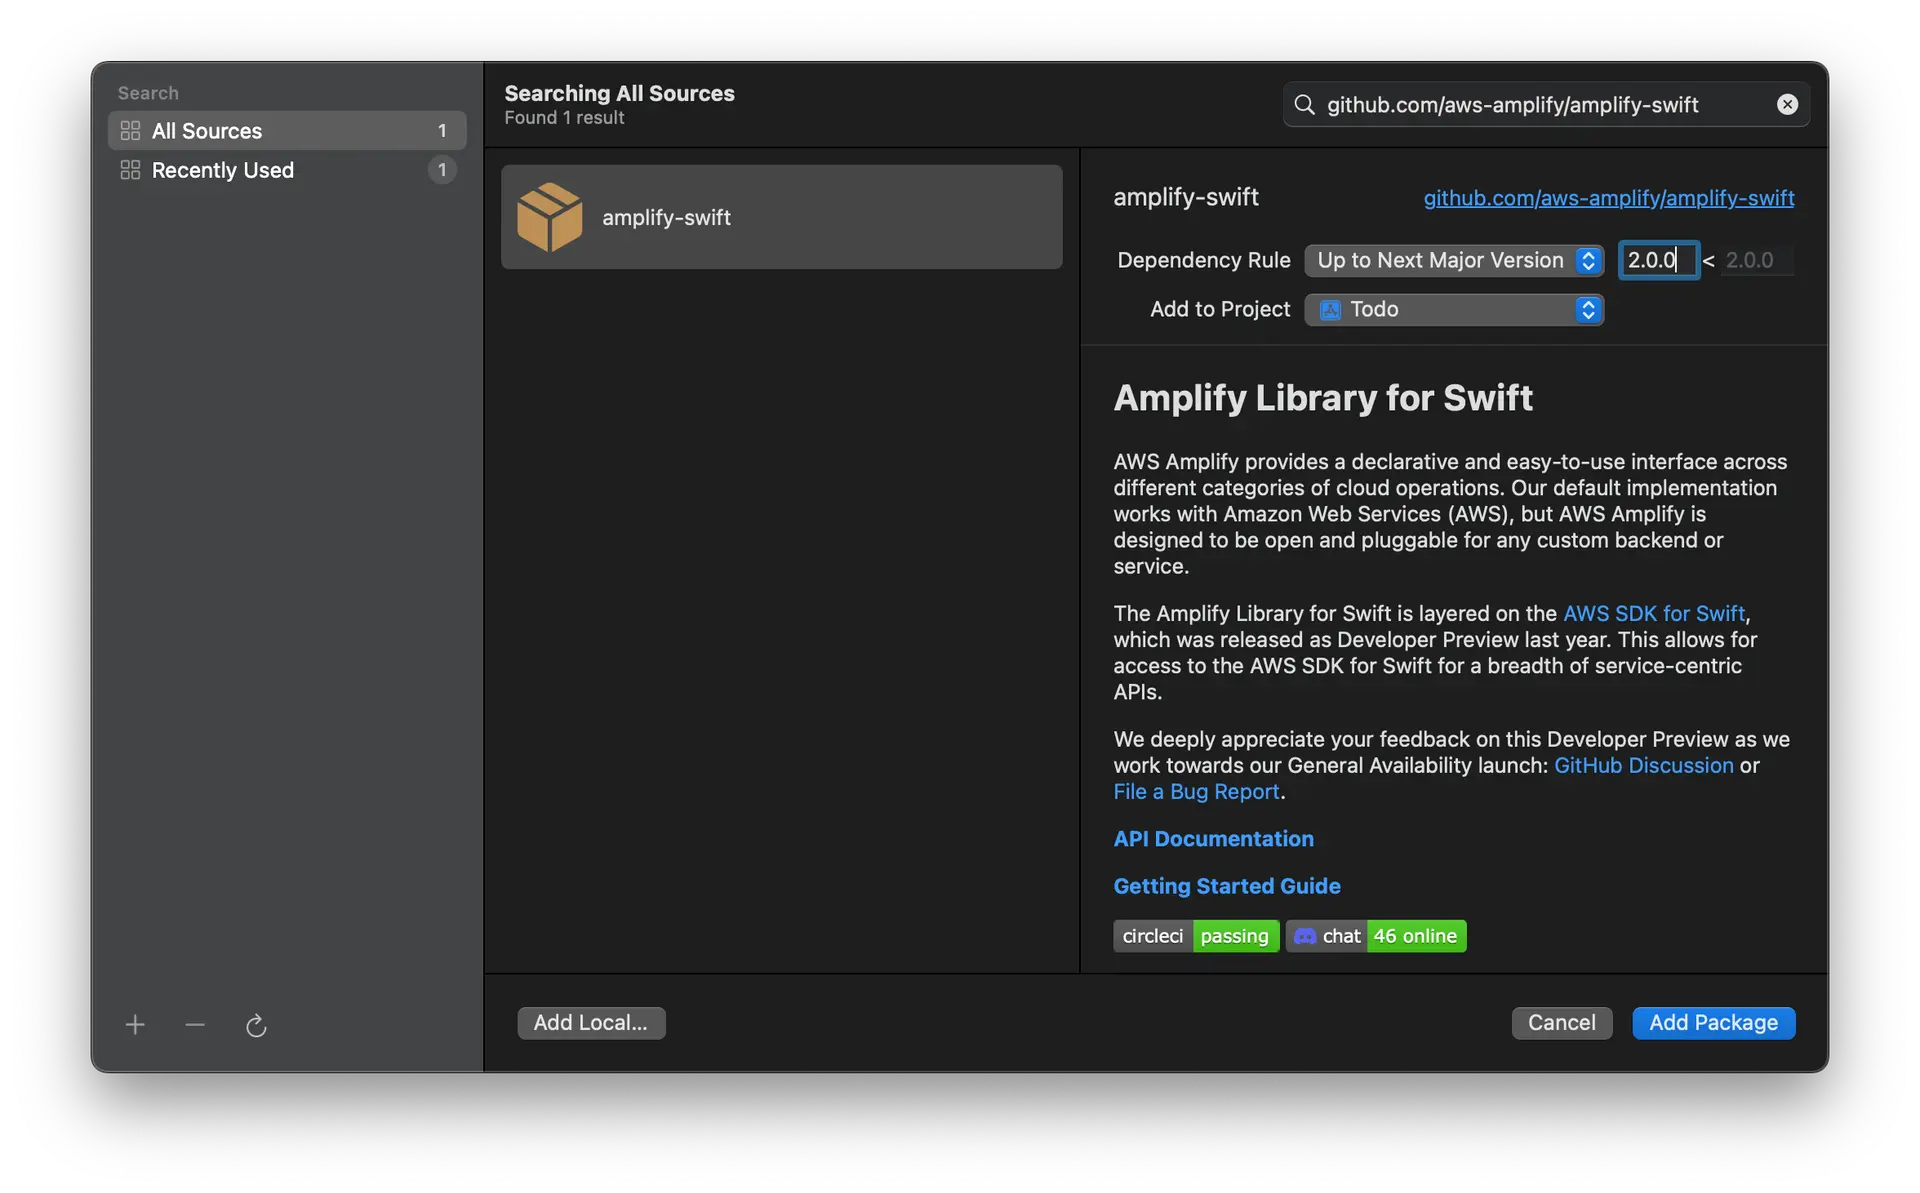
Enter the Amplify Library for Swift GitHub repo URL (
https://github.com/aws-amplify/amplify-swift) into the search bar and hit Enter.Once the result is loaded, choose Up to Next Major Version as the Dependency Rule, then click Add Package.
-
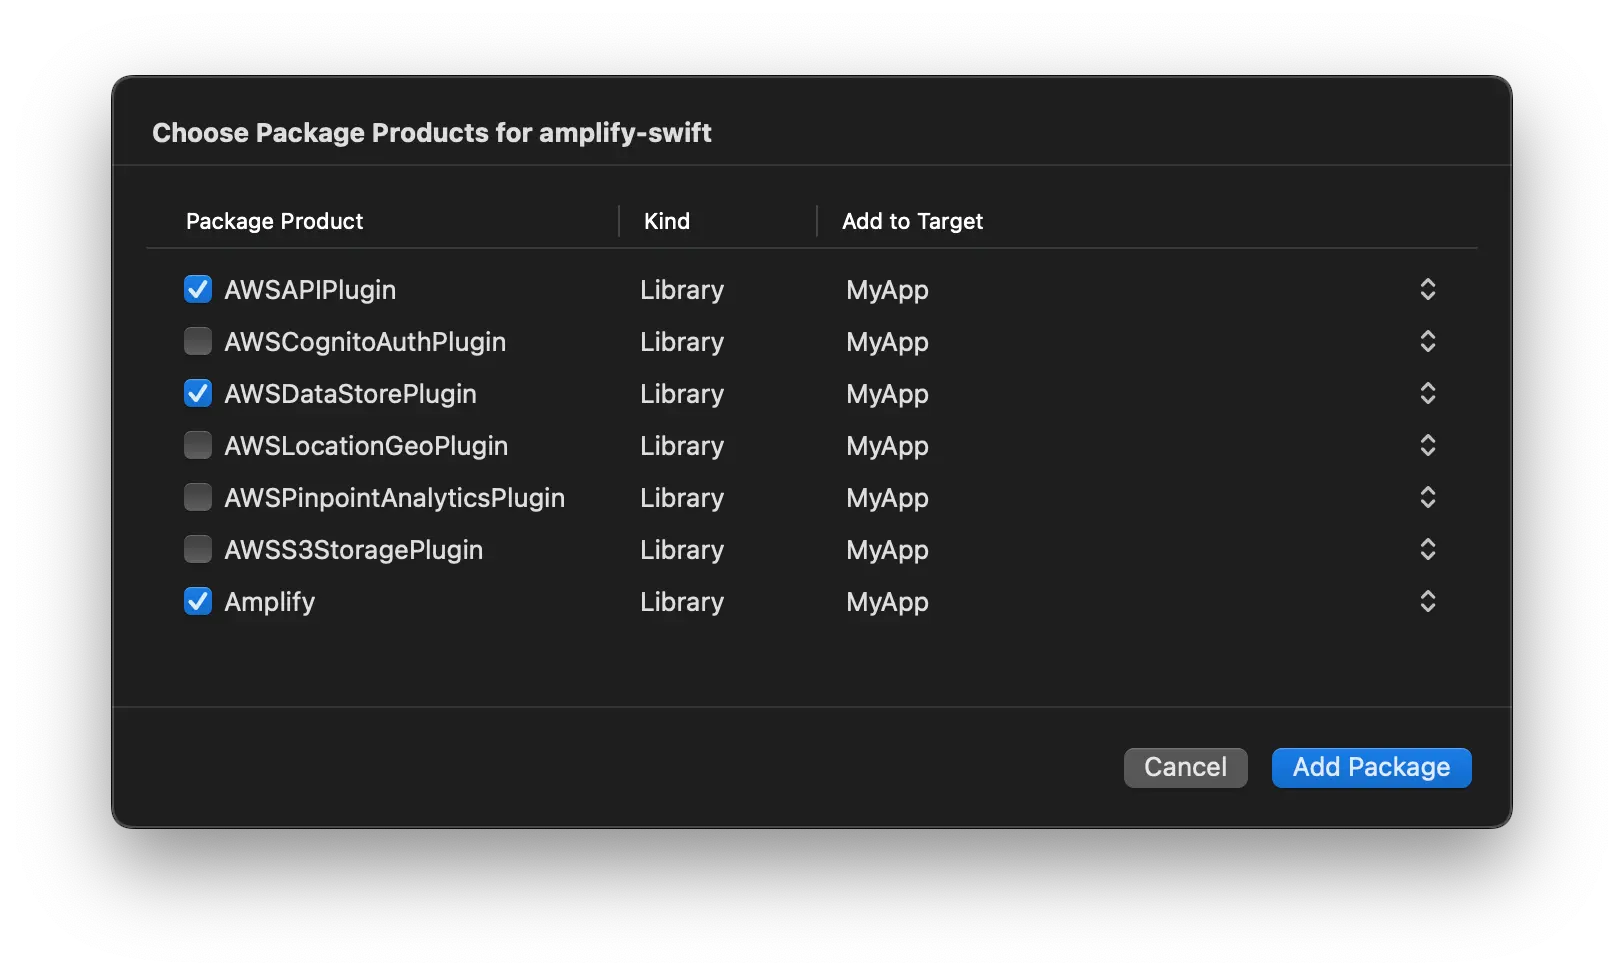
Lastly, choose which of the libraries you want added to your project. For this tutorial, select AWSAPIPlugin, AWSDataStorePlugin, and Amplify, then click Add Package.
You are now ready to start building with Amplify! 🎉
