Set up fullstack project
Set up your application
Create a new Flutter application
Create a new project using Flutter CLI:
flutter create budget_trackerAdd Amplify to your application
Amplify Flutter is distributed via pub.dev.
-
From your project root directory, find and modify your
pubspec.yamland add the Amplify plugins to the project dependencies.dependencies:amplify_api: ^2.0.0amplify_auth_cognito: ^2.0.0amplify_authenticator: ^2.0.0amplify_flutter: ^2.0.0flutter:sdk: fluttergo_router: ^6.5.5 -
Install the dependencies by running the following command. Depending on your development environment, you may perform this step via your IDE (or it may even be performed for you automatically).
flutter pub get
Platform Setup
Depending on the platform you're building for, some extra set up may be required.
Amplify requires a minimum deployment target of 13.0 and Xcode 15.0 or higher when targeting iOS.
From your project root, navigate to the ios/ directory and open the Podfile in a text editor of your choice. At the top of the file, update the target iOS platform to 13.0 or higher.
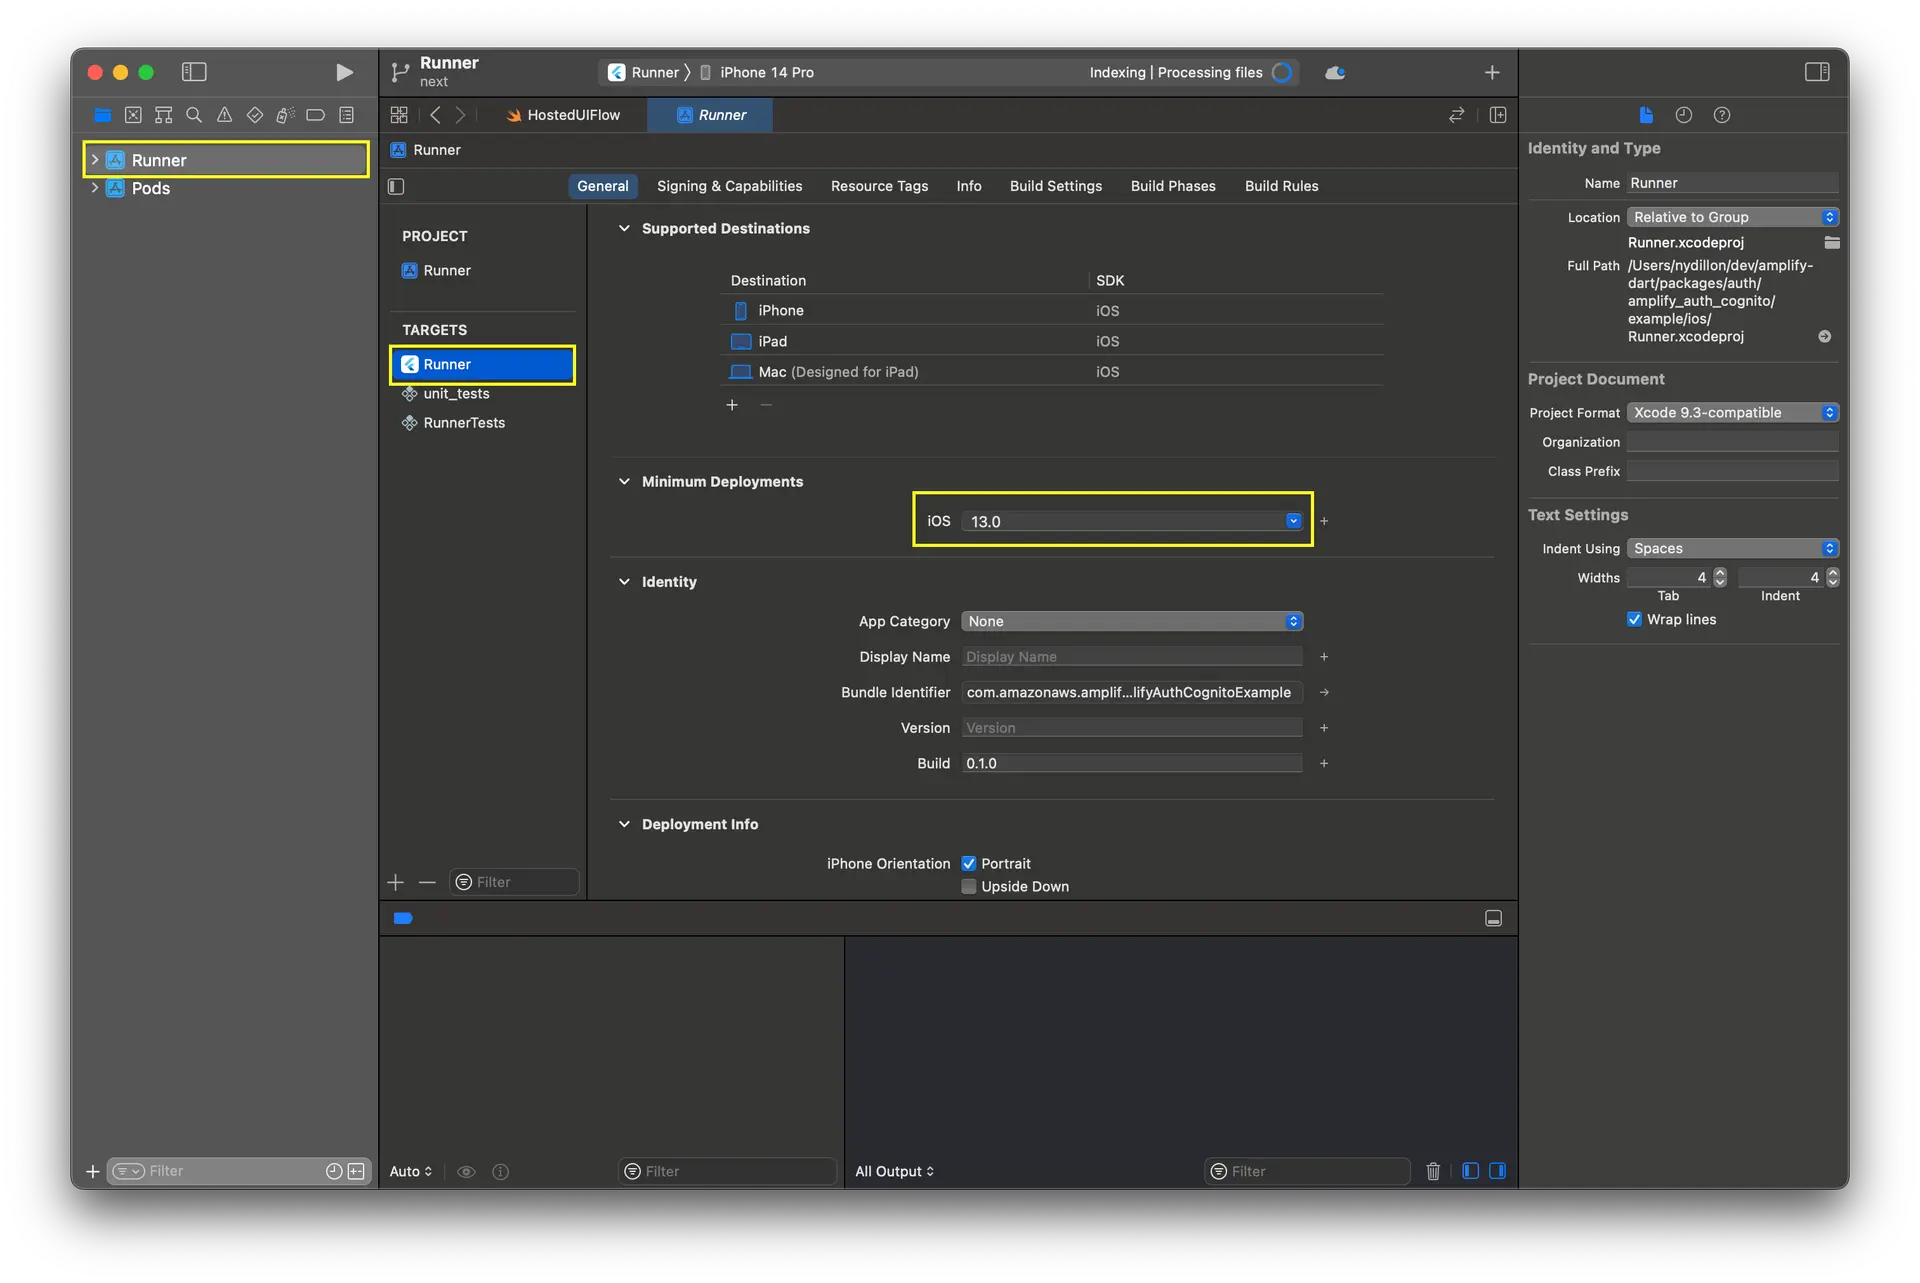
platform :ios, '13.0'Open your project in Xcode and select Runner, Targets -> Runner and then the "General" tab. Under the "Minimum Deployments" section, update the iOS version to 13.0 or higher.
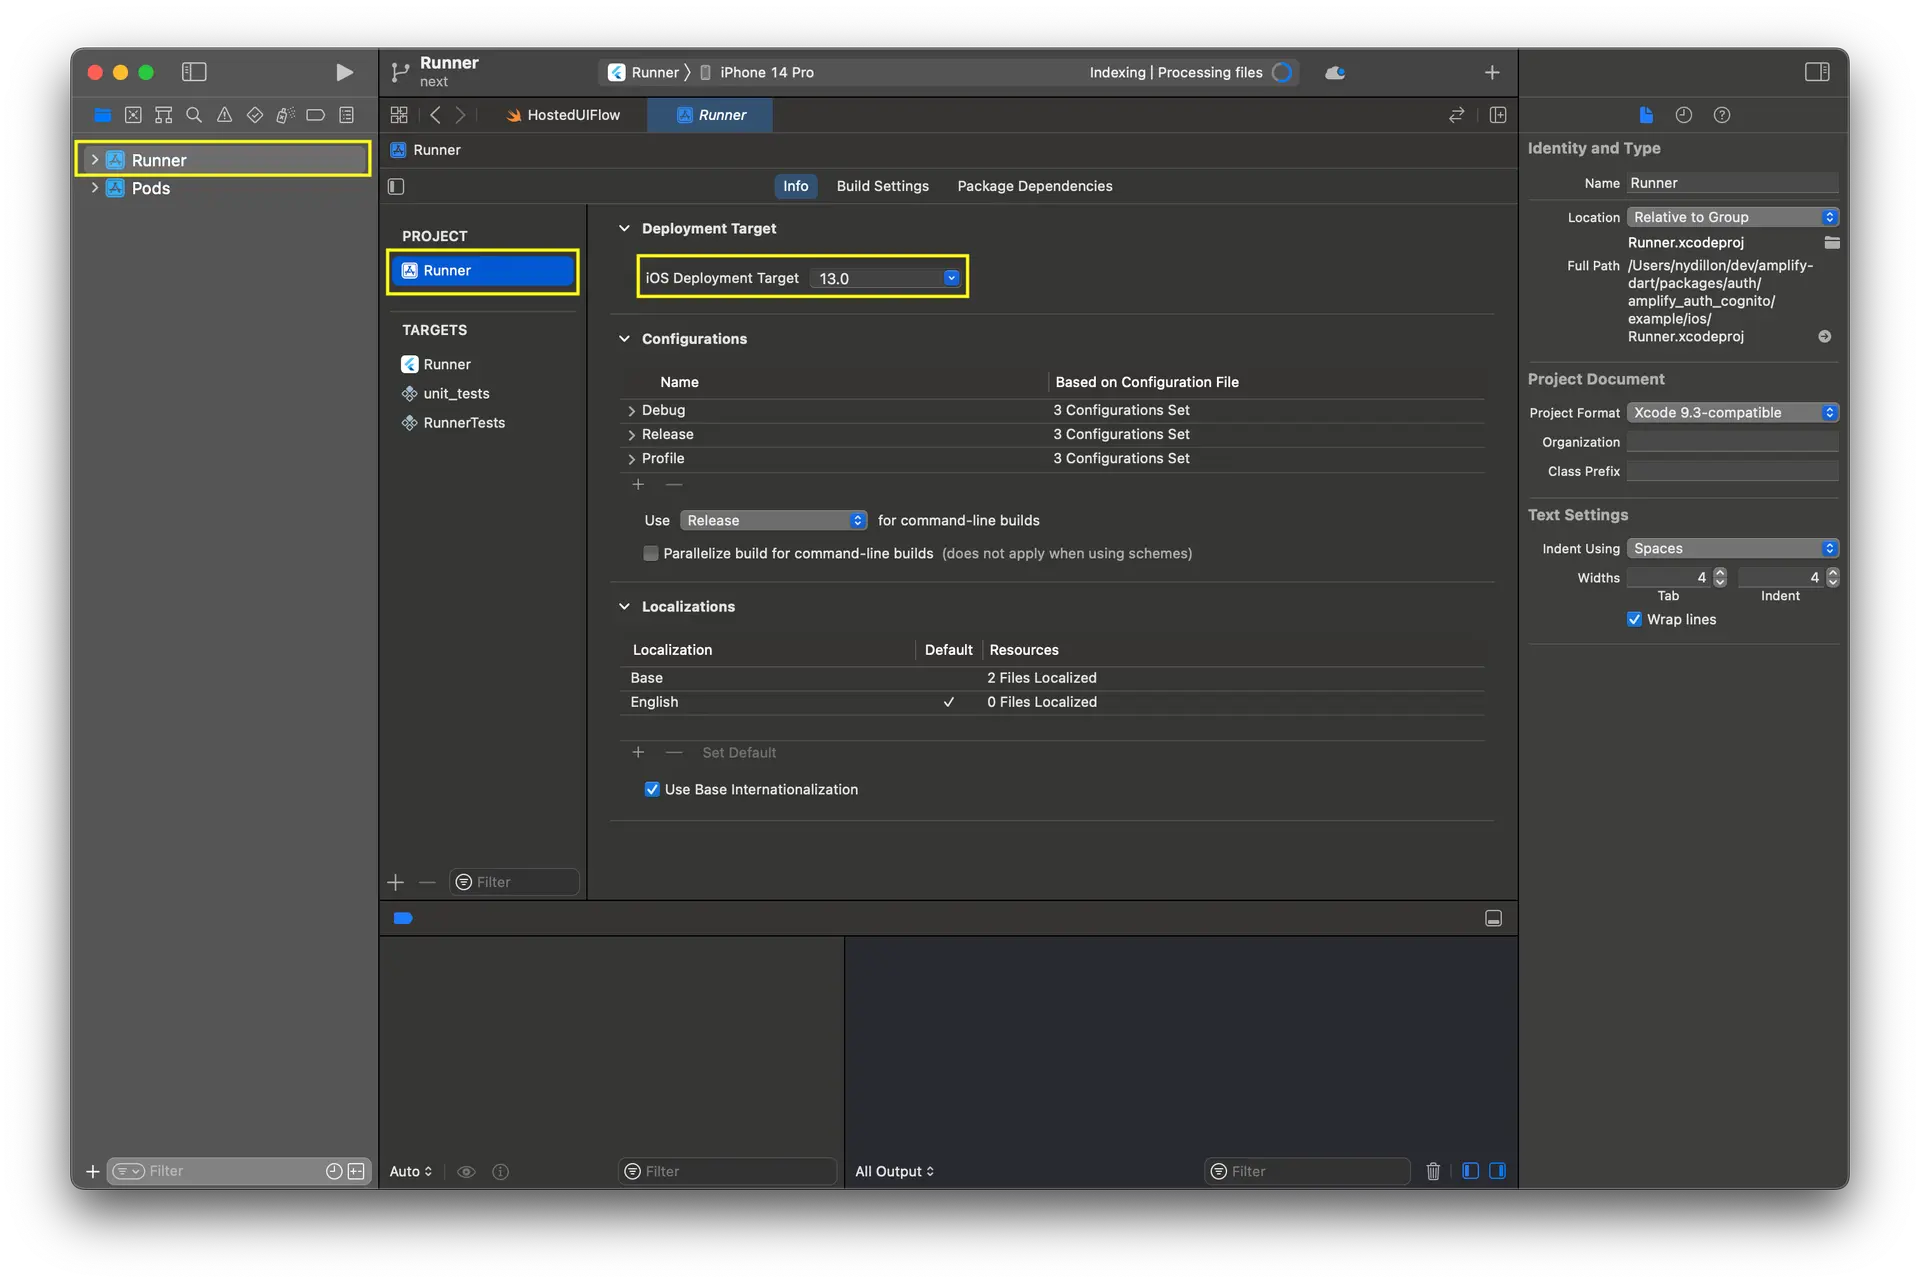
Select Runner, Project -> Runner and then the "Build Settings" tab. Update "iOS Deployment Target" to 13.0 or higher.
Amplify Flutter supports API level 24+ (Android 7.0+), and requires Gradle 8+, Kotlin 1.9+, and Java 17+ when targeting Android. Follow the steps below to apply these changes in your app.
- Open
android/settings.gradle.ktsand update the Android Gradle plugin and kotlin versions:
plugins { id("dev.flutter.flutter-plugin-loader") version "1.0.0"- id("com.android.application") version "8.7.0" apply false- id("org.jetbrains.kotlin.android") version "1.8.22" apply false+ id("com.android.application") version "8.12.1" apply false+ id("org.jetbrains.kotlin.android") version "2.2.0" apply false}- Open
android/gradle/wrapper/gradle-wrapper.propertiesand update the GradledistributionUrl.
distributionBase=GRADLE_USER_HOMEdistributionPath=wrapper/distszipStoreBase=GRADLE_USER_HOMEzipStorePath=wrapper/dists-distributionUrl=https\://services.gradle.org/distributions/gradle-8.10.2-all.zip+distributionUrl=https\://services.gradle.org/distributions/gradle-8.13-all.zip- Open
android/app/build.gradle.ktsand update the Java version and minimum Android SDK version.
android { namespace = "com.example.myapp" compileSdk = flutter.compileSdkVersion ndkVersion = flutter.ndkVersion compileOptions {- sourceCompatibility = JavaVersion.VERSION_1_8- targetCompatibility = JavaVersion.VERSION_1_8+ sourceCompatibility = JavaVersion.VERSION_17+ targetCompatibility = JavaVersion.VERSION_17 } kotlinOptions {- jvmTarget = JavaVersion.VERSION_11.toString()+ jvmTarget = JavaVersion.VERSION_17.toString() } defaultConfig { // TODO: Specify your own unique Application ID (https://developer.android.com/studio/build/application-id.html). applicationId = "com.example.myapp" // You can update the following values to match your application needs. // For more information, see: https://docs.flutter.dev/deployment/android#reviewing-the-gradle-build-configuration.- minSdk = flutter.minSdkVersion+ minSdk = 24 targetSdk = flutter.targetSdkVersion versionCode = flutterVersionCode.toInteger() versionName = flutterVersionName } buildTypes { release { // TODO: Add your own signing config for the release build. // Signing with the debug keys for now, so `flutter run --release` works. signingConfig = signingConfigs.debug } }}- Open
android/settings.gradleand update the Android Gradle plugin and kotlin versions:
plugins { id "dev.flutter.flutter-plugin-loader" version "1.0.0"- id "com.android.application" version "7.3.0" apply false- id "org.jetbrains.kotlin.android" version "1.7.10" apply false+ id "com.android.application" version "8.12.1" apply false+ id "org.jetbrains.kotlin.android" version "2.2.0" apply false}- Open
android/gradle/wrapper/gradle-wrapper.propertiesand update the GradledistributionUrl.
distributionBase=GRADLE_USER_HOMEdistributionPath=wrapper/distszipStoreBase=GRADLE_USER_HOMEzipStorePath=wrapper/dists-distributionUrl=https\://services.gradle.org/distributions/gradle-7.0-all.zip+distributionUrl=https\://services.gradle.org/distributions/gradle-8.13-all.zip- Open
android/app/build.gradleand update the Java version and minimum Android SDK version.
android { namespace = "com.example.myapp" compileSdk = flutter.compileSdkVersion ndkVersion = flutter.ndkVersion compileOptions {- sourceCompatibility = JavaVersion.VERSION_11- targetCompatibility = JavaVersion.VERSION_11+ sourceCompatibility = JavaVersion.VERSION_17+ targetCompatibility = JavaVersion.VERSION_17 } defaultConfig { // TODO: Specify your own unique Application ID (https://developer.android.com/studio/build/application-id.html). applicationId = "com.example.myapp" // You can update the following values to match your application needs. // For more information, see: https://docs.flutter.dev/deployment/android#reviewing-the-gradle-build-configuration.- minSdk = flutter.minSdkVersion+ minSdk = 24 targetSdk = flutter.targetSdkVersion versionCode = flutterVersionCode.toInteger() versionName = flutterVersionName } buildTypes { release { // TODO: Add your own signing config for the release build. // Signing with the debug keys for now, so `flutter run --release` works. signingConfig = signingConfigs.debug } }}Network Permissions for Release Builds
Flutter apps have access to make network requests by default in debug mode. This permission needs to be added when building in release mode. To do this, open android/app/src/main/AndroidManifest.xml and make the following addition.
<manifest xmlns:android="http://schemas.android.com/apk/res/android"> <uses-permission android:name="android.permission.INTERNET"/>...</manifest>There are no Amplify specific requirements or setup instructions when targeting web. You will need to use a browser supported by Flutter. See the following Flutter docs for more info:
Amplify requires a minimum deployment target of 10.15 and Xcode 15.0 or higher when targeting macOS. Additionally, you will need to enable networking, keychain entitlements, and code signing.
Update Minimum Version
From your project root, navigate to the macos/ directory and open the Podfile in a text editor of your choice. Update the target macOS platform to 10.15 or higher.
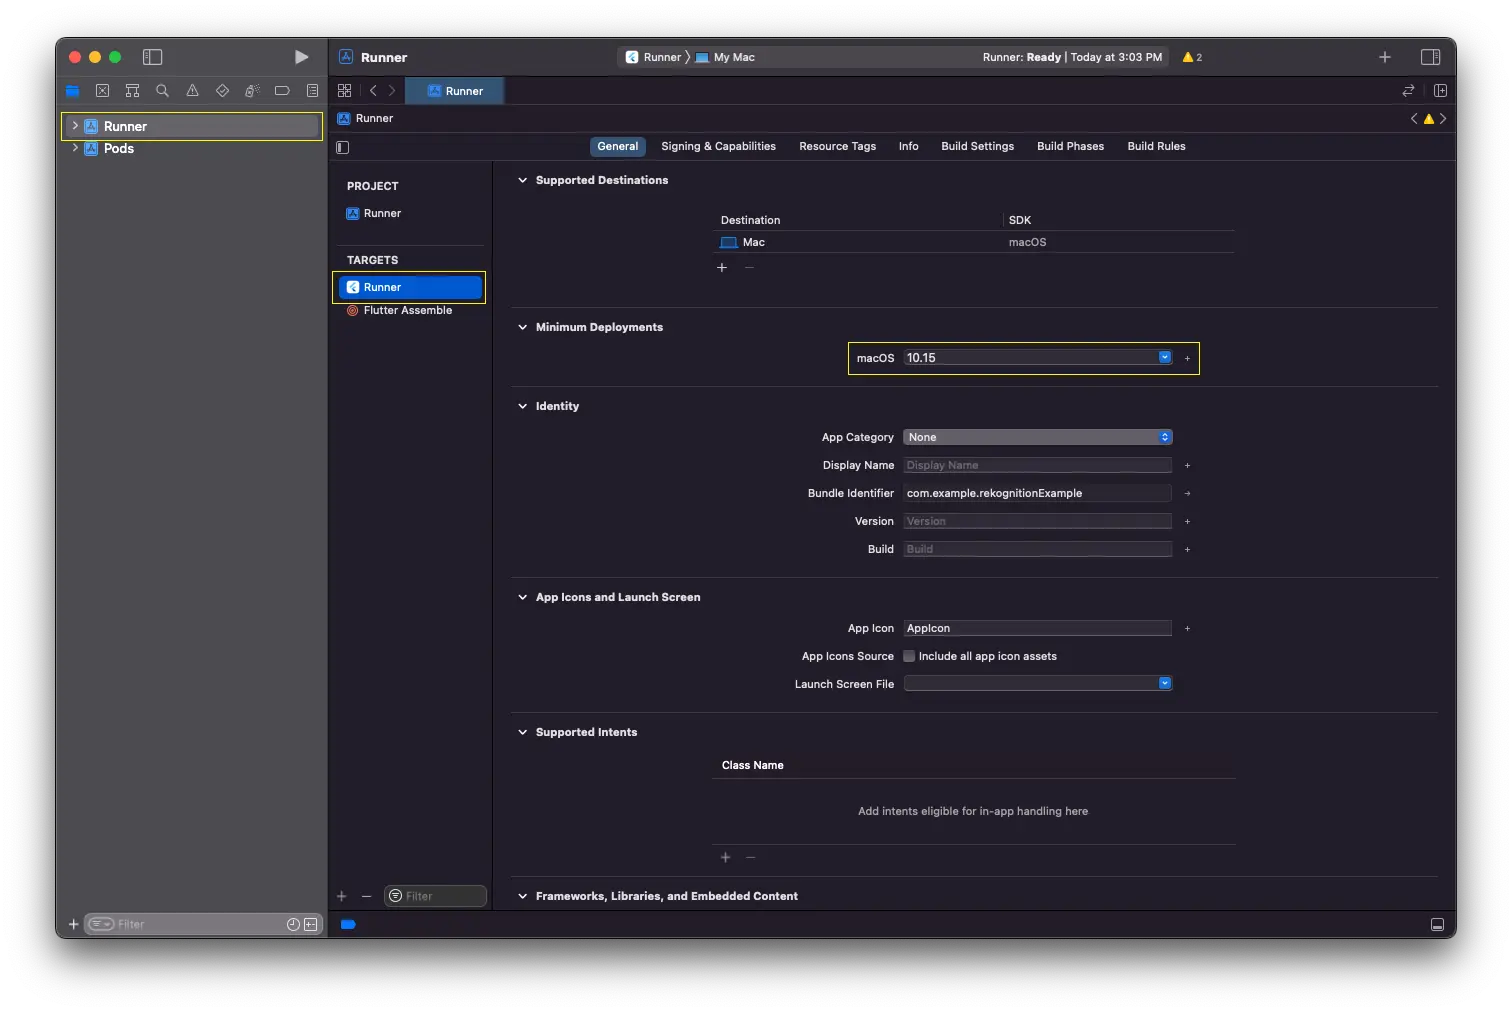
platform :osx, '10.15'Open your project in Xcode and select Runner, Targets -> Runner and then the "General" tab. Under the "Minimum Deployments" section, update the macOS version to 10.15 or higher.
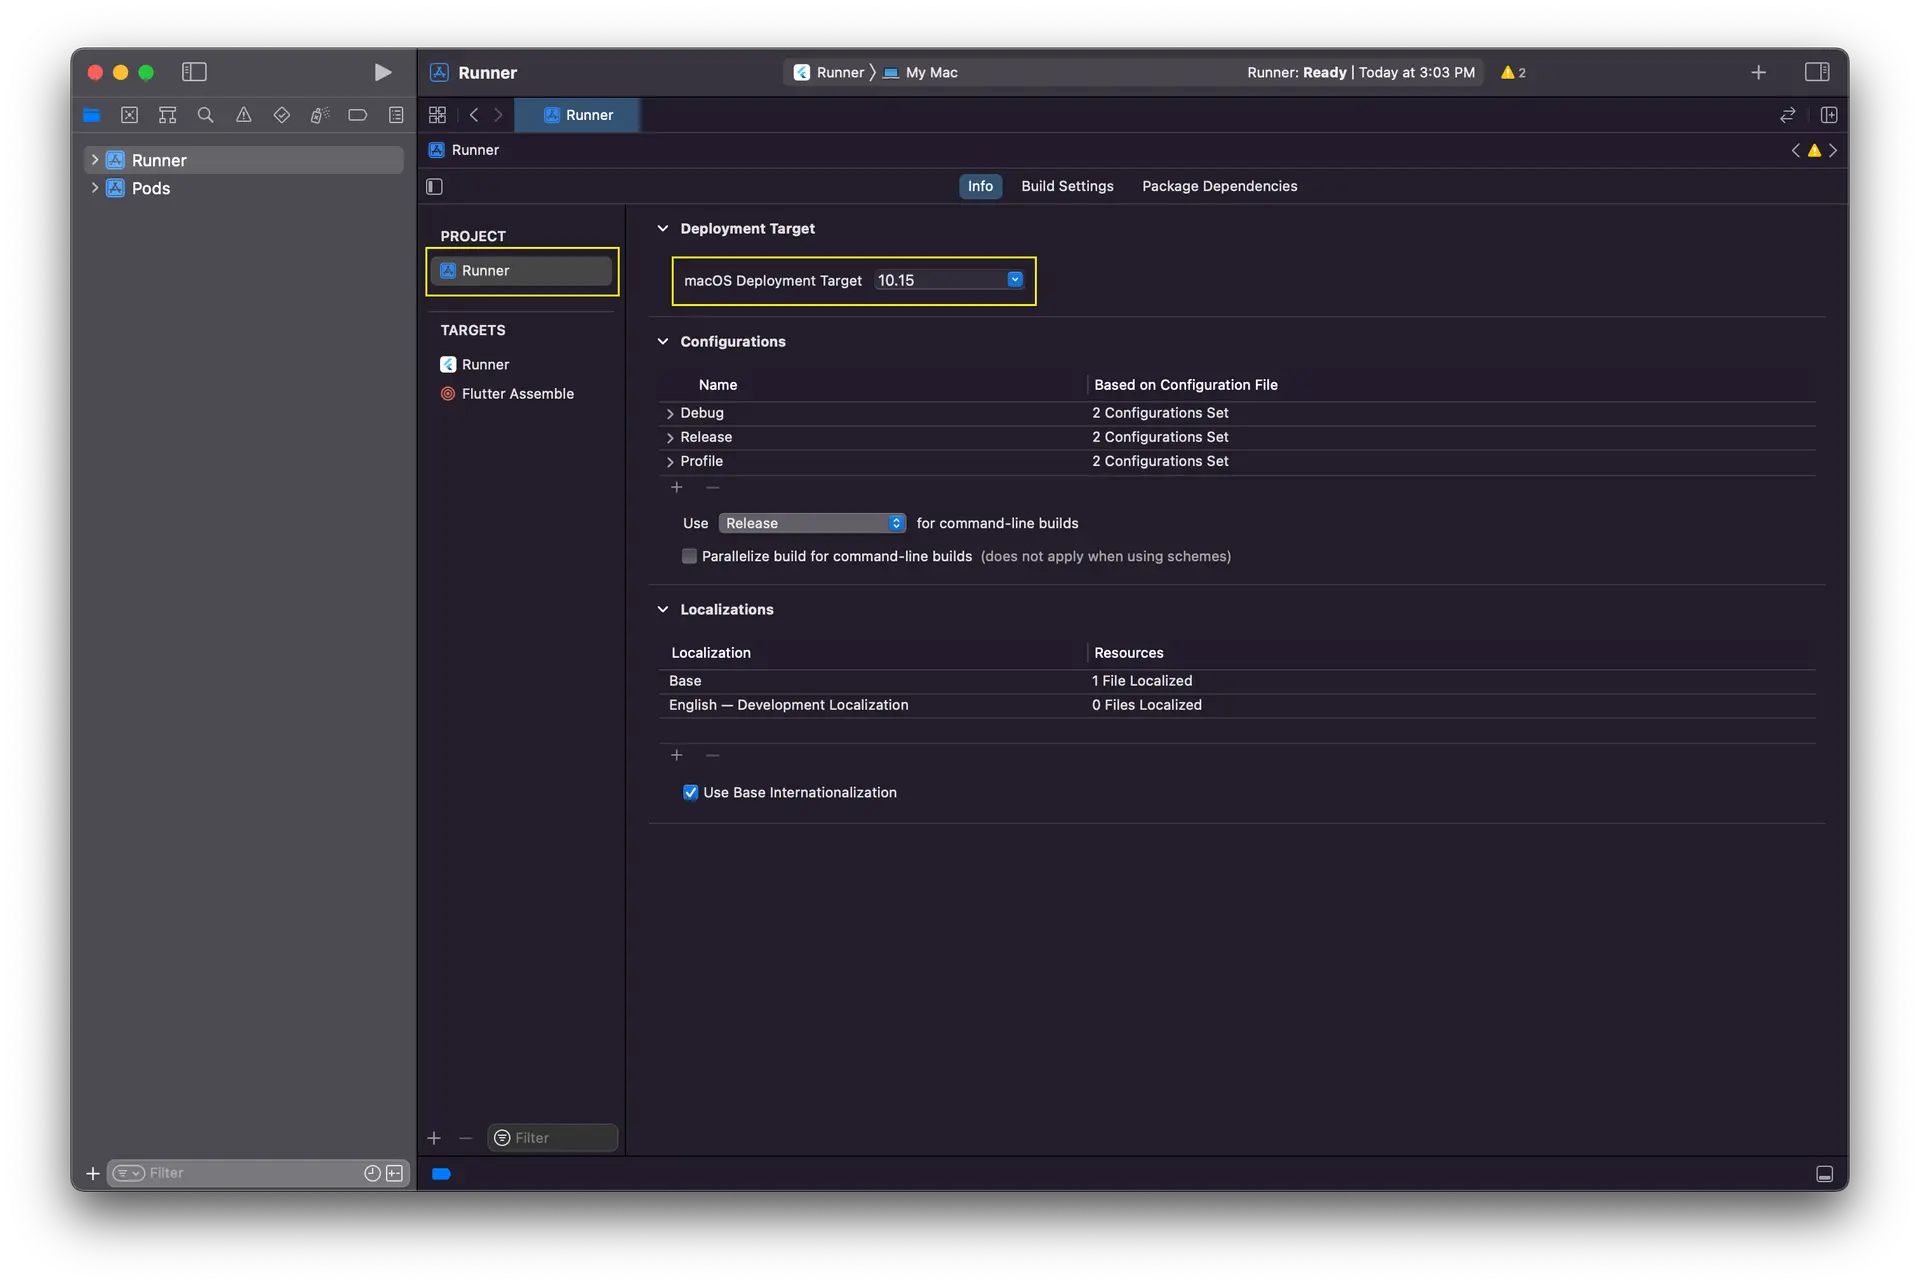
Select Runner, Project -> Runner and then the "Info" tab. Update "macOS Deployment Target" to 10.15 or higher.
Enable Network Calls
Open your project in Xcode and select Runner, Targets -> Runner and then the "Signing and Capabilities" tab. Under "App Sandbox" select "Outgoing Connections (Client)".
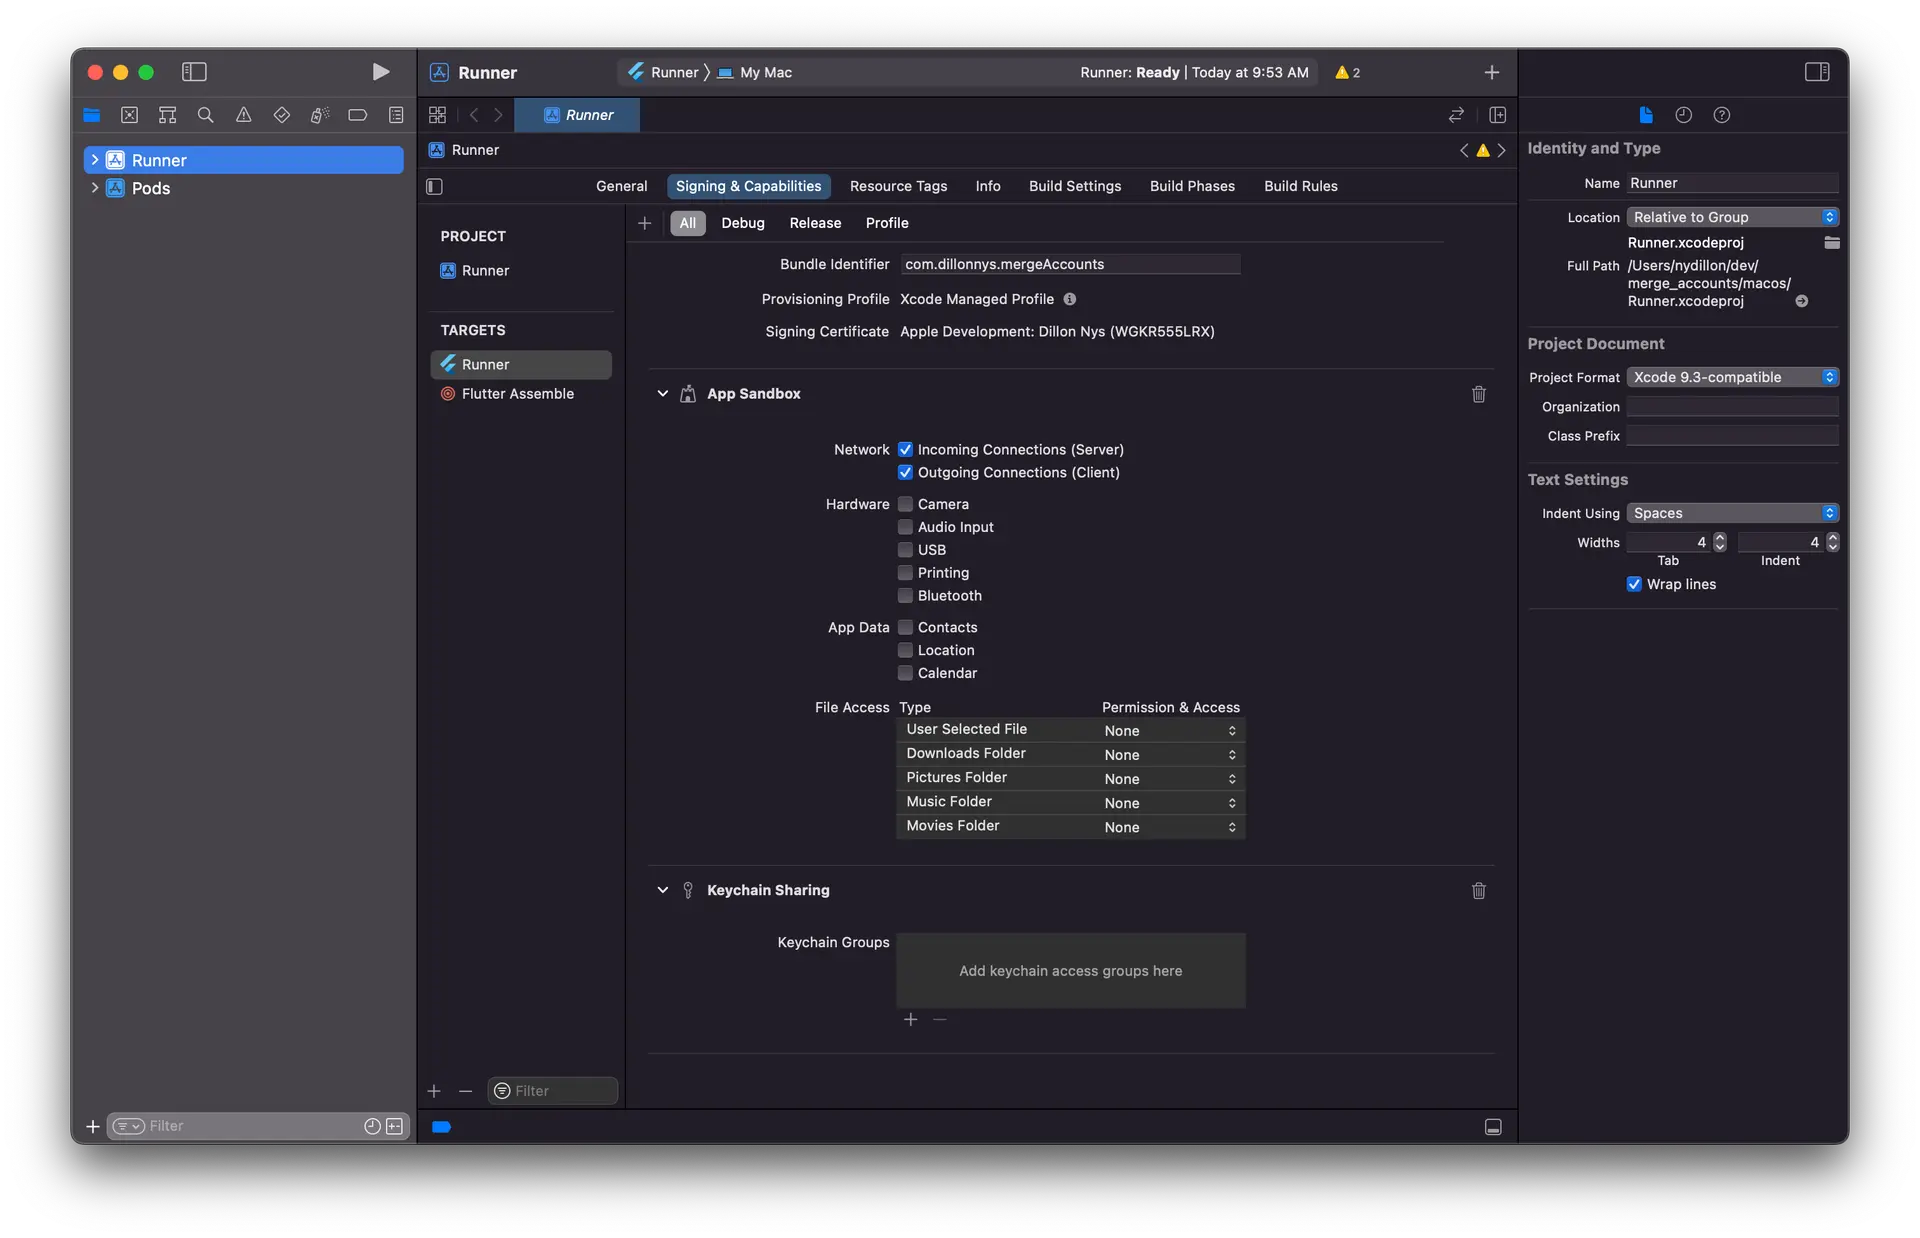
For more info on the Networking entitlement, see Apple's documentation on com.apple.security.network.client.
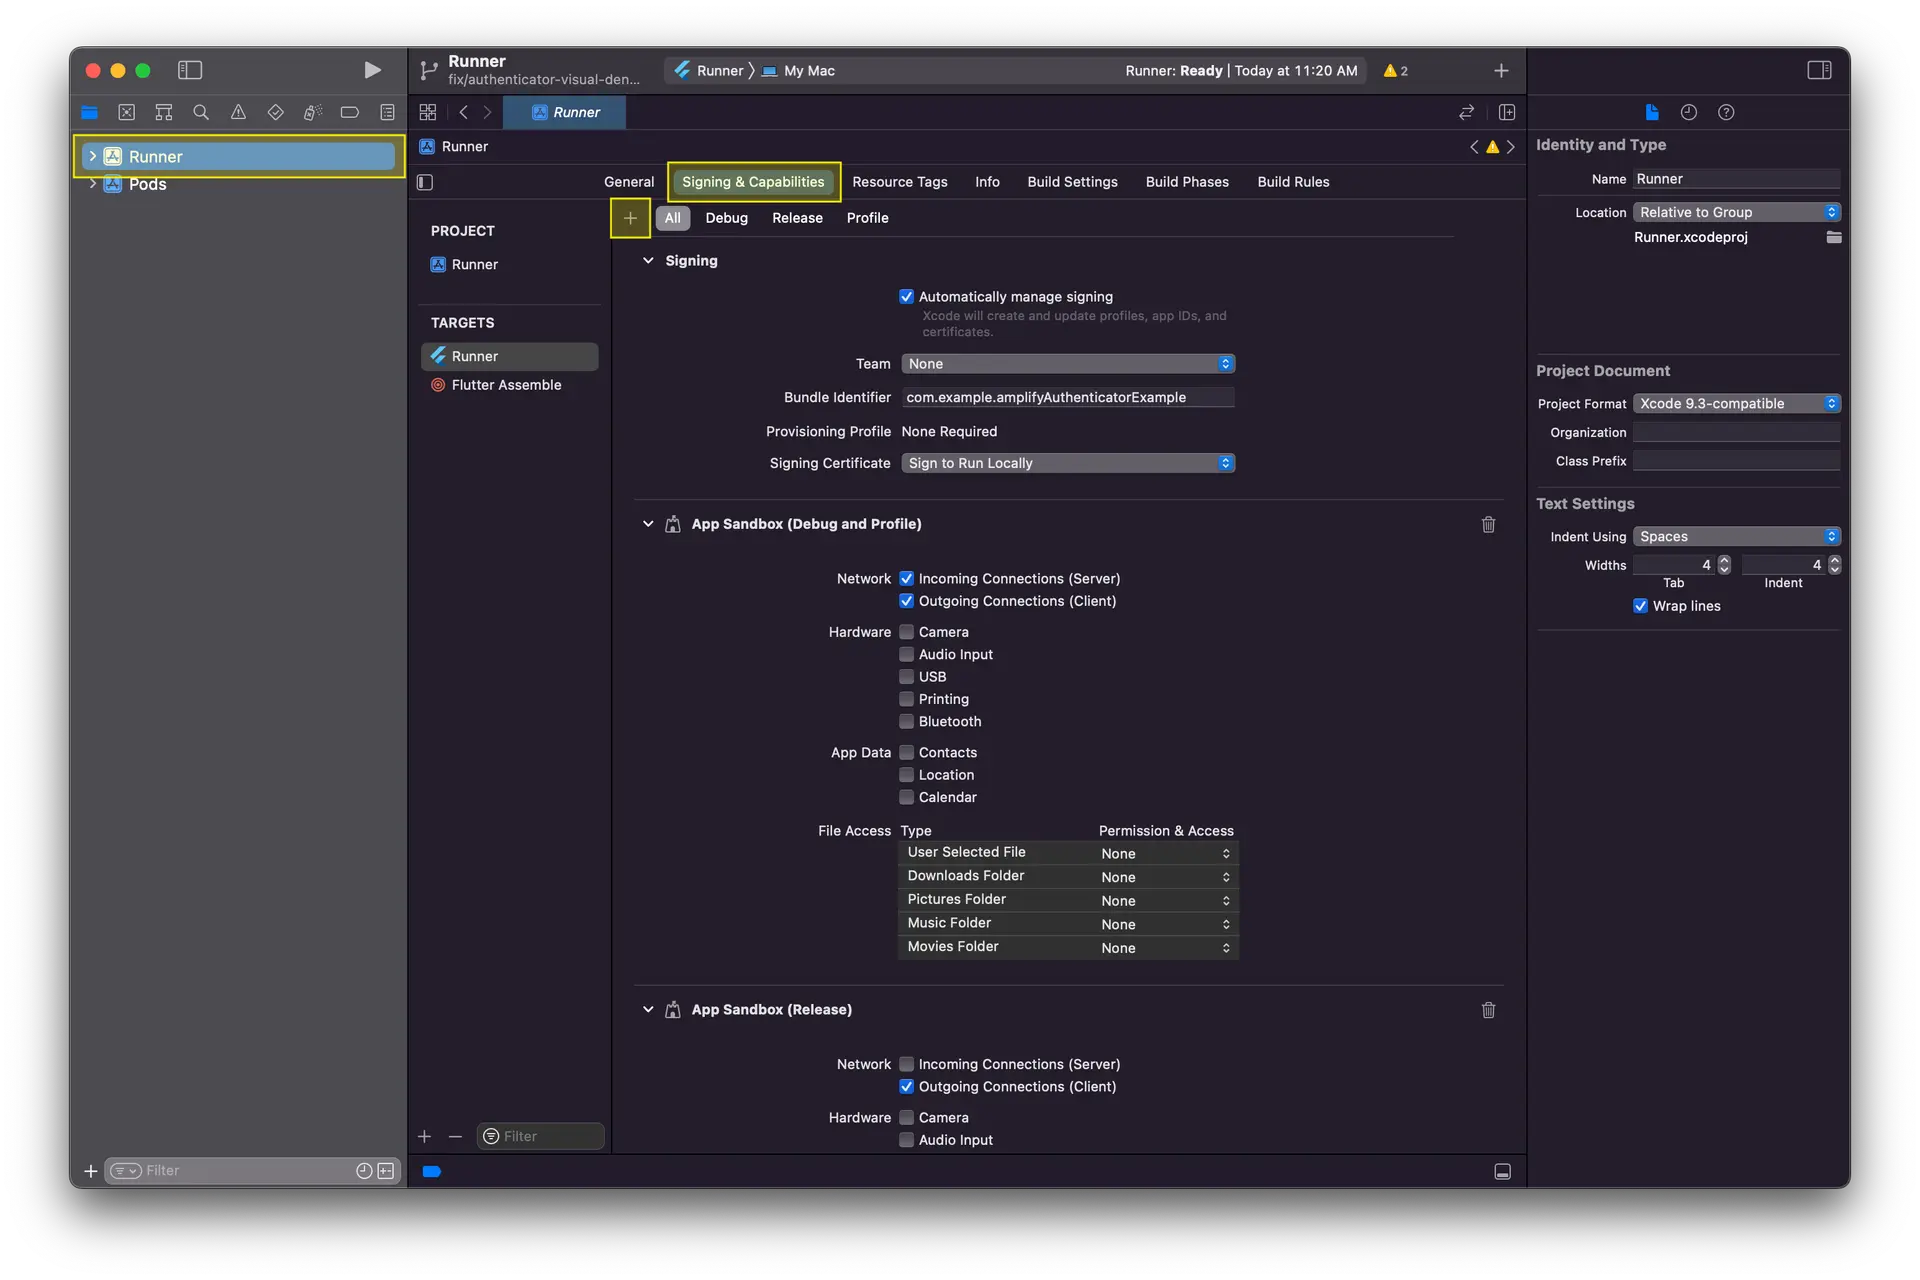
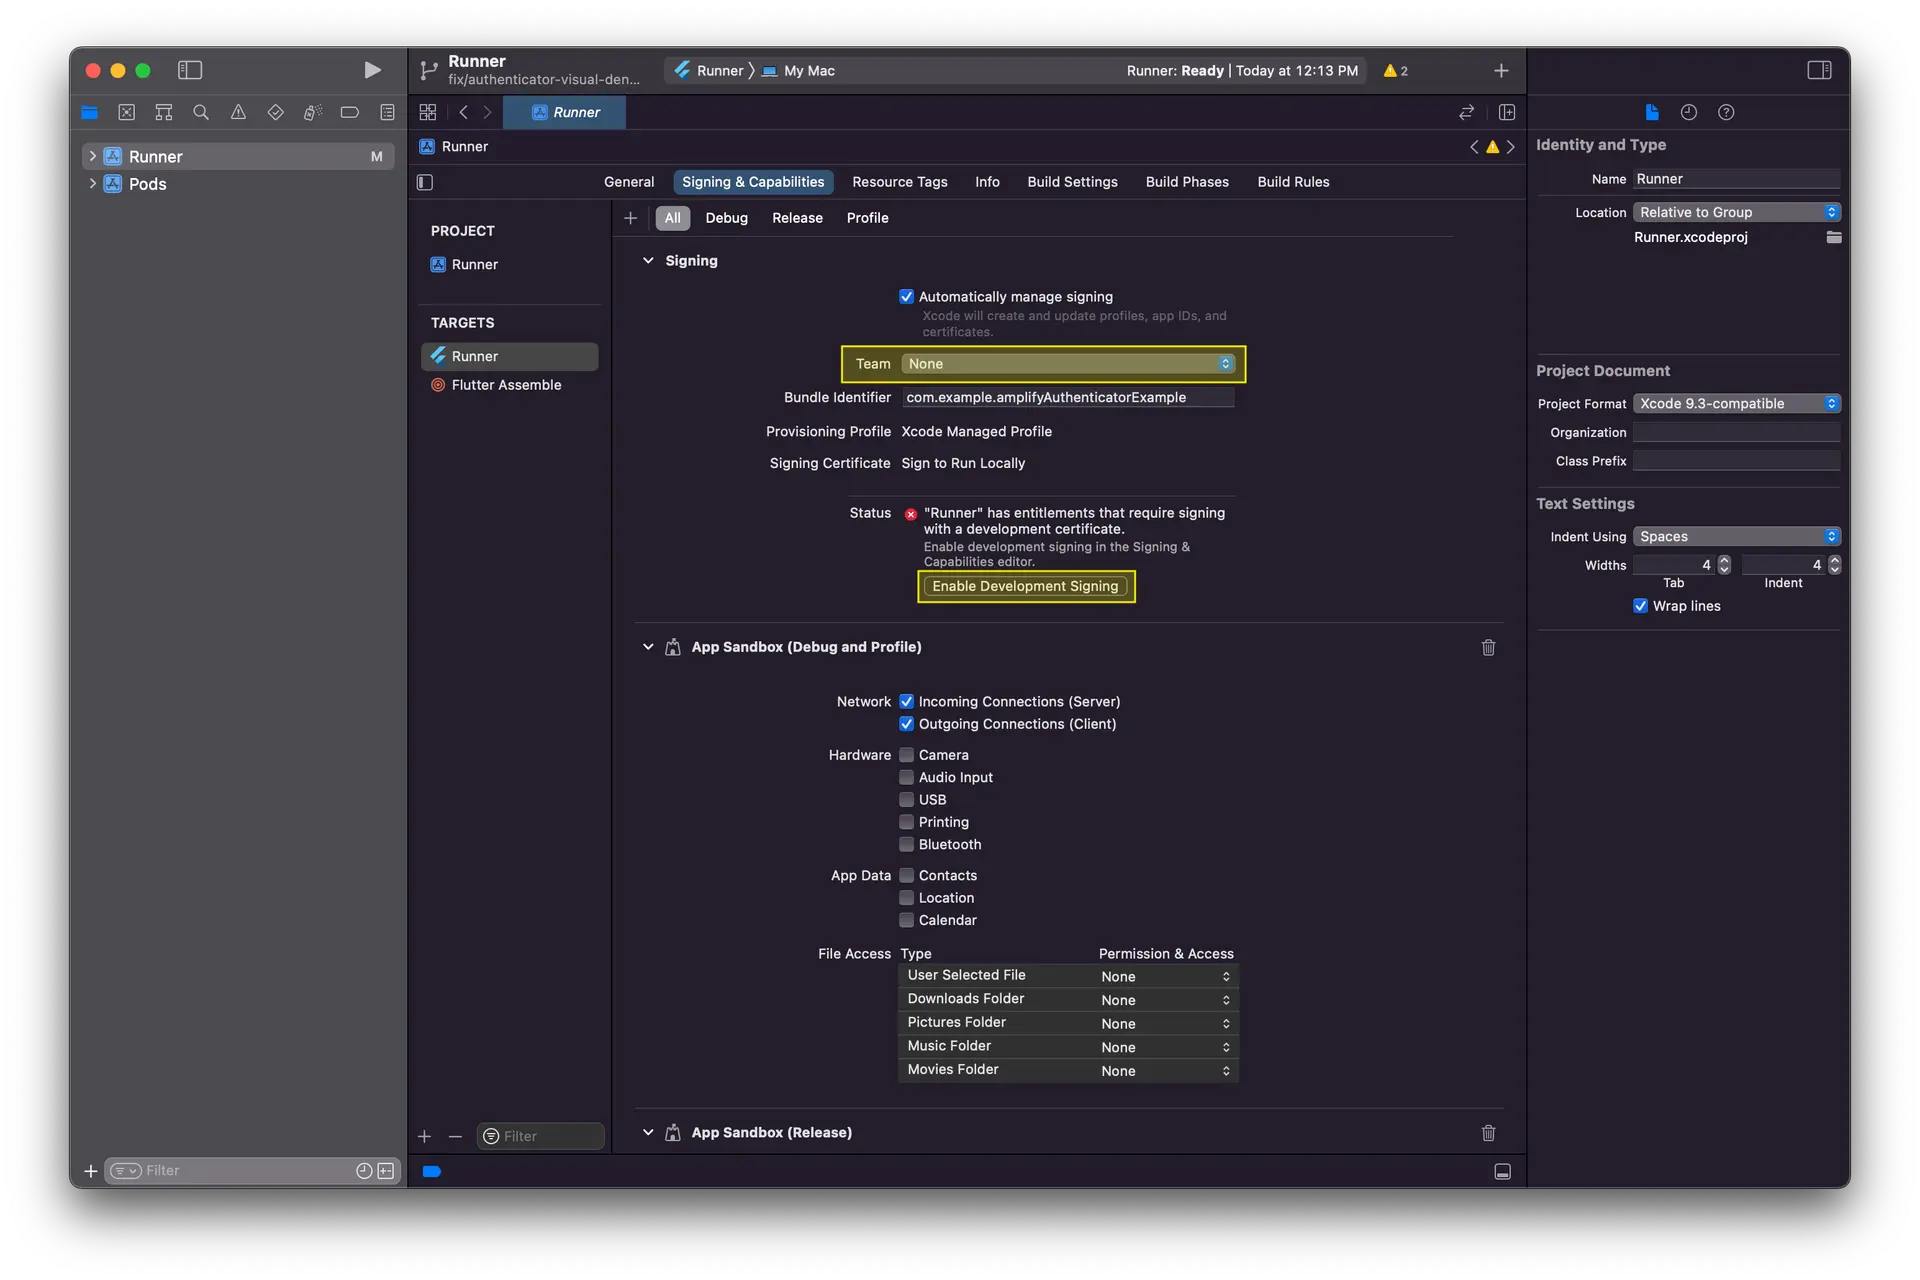
Enable Keychain Sharing
Open your project in Xcode and select Runner, Targets -> Runner and then the "Signing and Capabilities" tab.
- Click the "+ icon".
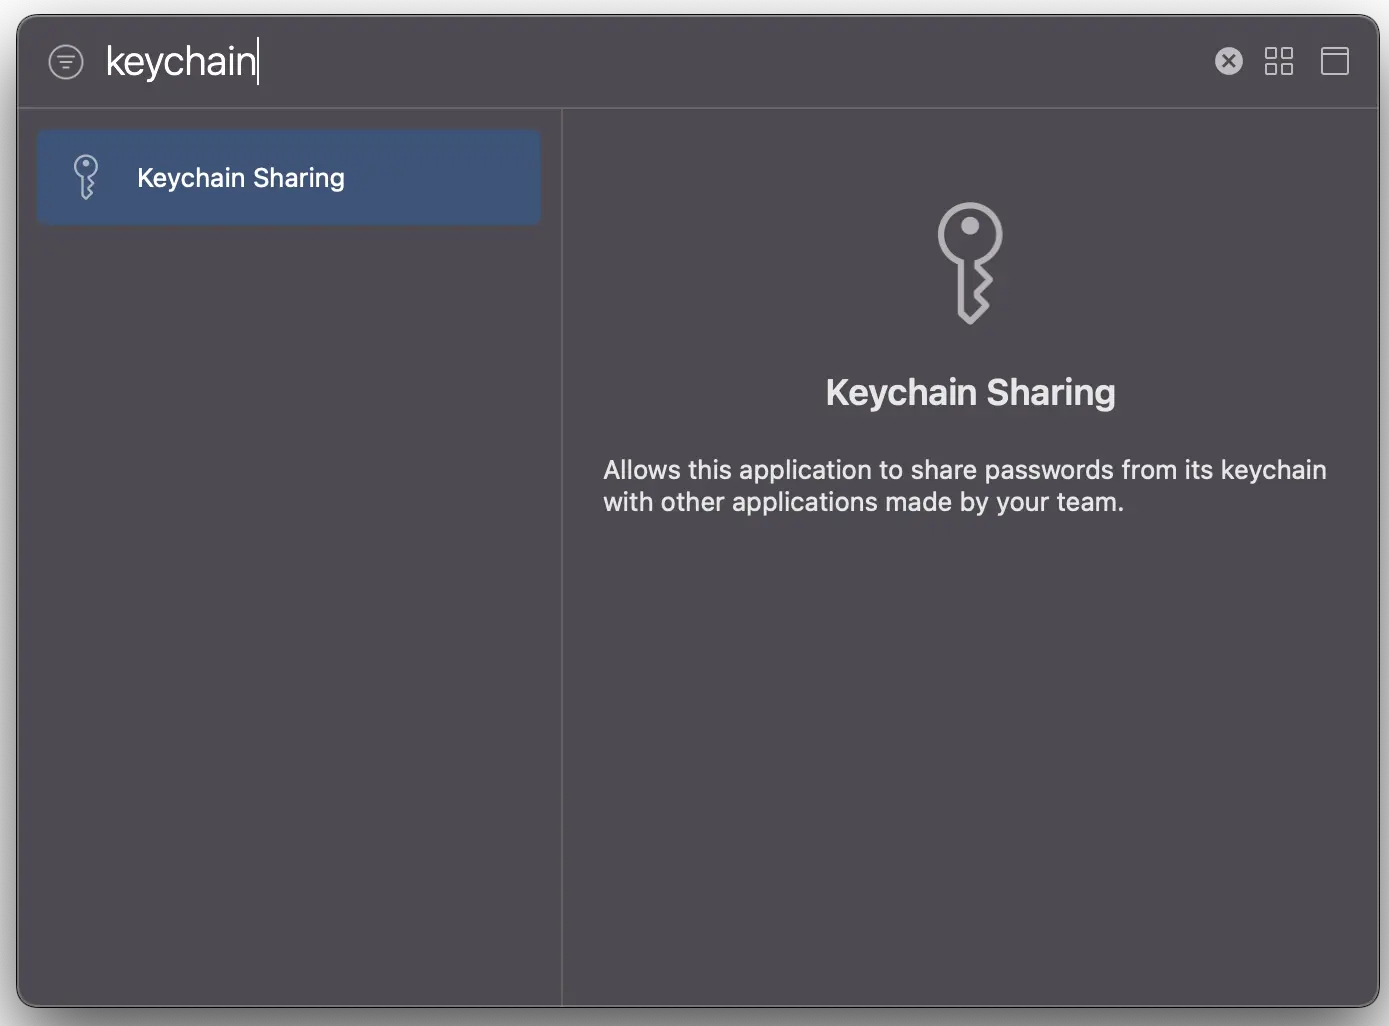
- Search for "Keychain Sharing" in the subsequent modal, and add it.
- Scroll down to "Keychain Sharing" in the "Signing and Capabilities" and click the "+" icon. By default, your bundle ID will be used.
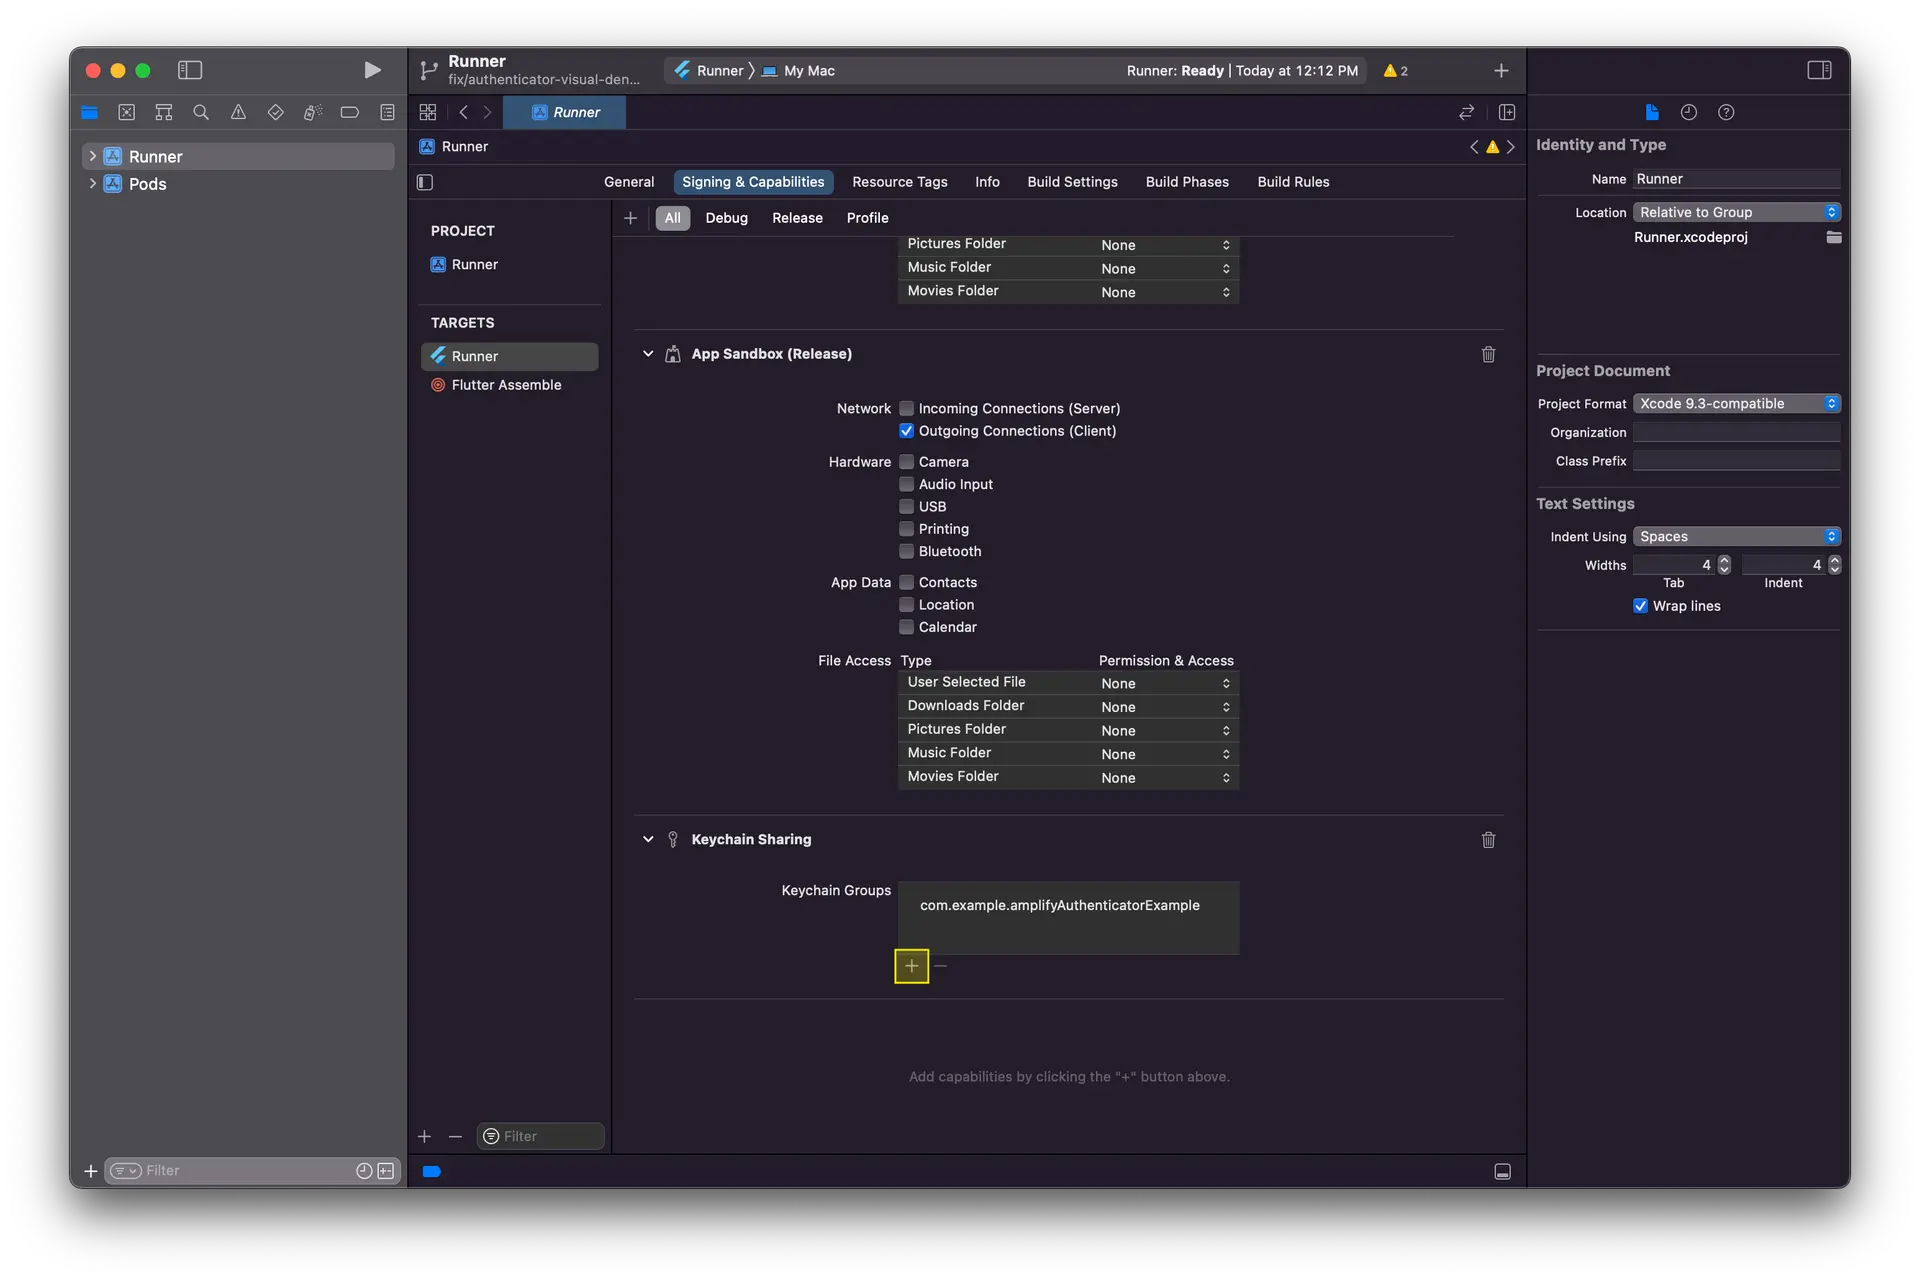
- Finally, add a development team and enable signing.
There are no Amplify specific requirements or setup instructions when targeting Windows. You will need to use a Windows version supported by Flutter. See the following Flutter docs for more info:
Amplify Flutter depends on the libsecret library when targeting Linux.
Local Development
To run and debug an app that depends on Amplify Flutter, you must install libsecret-1-dev.
To install on Ubuntu, run:
sudo apt-get updatesudo apt-get install -y libsecret-1-devThis will install libsecret-1-dev and any dependencies of libsecret-1-dev, such as libglib2.0-dev, which are also required to run and debug apps that depend on Amplify Flutter.
Packaging Your App
To include the required dependencies when packaging your app with Snapcraft, include them in your snapcraft.yaml file. For more info, see Flutter's documentation on releasing to the Snap Store.
parts: my-app: plugin: flutter source: . flutter-target: lib/main.dart build-packages: - libsecret-1-dev stage-packages: - libsecret-1-0