Configure a geofence collection
A Geofence is a virtual perimeter for a real-world geographic area. A Geofence contains points or vertices that form a closed boundary, defining an area of interest. Geofence collections store one or multiple Geofences. Amplify's geo category enables you to create and manage Geofence collections used to setup virtual geographic perimeters.
Setup a new Geofence Collection
Before you add a new Geofence Collection to your application, you need to have at least one Cognito User Pool group added to your project. The permissions to perform CRUD operations on Geofences in the collection will be granted only to users belonging to a Cognito User Pool group that is responsible for managing these Geofences.
If you haven't set up the auth category already, you can do so by running:
amplify add authWhen you have auth category set up, you can add the Cognito User Pool groups using:
amplify update auth? What do you want to do? Apply default configuration with Social Provider (Federation) Walkthrough all the auth configurations❯ Create or update Cognito user pool groups Create or update Admin queries API
? Provide a name for your user pool group: storesInWashingtonGeofenceCollectionAdmin
? Do you want to add another User Pool Group No
? Sort the user pool groups in order of preference storesInWashingtonGeofenceCollectionAdminIf you want to grant access to previously created geo resources to the users of the Cognito group added above, follow the instructions as mentioned in the section below.
Additionally, if you want to add existing users to the Cognito group, follow the instructions as mentioned in the section below.
When you have at least one Cognito User Pool group added, you can now provision a new Geofence Collection using:
amplify add geo? Select which capability you want to add: Map (visualize the geospatial data) Location search (search by places, addresses, coordinates)❯ Geofencing (visualize virtual perimeters)Next, set a name for the Geofence Collection:
? Provide a name for the Geofence Collection: storesInWashingtonGeofence Collection Access permissions
Next, configure the access permissions for your geofence collection resource and authorize users of desired Cognito User Pool groups to perform CRUD operations on Geofences in the collection.
? Select one or more cognito groups to give access:✔ storesInWashingtonGeofenceCollectionAdmin
? What kind of access do you want for storesInWashingtonGeofenceCollectionAdmin users? Select ALL that apply: ✔ Read geofence ✔ Create/Update geofence   Delete geofence ✔ List geofences
The above chosen permissions are granted to the users belonging the specified Cognito User Pool group. Please note that these permissions apply to ALL Geofences in a collection. For example, If you chose Read geofence permission for say storesInWashingtonGeofenceCollectionAdmin Cognito group, ALL users added to that group will be able to read the properties of ALL Geofences in that Geofence collection.
Geofence Collection Pricing Plan
The pricing plan for the Geofence Collection will be set to RequestBasedUsage. We advice you to go through the location service pricing along with the location service terms (82.5 section) to learn more about the pricing plan.
Set a default Geofence Collection
If you added more than one geofence collection via amplify add geo, the geofence collection that was added last will be the default. However, you can choose if the current geofence collection should be the default for your application:
? Set this geofence collection as the default? It will be used in Amplify geofence collection API calls if no explicit reference is provided. (Y/n)> NoAnswering No will retain the previously set default.
That's it! You can now create virtual perimeters around points of interest in your application. Follow the library documentation as listed here.
Granting Maps and Search permissions to a group of users
If you want to grant permissions to render a Map or Search for places to the users of a Cognito group, you can do so as shown below:
amplify update geo? Select which capability you want to update: (Use arrow keys)❯ Map (visualize the geospatial data) Location search (search by places, addresses, coordinates) Geofencing (visualize virtual perimeters)
? Select the Map you want to update:❯ EsriDarkCanvasMap
? Restrict access by? Auth/Guest Users Individual Groups❯ Both Learn moreAuth/Guest Users access
Select Auth/Guest Users, to scope permissions based on an individual user's authentication status. On the next question you'll be able to select if only authenticated users can access resources, or authenticated and guest users:
? Who can access this Map?❯ Authorized users only Authorized and Guest usersSelect Authorized users only if only authenticated users are allowed to render the map.
Select Authorized and Guest users if both authenticated and unauthenticated users are allowed to render the map.
For more information, refer link to location service page.
Individual Group access
Select Individual Groups to scope access permissions based on Cognito User Groups
? Select one or more cognito groups to give access: ✔ storesInWashingtonGeofenceCollectionAdminNote: If you combine
Auth/Guest user accessandIndividual Group access, users who are members of a group will only be granted the permissions of the group, and not the authenticated user permissions.
Adding users to a Cognito User Pool Group
In order to add users to an existing Cognito user pool group created using Amplify CLI, follow the steps mentioned below:
Using the AWS console
Open the AWS console page corresponding to the user pool that is provisioned by Amplify CLI using
amplify auth console
? Which console❯ User Pool  Identity Pool  User Pool and Identity Pool
From the Cognito user pool console page that opened in your default browser, choose Users and groups tab in General settings. Then, choose the corresponding Cognito group from the Groups tab on the right as shown 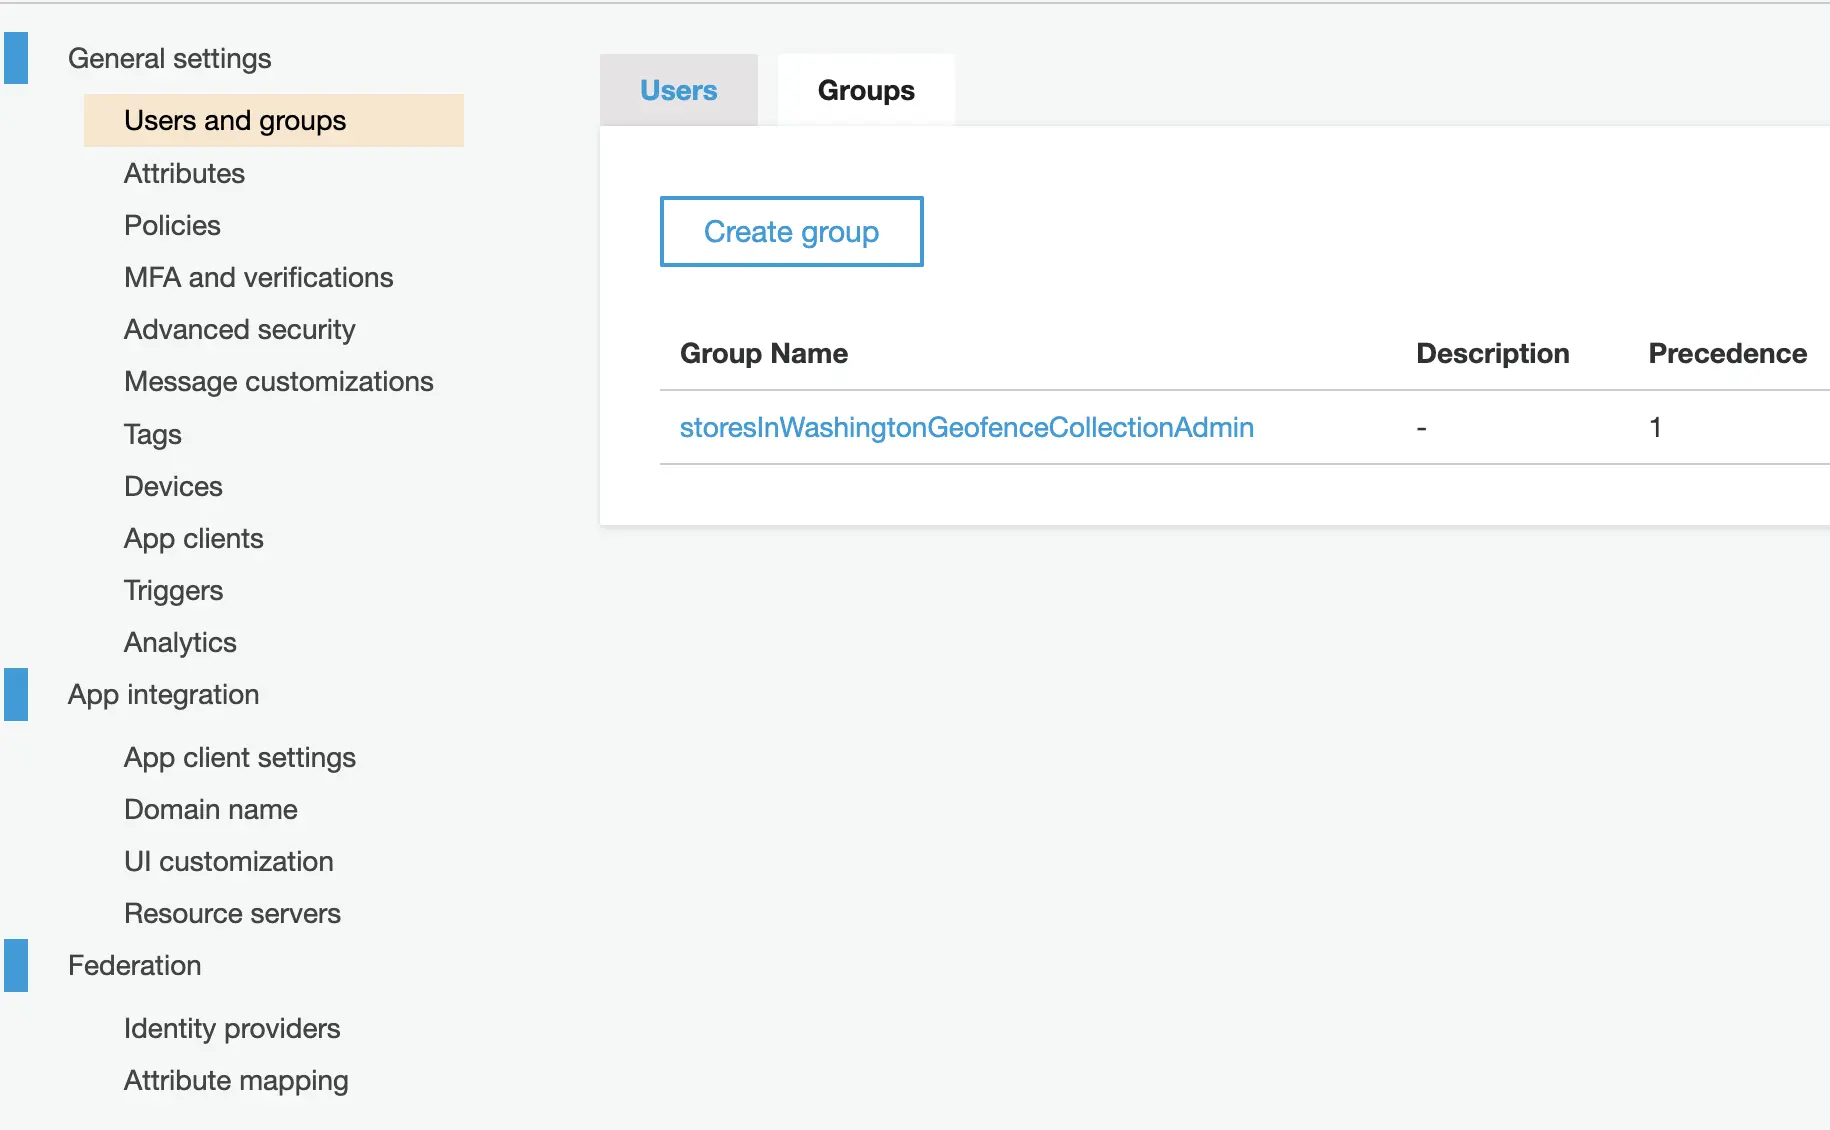
Then click on the Add users button that displays a window to select the users by their username, email etc. that you intend to add to the Cognito group. Note: the user(s) added to the Cognito User Pool Group may need to be re-authenticated by signing out and signing in again. 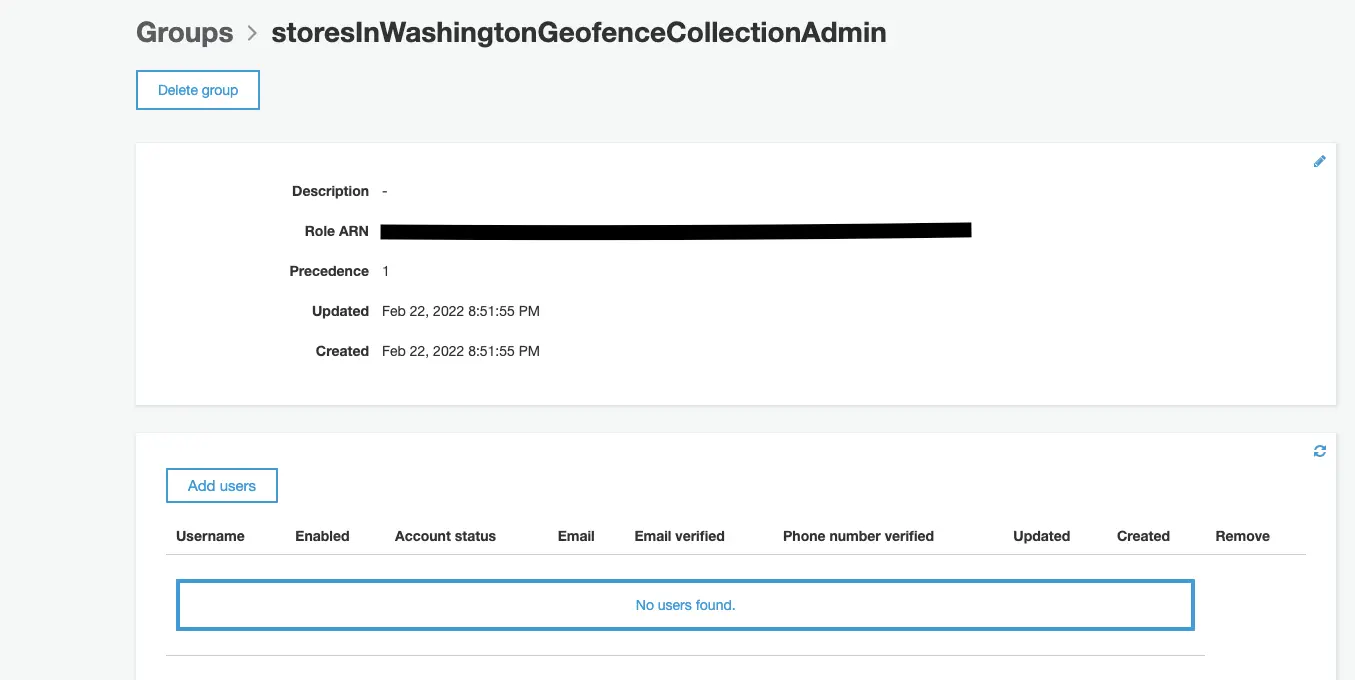
Using the AWS SDK for Javascript
Alternatively, if you want to add users to an existing Cognito user pool group programmatically, you can use the AWS SDK for Javascript. Refer to the API documentation.
Upload your own GeoJSON file to geofence collection
After you have added geofence collection and provisioned the resource, you will be able to upload your own GeoJSON file that defines the Geofences in a collection via the command:
amplify geo importYou can refer to GeoJSON.IO where you can draw your own geofences and have GeoJSON file auto generated. After you get the GeoJSON file, you can provide the file path:
? Provide the path to GeoJSON file containing the Geofences for ${your_geofence_collection} collection:> ${your_input_geojson_file_path}For each geofence feature, it requires a unique identifier. According to the RFC7946, There are two options for applying identifiers:
Root level ID
This option will use auto-generated id field in the root level of Feature object as identifier.
? Select the property to use as the Geofence feature identifier:> Use root-level "id" field. (Auto-assigned if missing)Custom properties
This option allows you to choose your own fields inside properties of Feature object. Amplify CLI will help scan the candidate properties and provide them as options in the walkthrough. The candidate properties are chosen based on the existence of all feature objects. The identifier field should have unique values among geofences and will be validated after being selected.
? Select the property to use as the Geofence feature identifier: Use root-level "id" field. (Auto-assigned if missing)> ${scanned_candidate_property_1} ${scanned_candidate_property_2}A validation of the GeoJSON file will be executed afterwards. The upload of geofences will be triggered upon the success of validation. For the regulation of GeoJSON, please refer to RFC7946
✅ Successfully validated GeoJSON file.✅ Successfully added/updated Geofences in your collection