Relationships
Model data for a one to one relationship
In this scenario, the bookstore maintains a list of ISBN numbers to track the books it sells. Each book has only one ISBN number and each ISBN number is assigned to only one book. This is an example of a one to one (1:1) data relationship between ISBN numbers and books. Use the following instructions to model the Book and ISBN data types and their relationship in Studio.
- In the cloned schema, define the one to one data relationship between
ISBNandBook, as each book has a single ISBN number and each ISBN number is associated with a single book. On the ISBN type, choose Add a relationship. - In the Add relationship window, in the Select related model menu, choose
Book. For the relationship type, choose One ISBN to one Book. For Relationship name, enterBook. Choose Save. The relationship should look like the following.
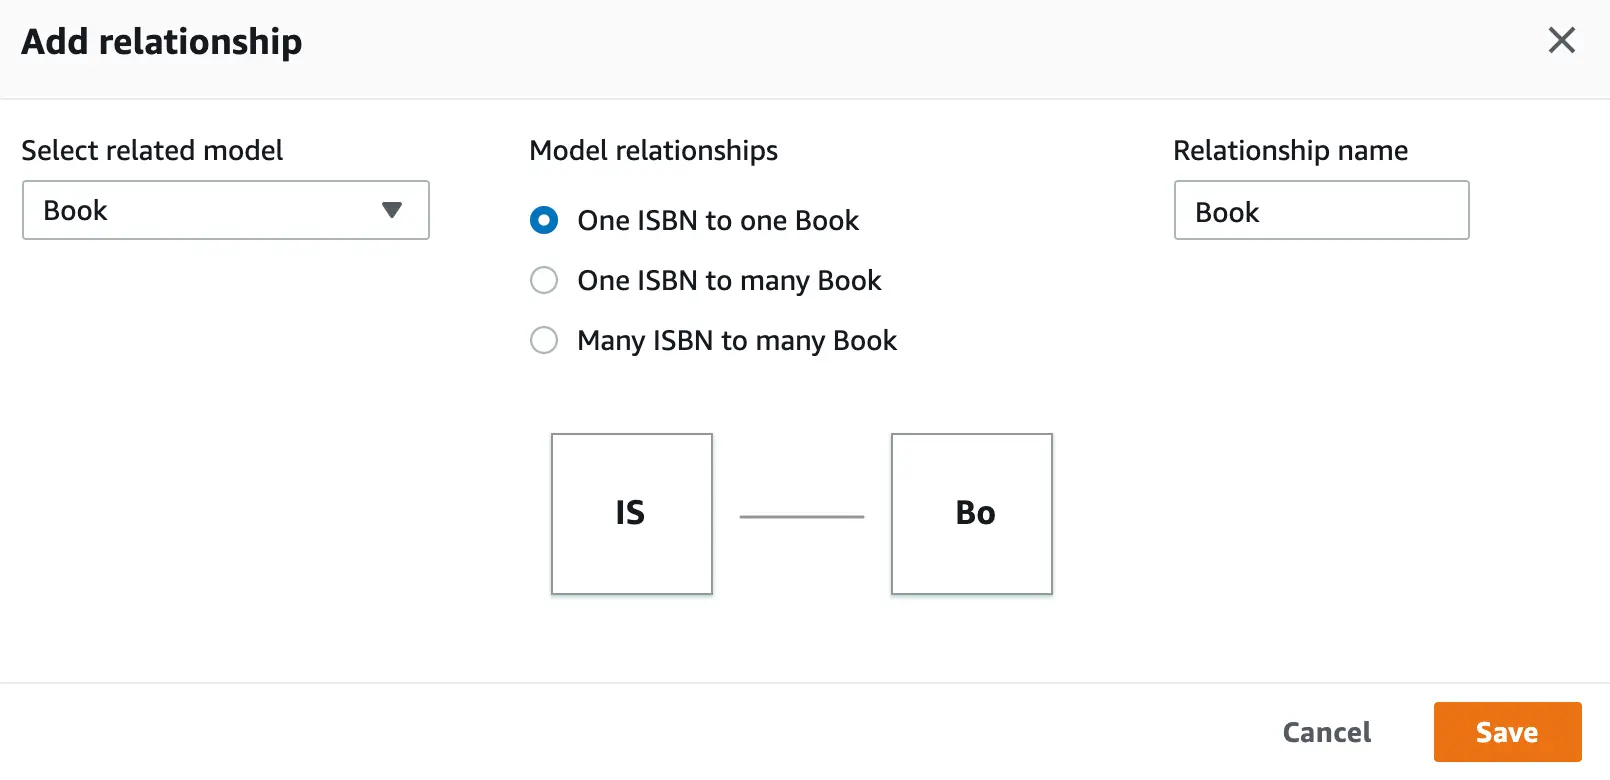
When you return to the Data modeling page, the ISBN model will be updated with the relationship information. Now repeat the same steps for the Book model - define a 1:1 relationship from Book to ISBN.
Model data for a one to many relationship
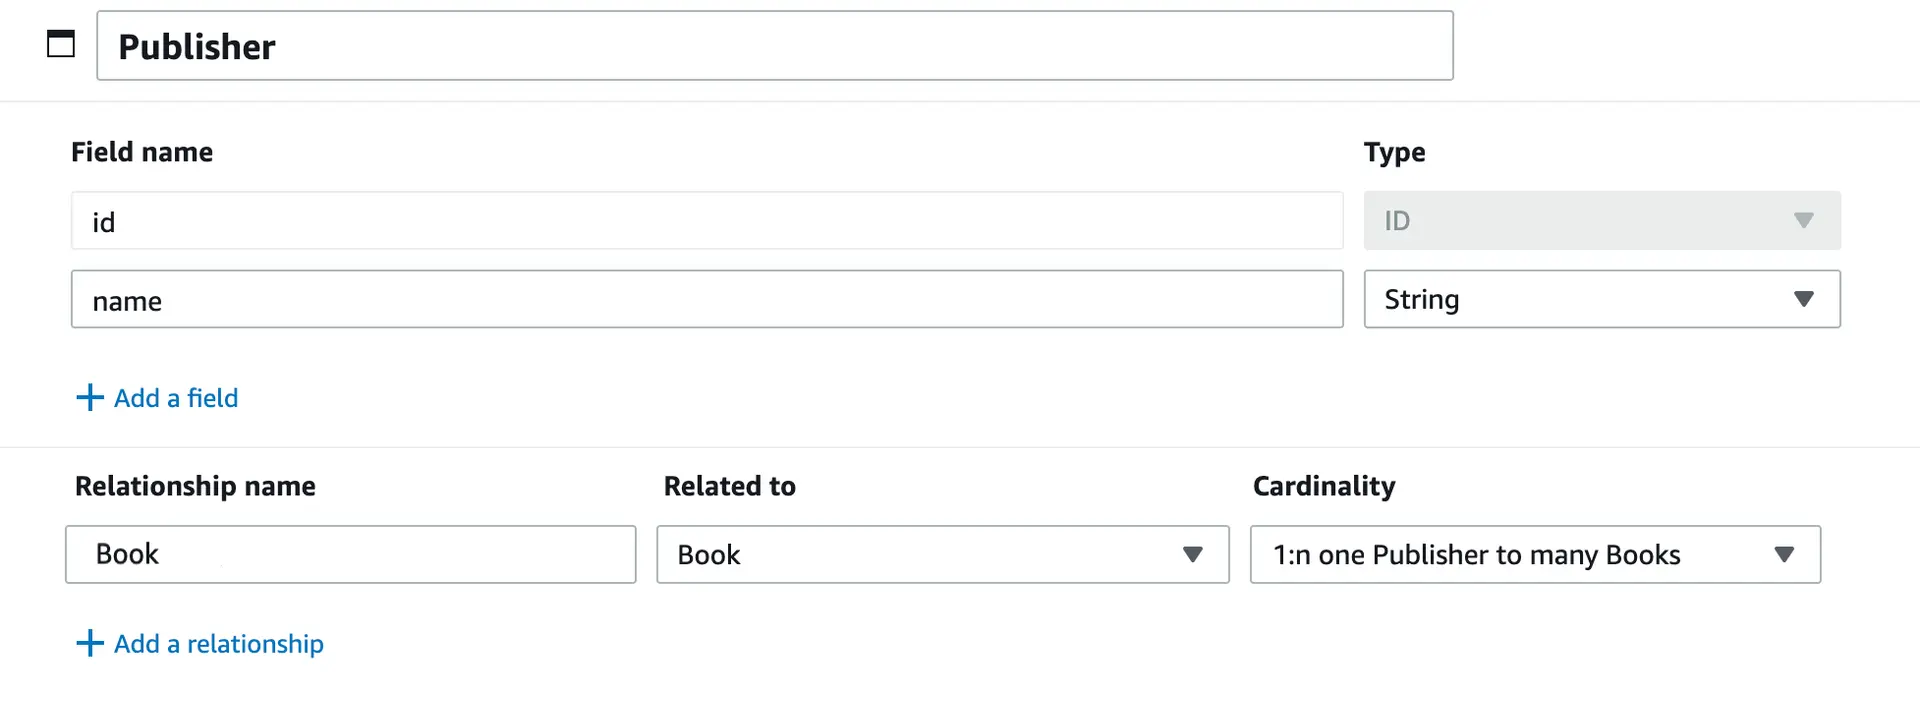
Now let's create a data model for publishers. Each book in the bookstore has only one publisher. However, each publisher can publish many books. This represents a one to many relationship (1:n) between publishers and books that you can model in our example.
- In the cloned schema, select the
Publishermodel. - For the
Publishermodel, choose Add a relationship. - In the Add relationship window, in the Select related model menu, choose
Book. For the relationship type, choose One Publisher to many Book. For Relationship name, enterbooks. Choose Save. The relationship should look like the following.
Model data for a many to many relationship
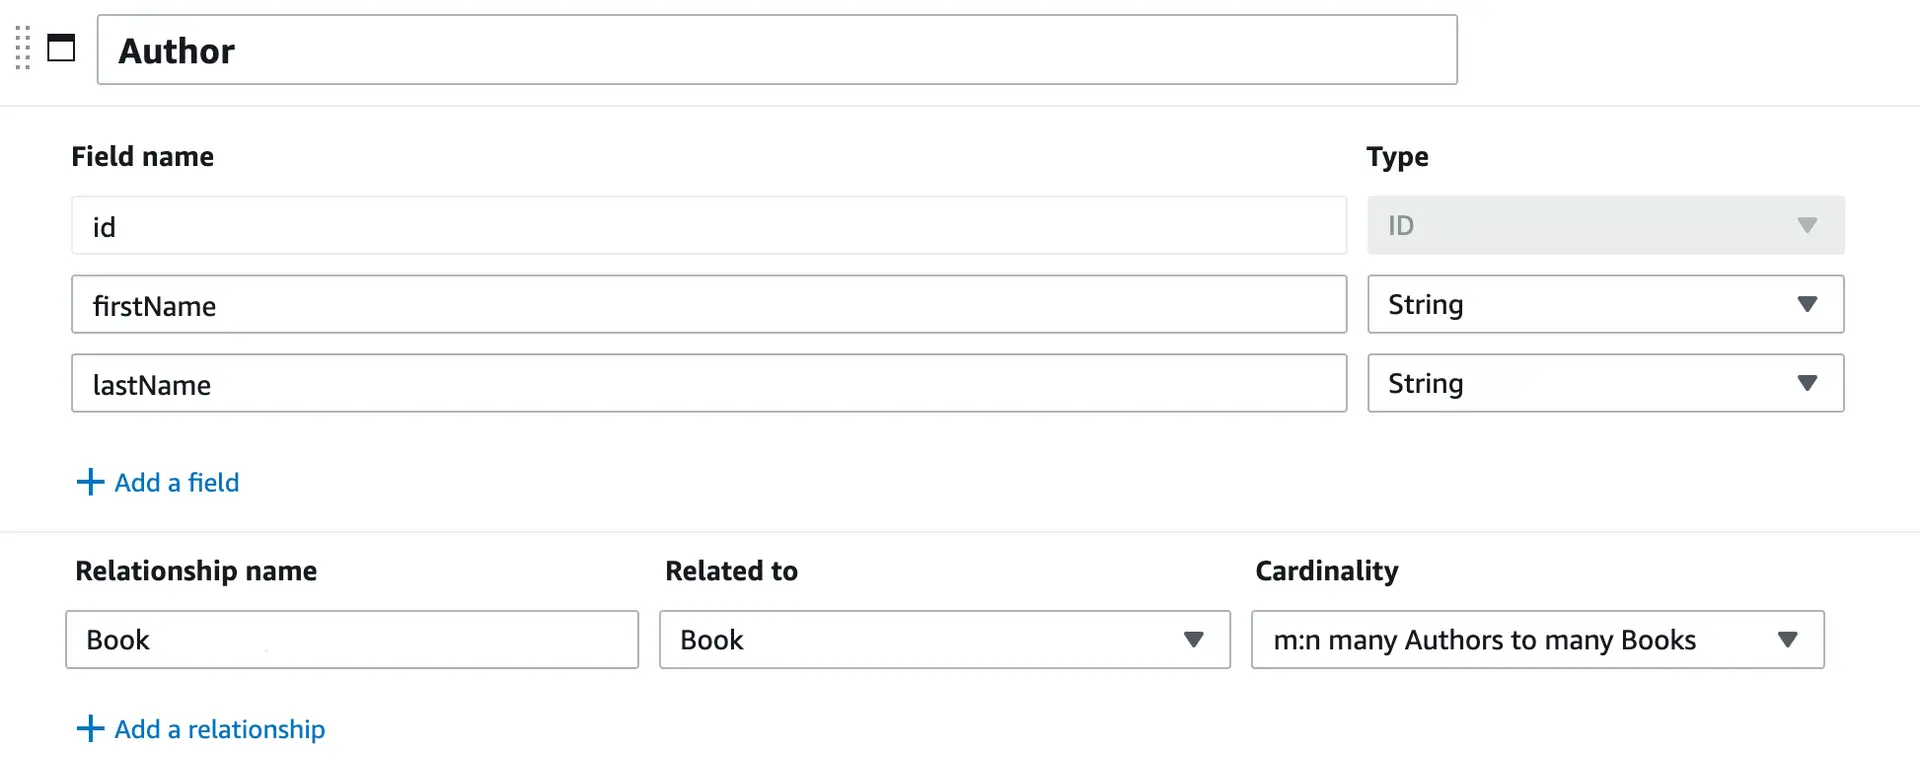
Let's add a final data model for authors to our example. A book can have a single author or multiple authors. Therefore, a book in the bookstore can be written by many authors and each author can write many books. This is a many to many (m:n)data relationship between books and authors that you can model in our example.
- In the cloned schema, select the
Authormodel. - For the
Authormodel, choose Add a relationship. - In the Add relationship window, choose
Bookfrom the Select related model menu. For the relationship type, choose Many Author to many Book. For Relationship name, enter a meaningful name, such asBook. Choose Save. The relationship should look like the following.
Test data model works as expected
When you are finished modeling your data and defining the data relationships, you can save and deploy the models to an Amplify backend environment.
-
Choose Deploy in the upper right corner of the Data modeling page.
-
If you are working in the sandbox, on the Deploy to AWS page, either choose Create an AWS account or Login to deploy AWS Account and proceed with the deployment process.
-
If you are working in Studio from your AWS account, the deployment status displays in the upper right corner of the page.
-
Navigate to the Content tab and create data in the tables. You should be able to create and link records from different models. For more information, see Manage content.