Collections
Amplify Studio also allows you to build lists and grids based on individual UI components. Let's create a NewHomes grid that showcases the latest homes added to the app.
Create a collection
- Launch Amplify Studio for an app
- From the Design menu, choose UI Library
- Choose a Component under the Components section.
- Select Create collection button in the top right corner in the UI component editor
Specify a name for the new collection component, or use the default name provided by Studio. For this example, you'll name the collection NewHomes.
Modify collection styling
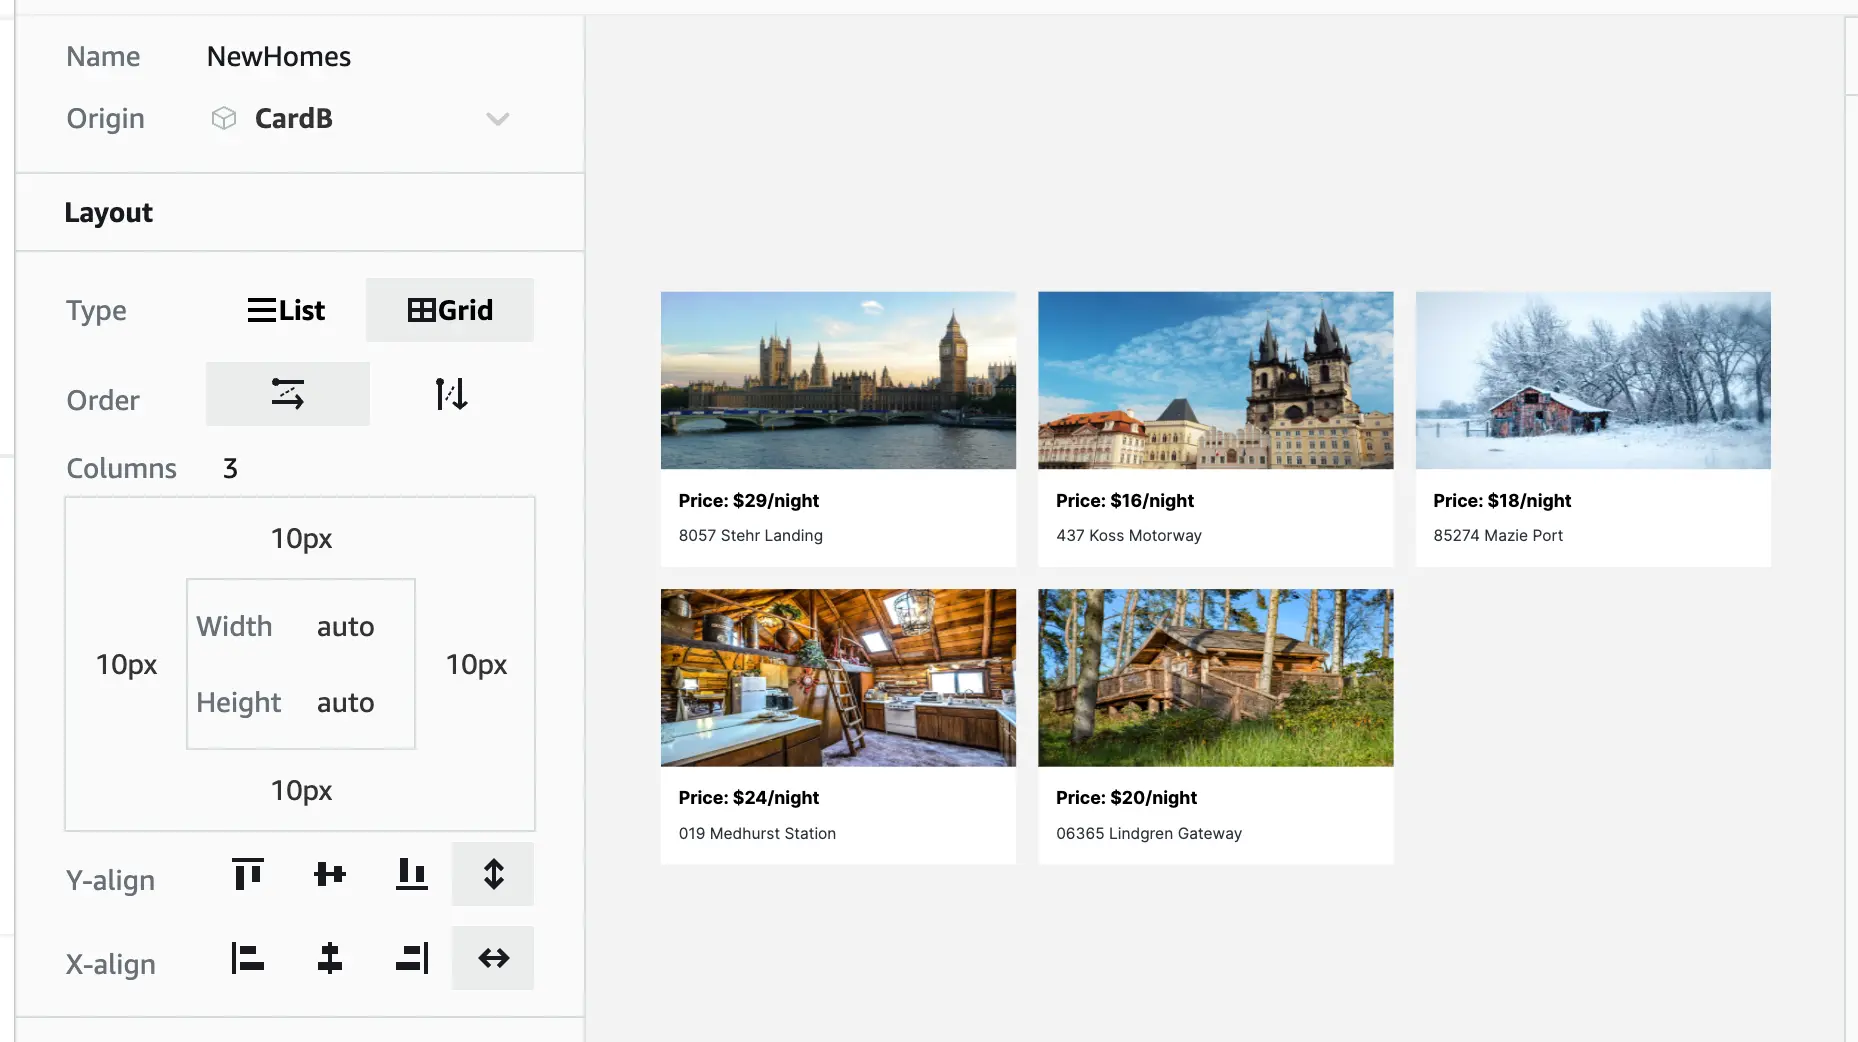
On the left side of the component editor, you can modify all the style settings for your collection. In our case, you'll choose a grid and apply column and margin settings to add spacing between the items.
- Select Grid as the Type
- Change Columns to 3
- Add Padding to 10px on all sides
Your collection should look similar to the following:
Modify collection data
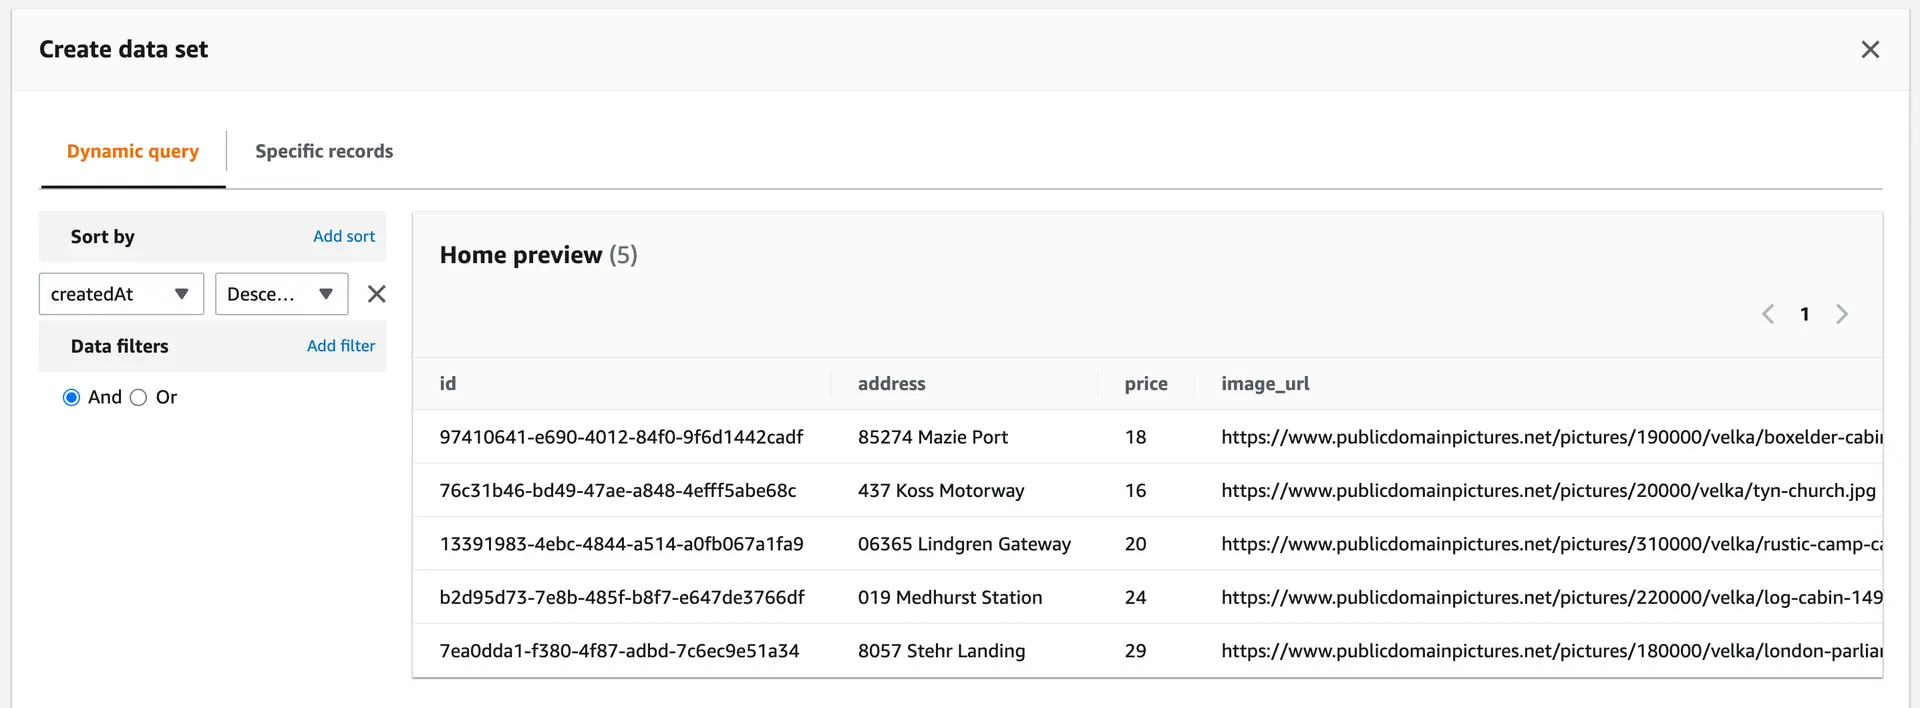
Next, let's populate the list with all recently created homes. By default, Amplify Studio renders collections with all records from the specified model. For our example, you will apply a sort condition to sort the records by the most recently created homes.
Modify the rendered data set by choosing View/Edit on the panel on the right side. Then choose Add sort and select createdAt and Descending as the sort condition.
Once configured, choose Create data set to display your collection sorted by the most recently created time stamp.
Use a collection in your app
Similar to individual components, choose Get component code to get your React code for the collection.
Run amplify pull to sync all your components, including the NewHomes collection, into your local src/ui-components folder.
Import the NewHomes collection from ./ui-components and then render it in your React app. For example:
import { NewHomes } from './ui-components'... return <div> <NewHomes /> </div>...
