Create your application
Goal
Setup a skeleton project so that Amplify categories can be added to it
Project Setup
1. Create a new project
Open Xcode. From the menu bar, select "File -> New -> Project..."
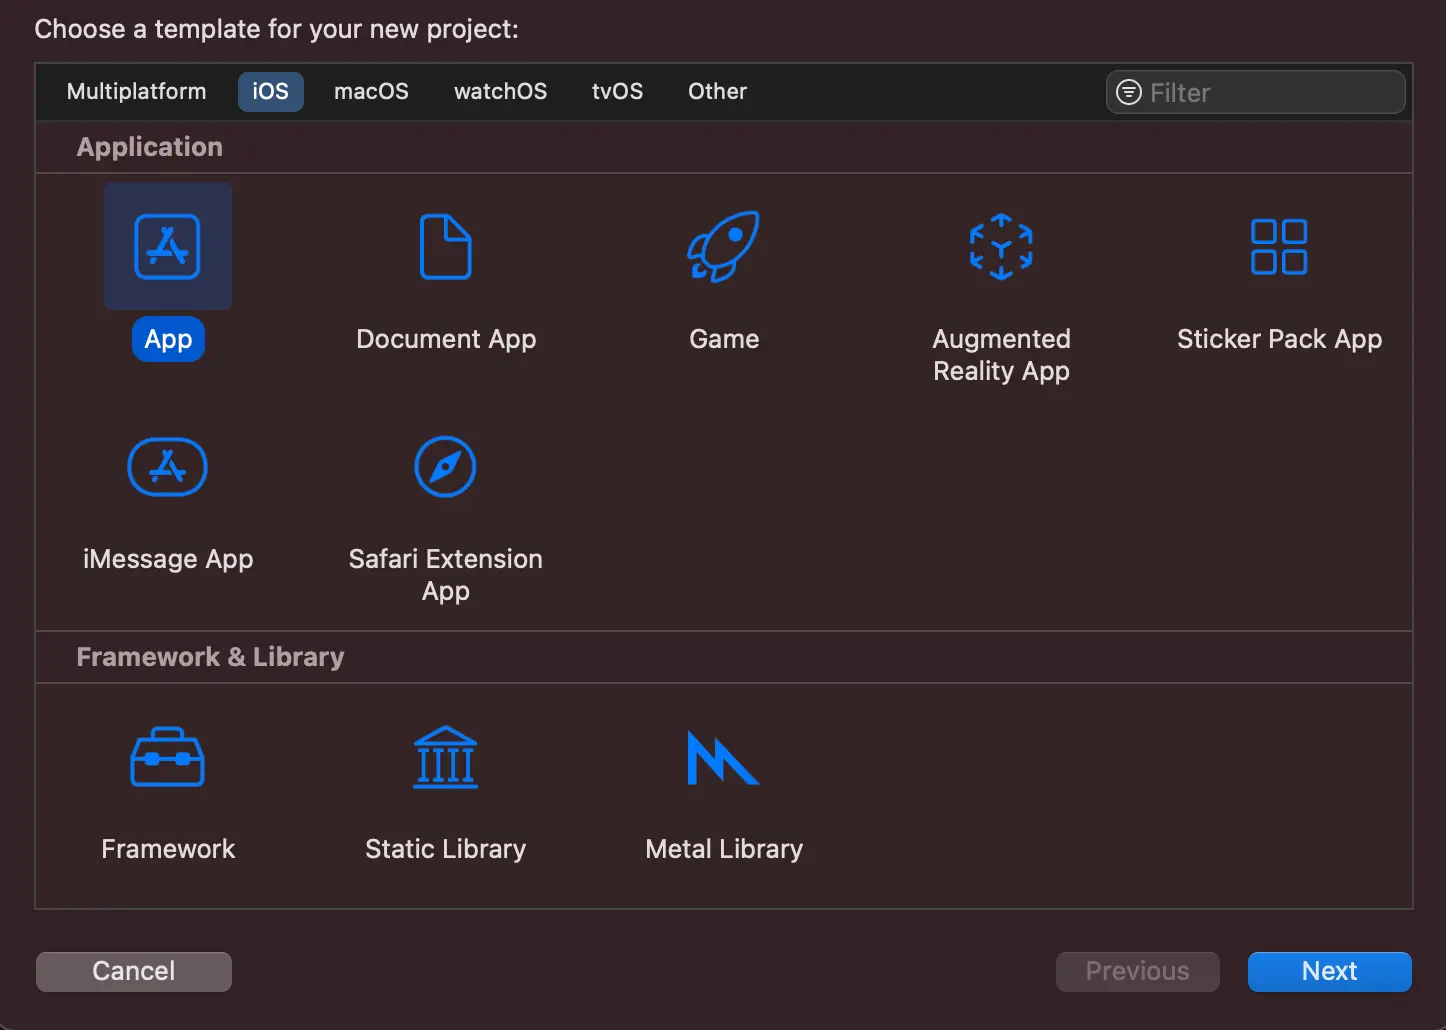
In this example, you will create a new iOS App.
Select iOS tab, choose Application type as App and then click on Next.
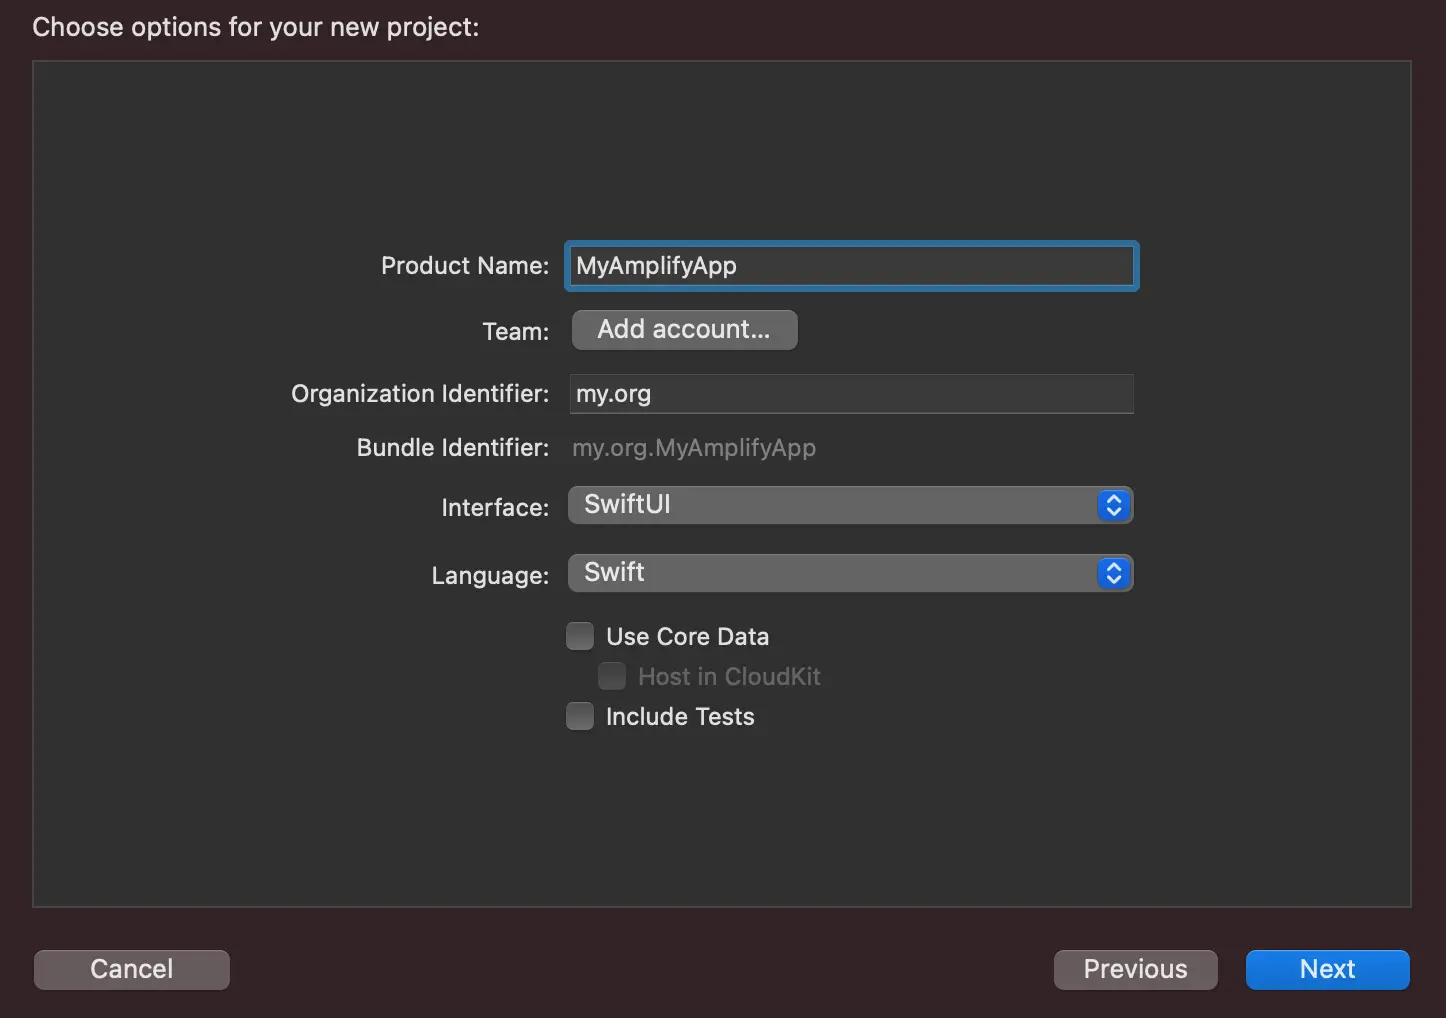
Fill in the following for your project:
- Product Name: MyAmplifyApp
- Interface: SwiftUI
- Language: Swift
- Tap
Next
After tapping Next, select where you would like to save your project, then tap Create. In this example, you will choose: ~/Developer
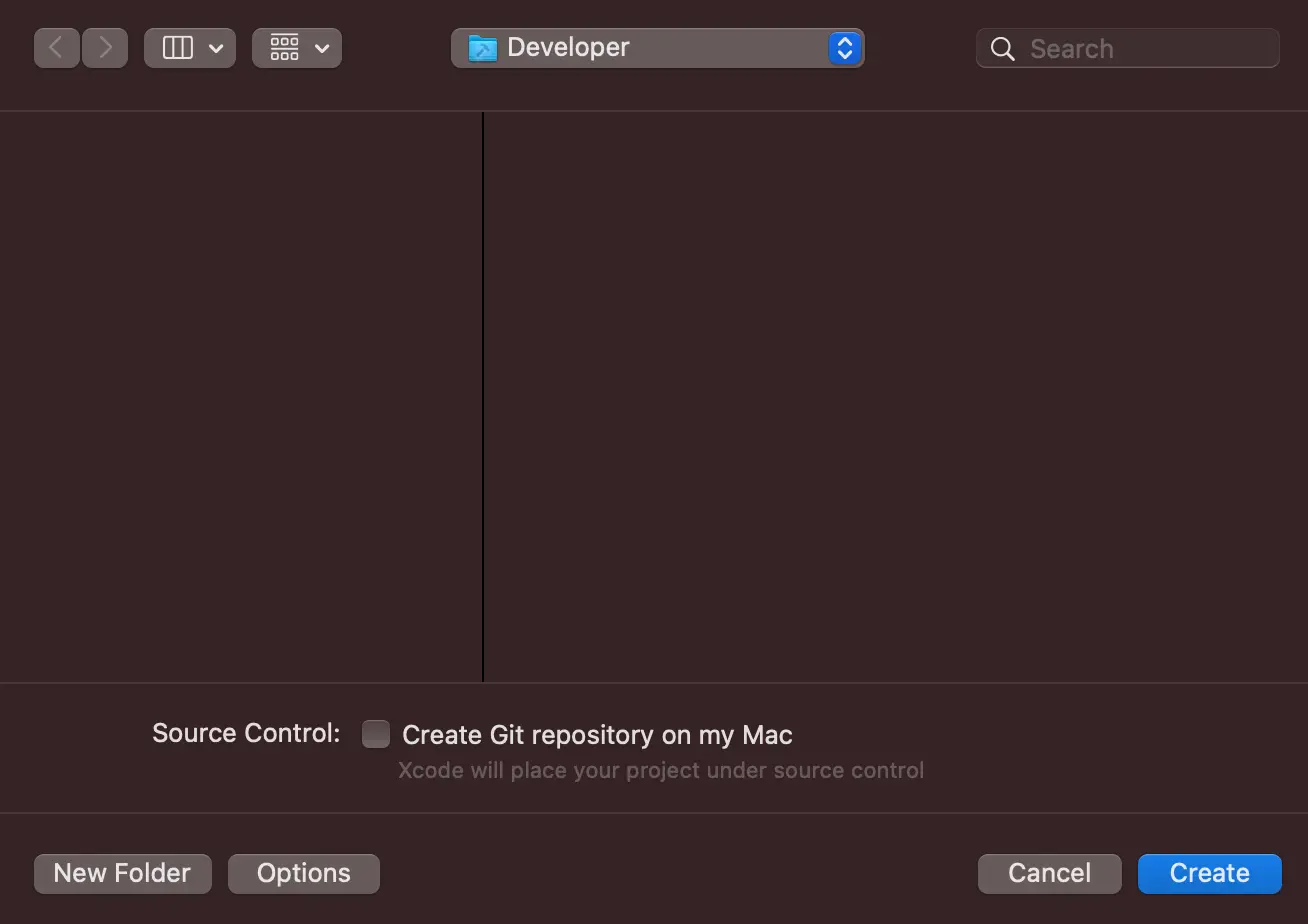
You should now have an empty iOS project without Amplify.
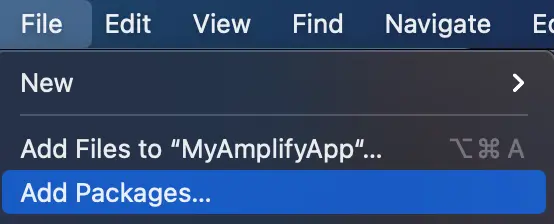
2. Install Amplify Libraries
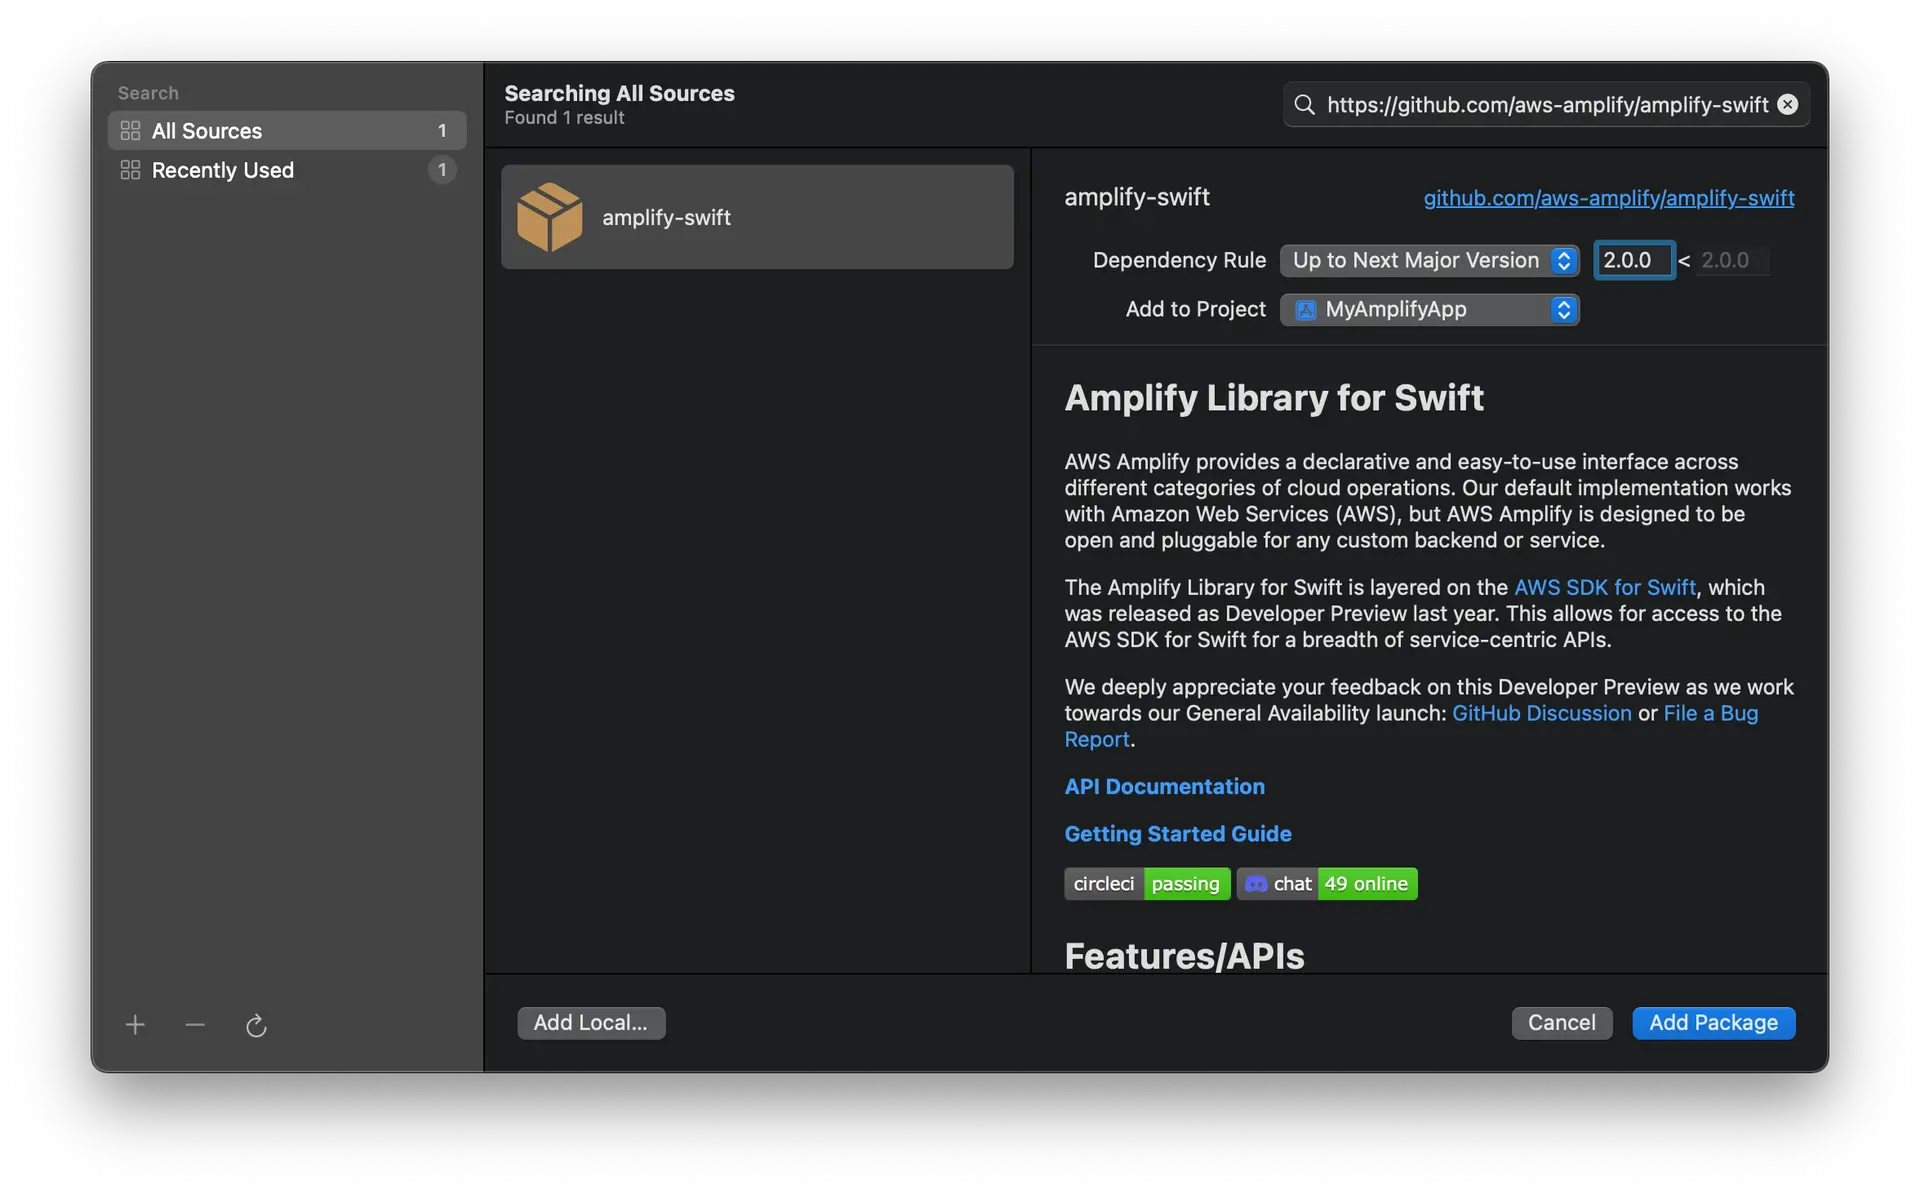
To start adding the Amplify Libraries to your iOS project, open your project in Xcode and select File > Add Packages...
Enter the Amplify Library for Swift GitHub repo URL (https://github.com/aws-amplify/amplify-swift) into the search bar and hit Enter. Wait for the result to load.
You'll see the Amplify Library for Swift repository rules for which version of Amplify you want Swift Package Manager to install. Choose the dependency rule Up to Next Major Version, as it will use the latest compatible version of the dependency that can be detected from the main branch, then click Add Package.
Lastly, choose which of the libraries you want added to your project. Always select the Amplify library. The "Plugin" to install depends on which categories you are using:
-
API: AWSAPIPlugin
-
Analytics: AWSPinpointAnalyticsPlugin
-
Auth: AWSCognitoAuthPlugin
-
DataStore: AWSDataStorePlugin
-
Geo (Developer Preview): AWSLocationGeoPlugin
-
Storage: AWSS3StoragePlugin
Note: AWSPredictionsPlugin is not currently supported through Swift Package Manager due to different minimum iOS version requirements. Support for this will eventually be added.
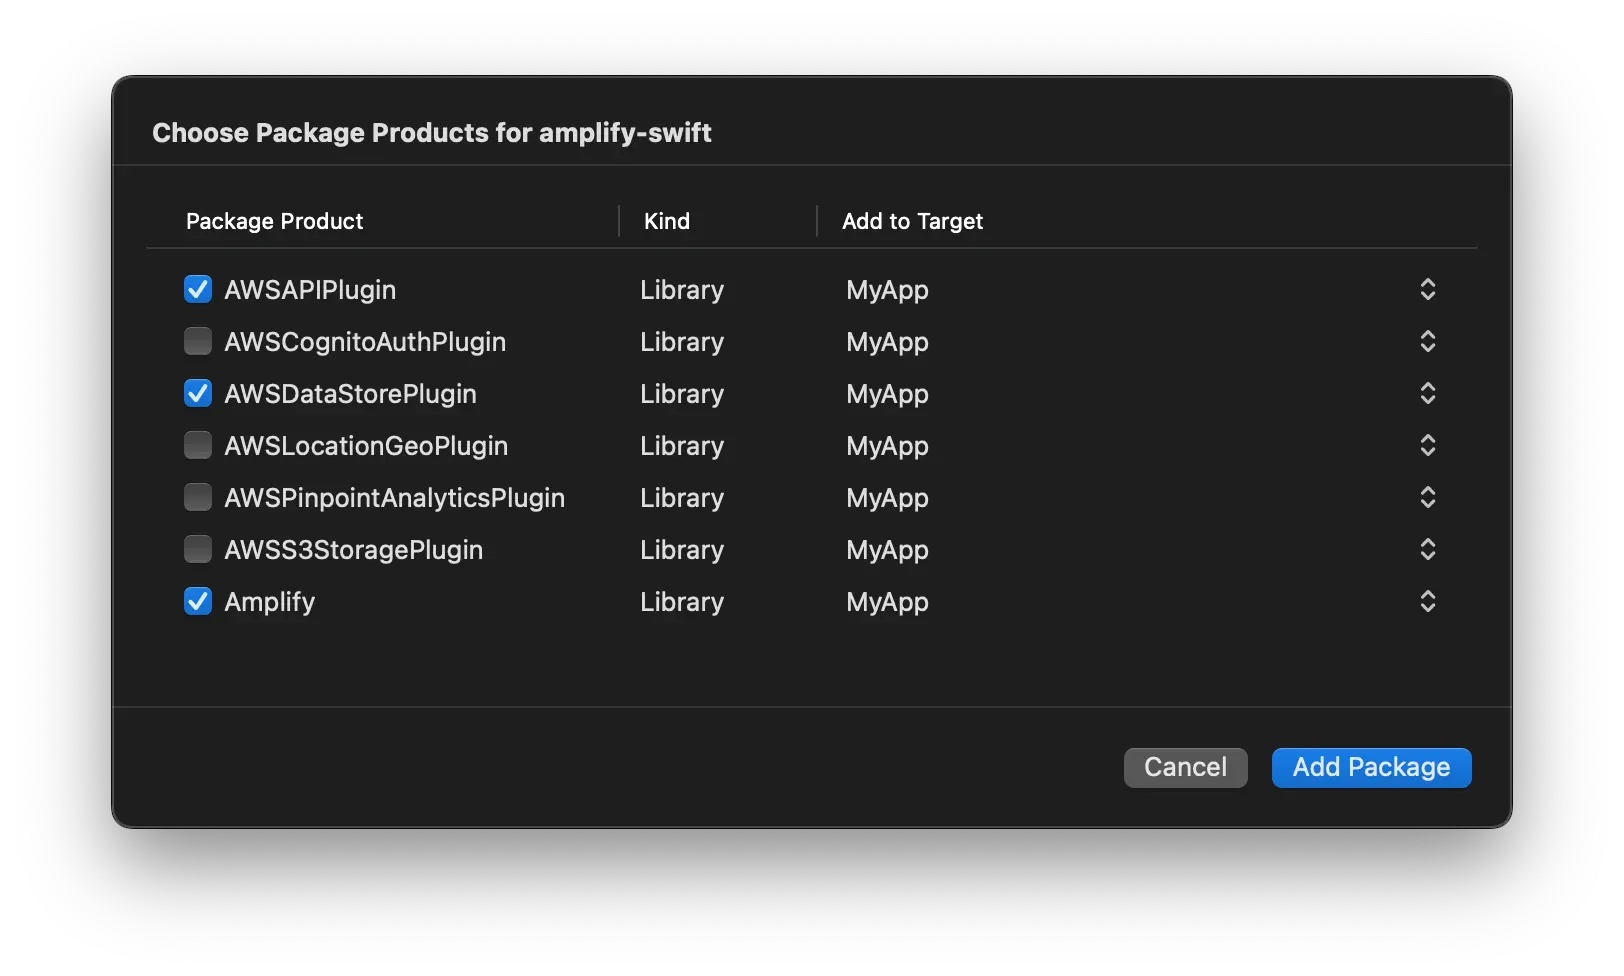
Select all that are appropriate, then click Add Package.
You can always go back and modify which SPM packages are included in your project by opening the Package Dependencies tab for your project: Click on the Project file in the Xcode navigator, then click on your project's icon, then select the Package Dependencies tab.
3. Provision the backend with Amplify CLI
To start provisioning resources in the backend, change directories to your project directory and run amplify init:
cd ~/Developer/MyAmplifyApp/amplify initEnter the following when prompted:
? Enter a name for the project MyAmplifyApp? Enter a name for the environment dev? Choose your default editor: Visual Studio Code? Choose the type of app that you're building ios? Do you want to use an AWS profile? Yes? Please choose the profile you want to use defaultUpon successfully running amplify init, you should see two new created files in your project directory: amplifyconfiguration.json and awsconfiguration.json. These two files are automatically added to your project so that they are bundled with your application. This is required so that Amplify libraries know how to reach your provisioned backend resources.
Now you can build (Cmd+b) and run (Cmd+r) your application.
4. Initialize Amplify in the application
Open AppDelegate.swift or MyAmplifyApp.swift and add import Amplify at the top of the file:
import AmplifyUpdate the following function to verify that Amplify can be compiled into your project:
func application( _ application: UIApplication, didFinishLaunchingWithOptions launchOptions: [UIApplication.LaunchOptionsKey: Any]?) -> Bool { do { try Amplify.configure() } catch { print("An error occurred setting up Amplify: \(error)") } return true}Note: If your app conforms to the App protocol, you can use your own AppDelegate class. Implement an AppDelegate and point Swift UI's UIApplicationDelegateAdaptor property wrapper to it, as below.
class AppDelegate: NSObject, UIApplicationDelegate {    func application(        _ application: UIApplication,        didFinishLaunchingWithOptions launchOptions: [UIApplication.LaunchOptionsKey : Any]? = nil    ) -> Bool {        do {            try Amplify.configure()        } catch {            print("An error occurred setting up Amplify: \(error)")        }        return true    }}@mainstruct MyAmplifyApp: App {    @UIApplicationDelegateAdaptor(AppDelegate.self) var appDelegate
    var body: some Scene {        WindowGroup {            ContentView()        }    }}
Build your project (Cmd+b), then you have successfully added the Amplify library to your project and you should be able to run the application.
Optionally, if you'd like to see additional log messages of what amplify is doing during configuration, you can turn on verbose logging before calling Amplify.configure():
do { Amplify.Logging.logLevel = .verbose // Configure Amplify as usual... try Amplify.configure() // ...Re-running the application with verbose logging on, you will see the following messages:
[Amplify] Configuring[Amplify] Configuration: nilNext steps
Congratulations! You've created a skeleton app and are ready to start adding Amplify categories to your application. The following are some categories that you can start to build into your application:
- Analytics - for logging metrics and understanding your users
- API (GraphQL) - for adding a GraphQL endpoint to your app
- API (REST) - for adding a REST endpoint to your app
- Authentication - for managing your users
- DataStore - for making it easier to program for a distributed data store for offline and online scenarios
- Geo - to use location data and map UI components.
- Storage - store complex objects like pictures and videos to the cloud.