Model database
Amplify Studio provides a visual way to create your app's data model and manage the contents of your database.
Create data model
- Launch Studio for an app
- On the Set up menu, choose Data
- On the Data modeling page, choose Add model to create your first data model.
Think of a model as a table in your database. In this case, you'll create a Home model and add a few fields like address (String), price (Float), and image_url (String).
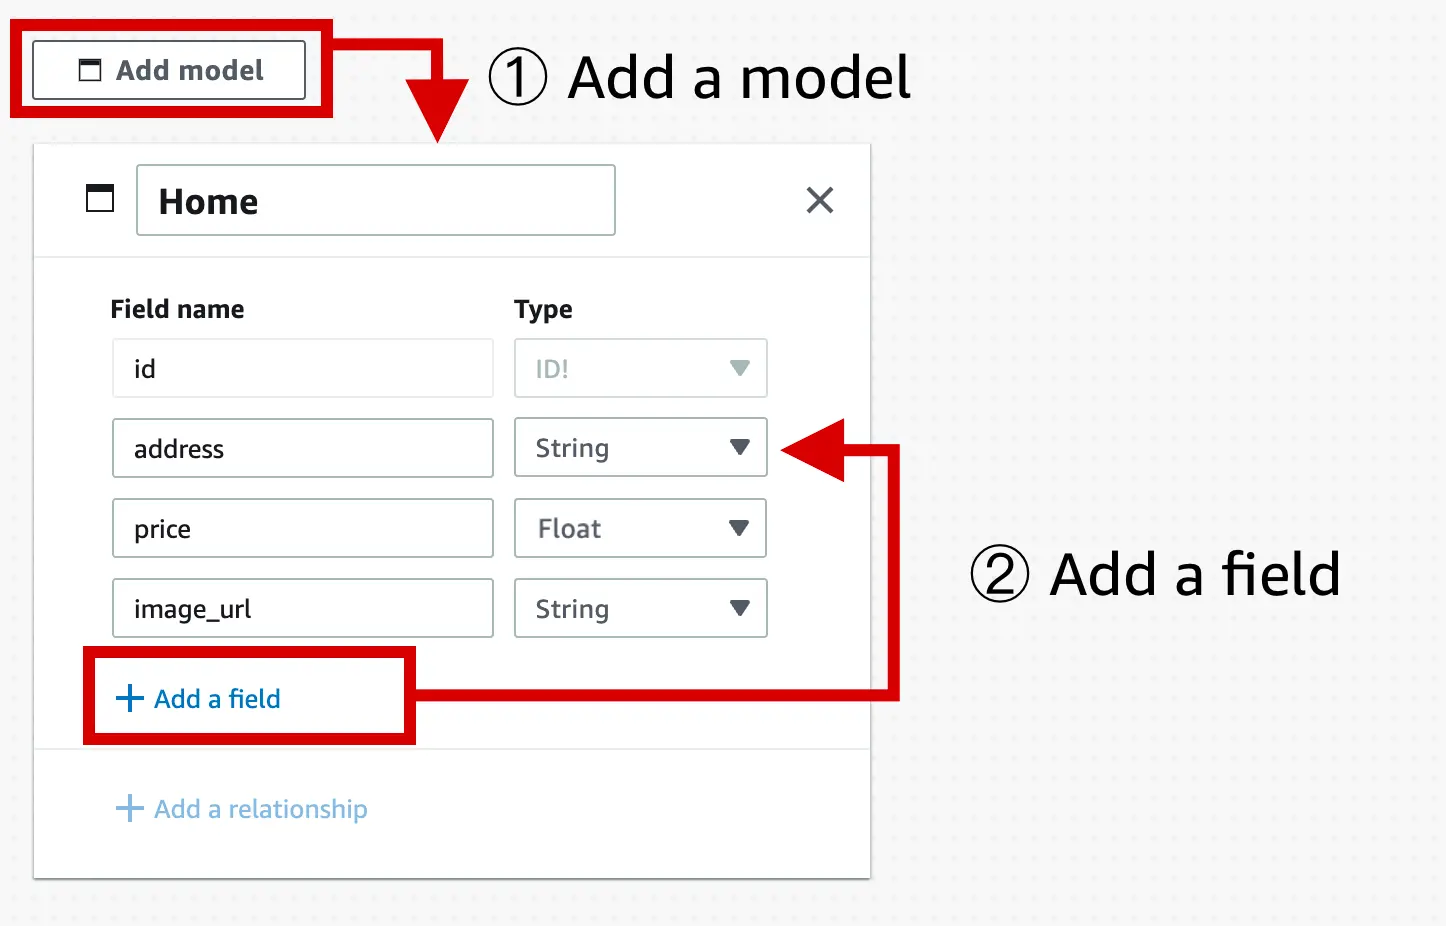
You can take this further by adding more data models to your app and creating relationships between them.
Once you're ready, choose Save and Deploy to deploy your data model to the cloud.

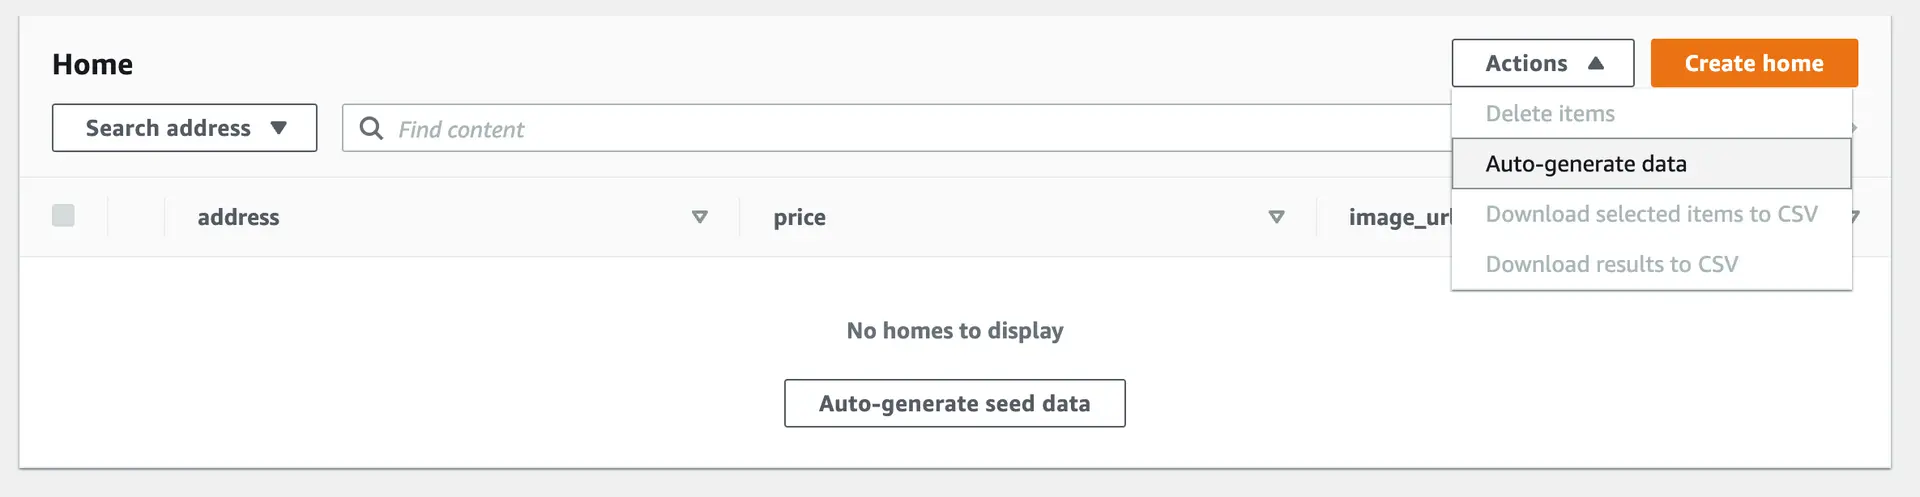
Browse and auto-generate your app data
After your backend is deployed, choose Content on the Manage menu to start browsing your app data. Amplify Studio also provides a feature to auto-generate seed data to help you test your app faster.
Choose Auto-generate data from the Actions menu.
The auto-generate seed data functionality also allows you to set constraints to make the generated seed data more semantically accurate. In your case, set a constraint for address as "Street address".
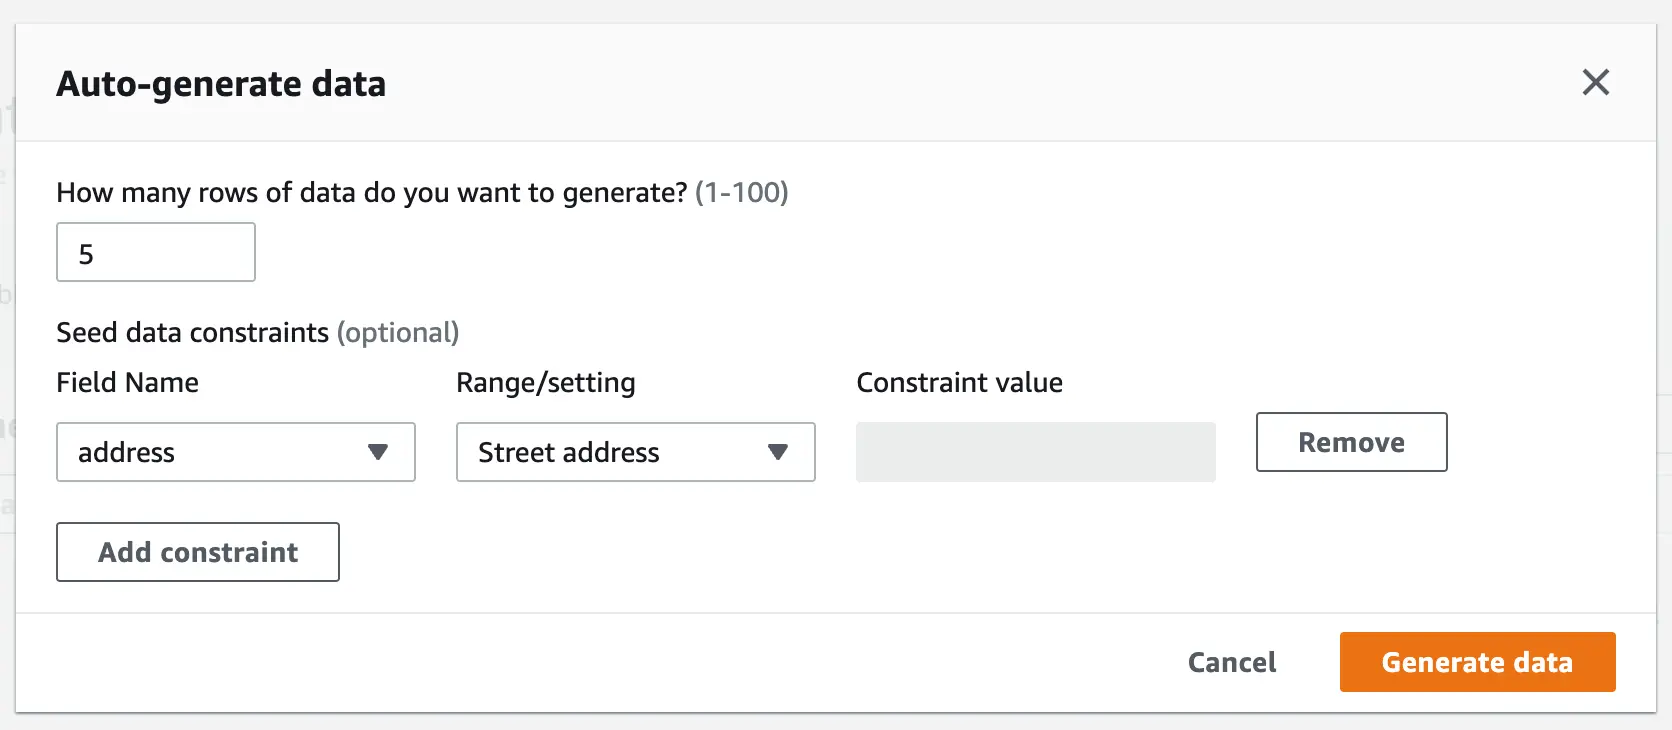
Five records are now created. To better showcase image support for the rest of this tutorial, select each record and modify the image_url to a publicly reachable image URL.