Deploy a Next.js app
In this guide you'll learn how to deploy a Next.js app using Amplify Hosting. Amplify supports the hosting of static apps and apps with dynamic server-side rendered routes (SSR).
Prerequisites
If you haven't already, install and configure the latest version of the Amplify CLI:
npm install -g @aws-amplify/clicurl -sL https://aws-amplify.github.io/amplify-cli/install | bash && $SHELLcurl -sL https://aws-amplify.github.io/amplify-cli/install-win -o install.cmd && install.cmdamplify configureTo see a video walkthrough of how to configure the CLI, click here.
Deploy and host an SSG only app
You can deploy static (SSG) apps with manual deployments or with Git-based continuous deployments. This example demonstrates how to manually deploy an SSG app.
Getting started
Create a new Next.js app:
$ npm init next-app
✔ What is your project named? my-app✔ Pick a template › Default starter appIn the root of the project, open next.config.js and add the following code to the configuration:
images: { unoptimized: true, }The edited next.config.js will look similar as the example below
const nextConfig = {  reactStrictMode: true,  swcMinify: true,  images: {    unoptimized: true,  },};
module.exports = nextConfig;
Next, change to the my-app directory to update the package.json file. When you deploy a Next.js app, Amplify inspects the app's build script in the package.json file to detect whether the app is static (SSG) or server-side rendered (SSR).
To deploy a static app, add the export script to the existing build script:
"scripts": { "dev": "next dev", "build": "next build && next export", "start": "next start"},The build script next build && next export indicates that the app supports SSG pages only.next export allows you to export your app to static HTML, which can be run standalone without the need of a Node.js server.
Adding Amplify hosting
Initialize a new Amplify project. The Distribution Directory Path depends on whether you are deploying a static or SSR app. For a static app, set the Distribution Directory Path to out.
$ amplify init
? Enter a name for the project: mynextapp? Enter a name for the environment: dev? Choose your default editor: Visual Studio Code (or your preferred editor)? Choose the type of app that youre building: javascript? What javascript framework are you using: react? Source Directory Path: src? Distribution Directory Path: out? Build Command: npm run-script build? Start Command: npm run-script start? Do you want to use an AWS profile? Y? Please choose the profile you want to use: <your profile>
Add hosting with the Amplify add command:
amplify add hosting? Select the plugin module to execute Hosting with Amplify Console (Managed hosting with custom domains, Continuous deployment)? Choose a type Manual deployment
You can now publish your app using the following command:
Command: amplify publishDeploy the app with the Amplify publish command:
amplify publish
✔ Successfully pulled backend environment dev from the cloud.
    Current Environment: dev
┌──────────┬────────────────┬───────────┬───────────────────┐│ Category │ Resource name  │ Operation │ Provider plugin   │├──────────┼────────────────┼───────────┼───────────────────┤│ Hosting  │ amplifyhosting │ Create    │ awscloudformation │└──────────┴────────────────┴───────────┴───────────────────┘
? Are you sure you want to continue? Yes
Congratulations, your app has now been successfully deployed! The URL for the app should be displayed in your terminal.

To see your app in the Amplify console at any time, run the following command:
$ amplify consoleDeploying updates
Once you make changes to your app and are ready to deploy them, you can run the publish command again:
$ amplify publishDeleting the app
To delete the app and the deployment, run the delete command:
$ amplify deleteDynamic routes
Next.js also supports dynamic routes.
Let's say you have a folder and file structure that looks like this:
/pages/posts/[id].jsThis component needs to read the ID from the URL and do something useful with it in the app. To make this happen, you can use next/router:
// /pages/posts/[id].jsimport { useRouter } from 'next/router'
const Post = () => {  const router = useRouter()  const { id } = router.query
  return <p>Post: {id}</p>}
export default Post
To enable this, you need to set up a rewrite for /pages/posts/[id].html in the Rewrites and redirects section of the Amplify Console:

Setting up rewrites for SPAs
Most SPA frameworks support HTML5 history.pushState() to change browser location without triggering a server request. This works for users who begin their journey from the root (or /index.html), but fails for users who navigate directly to any other page. Using regular expressions, the following example sets up a 200 rewrite for all files to index.html, except for the specific file extensions specified in the regular expression.
To set up rewrites, follow the guide on AWS Amplify Hosting's documentation.
Deploy and host a hybrid app (SSG and SSR)
To deploy a hybrid (SSG and SSR) app, use Amplify's Git-based CI/CD and hosting service.
Getting started
Create a new Next.js app:
$ npm init next-app
✔ What is your project named? my-app✔ Pick a template › Default starter app
When you deploy a Next.js app, Amplify inspects the app's build script in the package.json file to detect whether the app is static (SSG) or server-side rendered (SSR). Change into the my-app directory to view the package.json file. The build script next build indicates that the app supports both SSG and SSR pages.
To deploy an SSR app, keep the following default build script:
"scripts": { "dev": "next dev", "build": "next build", "start": "next start"},Creating the Git repository
Create a new Git repository for your project. For a Github repo, you can run the following commands in the root of your project to initialize the repo and push the code to Github:
$ git init$ git remote add origin git@github.com:username/my-next-app.git$ git add .$ git commit -m "initial commit"$ git push origin mainAdding Amplify hosting
Next, initialize a new Amplify project. The Distribution Directory Path that you set depends on whether you are deploying a static or SSR app.
For an SSR app, set the Distribution Directory Path to .next.
$ amplify init
? Enter a name for the project: mynextapp? Enter a name for the environment: dev? Choose your default editor: Visual Studio Code (or your preferred editor)? Choose the type of app that youre building: javascript? What javascript framework are you using: react? Source Directory Path: src? Distribution Directory Path: .next? Build Command: npm run-script build? Start Command: npm run-script start? Do you want to use an AWS profile? Y? Please choose the profile you want to use: <your profile>
Add hosting with the Amplify add command:
$ amplify add hosting
? Select the plugin module to execute: # Hosting with Amplify Console (Managed hosting with custom domains, Continuous deployment)? Choose a type: # Continuous deployment (Git-based deployments)
The Amplify Console opens and displays your deployed backend environment.
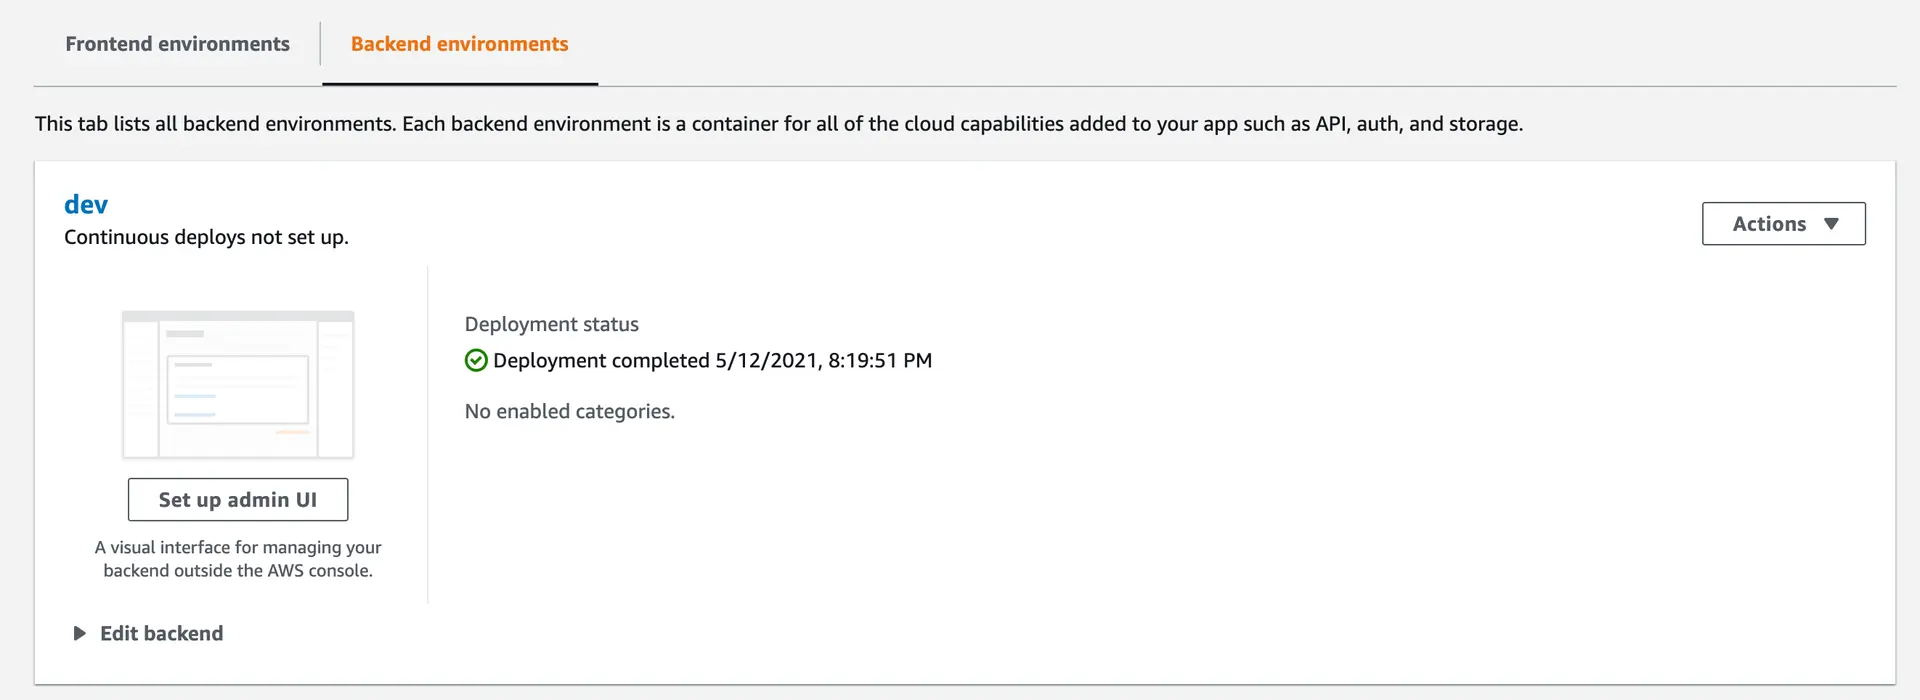
Choose the Frontend environments tab, select your Git provider, then choose Connect Branch.
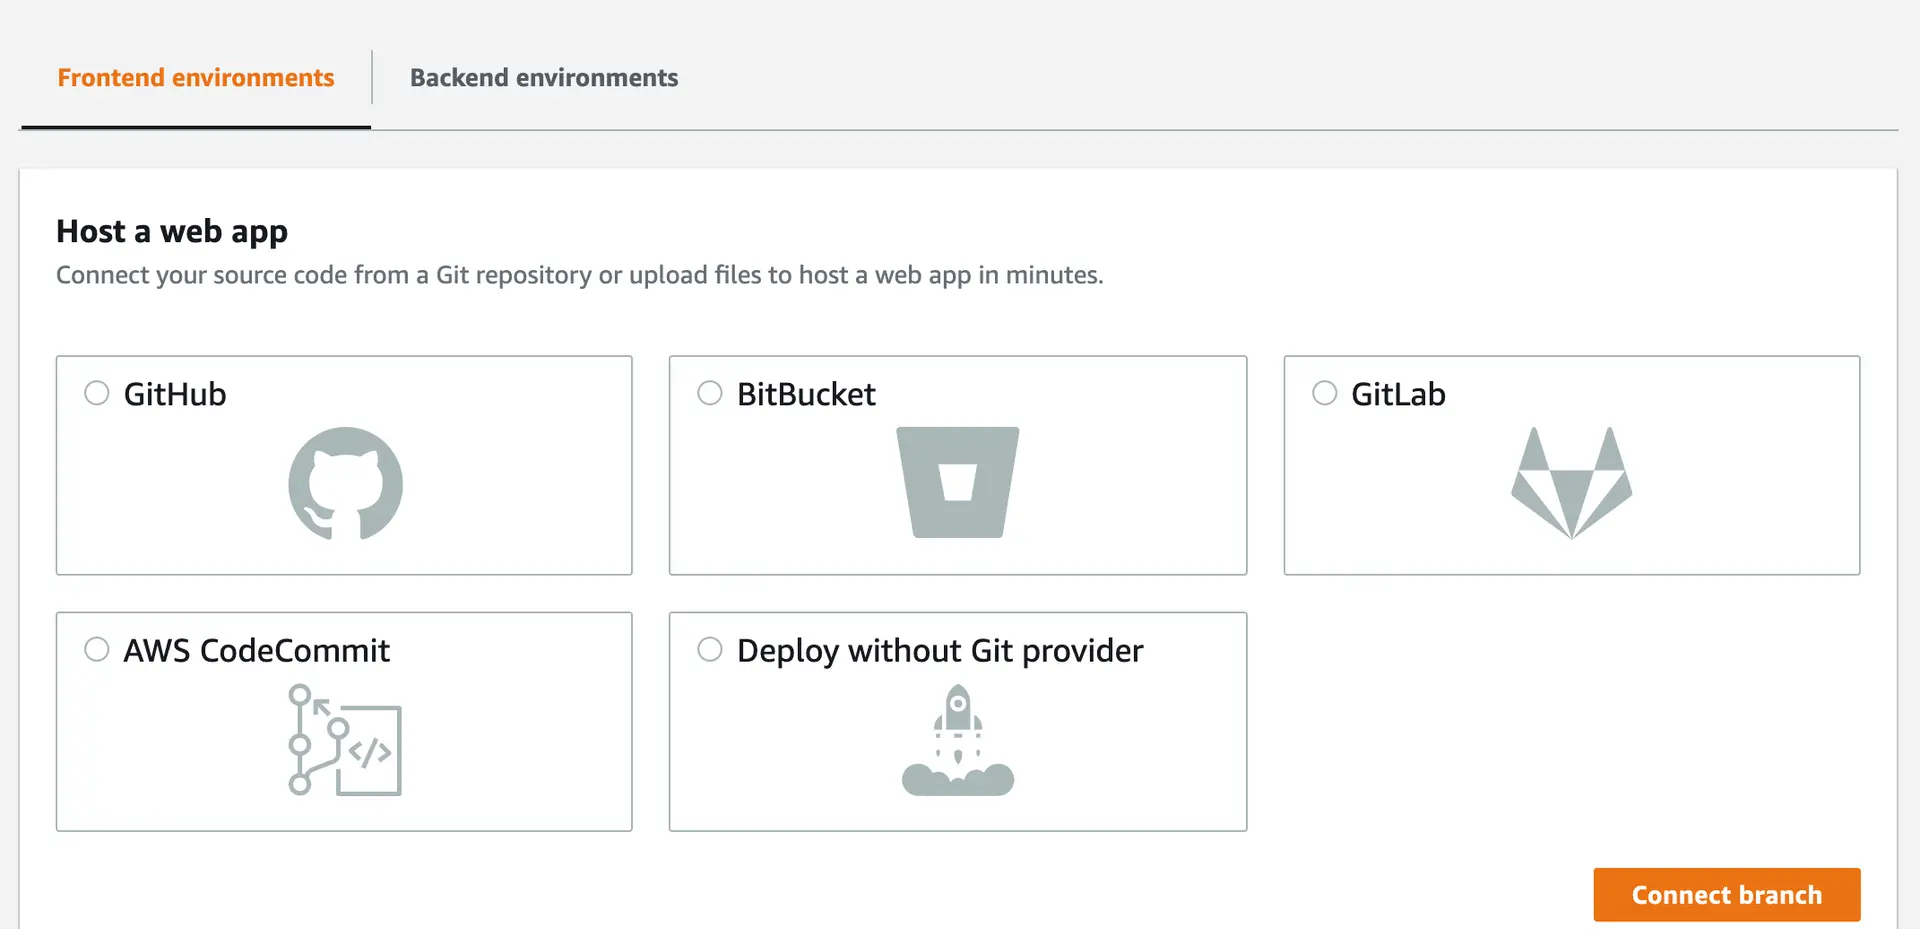
Follow the steps in the Amplify console to choose the branch to connect, and deploy your app.
Note: Your CloudFront Distribution may take several minutes to go from "In Progress" to "Active". Visit your CloudFront Console to monitor progress.
After your site is successfully deployed, you'll see four green checkmarks. To view the live site, click on the automatically generated URL circled in red in the following screenshot.
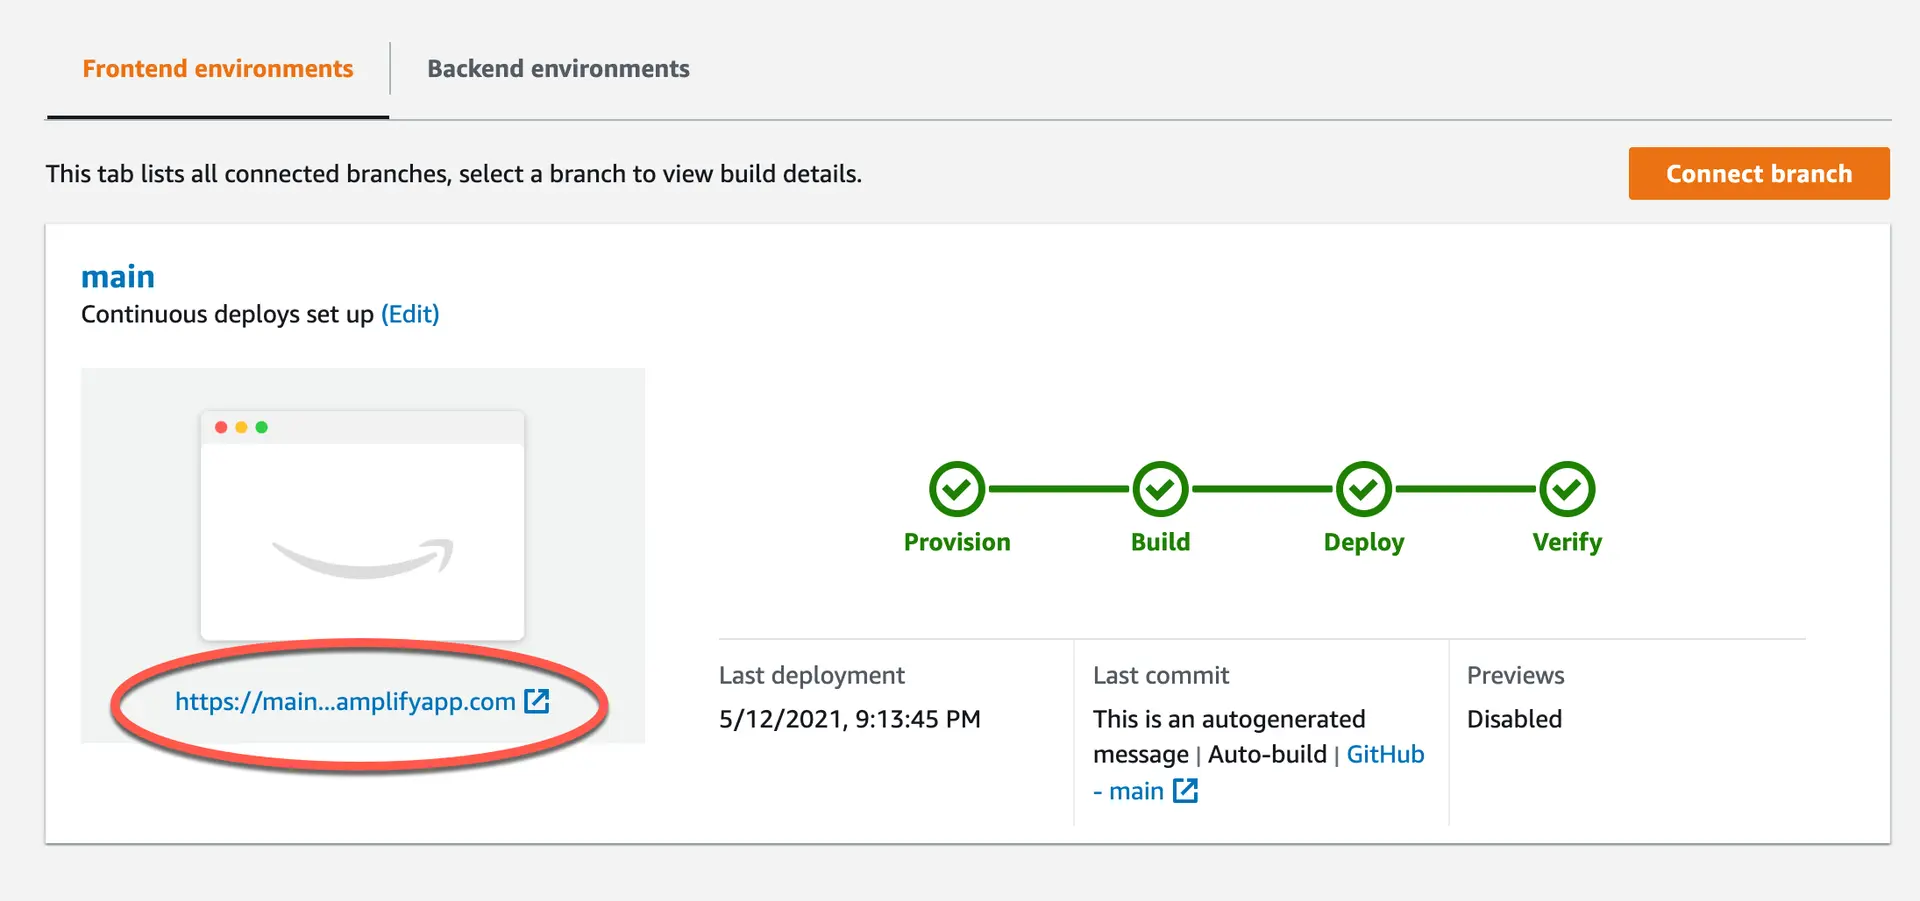
Congratulations, your app has now been successfully deployed!
Kicking off a new build
You can kick off a new build directly from the Amplify console or by pushing changes to main.
-
Make some changes to your code
-
Push the changes to git
$ git add .$ git commit -m 'updates'$ git push origin mainAPI routes
Amplify now supports API routes in Next.js apps. Any file inside the folder pages/api is mapped to /api/* and treated as an API endpoint instead of a page. You can use these APIs to interface with any backend service to fetch data.