Data binding
Amplify Studio offers visual data binding capabilities to bind UI components to data to build dynamic components. Use the UI component editor to map fields to static values, or map fields to your backend data model. All data bindings get automatically included in generated code.
UI component editor
The UI component editor allows you to bind elements in your component to actual data.
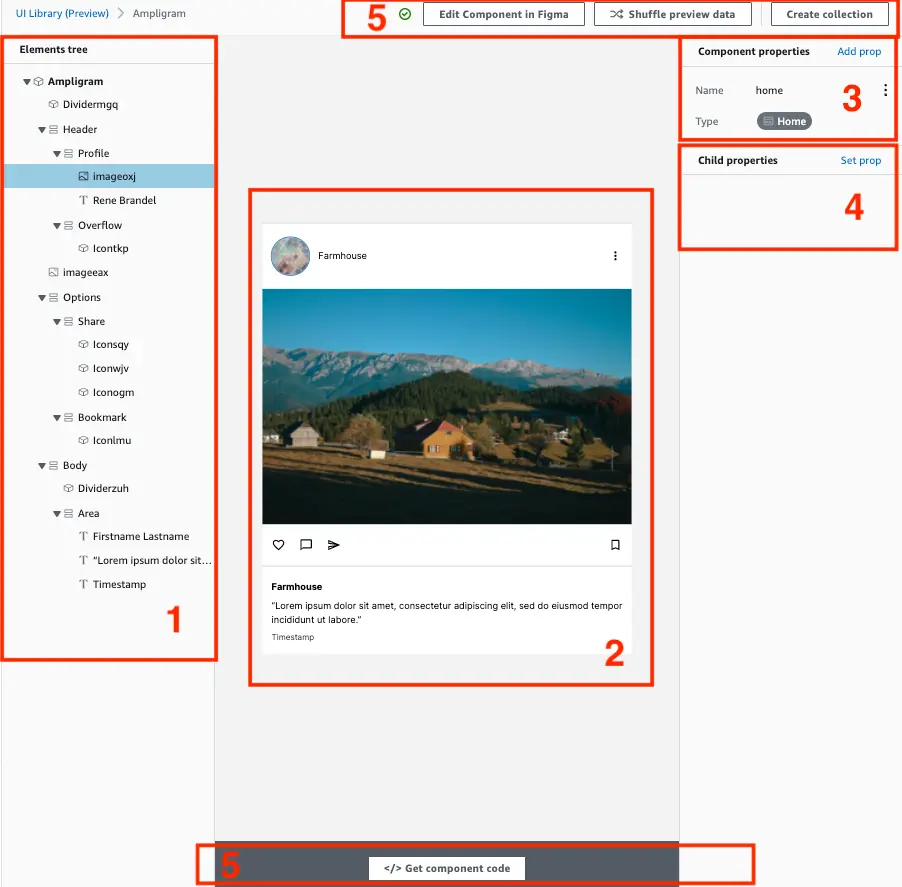
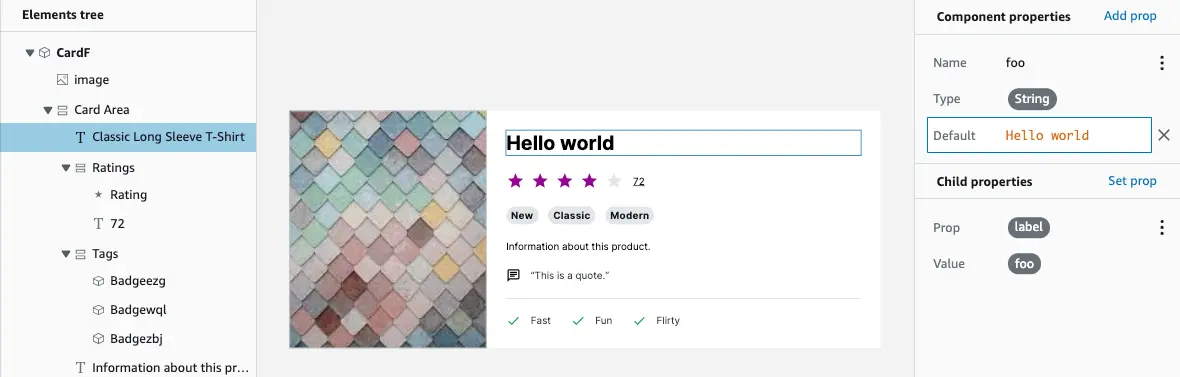
1. Elements tree
The elements tree shows the composition of the component in Figma. Each layer in Figma maps to a specific Amplify UI primitive. For example, a frame in Figma maps to a <Flex> component in the Amplify UI library. Clicking on a layer will highlight the element in the live preview.
2. Live component preview
The live preview is a representation of the React component! If you inspect the component in the browser developer tools, you will see that each element in the component maps to real code. Click on any element within a component to select a specific child component. This will highlight the layer in the elements tree as well as bring up all relevant child properties for that component.
3. Component properties
Just like in React, you can set props on your parent component. React components use props to communicate with each other. Every parent component can pass some information to its child components by giving them props. To learn more about React props visit their documentation. Amplify Studio supports Scalar (String, Number, Boolean) and Data model component types.
4. Child properties
Clicking on any child elements within the live preview allows you to set child prop values. You can either set static values or pass prop values from the parent component. Child props will map to props available on the UI primitives. For example, if you select a <Button> component, you will be able to set props such as variation, size and see the live preview update with the values.
5. Component controls
You can perform the following actions on a component:
- Edit component in Figma: This will deep link you into the Figma file to edit the component.
- Shuffle preview data: When you bind UI to static data or data from data models, use shuffle preview to see how your component renders with different data.
- Create collection: Create a collection out of a component. Learn more.
- Get component code: Use this React component in your app.
Bind UI to data from data models
With Amplify Studio, you can bind elements in your UI component to actual backend data from your database by passing component properties with a Data model type down to the child elements.
You need to deploy a data model in order to bind to data. Studio supports any GraphQL API created with Amplify, with and without DataStore.
- In Amplify Studio, navigate to UI builder components and select a component.
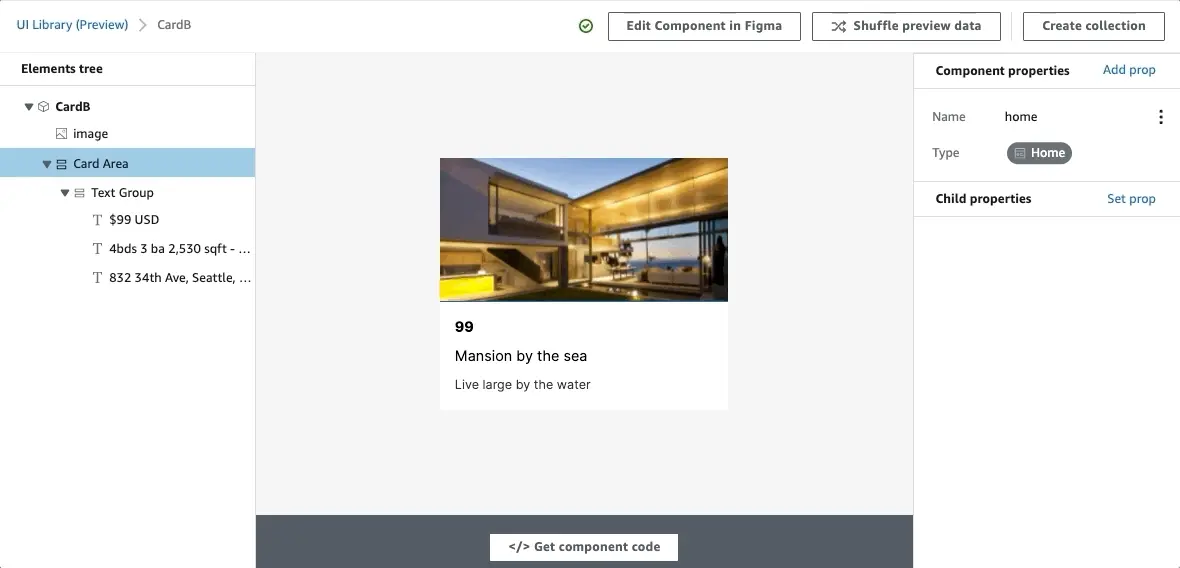
- Add Component property named
foo. Reference your data model (e.g.Home) as the type. - Click on an image child element in your UI component.
- Choose Set prop for child properties. From the Prop dropdown, choose
src, and for value, link tohome.image_url. The live preview should update to an image from your database. Continue to repeat the same steps for different child elements such as text fields, inputs etc.
Learn more in the Collections documentation
Bind UI to static data
You can bind text labels to static values. Use one of the following two methods to bind UI elements to static values.
Pass component property default value to child props
The following example demonstrates how to set the text label's value to the component's default value.
- In Amplify Studio, navigate to UI builder components and select a component.
- Add a Component property named
fooof typeStringwith a default value ofHello world. - Click on a text child element in your UI component.
- Choose Set prop for child properties. From the Prop dropdown, choose
labeland for value, link tofoo. The live preview should update to display "Hello world".
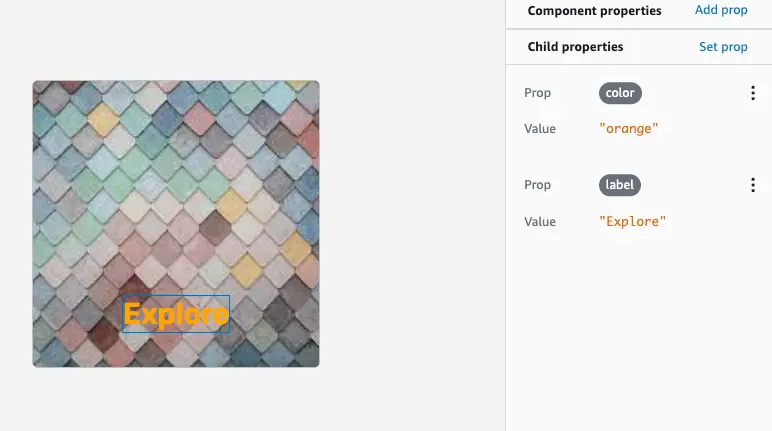
Directly set child props
You can directly set child prop values with all available properties. In the following example, you are setting the label prop to "Explore" and the color prop to "orange".
Apply modifiers
Modifiers let you apply custom logic to renders child prop values.
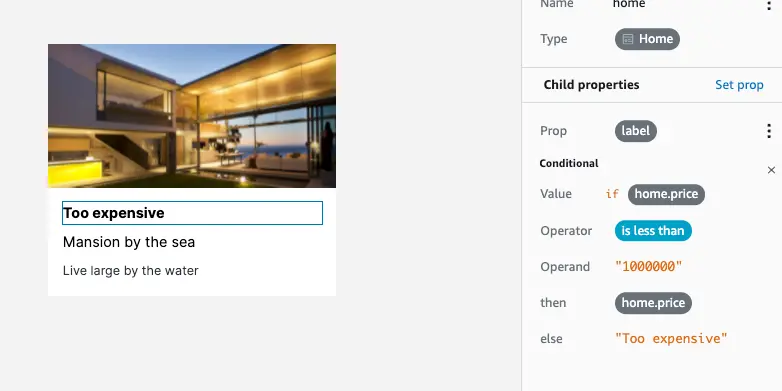
Conditionals
You can apply conditional logic on values of child props. The following example demonstrates how you can conditionally set the value of a child prop based on custom logic.
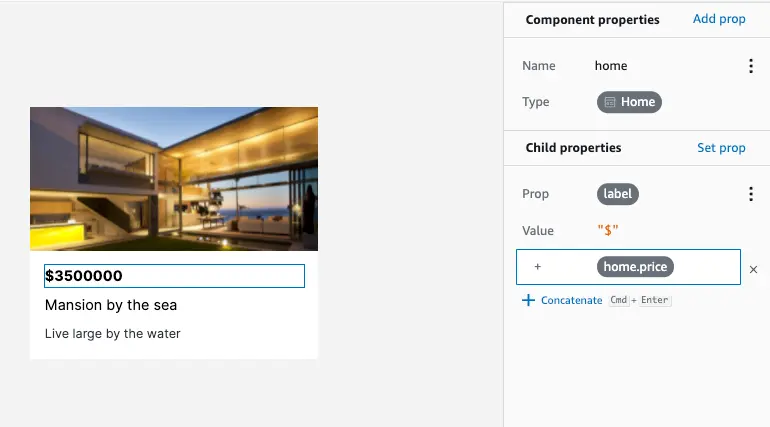
Concatenations
You can apply concatenations on values of child props. The following example demonstrates how to add a $ sign before displaying a price.