Connect to existing AWS resources built with the CDK
This guide shows you how to connect a new app to AWS resources you've already created using the AWS Cloud Development Kit (AWS CDK). The AWS CDK is an open-source software development framework for defining cloud infrastructure as code with modern programming languages. This infrastructure is then deployed through AWS CloudFormation.
In this guide, you will use the Amplify Data CDK to create a GraphQL API backend with AWS AppSync. This creates the core backend. You will then create and connect a React web app to the GraphQL API.
Before you begin, you will need:
- An AWS account: If you don't already have an account, follow the Setting Up Your AWS Environment tutorial for a quick overview.
- The Amplify CLI installed and configured.
- A text editor. For this guide, we will use VS Code, but you can use your preferred IDE.
Build a GraphQL API using the Amplify Data CDK construct
The CDK provides a simple way to define cloud infrastructure in code. In this section, we will use the CDK to build out the backend resources for our application.
Step 1: Create a folder for the CDK app by running the following command in your terminal.
mkdir cdk-backendStep 2: Navigate to the cdk-backend folder and create a new CDK project by running the cdk init command and specifying your preferred language.
cd cdk-backend cdk init --language typescriptStep 3: Open the newly created CDK project using VS Code, or your preferred IDE.
Step 4: In your terminal, navigate to the cdk_backend root folder, and install the AWS Amplify Data package by running the following command.
npm install @aws-amplify/data-constructStep 5: Update the cdk_backend/lib/cdk-backend-stack.ts file as shown in the following code to use the AmplifyData construct to create an AWS AppSync API.
import * as cdk from 'aws-cdk-lib';import { Construct } from 'constructs';import { AmplifyData, AmplifyDataDefinition} from '@aws-amplify/data-construct';
export class CdkBackendStack extends cdk.Stack { constructor(scope: Construct, id: string, props?: cdk.StackProps) { super(scope, id, props);
new AmplifyData(this, 'AmplifyCdkData', { definition: AmplifyDataDefinition.fromString(/* GraphQL */ ` type Todo @model @auth(rules: [{ allow: public }]) { id: ID! name: String! description: String complete: Boolean } `), authorizationModes: { defaultAuthorizationMode: 'API_KEY', apiKeyConfig: { expires: cdk.Duration.days(30) } } }); }}Step 6: Deploy the CDK stacks by running the following command.
cdk deployStep 7: The CDK will prepare the resources for deployment and will display the following prompt. Enter Y and press Enter.
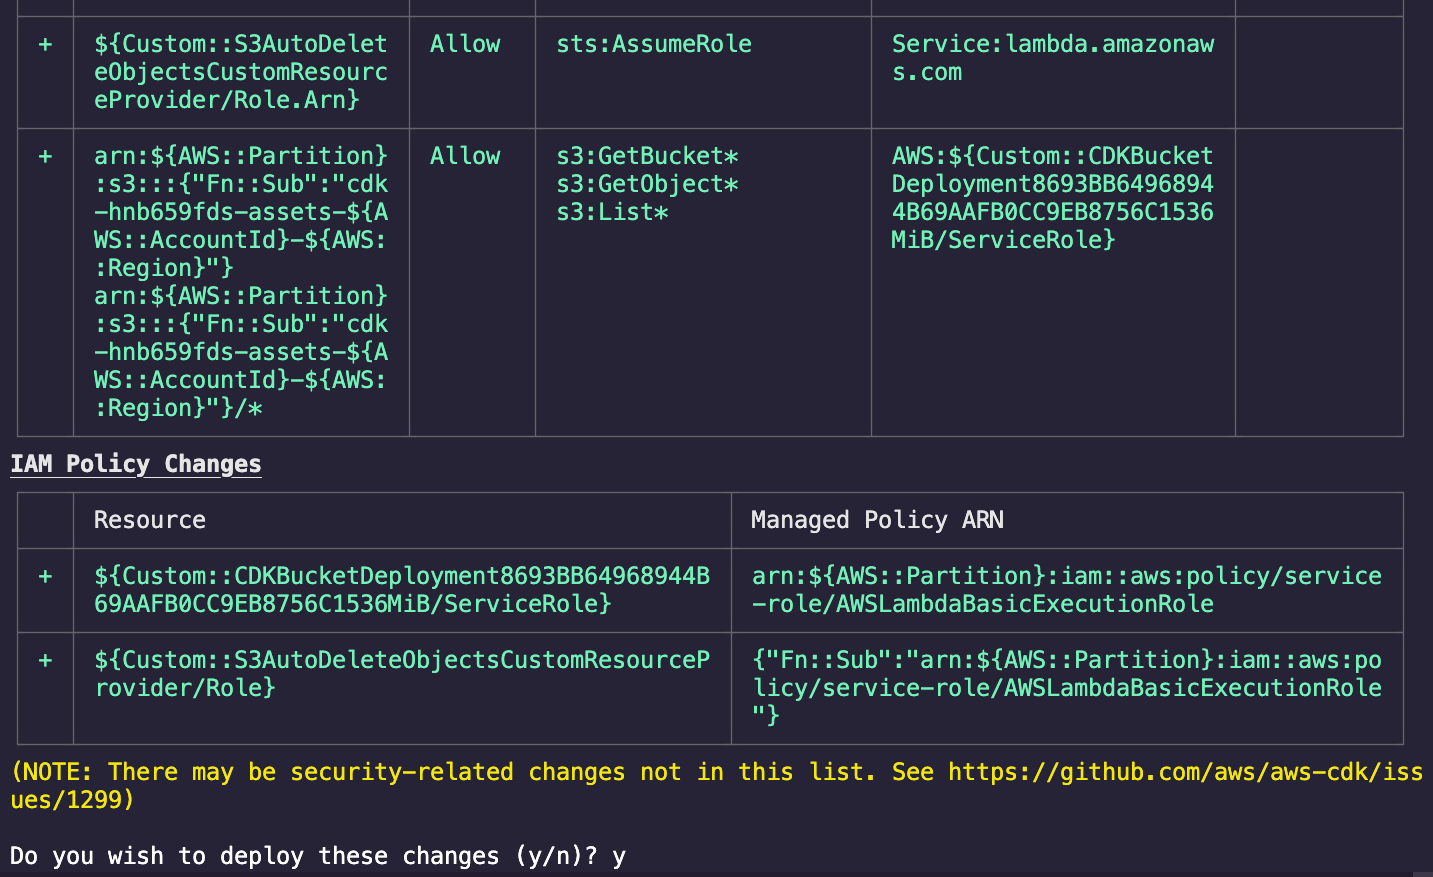
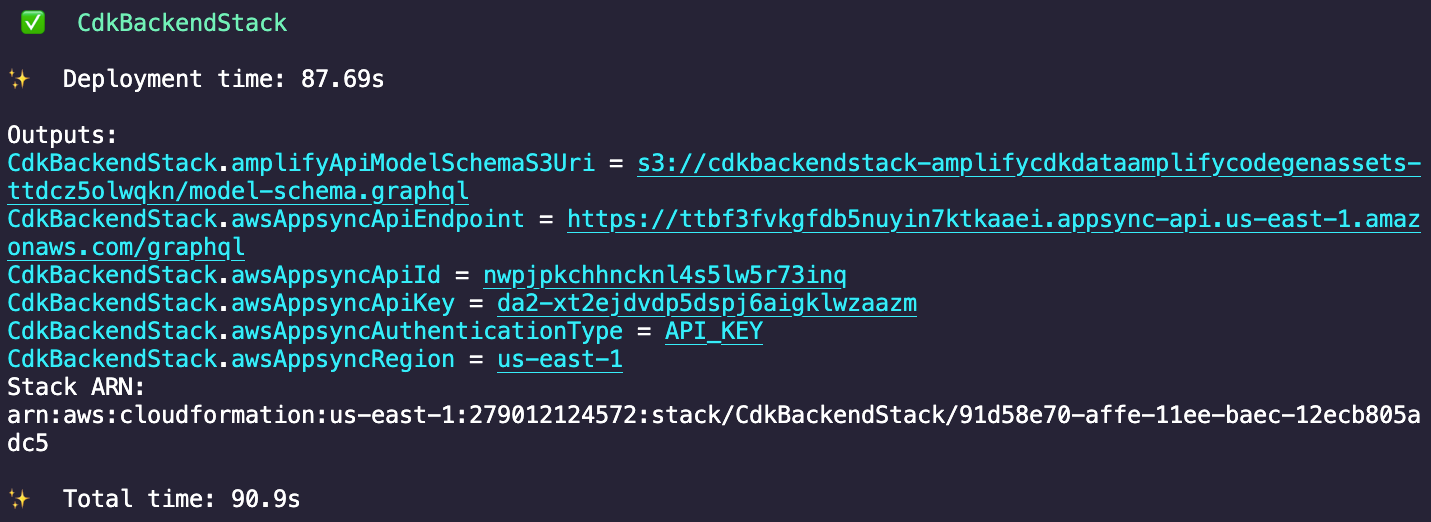
The CDK will deploy the stacks and display the following confirmation. Note the details of the deployed API; we’re going to use them in the next section.
Now that you have built the backend API with the CDK, you can connect a frontend.
Build a React app and connect to the GraphQL API
In this section, we will connect a React web app to our existing GraphQL API. First, we will create a new React project and install the necessary Amplify packages. Next, we will use the Amplify CLI to generate GraphQL code matching our API structure. Then, we will add React components to perform queries and mutations to manage to-do items in our API. After that, we will configure the Amplify library with details of our backend API. Finally, we will run the application to demonstrate full CRUD functionality with our existing API.
Step 1: Create a React app by running the following command in your terminal.
npx create-react-app react-amplify-connectStep 2: Open the newly created React app using VS Code, or your preferred IDE.
Step 3: Install the aws-amplify, @aws-amplify/ui-react, and @aws-amplify/cli packages by running the following commands.
npm install aws-amplify @aws-amplify/ui-react @aws-amplify/cliStep 4: Use the awsAppsyncApiId and awsAppsyncRegion values of the CDK stack you created previously to generate the GraphQL client helper code by running the following command.

npx @aws-amplify/cli codegen add --apiId <aws-appsync-api-id> --region <aws-appsync-region>Step 5: Accept the default values for the prompts.
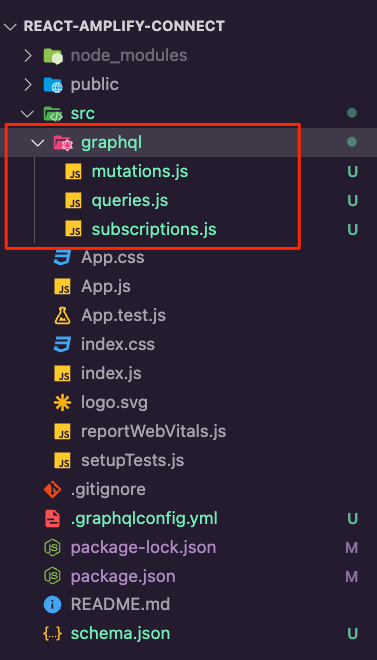
? Choose the type of app that you're building javascript? What javascript framework are you using react✔ Getting API details? Choose the code generation language target javascript? Enter the file name pattern of graphql queries, mutations and subscriptions src/graphql/**/*.js? Do you want to generate/update all possible GraphQL operations - queries, mutations and subscriptions Yes? Enter maximum statement depth [increase from default if your schema is deeply nested] 2✔ Downloaded the schema✔ Generated GraphQL operations successfully and saved at src/graphqlThe Amplify CLI will create the GraphQL client helper code inside the src/graphql folder.
Step 6: Update the App.js file with the following code to create a form with a button to create to-dos, as well as a way to fetch and render the to-do list.
import { Amplify} from 'aws-amplify'import '@aws-amplify/ui-react/styles.css';import { useEffect, useState } from 'react';import { generateClient } from 'aws-amplify/api';import { createTodo } from './graphql/mutations';import { listTodos } from './graphql/queries';
Amplify.configure({ API: { GraphQL: { endpoint: '<your-graphql-endpoint>', region: '<your-aws-region>', defaultAuthMode: 'apiKey', apiKey: '<your-api-key>' } }});
const initialState = { name: '', description: '' };const client = generateClient();
const App = () => { const [formState, setFormState] = useState(initialState); const [todos, setTodos] = useState([]);
useEffect(() => { fetchTodos(); }, []);
function setInput(key, value) { setFormState({ ...formState, [key]: value }); }
async function fetchTodos() { try { const todoData = await client.graphql({ query: listTodos }); const todos = todoData.data.listTodos.items; setTodos(todos); } catch (err) { console.log('error fetching todos'); } }
async function addTodo() { try { if (!formState.name || !formState.description) return; const todo = { ...formState }; setTodos([...todos, todo]); setFormState(initialState); await client.graphql({ query: createTodo, variables: { input: todo } }); } catch (err) { console.log('error creating todo:', err); } }
return ( <div style={styles.container}> <h2>Amplify Todos</h2> <input onChange={(event) => setInput('name', event.target.value)} style={styles.input} value={formState.name} placeholder="Name" /> <input onChange={(event) => setInput('description', event.target.value)} style={styles.input} value={formState.description} placeholder="Description" /> <button style={styles.button} onClick={addTodo}> Create Todo </button> {todos.map((todo, index) => ( <div key={todo.id ? todo.id : index} style={styles.todo}> <p style={styles.todoName}>{todo.name}</p> <p style={styles.todoDescription}>{todo.description}</p> </div> ))} </div> );};
const styles = { container: { width: 400, margin: '0 auto', display: 'flex', flexDirection: 'column', justifyContent: 'center', padding: 20 }, todo: { marginBottom: 15 }, input: { border: 'none', backgroundColor: '#ddd', marginBottom: 10, padding: 8, fontSize: 18 }, todoName: { fontSize: 20, fontWeight: 'bold' }, todoDescription: { marginBottom: 0 }, button: { backgroundColor: 'black', color: 'white', outline: 'none', fontSize: 18, padding: '12px 0px' }};
export default App;Step 7: Run the app using the following command.
npm startStep 8: Use the form to create a few to-do items.
In this section, we generated GraphQL code, created React components, configured Amplify, and connected the app to the API. This enabled full CRUD functionality with our backend through queries and mutations.
Conclusion
Congratulations! You used the AWS Amplify Data CDK construct to create a GraphQL API backend using AWS AppSync. You then connected your app to that API using the Amplify libraries. If you have any feedback, leave a GitHub issue or join our Discord Community!
Clean up resources
Once you're finished experimenting with this demo app, we recommend deleting the backend resources to avoid incurring unexpected costs. You can do this by running the following command in the root folder of the CDK app created above.
cdk destroy