Team environments
When you initialize a project, you create an Amplify backend environment. Every Amplify backend environment is a container for the categories added to your project. To deploy updates to an environment, run amplify push. In teams where multiple members are working on the same backend, it is good practice to run amplify pull to fetch changes from upstream before beginning work on new backend features. View the list of backend environments in your cloud project by visiting the Amplify Console.
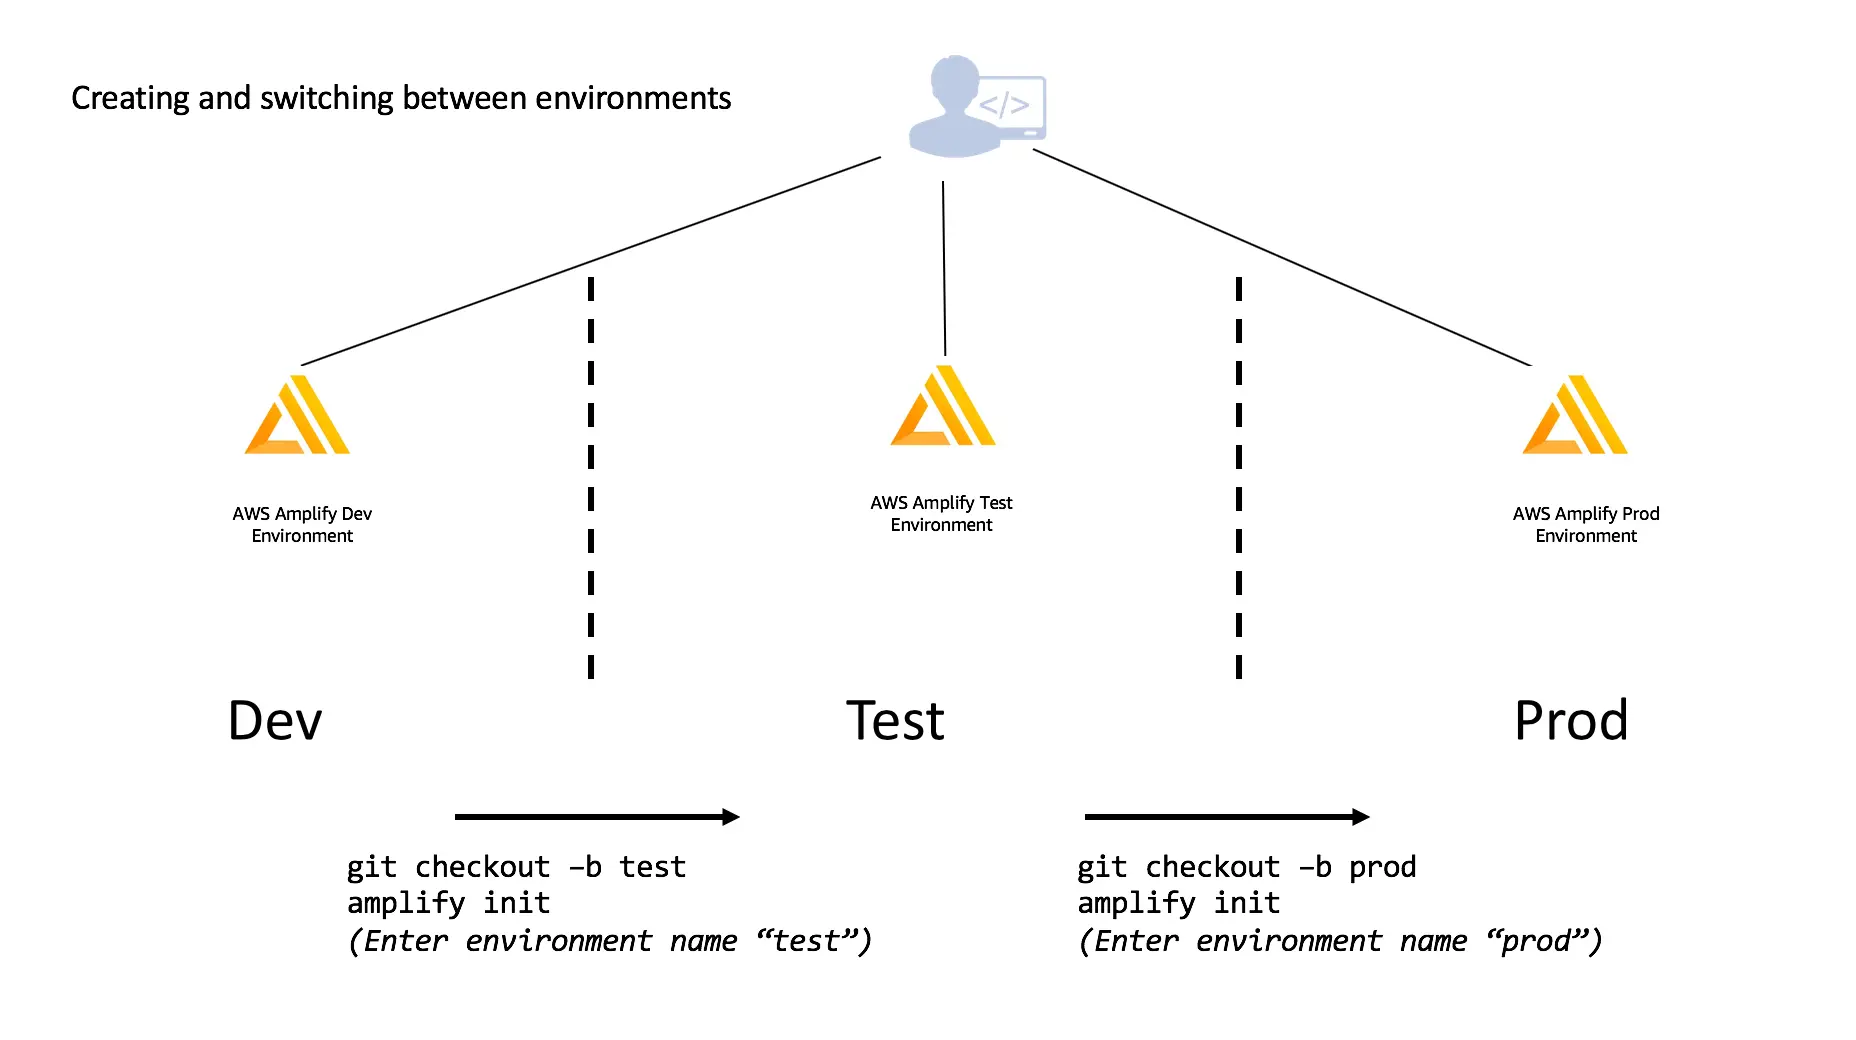
For multiple environments, Amplify matches the standard Git workflow where you switch between different branches using the env checkout command -- similar to running git checkout BRANCHNAME, run amplify env checkout ENVIRONMENT_NAME to switch between environments. The diagram below shows a workflow of how to initialize new environments when creating new git branches.
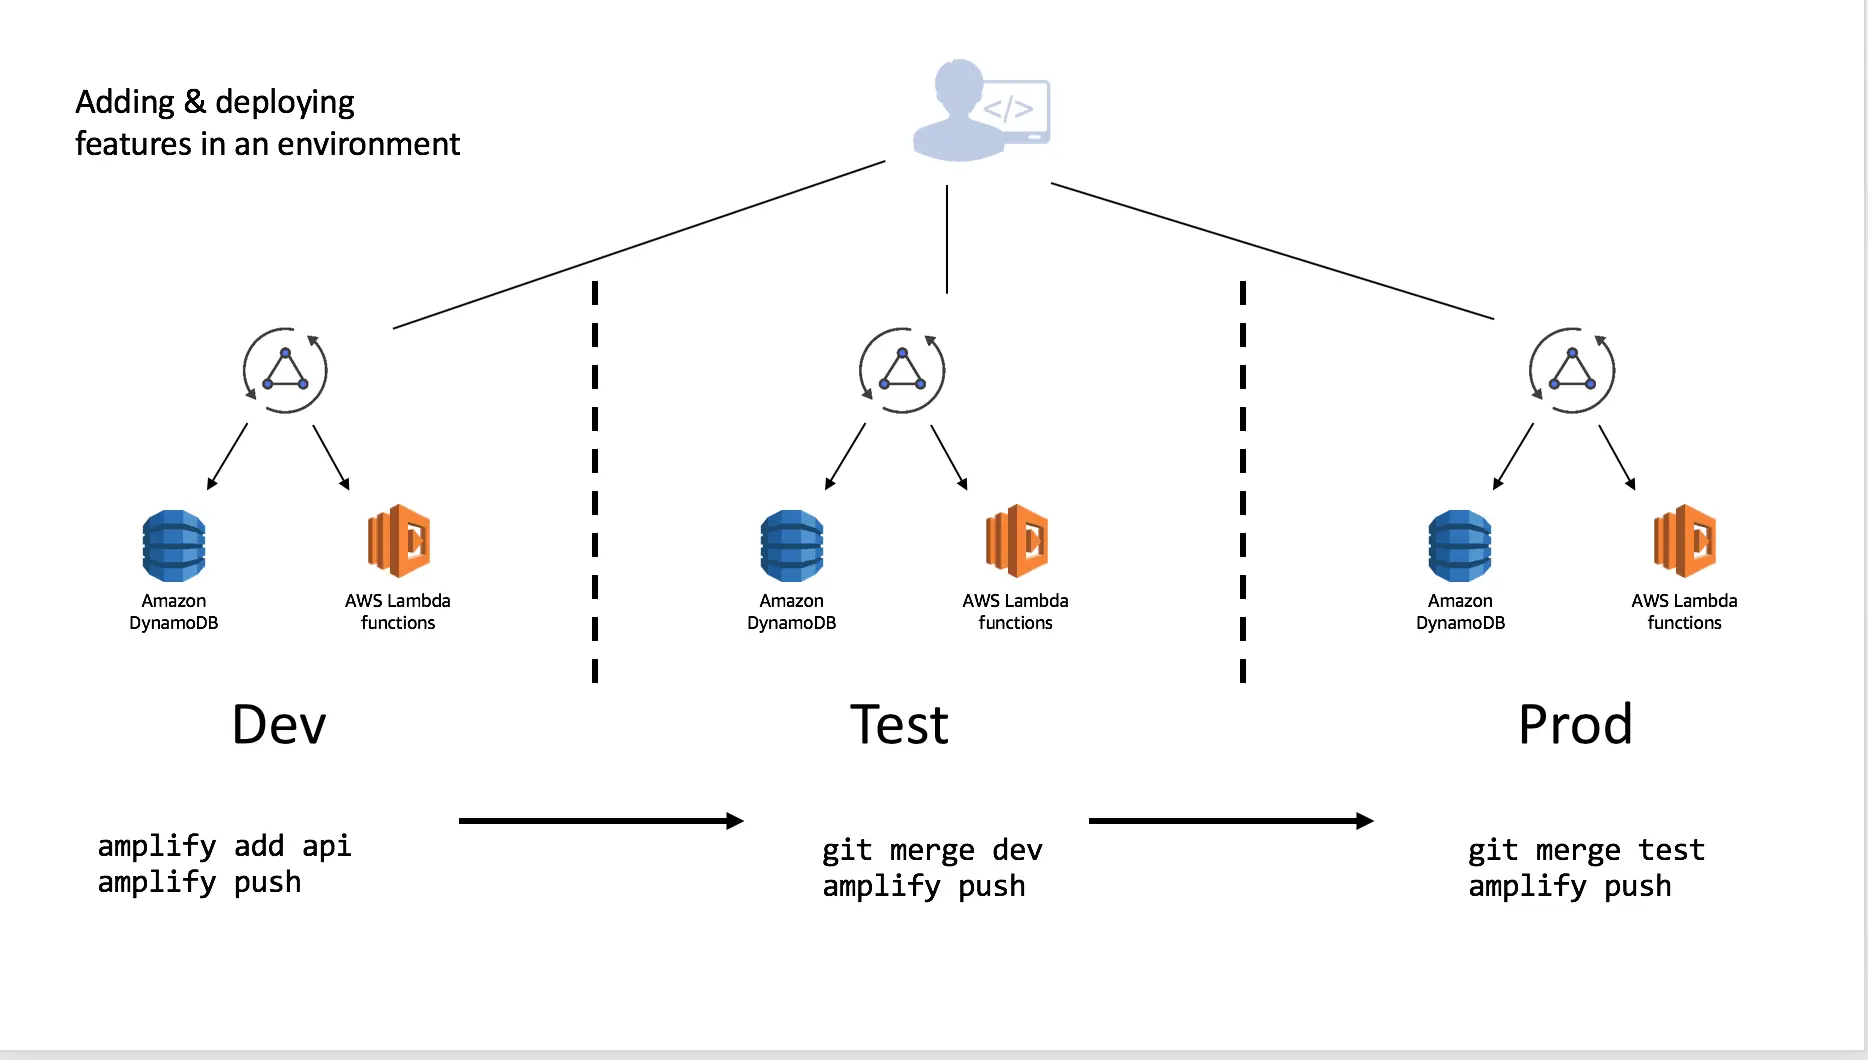
You can independently add features to each environment which allows you to develop and test before moving them to different stages. Using the same example above of Dev being the base which Test and Prod were derived, you could add (or remove) features and merge & deploy accordingly once you are comfortable with your setup.
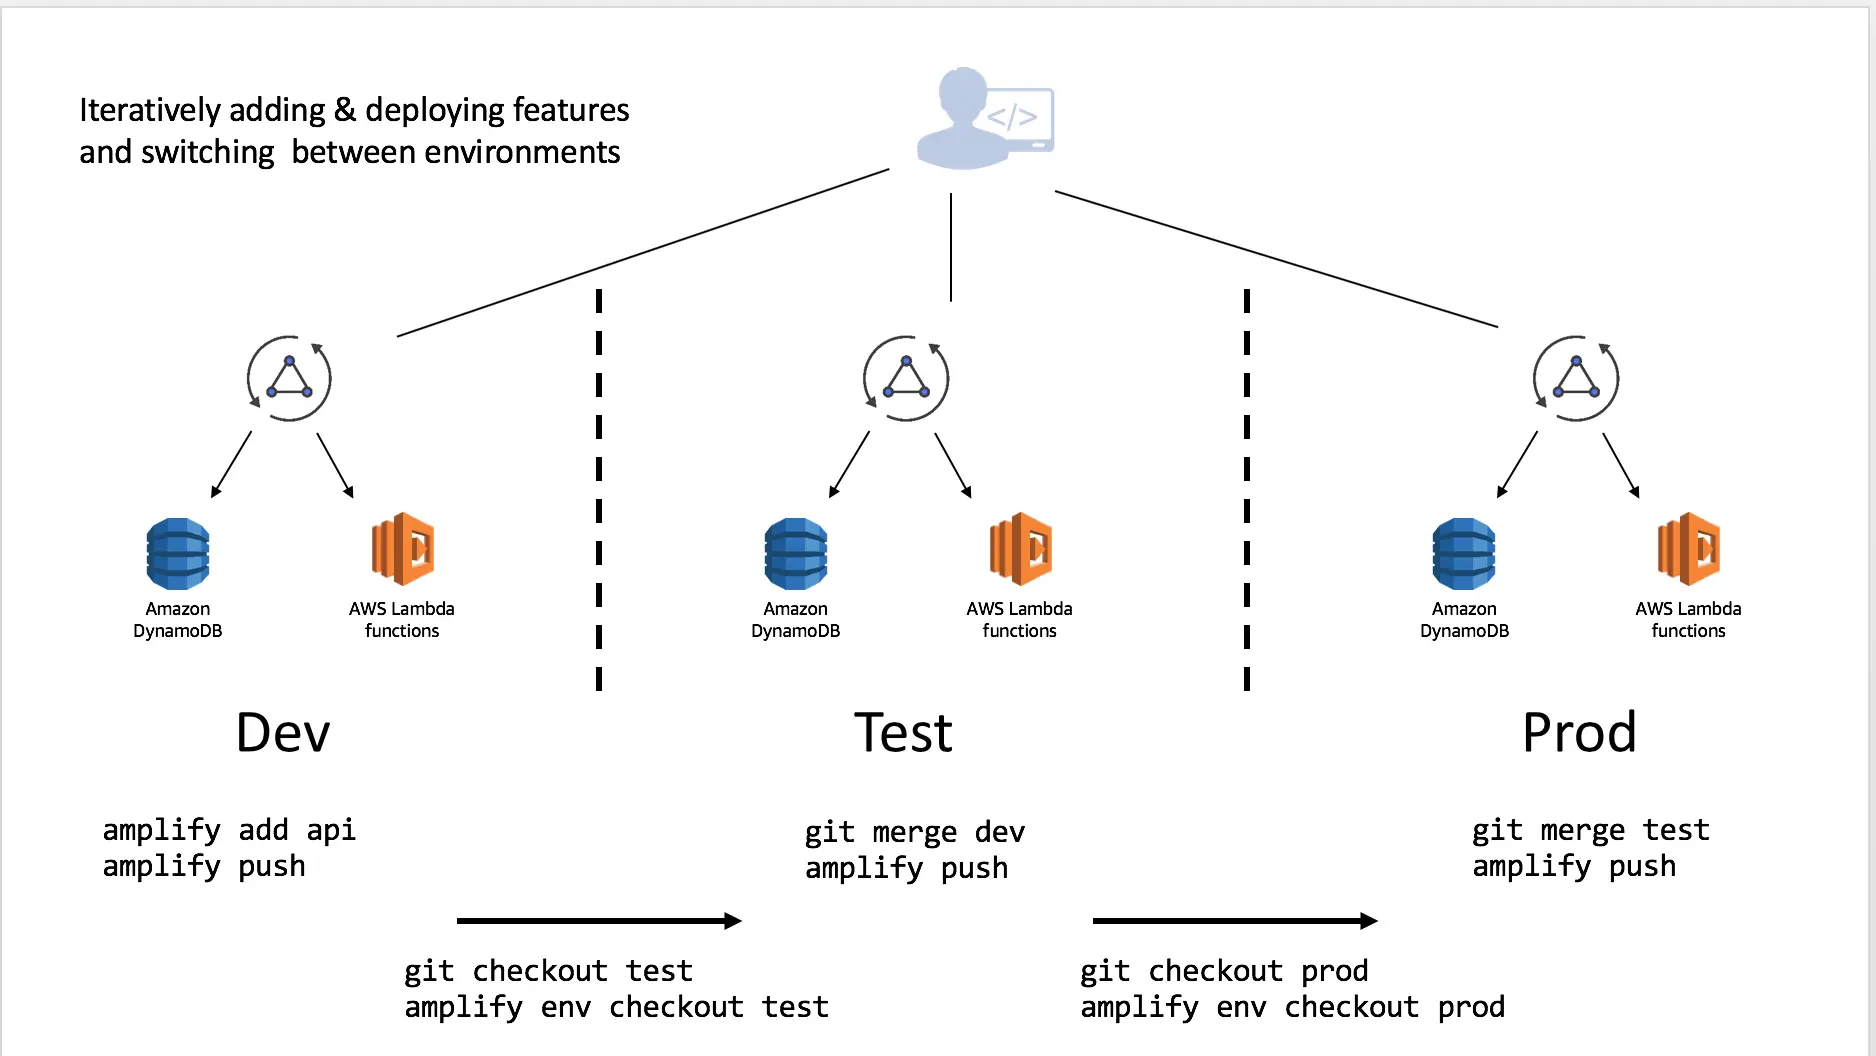
This can be done in an iterative manner as you work through your deployment pipeline:
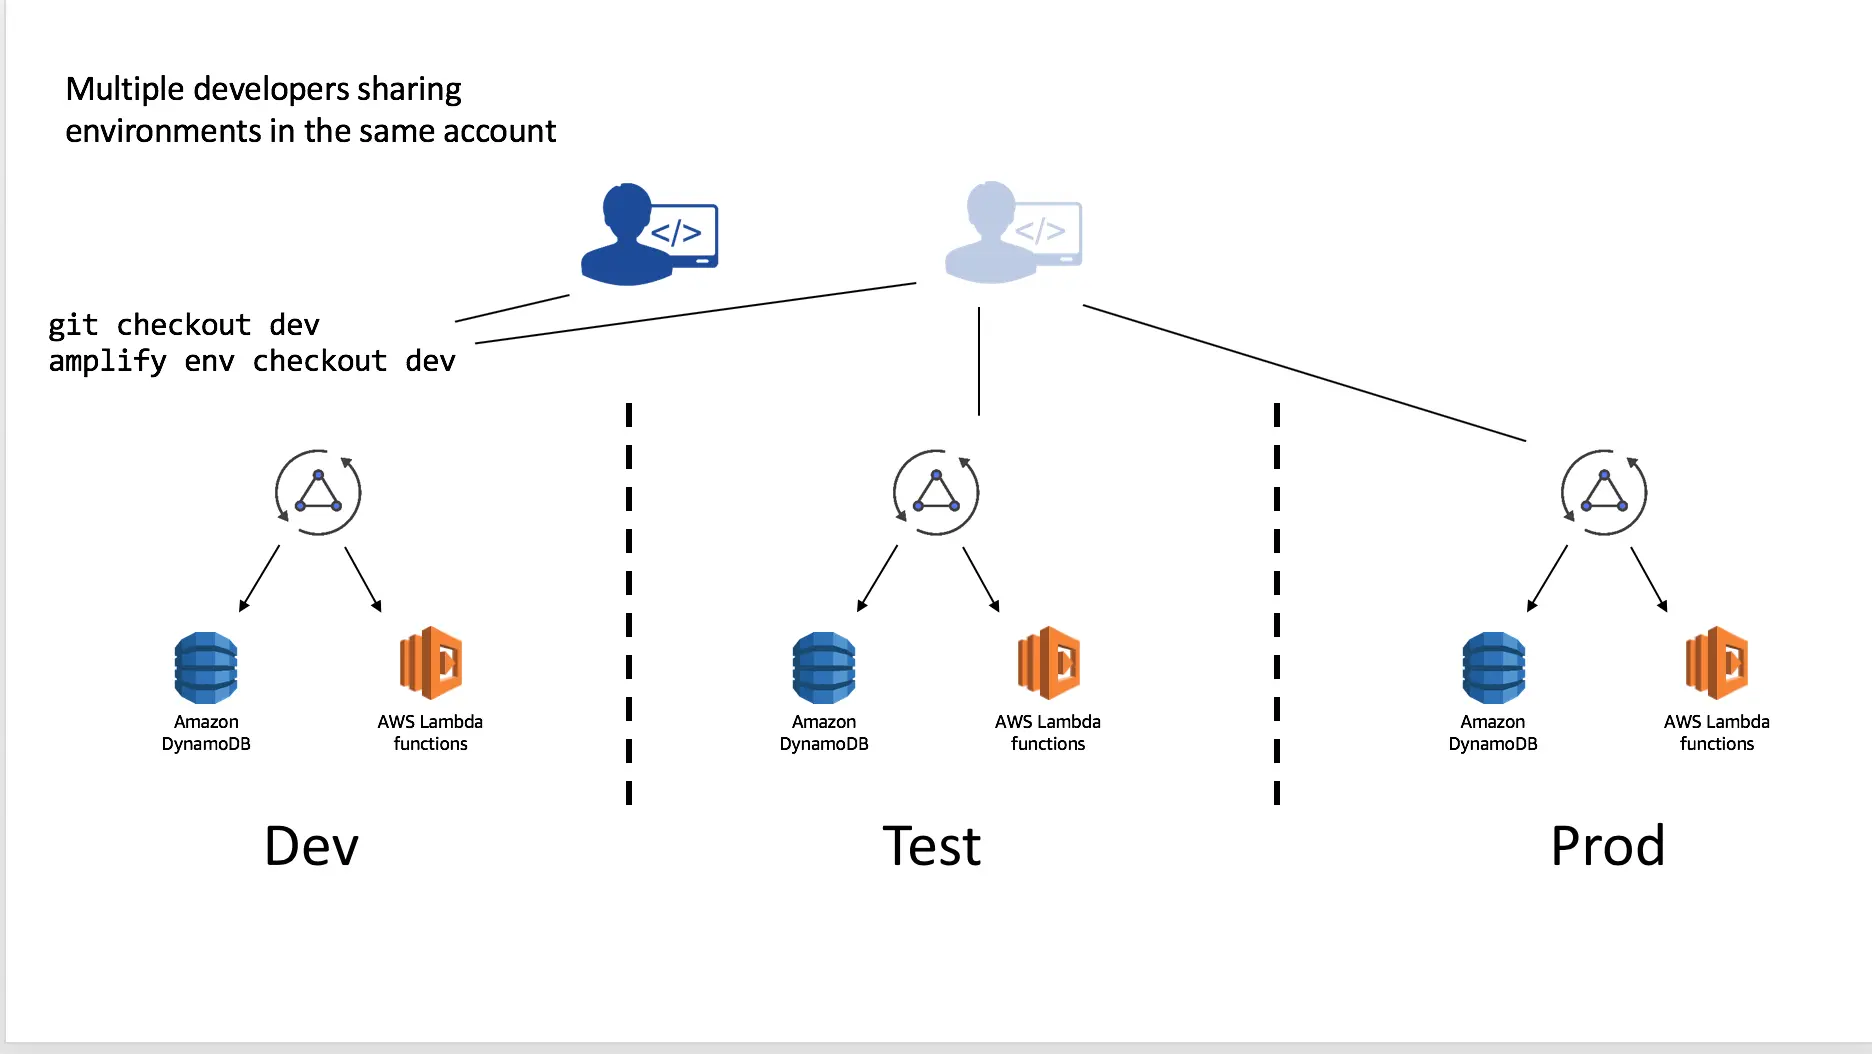
Multiple developers on a team can also share and manipulate the environment as well by using the credentials in the account. For instance suppose they wanted to test a change to the API without impacting the Test or Prod deployments. This will allow them to test the configured resources and, if they have been granted appropriate CloudFormation permissions, they can push resources as well to the backend with amplify push.
You can alternatively, have developers setup their own isolated replica of these environments in a different AWS account. To do this simply:
- Clone the existing project
- Run
amplify env addand set up a new environment (e.g. "mydev") with that developer's account and AWS profile - Deploy with
amplify push
This workflow can be used to share complete Amplify projects with people outside of your organization as well by committing the project into a Git repository. If you are doing this remove (or add to the .gitignore file) the team-provider-info.json which is located in the amplify directory. You can learn more about this file here.
Continuous deployment and Hosting
The Amplify CLI supports basic web application hosting with Amazon S3 and CloudFront. You can use the multi-environments feature with the Amplify Console for a fully managed web application hosting and continuous deployment solution. For more information please learn more in the official documentation.
Setting up prod and dev environments
Create a Git repository for your project if you haven't already. It is recommended managing separate Git branches for different environments (try to have the same branch name as your environment name to avoid confusion). From the root of your project, execute the following commands:
$ amplify init? Enter a name for the environment: prod// Provide AWS Profile info// Add amplify categories using `amplify add <category>`$ git init$ git add <all project related files>$ git commit -m "Creation of a prod amplify environment"$ git remote add origin git@github.com:<repo-name>$ git push -u origin prodNote: When you initialize a project using the Amplify CLI, it appends (if a gitignore file exists at the root of the project) or creates one for you (if a gitignore file doesn't exist at the root of your project), with a list of recommended files to check in from the Amplify CLI generated list of files, into your Git repository. Amplify CLI will continue to manage the section of your .gitignore between the #amplify-do-not-edit-begin and #amplify-do-not-edit-end pragmas.
Once you have your 'prod' branch setup in Git, set up a 'dev' environment in your Amplify project (which would be based on your 'prod' environment), and then walk through the following steps to create a corresponding git branch for it.
$ amplify env add? Do you want to use an existing environment? No? Enter a name for the environment dev// Provide AWS Profile infoThis will set up another environment for the project in the cloud. The backend-configs and resources are now cloned from the 'prod' environment. Run amplify push to provision all the AWS resources for your new environment (dev).
Now push the changes to the 'prod' branch (you would just see changes to the team-provider-info.json file -- when running a git status command, which has cumulative stack information for all the project environments which are useful when you want to share the same backend within a team). After this, let's create a new git branch -- 'dev' corresponding to the new environment you just created.
$ git add .$ git commit -m "Creation of a dev amplify environment"$ git push -u origin prod$ git checkout -b dev$ git push -u origin dev