Hosting
Deploy and host your app using either Amplify Console or Amazon CloudFront/S3. The Amplify Console offers fully managed hosting with features such as instant cache invalidation and atomic deploys. For more control with setting up a CDN and hosting buckets, use CloudFront and S3.
Workflow
amplify add hosting
This adds the hosting resources to the backend. Upon completion, the CloudFormation template for the resources is placed in the amplify/backend/hosting directory.amplify configure hosting
This command walks through the steps to configure the different sections of the resources used in hosting, including S3, CloudFront, and publish ignore. See below for more details.amplify publish
Theamplify publishcommand is designed to build and publish both the backend and the frontend of the project. In the current implementation, the frontend publish functionality is only available for a JavaScript project for static web hosting.amplify remove hosting
This removes the hosting resources locally from the backend. On your nextamplify pushthe provisioned hosting resources will get removed from the cloud.
Using AWS Amplify Console
The AWS Amplify Console provides a Git-based workflow for building, deploying, and hosting your Amplify web app — both the frontend and backend — from source control. Once you connect a feature branch, all code commits are automatically deployed to an amplifyapp.com subdomain or your custom domain. Get Started
Following are the concepts you would encounter when adding Amplify console as a hosting option for your Amplify project.
Type of deployments
If you select Amplify Console for hosting your Amplify project in the amplify add hosting flow, there are two stages you can select from as a part of the flow:
- Continuous deployment allows you to publish changes on every code commit by connecting your GitHub, Bitbucket, GitLab, or AWS CodeCommit repositories. Selecting this option would open up your AWS Amplify console where you can connect your Git repository. Once your repository is connected, run
git pushto deploy changes to both your backend and frontend in a single workflow. - Manual deployment allows you to publish your web app to the Amplify Console without connecting a Git provider. If you select this option, you will have to run the
amplify publishcommand every time you would like to see your changes reflected in the cloud.
In order to change deployment types, you need to run amplify remove hosting and then amplify add hosting to choose your new preferred deployment type.
Custom domain, redirects, and more
The amplify configure hosting command for the Amplify Console option, opens up the AWS Amplify Console browser tab for you where you can configure settings such as rewrite/redirect URL's, password protection, custom domain.
These settings do not get replicated or cloned between environments and you'd have to configure them on a per-environment basis.
Note:
Amplify Console automatically handles cache invalidation and there is no additional configurations or commands/command-line parameters required for it.
If you start from the Amplify Console's home page and connect your project's code repository (by clicking Connect app button), the frontend environment is created for your project once the workflow successfully completes. After setting up hosting in the Amplify Console, you cannot run the amplify hosting add command from your local installation of the Amplify CLI. To disable hosting, please visit the Amplify Console and disconnect the branch from the App settings > General page.
If you're hosting a Single Page Web App (SPA) with routing such as react-router, you'll need to add a redirect in the Amplify console.
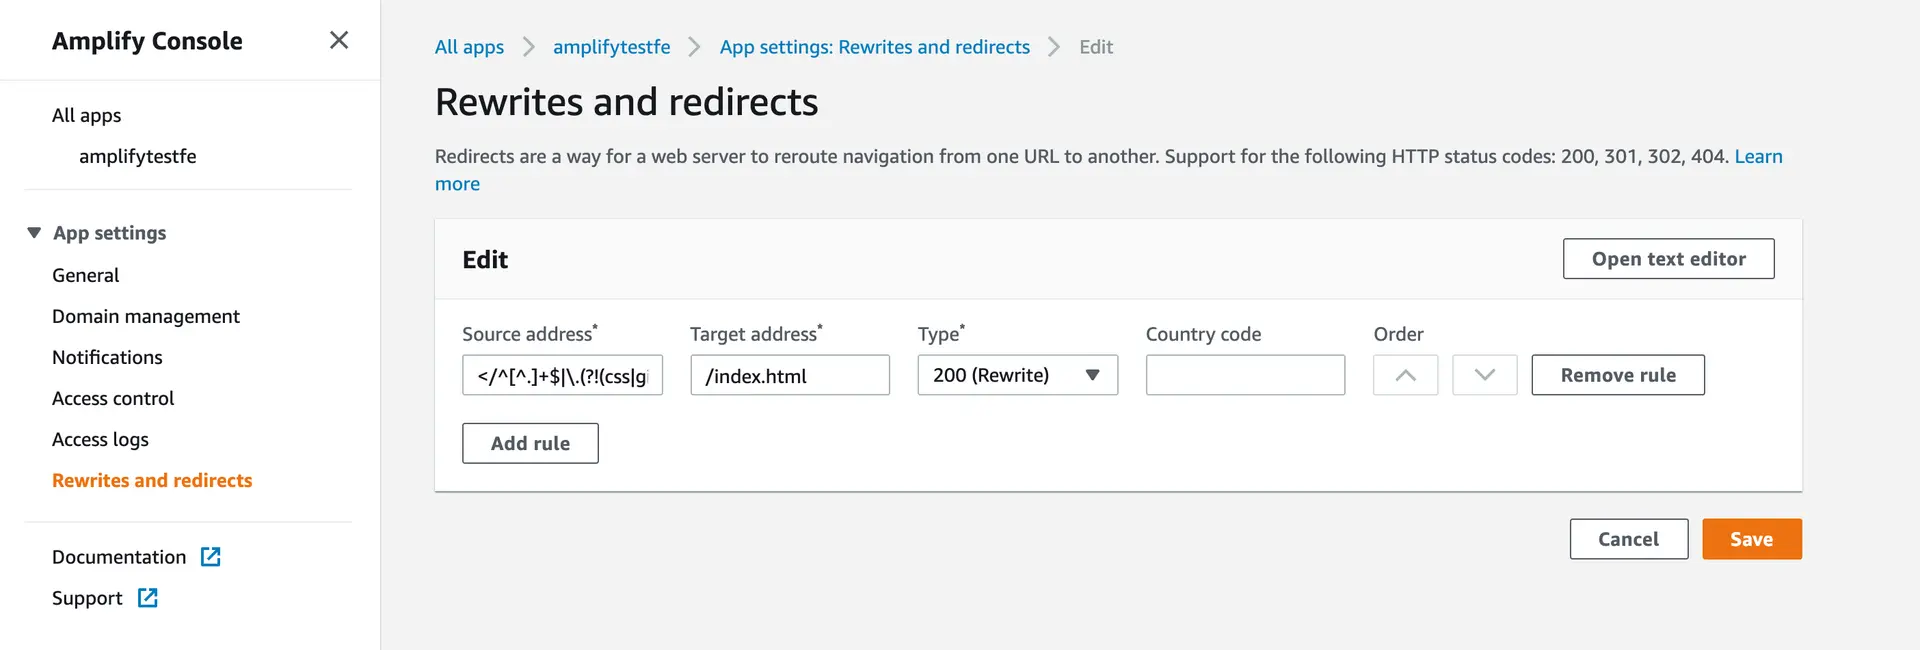
The redirect address should be consistent with the redirect documentation.
Amazon S3 and Amazon Cloudfront
The Amplify CLI provides you the option to manage the hosting of your static website using Amazon S3 and Amazon Cloudfront directly as well. Following are the concepts you would encounter when adding S3 & Cloudfront as a hosting option for your Amplify project.
Stages
It can take time to provision a CloudFront Distribution across the global CDN footprint, in some cases 15 minutes or more. Amazon CloudFront service can also be added or removed in your Amplify project later on top of your Amazon S3 bucket by using the amplify hosting configure command. Note that if the hosting S3 bucket is newly created in regions other than us-east-1, you might get the HTTP 307 Temporary Redirect error in the beginning when you access your published application through CloudFront. This is because CloudFront forwards requests to the default S3 endpoint (s3.amazonaws.com), which is in the us-east-1 region, and it can take up to 24 hours for the new hosting bucket name to propagate globally.
For more information of the Amazon S3 and Amazon CloudFront, check their docs: S3 static web hosting CloudFront DEV Guide
Cache Invalidation
If you select Amazon S3 & Amazon Cloudfront for hosting your Amplify project in the amplify add hosting flow, the frontend build artifacts will be uploaded to the S3 hosting bucket, and then if Amazon CloudFront is enabled along with it, the amplify publish command executed with the --invalidateCloudFront or -c flag will send an invalidation request to the Amazon CloudFront service to invalidate its cache.
Advanced Configurations
The amplify configure hosting command walks through the steps to configure the different sections of the resources used when hosting through Amazon S3 & Amazon Cloudfront. Following are the available configurable options:
Website
Configures the S3 bucket for static web hosting. You can set the index doc and error doc references by configuring this option. Both are set to beindex.htmlby default.CloudFront
Configures the CloudFront content delivery network (CDN). You can configure TTLs (Time To Live) for the default cache behavior, and configure custom error responses.Publish
Configures the publish ignore patterns (similar to a .gitignore file in your git based project) for the publish command. The publish command will ignore these set of directories and files in the distribution folder that have names matching the patterns.