Reuse code and assets using layers
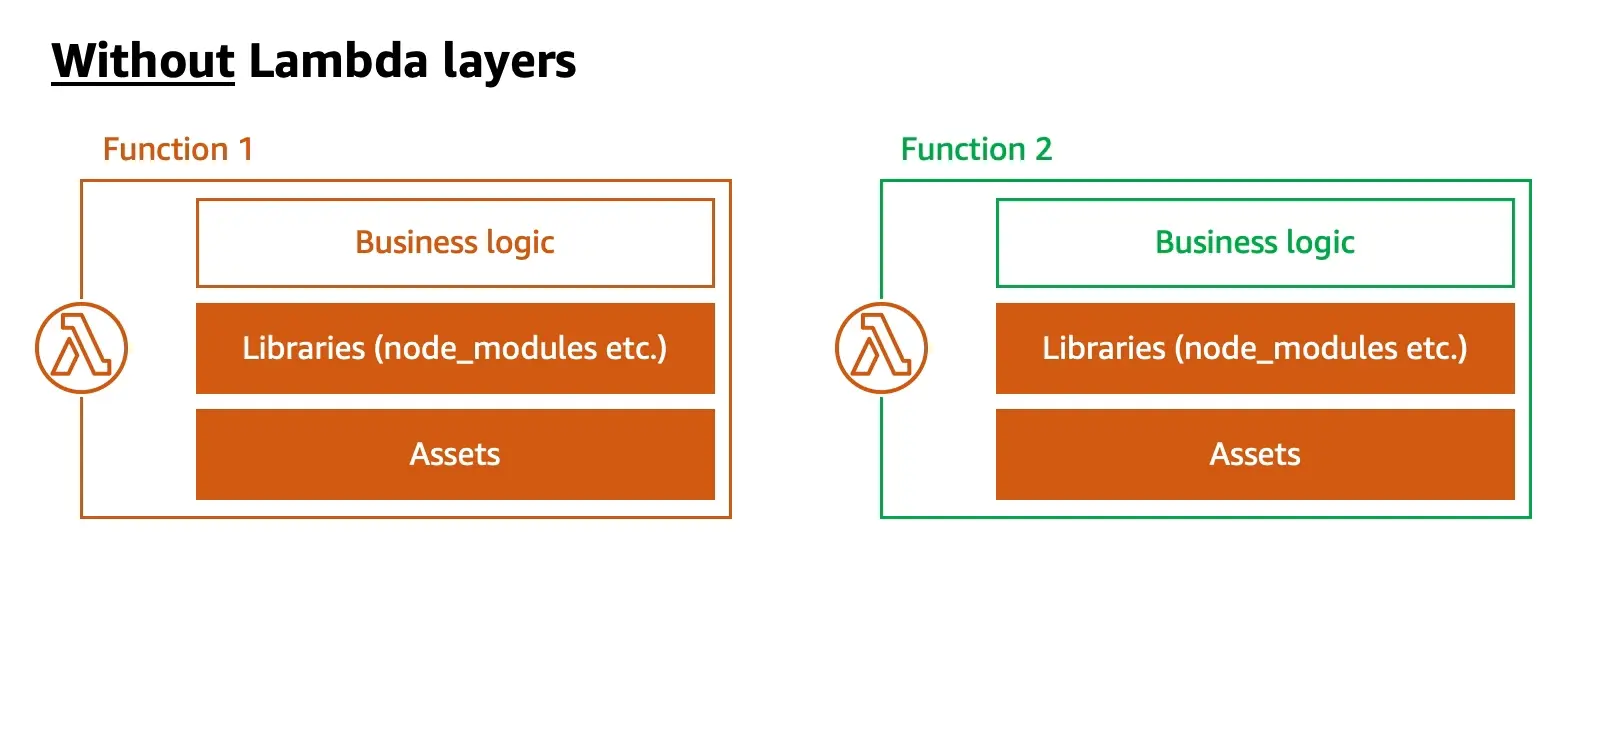
Lambda layers allow you to pull common code & assets for your Lambda function into a centralized location. With Lambda layers you can:
- Re-use your code & assets: Your Lambda functions can leverage these layers to reuse shared code & assets across functions
- Speed up function deployments: Iterating on your Lambda function will be significantly faster because it can be independently updated from the layer which usually contains the bulk of large static content
Known limitation: Functions using a layer can't be mocked locally using
amplify mock. We recommend you to create a dev environment and test the functions inside the AWS Lambda console.
The general workflow breaks down into the following steps:
- Create a Lambda layer
- Add shared code & assets to the layer
- Add the Lambda layer to a function
- Deploy the layer & function
Create a Lambda Layer
To create a layer, run the following command within your Amplify project:
amplify add functionSelect Lambda layer as the capability to add
? Select which capability you want to add:> Lambda layer (shared code & resource used across functions)? Provide a name for your Lambda layer: (layer-name)? Choose the runtime that you want to use: (Use arrow keys)❯ NodeJS PythonNext, you'll be guided through a workflow to provide a layer name, and select a supported runtime. Currently Amplify CLI provides NodeJS or Python runtime support for layers.
? The current AWS account will always have access to this layer. Optionally, configure who else can access this layer. (Hit <Enter> to skip)◯ Specific AWS accounts◯ Specific AWS organization◯ Public (everyone on AWS can use this layer)After that, you'll be asked to configure your layer's permission.
The current AWS account will always have access to this layer. In addition, the customer can configure access for:
- Specific AWS accounts: provide a comma-separated list of AWS Account IDs to provide access to them.
- Specific AWS organizations: provide a comma-separated list of AWS Organization IDs to provide access to them. AWS Organization IDs start with
o-. - Public: make this layer available for everyone AWS. Anyone in AWS can reference this layer using its ARN.
Next steps:Move your libraries to the following folder:[NodeJS]: amplify/backend/function/<lambda-layer-name>/lib/nodejs
Include any files you want to share across runtimes in this folder:amplify/backend/function/<lambda-layer-name>/opt
"amplify function update <function-name>" - configure a function with this Lambda layer"amplify push" - builds all of your local backend resources and provisions them in the cloud
Your Lambda layer is ready to use after the permissions are set up.
Add shared code & assets
Now that your layer is set up, you'll see a new folder with the layer-name added to amplify/backend/function/. The respective runtime's folder structure is autogenerated.
Add shared code
A nodejs folder is auto-generated for you. In there you'll find an empty package.json file and a node_modules folder. If you want to offload other node_modules you can either:
cdinto thenodejsfolder and add the dependencies into thepackage.jsonfile, or- move all your existing function's
node_modulescontent into the layer'snode_modulesfolder
Any dependency listed within the layer's package.json file will be installed and packaged during amplify push.
Any node module that is in the layer's node_modules folder can be accessed from the function as if the node module is in the function's node_modules folder.
In order to take advantage of Lambda layer's for your NodeJS function, you don't even need to update your function's code!
A python folder is auto-generated for you. In there you'll find an empty Pipfile file. Any packages listed within the layer's Pipfile file will be installed and packaged during amplify push. You can import these packages from within your Python function just like any other package within your Python function.
Add shared assets
Any assets like large images or other files that you want to share across various functions can be placed in the amplify/backend/function/<layer-name>/opt/ folder. Your function's code can import any assets by looking for files in the /opt/ path.
Lambda layer versions
Every time amplify push or amplify update function is run, Amplify CLI checks if a layer's content has changed and automatically creates a new layer version. Layer versions are immutable and functions always use a specific layer version.
In order to speed up deployments when vast amount of node_modules exist, Amplify CLI scans only for changes within each module's package.json file. If you don't see Amplify CLI detect your latest changes, verify that at least of your node module's package.json content has changed.
Add a layer to a function
You can either create a new function and add Lambda layers by running amplify add function or add layers to an existing function using amplify update function. Select Lambda function when prompted and you'll be presented the following question during the guided flow:
...? Do you want to enable Lambda layers for this function? Yes? Provide existing layers or select layers in this project to access from this function (pick up to 5): ◯ Provide existing Lambda layer ARNs❯◉ myamplifylayer1 ◯ myamplifylayer2You can either add an existing layer in AWS by referencing its ARN or select a layer from your Amplify project that's listed below.
? Select a version for myamplifylayer1:❯ Always choose latest version 2: Updated layer version 2021-06-08T05:33:42.651Z 1: Updated layer version 2021-06-08T05:30:43.101ZWhen adding a layer from your Amplify project, you'll also be able to select a specific layer version or always choose the latest layer version. The largest layer version number represents the most recent changes.
? Modify the layer order:(Layers with conflicting files will overwrite contents of layers earlier in the list):- layer2- layer3- layer6- <ARN1>- <ARN2>Given that layers can have overlapping contents, the order of the layer matters. You can adjust the layer's order if needed in the next step.
Now, you've successfully added a layer to your function.
Deploy Lambda layers & functions with Lambda layers
Once you're ready with your changes in your layer and functions, you can deploy them by running amplify push.
If a layer’s content has been updated and it has permissions associated, Amplify CLI will prompt you whether you want to carry the permissions forward to a newer version.
Content changes in Lambda layers detected.Suggested configuration for new layer versions:
myamplifylayer1  - Description: Updated layer version  2021-06-08T05:33:42.651Z
? Accept the suggested layer version configurations? (Y/n)
During amplify push, you get to modify the layer version description. By default, Amplify CLI will populate the description as Updated layer version <timestamp>.
Update layer content
Any file changes within a layer's folder are automatically tracked by Amplify CLI. If there are changes available, the Amplify CLI will create a new layer version with the changes.
Update layer settings
You can update layer's permissions by running amplify update function and selecting Lambda layer.
Next, you'll be prompted to select the layer for which you want to update the settings for.
Note: Update Layer Permissions from Public to Specific
- To update a lambda layer from Public access to Specific (Account/Organization) access, please remember to remove Public access by un-selecting the option in the 'amplify update' CLI flow before selecting a specific AWS account/organization.
- If you have already selected 'Public' access, just adding additional 'specific' AWS accounts/organizations will not have any effect on the Lambda Layer configuration. It will not automatically remove Public access.
Remove a layer
To remove a Lambda layer, run the amplify function remove command and select Lambda layers. Next, you'll be prompted to select which layer to remove. You can delete specific layer versions or all of them.
Warning: When you delete a layer, you can no longer configure functions to use it. However, any function that already uses the layer continues to have access to it.
? Choose the resource you would want to remove <lambda-layer-name> (layer)When you delete a layer version, you can no longer configure functions to use it.However, any function that already uses the layer version continues to have access to it.? Choose the Layer versions you want to remove.❯◯ 1: Updated layer version 2021-06-08T05:30:43.101Z ◯ 2: Updated layer version 2021-06-08T05:33:42.651Z? Are you sure you want to delete the resource? This action deletes all files related to this resource from the backend directory. (Y/n)