Set up Amplify Push Notifications
The Push Notifications category allows you to integrate push notifications in your app with Amazon Pinpoint targeting, campaign, and journey management support. You can segment your users, trigger push notifications to your app, and record metrics in Pinpoint when users receive or open notifications. Amazon Pinpoint helps you to create messaging campaigns and journeys targeted to specific user segments or demographics and collect interaction metrics with push notifications.
Prerequisites
You should have completed the CLI and project setup steps.
An application targeting at least iOS 13.0, using Xcode 14.1 or later.
Push Notifications are delivered via the Apple Push Notification service (APNs). In order to use APNs, you need to setup credentials (keys or certificates) and export your credentials to a p12 file. See Setting up push notification services for more information.
Set Entitlements
Using Amplify Push Notifications with APNs requires the following capabilities:
- Push Notifications
- Background Processing -> Remote Notifications
To add these capabilities:
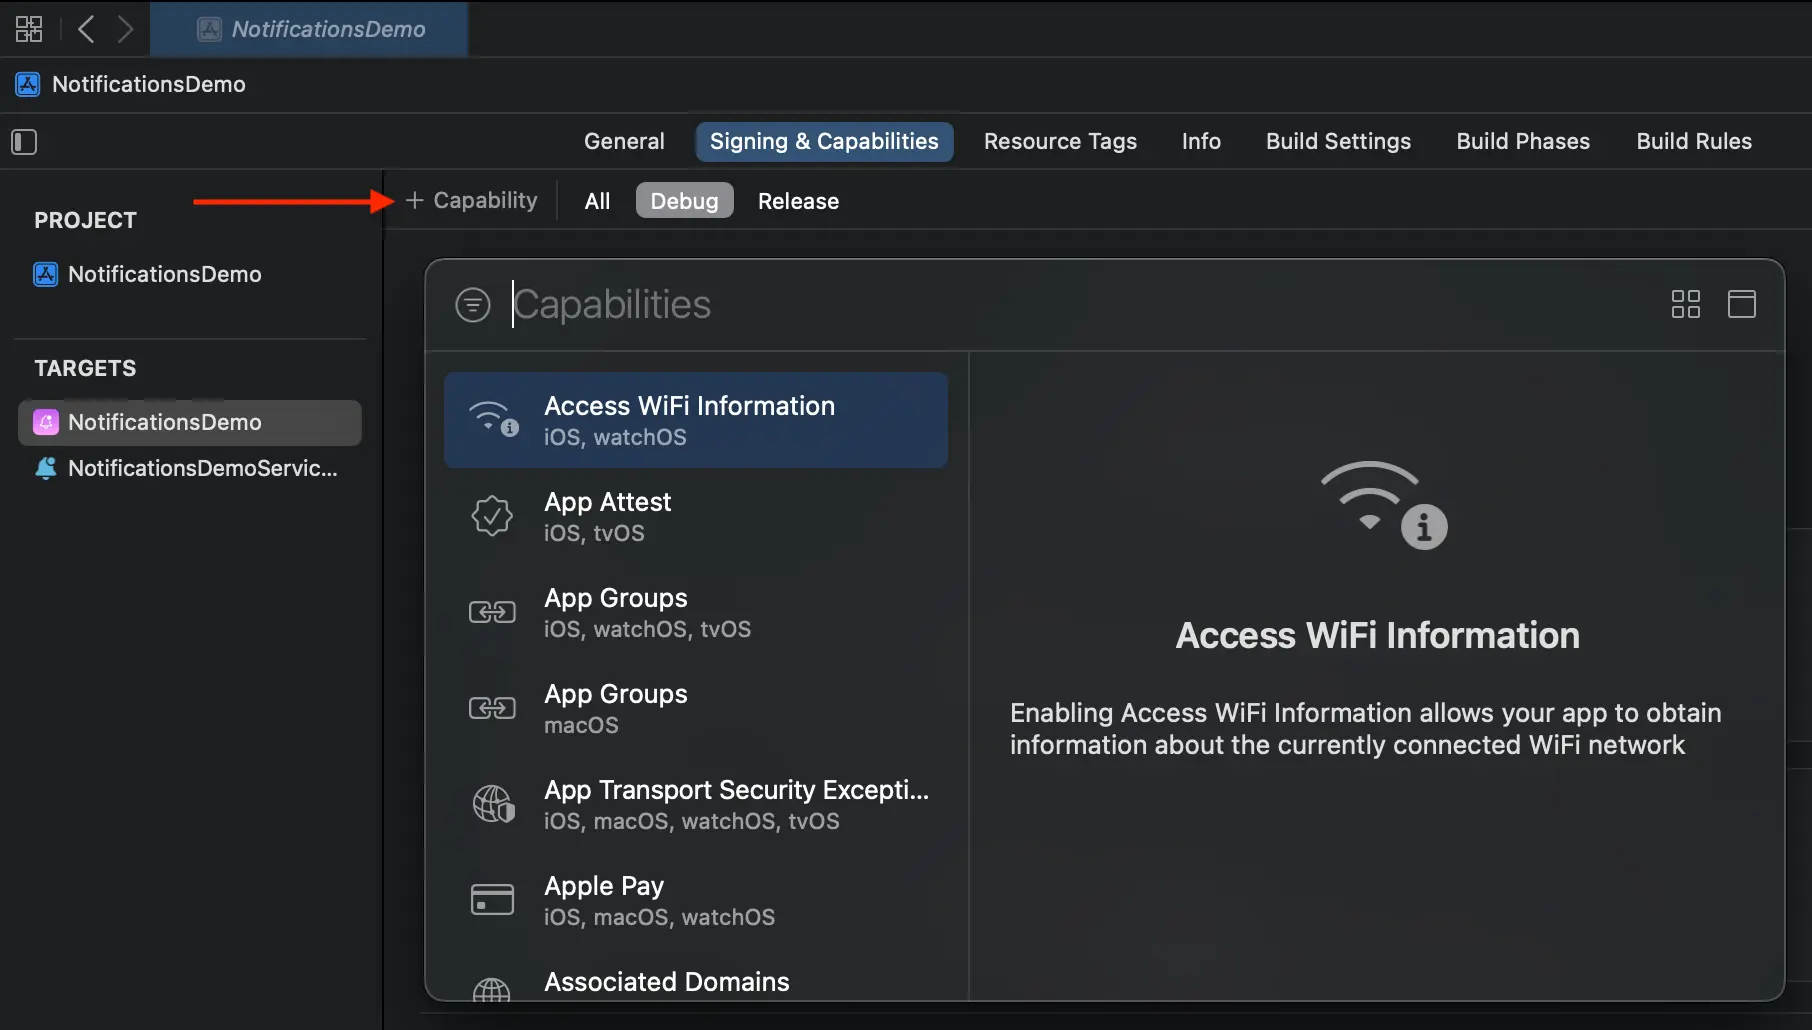
- Open your Xcode project, go to project settings, select your main application target, select the Signing and Capabilities tab, and click + Capability in the upper left corner of the editor pane to bring up the Capabilities dialog.
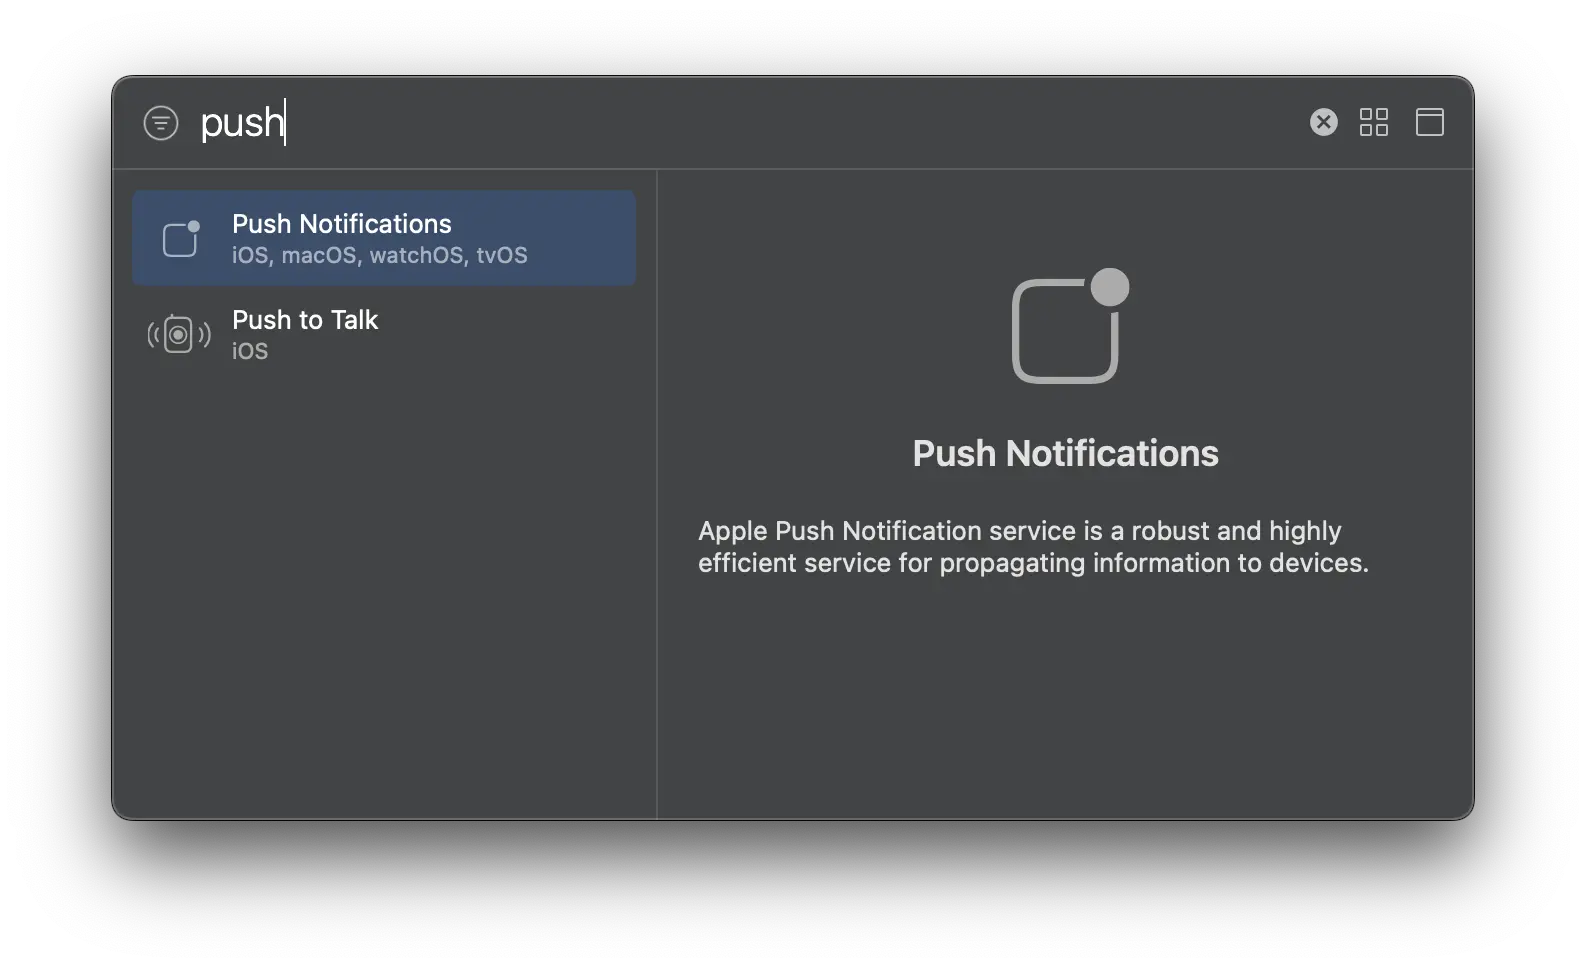
- Type push in the filter box and double-click Push Notifications to add the capability.
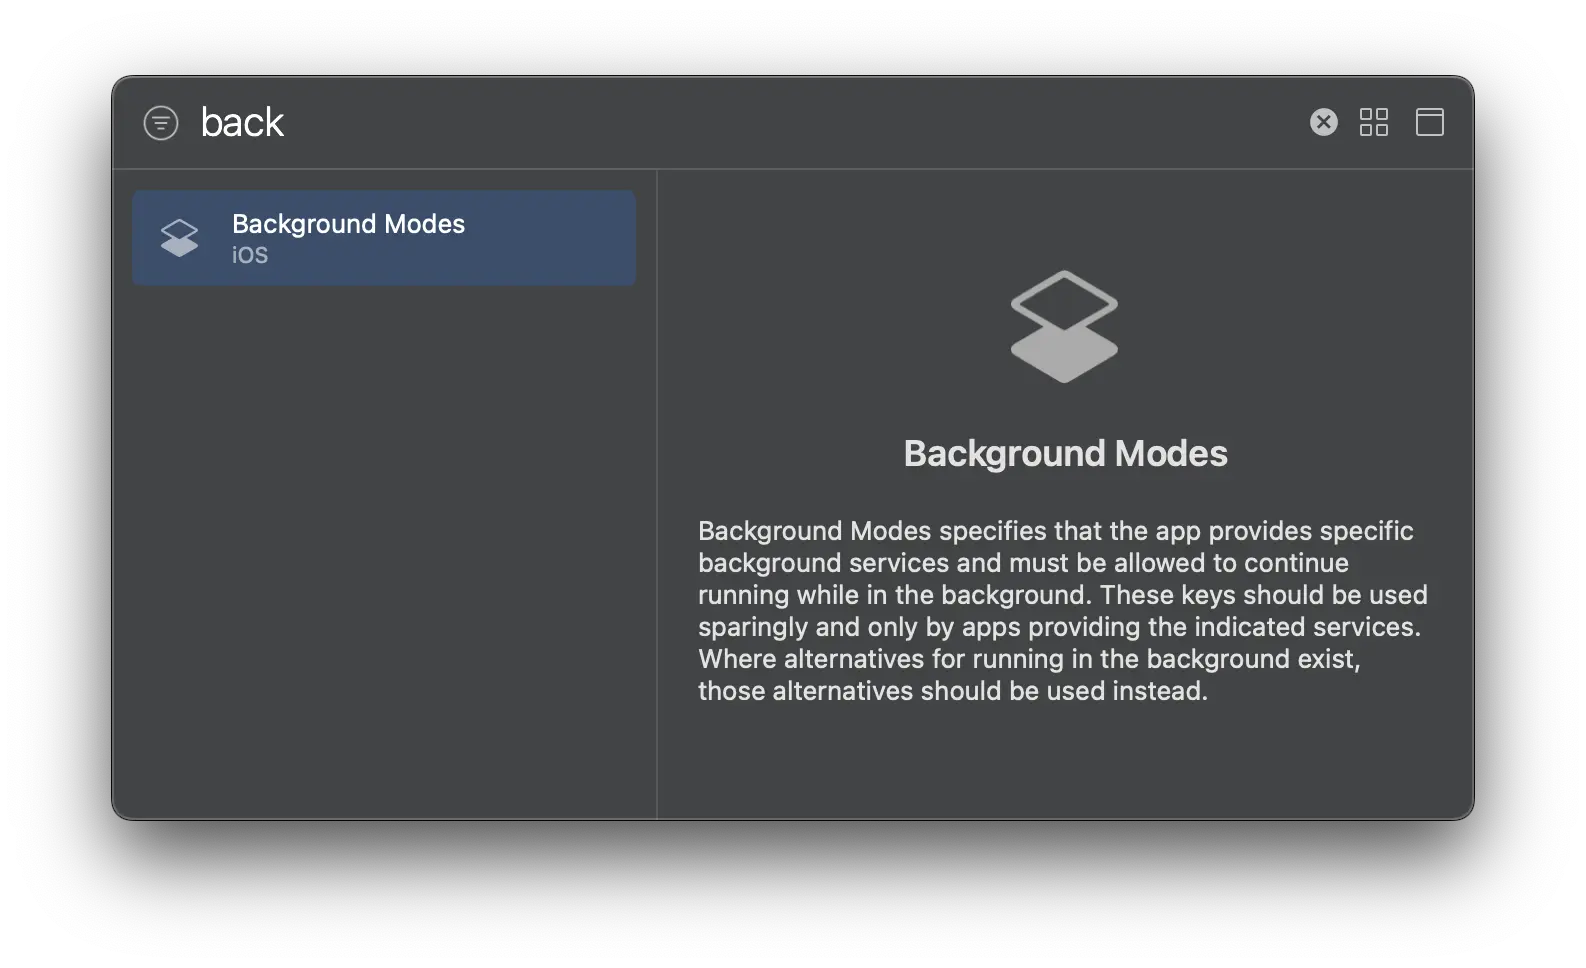
- Repeat step 1 to open the Capabilities dialog and then type back in the filter box and double-click Background Modes to add the capability.
-
Select Change All when prompted.
-
Under Background Modes, select Remote Notifications

- Select Change All again when prompted.
An application targeting at least Android SDK API level 24.
Push Notifications are delivered via Firebase Cloud Messaging (FCM). In order to use FCM, you need to register your app on the Firebase console. See Setting up push notification services for more information.
Applying the Google services plugin
The Firebase documentation directs you to add the Google services plugin to your app build.gradle using the Gradle plugins DSL. However, we recommend you continue to use the Legacy Plugin Application instead:
apply plugin: 'com.google.gms.google-services'If you prefer using the plugins DSL, you should add the plugins block to the very top of the file or you may experience issues when building your app for Android.
Set up backend resources
To use Push Notifications with Amplify, you have the option to either have the Amplify CLI setup resources for you, or you can use an existing Amazon Pinpoint resource in your AWS account.
Prerequisite: Install and configure the Amplify CLI
To start provisioning push notification resources in the backend, go to your project directory and execute the command:
amplify add notificationsChoose APNS when promoted:
? Choose the push notification channel to enable.❯ APNS | Apple Push Notifications FCM | » Firebase Push Notifications In-App Messaging Email SMSFollow the setup prompts:
? Provide your pinpoint resource name: › [pinpoint_resource_name]? Apps need authorization to send analytics events. Do you want to allow guests and unauthenticated users to send analytics events? (we recommend you allow this when getting started) (Y/n)Choose Certificate when promoted:
? Choose authentication method used for APNs> CertificateKeyThe CLI will prompt for your p12 certificate path, enter a path relative to the location where you ran the command.
Upon completion, amplifyconfiguration.json will be updated to reference the newly provisioned backend push notifications resources. Note that this file should already be generated for you by the Amplify CLI as a part of your project if you followed the project setup walkthrough.
Choose FCM when promoted:
? Choose the push notification channel to enable. APNS | Apple Push Notifications❯ FCM | » Firebase Push Notifications In-App Messaging Email SMS
? Provide your pinpoint resource name: `yourPinpointResourceName`
? Apps need authorization to send analytics events. Do you want to allow guests and unauthenticated users to send analytics events? (we recommend you allow this when getting started) (Y/n) 'Y'The CLI will prompt for your service account key (json file) path created from steps in setting up push notification services. Enter the absolute path, or a path relative to the location where you ran the command.
Upon completion, amplifyconfiguration.json will be updated to reference the newly provisioned backend push notifications resources. Note that this file should already be generated for you by the Amplify CLI as a part of your project if you followed the project setup walkthrough.
Existing Amazon Pinpoint resources can be used with Amplify Push Notifications by configuring it with Application ID and Region.
Amplify.configure({ Notifications: { Push: { AWSPinpoint: { appId: '<app-id>', region: '<region>' } } }});- appId: Amazon Pinpoint application ID
- region: AWS Region where the resources are provisioned (e.g.
us-east-1)
Install Amplify Libraries
In your project directory, you should first install the necessary dependencies for using Amplify Push Notifications.
Instructions for React Native version 0.72 and below
@aws-amplify/react-native requires a minimum iOS deployment target of 13.0 if you are using react-native version less than or equal to 0.72. Open the Podfile located in the ios directory and update the target value:
- platform :ios, min_ios_version_supported + platform :ios, 13.0npm install aws-amplify @aws-amplify/react-native @aws-amplify/rtn-push-notification @react-native-async-storage/async-storage react-native-get-random-valuesIntegrate native module
Since push notifications require interaction with the native platform, there are some additional steps required to integrate your React Native app with the Amplify Push Notifications native module.
Link the module
You should have already installed the native module in an earlier step, now you need to link it. In your React Native app's root directory run the following command.
npx pod-installUpdate your Application Delegate
Depending on the React Native version you’re using, you need to use Objective-C or Swift code snippets to update your Application.
Locate and open your AppDelegate.swift file in your text editor. You should find it in your React Native project under /ios/<your-project-name>.
At the top of your AppDelegate, import Amplify Push Notifications:
import ReactAppDependencyProviderimport AmplifyRTNPushNotification // <- add this line
...
In the body of your AppDelegate, add the following two methods:
override func application(_ application: UIApplication, didRegisterForRemoteNotificationsWithDeviceToken deviceToken: Data) {  AmplifyPushNotification.didRegisterForRemoteNotifications(withDeviceToken: deviceToken)}
override func application(_ application: UIApplication, didReceiveRemoteNotification userInfo: [AnyHashable : Any], fetchCompletionHandler completionHandler: @escaping (UIBackgroundFetchResult) -> Void) {  AmplifyPushNotification.didReceiveRemoteNotification(userInfo, withCompletionHandler: completionHandler)}
Locate and open your AppDelegate.m or AppDelegate.mm file in your text editor. You should find it in your React Native project under /ios/<your-project-name>
At the top of your AppDelegate, import Amplify Push Notifications:
#import "AppDelegate.h"#import "AmplifyPushNotification.h"
...
In the body of your AppDelegate, add the following two methods:
- (void)application:(UIApplication *)application didRegisterForRemoteNotificationsWithDeviceToken:(NSData *)deviceToken {  [AmplifyPushNotification didRegisterForRemoteNotificationsWithDeviceToken:deviceToken];}
- (void)application:(UIApplication *)application didReceiveRemoteNotification:(NSDictionary *)userInfo fetchCompletionHandler:(void (^)(UIBackgroundFetchResult result))completionHandler {  [AmplifyPushNotification didReceiveRemoteNotification:userInfo withCompletionHandler:completionHandler];}
Initialize Amplify Push Notifications
To initialize Amplify Push Notifications, you will first need to configure Amplify.
Import and load the configuration file in your app.
// Example index.js// ...import { Amplify } from 'aws-amplify';import amplifyconfig from './src/amplifyconfiguration.json';
Amplify.configure(amplifyconfig);// ...
Next, initialize Amplify Push Notifications. It is recommended to do this in your app's root entry point after configuring Amplify if your app requires push notification handling even while in a terminated state.
// Example index.js// ...import { initializePushNotifications } from 'aws-amplify/push-notifications';
initializePushNotifications();// ...
Your resulting entry file should look something like the following:
import { AppRegistry } from 'react-native';import App from './App';import { name as appName } from './app.json';
import { Amplify } from 'aws-amplify';import { initializePushNotifications } from 'aws-amplify/push-notifications';import amplifyconfig from './src/amplifyconfiguration.json';
Amplify.configure(amplifyconfig);initializePushNotifications();
AppRegistry.registerComponent(appName, () => App);