Bind UI to data
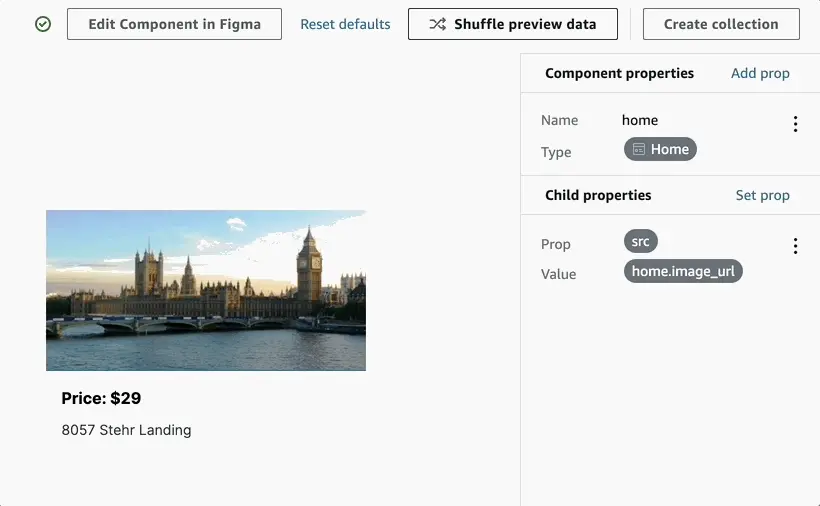
Studio also allows you to bind UI elements to real backend data. Add properties to components, then reference the properties in your child UI elements. To get started, first, login to Amplify Studio, then navigate into a UI component by choosing the Configure button in the UI Library. For this example, you'll use the CardB component.
Add a component property
To add a property, choose Add prop and set a name for your property. For this example, create a new property called home with the type Home.
Set child property values
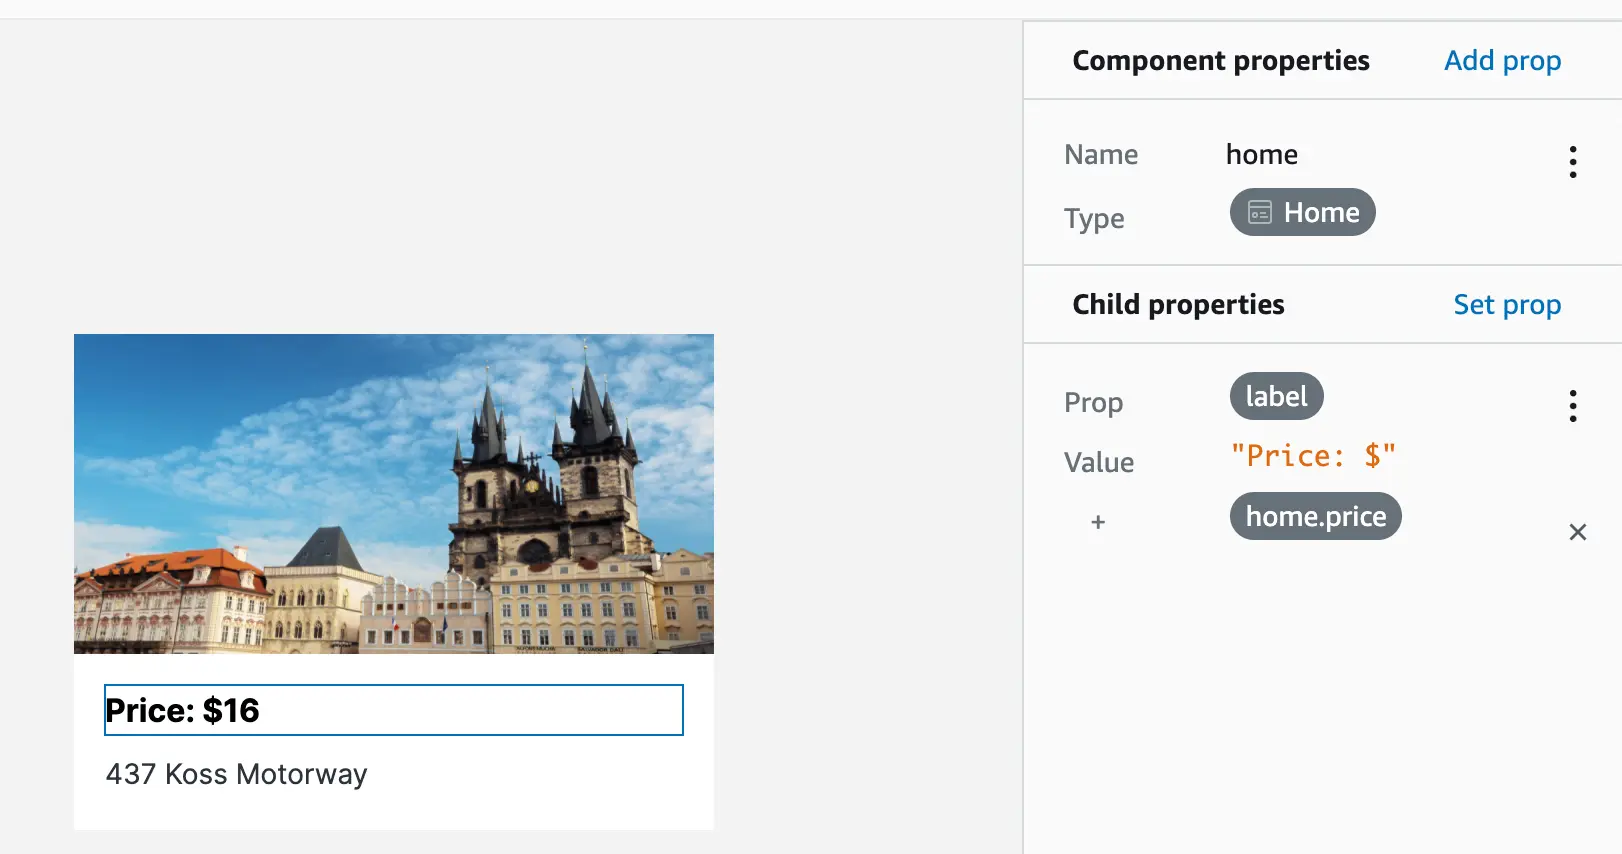
Select a child element such as the $99 USD Text element and choose Set prop. Here, you are able to set all available properties for that child element. Configure the label for the text element and set the value to Price: $ and then select Command + Enter (or Ctrl + Enter) on your keyboard to concatenate another value such as home.price.
Bind the address text element's label to home.address and the image's src to home.image_url.
You are also able to set traditional HTML properties through Studio. For example, hide the text element containing "4bds 3 ba 2,530 sqft - Active" by setting the display to none.
Shuffle preview data
To see how your component scales with different data, choose the Shuffle preview data button. This selects a random record in your database and applies it as a property to preview the component.