Build a generative AI sandbox with Amplify and Amazon Bedrock
Overview
AWS Amplify helps you build and deploy generative AI applications by providing you with the tools needed to build a fullstack application that integrates with Amazon Bedrock. Amazon Bedrock is a fully managed service that provides access to Foundation Models (FMs) so you can build generative AI applications easily and not worry about managing AI infrastructure. Integrating generative AI capabilities into your application or building your own generative AI application requires more than just making calls to a foundation model. To build a fullstack generative AI application, in addition to Amazon Bedrock, you will need:
- Authentication
- API layer
- Hosting
- Accessible UI
With Amplify and Amazon Bedrock, you can create a generative AI application easily in under an hour. This guide will walk you through the steps of building a generative AI sandbox.
Project setup
For this we will use React and Next.js to take advantage of the full managed hosting of Next.js server-side rendering (SSR) capabilities in Amplify Hosting. The first step is to create a new Next.js project using yarn, npm, pnpm, or Bun.
npx create-next-app@14✔ Would you like to use TypeScript with this project? … No / Yes✔ Would you like to use ESLint with this project? … No / Yes✔ Would you like to use Tailwind CSS with this project? … No / Yes✔ Would you like to use `src/` directory with this project? … No / Yes✔ Would you like to use experimental `app/` directory with this project? … No / Yes✔ What import alias would you like configured? … @/*For this project we will use the Next.js Pages router. Feel free to change the settings to your liking. Then go into your newly created Next.js app and add Amplify to your project with the Amplify CLI:
amplify init? Enter a name for the project amplify-gen-aiThe following configuration will be applied:
Project information| Name: amplify-gen-ai| Environment: dev| Default editor: Visual Studio Code| App type: javascript| Javascript framework: react| Source Directory Path: src| Distribution Directory Path: build| Build Command: npm run-script build| Start Command: npm run-script start? Initialize the project with the above configuration? YesAdd authentication
While adding authentication to your app is optional, allowing anyone to use an LLM through your app without authenticating is not recommended in practice. This is because requests to an LLM incur costs based on the amount of text sent to and received from the LLM. Most LLMs, like Amazon Bedrock, also enforce rate limits.
You can add authentication to your application with the Amplify CLI or Amplify Studio. For this, we will use the CLI:
amplify add authThe output from the CLI should look like this:
Using service: Cognito, provided by: awscloudformation
 The current configured provider is Amazon Cognito.
 Do you want to use the default authentication and security configuration? _**Default configuration**_ Warning: you will not be able to edit these selections. How do you want users to be able to sign in? _**Email**_ Do you want to configure advanced settings? _**No, I am done.**_
Then push your Amplify project to the cloud:
amplify pushYou should see:
✔ Successfully pulled backend environment dev from the cloud.
    Current Environment: dev
┌──────────┬──────────────────────┬───────────┬───────────────────┐│ Category │ Resource name        │ Operation │ Provider plugin   │├──────────┼──────────────────────┼───────────┼───────────────────┤│ Auth     │ amplifyGenAi         │ Create    │ awscloudformation │└──────────┴──────────────────────┴───────────┴───────────────────┘
Configure Amplify
Add the frontend packages for Amplify and Amplify UI:
npm i --save @aws-amplify/ui-react aws-amplifyThen add these imports to the top of the src/pages/_app.tsx :
import '@aws-amplify/ui-react/styles.css';import { Amplify } from 'aws-amplify';import awsconfig from '../aws-exports';And then after the imports, add this to configure Amplify:
Amplify.configure({ ...awsconfig, // this lets you run Amplify code on the server-side in Next.js ssr: true});Then wrap the <Component /> in JSX with the Authenticator component from '@aws-amplify/ui-react'. Your file should now look like this:
import '@aws-amplify/ui-react/styles.css';import { Amplify } from 'aws-amplify';import awsconfig from '../aws-exports';import type { AppProps } from 'next/app';import { Authenticator } from '@aws-amplify/ui-react';
Amplify.configure({  ...awsconfig,  // this lets you run Amplify code on the server-side in Next.js  ssr: true});
export default function App({ Component, pageProps }: AppProps) {  return (    <Authenticator>      <Component {...pageProps} />    </Authenticator>  );}
If you start up your local dev server, you should now see this:
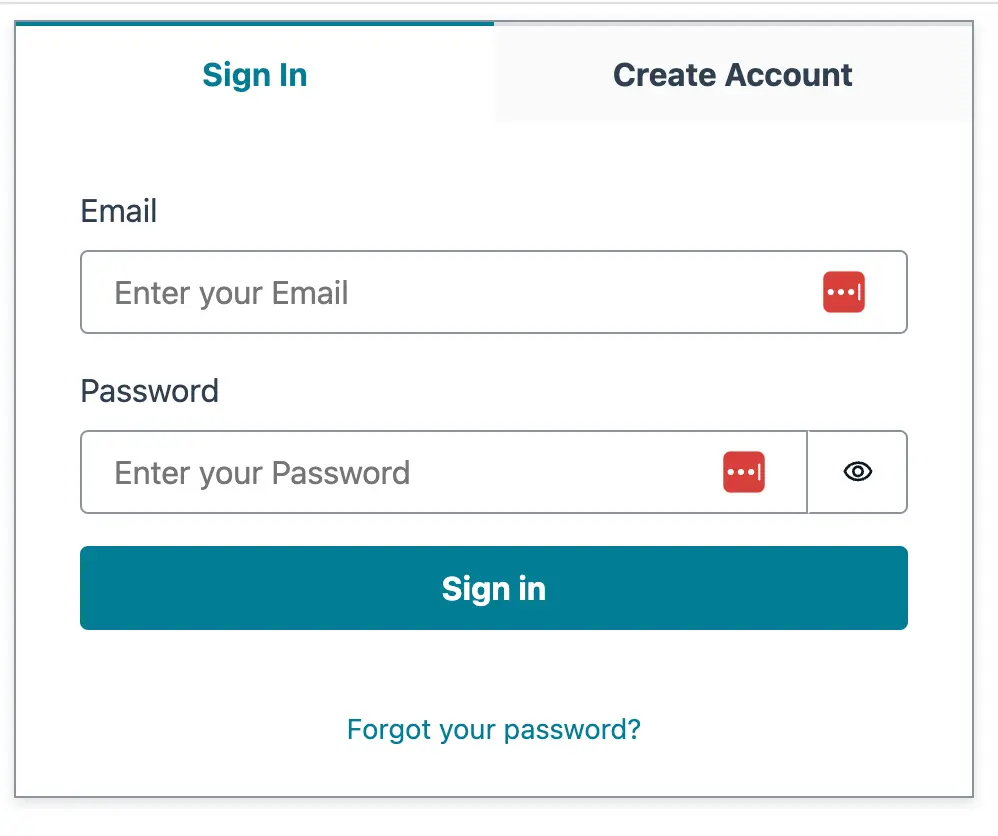
Create an account for yourself for testing. Once you log in, you should see the default Next.js starter homepage.
Add an API layer
Add the Amazon Bedrock SDK to your dependencies:
npm i --save @aws-sdk/client-bedrock-runtimeThe default Next.js template with the Pages router should come with an example API route at src/pages/api/hello.ts. Let’s rename that file to chat.ts. The first thing we will need to do in this file is configure Amplify on the server-side. To do that, you will import Amplify and your Amplify config file that Amplify creates for you.
import { Amplify } from 'aws-amplify';import awsconfig from '@/aws-exports';
Amplify.configure({  ...awsconfig,  ssr: true});
Then, to get the Authentication credentials, import withSSRContext from aws-amplify. Change the default handler function to an async function.
- export default function handler(+ export default async function handler(Then, in the body of the function, create an SSR context:
const SSR = withSSRContext({ req });This will give you access to all the Amplify Library functionality on the server-side, like using the Auth module. To get the current credentials of the user, include the following:
const credentials = await SSR.Auth.currentCredentials();To test that this is working, you can output the credentials to the console and boot up your local server again. Let’s do that to make sure everything is working so far. In src/pages/index.tsx, create a function called callAPI that does a fetch to our API endpoint:
const callAPI = () => { fetch('/api/hello');};Then in the JSX of the page, add a button that calls our callAPI function on click:
<button onClick={callAPI}>Click me</button>If you are logged in and click the button, your authentication credentials should print to the console in your terminal.
fetch('/api/hello', { method: 'POST', body: JSON.stringify({ input: 'Who are you?' })});Open src/pages/api/chat.ts and remove that console.log and initialize the Amazon Bedrock client with your user’s credentials:
const bedrock = new BedrockRuntimeClient({ serviceId: 'bedrock', region: 'us-east-1', credentials});Then you can send the Bedrock client the InvokeModel command. Here is the full chat.ts file with comments for what it is doing.
import {  BedrockRuntimeClient,  InvokeModelCommand} from '@aws-sdk/client-bedrock-runtime';import { Amplify, withSSRContext } from 'aws-amplify';import type { NextApiRequest, NextApiResponse } from 'next';import awsExports from '@/aws-exports';
Amplify.configure({  ...awsExports,  ssr: true});
export default async function handler(  req: NextApiRequest,  res: NextApiResponse) {  const body = JSON.parse(req.body);  const SSR = withSSRContext({ req });  const credentials = await SSR.Auth.currentCredentials();  const bedrock = new BedrockRuntimeClient({    serviceId: 'bedrock',    region: 'us-east-1',    credentials  });
  // Anthropic's Claude model expects a chat-like string  // of 'Human:' and 'Assistant:' responses separated by line breaks.  // You should always end your prompt with 'Assistant:' and Claude  // will respond. There are various prompt engineering techniques  // and frameworks like LangChain you can use here too.  const prompt = `Human:${body.input}\n\nAssistant:`;
  const result = await bedrock.send(    new InvokeModelCommand({      modelId: 'anthropic.claude-v2',      contentType: 'application/json',      accept: '*/*',      body: JSON.stringify({        prompt,        // LLM costs are measured by Tokens, which are roughly equivalent        // to 1 word. This option allows you to set the maximum amount of        // tokens to return        max_tokens_to_sample: 2000,        // Temperature (1-0) is how 'creative' the LLM should be in its response        // 1: deterministic, prone to repeating        // 0: creative, prone to hallucinations        temperature: 1,        top_k: 250,        top_p: 0.99,        // This tells the model when to stop its response. LLMs        // generally have a chat-like string of Human and Assistant message        // This says stop when the Assistant (Claude) is done and expects        // the human to respond        stop_sequences: ['\n\nHuman:'],        anthropic_version: 'bedrock-2023-05-31'      })    })  );  // The response is a Uint8Array of a stringified JSON blob  // so you need to first decode the Uint8Array to a string  // then parse the string.  res.status(200).json(JSON.parse(new TextDecoder().decode(result.body)));}
Then update the callAPI function in your frontend to accept a JSON response:
fetch('/api/hello', { method: 'POST', body: JSON.stringify({ input: 'Who are you?' })}) .then((res) => res.json()) .then((data) => { console.log(data); });But if you click that button, you will see this in your terminal:
⨯ AccessDeniedException: User: arn:aws:sts::553879240338:assumed-role/amplify-amplifyGenAi-dev-205330-authRole/CognitoIdentityCredentials is not authorized to perform: bedrock:InvokeModel on resource:When you create an Authentication backend with Amplify, it sets up Amazon Cognito and creates two IAM roles, one for unauthenticated users and another for authenticated users. These IAM roles let AWS know what resources your authenticated and guest users can access. We didn’t give our authenticated users access to Amazon Bedrock yet. Let’s do that now.
You can update the IAM policies Amplify creates with an override. Run this command:
amplify override projectEdit the override.ts file it creates and add a policy to allow the authenticated role access to Amazon Bedrock’s InvokeModel command like this:
import {  AmplifyProjectInfo,  AmplifyRootStackTemplate} from '@aws-amplify/cli-extensibility-helper';
export function override(  resources: AmplifyRootStackTemplate,  amplifyProjectInfo: AmplifyProjectInfo) {  const authRole = resources.authRole;
  const basePolicies = Array.isArray(authRole.policies)    ? authRole.policies    : [authRole.policies];
  authRole.policies = [    ...basePolicies,    {      policyName: '',      policyDocument: {        Version: '2012-10-17',        Statement: [          {            Effect: 'Allow',            Action: 'bedrock:InvokeModel',            Resource:              'arn:aws:bedrock:us-east-1::foundation-model/anthropic.claude-v2'          }        ]      }    }  ];}
Run amplify push to sync your changes with the cloud. Now restart your local Next.js server and try to call Amazon Bedrock again through your API route.

Hosting
The last thing to do is to add hosting to our Next.js application. Amplify has you covered there too. Create a new Git repository in GitHub, Bitbucket, or GitLab. Commit your code and push it to the git provider of your choice. Let’s use GitHub as an example. If you have the GitHub CLI installed, you can run:
gh repo create? What would you like to do? Push an existing local repository to GitHub? Path to local repository .? Repository name amplify-gen-ai? Repository owner danny? Description? Visibility Private✓ Created repository danny/amplify-gen-ai on GitHub? Add a remote? Yes? What should the new remote be called? origin✓ Added remote git@github.com:danny/amplify-gen-ai.git? Would you like to push commits from the current branch to "origin"? YesNow we can add Amplify Hosting from the Amplify CLI:
amplify add hosting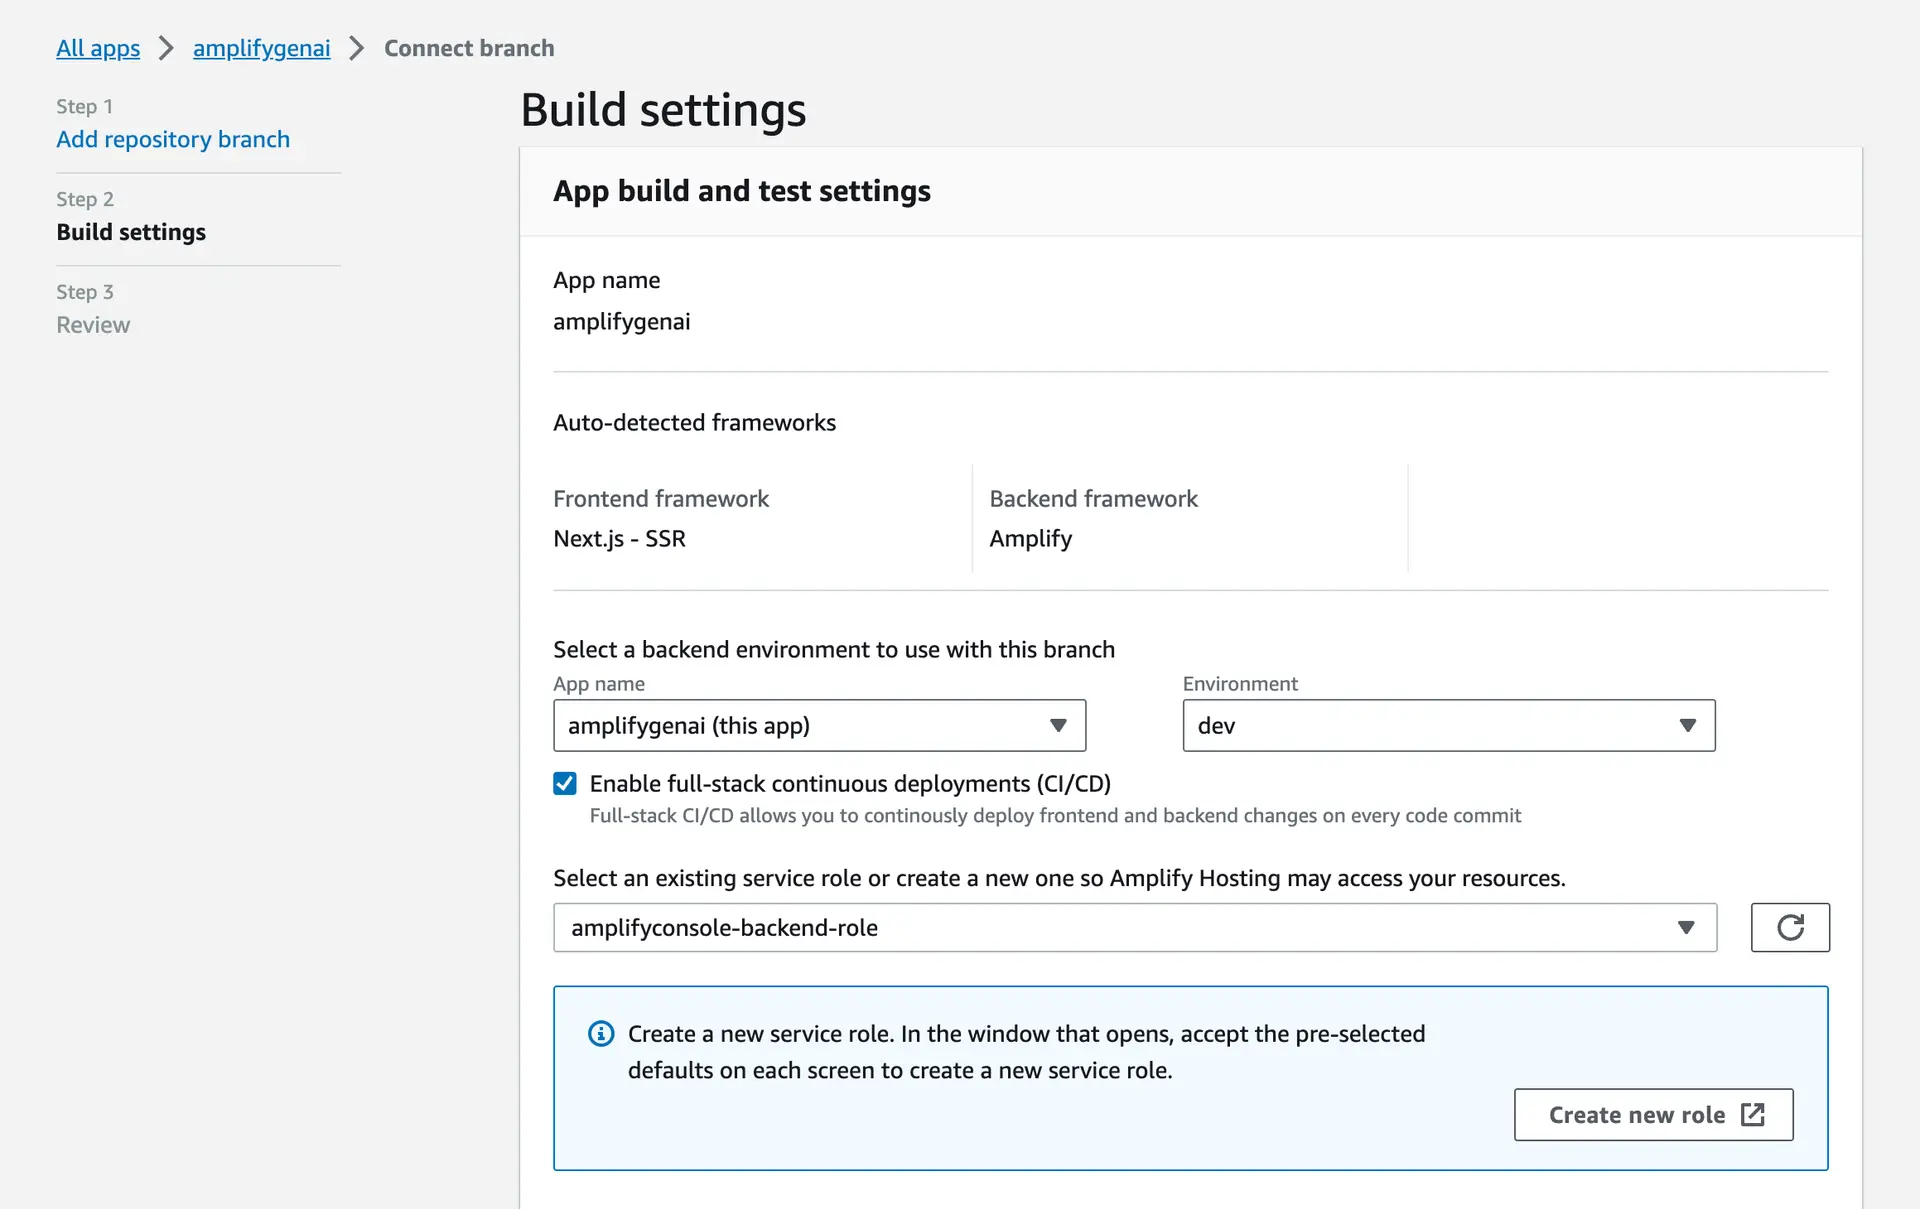
✔ Select the plugin module to execute · Hosting with Amplify Console (Managed hosting with custom domains, Continuous deployment)
? Choose a type Continuous deployment (Git-based deployments)? Continuous deployment is configured in the Amplify Console. Please hit enter once you connect your repositoryAmplify hosting urls:┌──────────────┬───────────────────────────────────────────┐│ FrontEnd Env │ Domain                                    │├──────────────┼───────────────────────────────────────────┤│ main         │ https://main.dade6up5cdfhu.amplifyapp.com │
Now you have a hosted fullstack application using Amplify connected to Amazon Bedrock.
If you are using TypeScript, you will need to ignore the Amplify directory in the tsconfig file at the root of your project or you might get a type error when Amplify tries to build your Next.js application. Update the "exclude" array in your tsconfig to have "amplify":
"exclude": ["node_modules","amplify"]