Connect to existing AWS resources with Amplify CLI
The AWS Amplify CLI (Command Line Interface) CLI provides a simple workflow for provisioning cloud resources like authentication, databases, and storage for apps through the command line.
In this guide, you will learn how to connect a new Flutter mobile app to backend resources you've already created using the Amplify CLI.
Connect mobile app to existing AWS resources
This guide will walk you through connecting a new Flutter app to AWS resources created with Amplify for an existing Flutter app. If you don't already have an existing app, you can follow this Flutter tutorial to create a budget tracker app that uses Amplify Auth and API resources.
Before you begin, you will need:
- An existing Flutter app
- An AWS account: If you don't already have an account, follow the Setting Up Your AWS Environment tutorial for a quick overview.
- The Amplify CLI installed and configured.
- Flutter installed and configured.
- A text editor combined with Flutter’s command-line tools. For this guide, we will use VS Code, but you can use your preferred IDE.
Find the AWS backend details
Before connecting the backend resources to our new app, we first need to locate the details of the AWS environment provisioned for the existing app.
Step 1: In your existing app, open the file <Your-App>/amplify/team-provider-info.json.
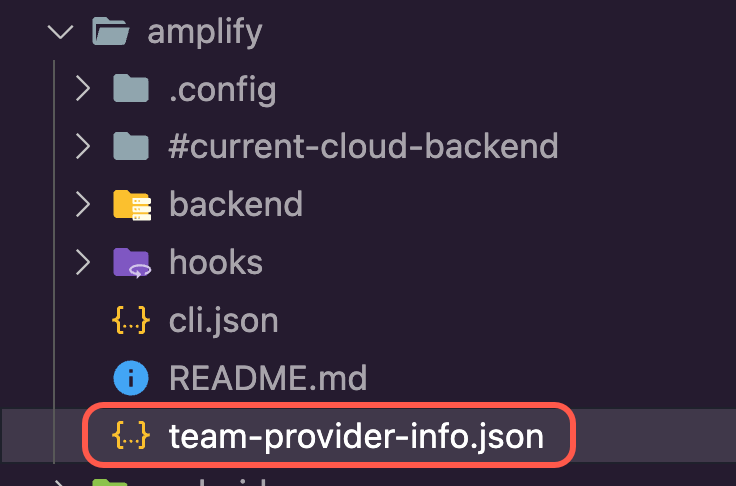
Step 2: In the team-provider-info.json file, note the following:
- The environment you want to use
- The
AmplifyAppIdfor the required environment

Create the Flutter app
Now that we have gathered the necessary backend details, we can start building out the new Flutter app.
Step 1: Create a Flutter app by running the following command in your terminal.
flutter create amplify_connect_resourcesStep 2: Open the newly created Flutter app using VS Code by running the following commands in your terminal.
cd amplify_connect_resources code . -r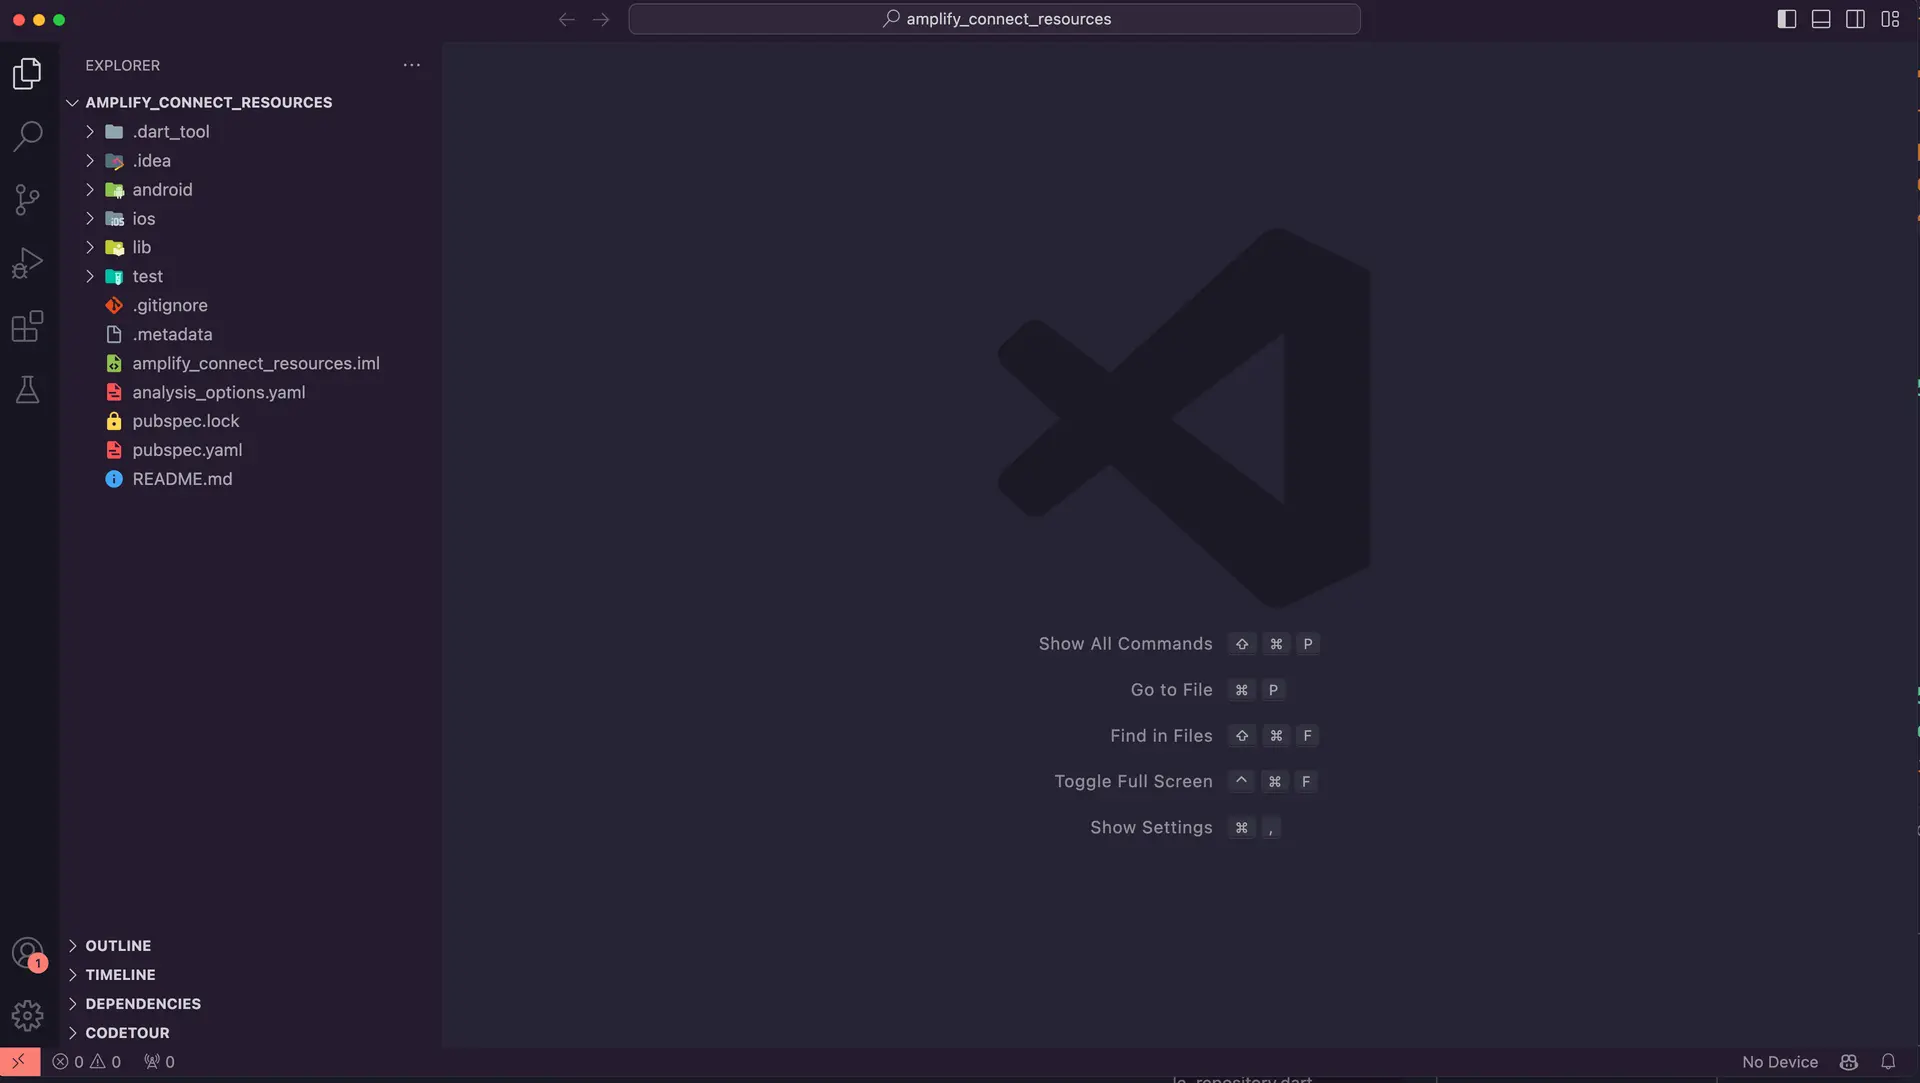
Step 3: Navigate to the app's root folder and import the Amplify backend for the app by running the following command in your terminal.
amplify pull --appId <The_App_ID> --envName <The_App_Env>Step 4: Select the AWS Authentication method. In this example, we are using an AWS profile. Ensure that the selected profile has the necessary permissions to access and modify AWS resources. See Configure the Amplify CLI for more information on setting up your AWS profile.
Accept the default values for the prompts about the default editor, type of app, and storage location of the configuration file. Then answer Yes to the “modifying this backend” question. Amplify CLI will initialize the backend and connect the project to the cloud.
? Select the authentication method you want to use: AWS profile
For more information on AWS Profiles, see:https://docs.aws.amazon.com/cli/latest/userguide/cli-configure-profiles.html
? Please choose the profile you want to use AwsWest1Amplify AppID found: dorapq24trw9r. Amplify App name is:amplifyBudgetBackend environment dev found in Amplify Console app: amplifyBudget? Choose your default editor: Visual Studio Code✔ Choose the type of app that you're building · flutterPlease tell us about your project? Where do you want to store your configuration file? ./lib/? Do you plan on modifying this backend? Yes⠦ Fetching updates to backend environment: dev from the cloud.⠋ Building resource api/amplifyBudget⠹ Fetching updates to backend environment: dev from the cloud.✅ GraphQL schema compiled successfully.
Edit your schema at /Users/malakamm/development/amplify_connect_resources/amplify/backend/api/amplifyBudget/schema.graphql or place .graphql files in a directory at /Users/malakamm/development/amplify_connect_resources/amplify/backend/api/amplifyBudget/schema✔ Successfully pulled backend environment dev from the cloud.✅
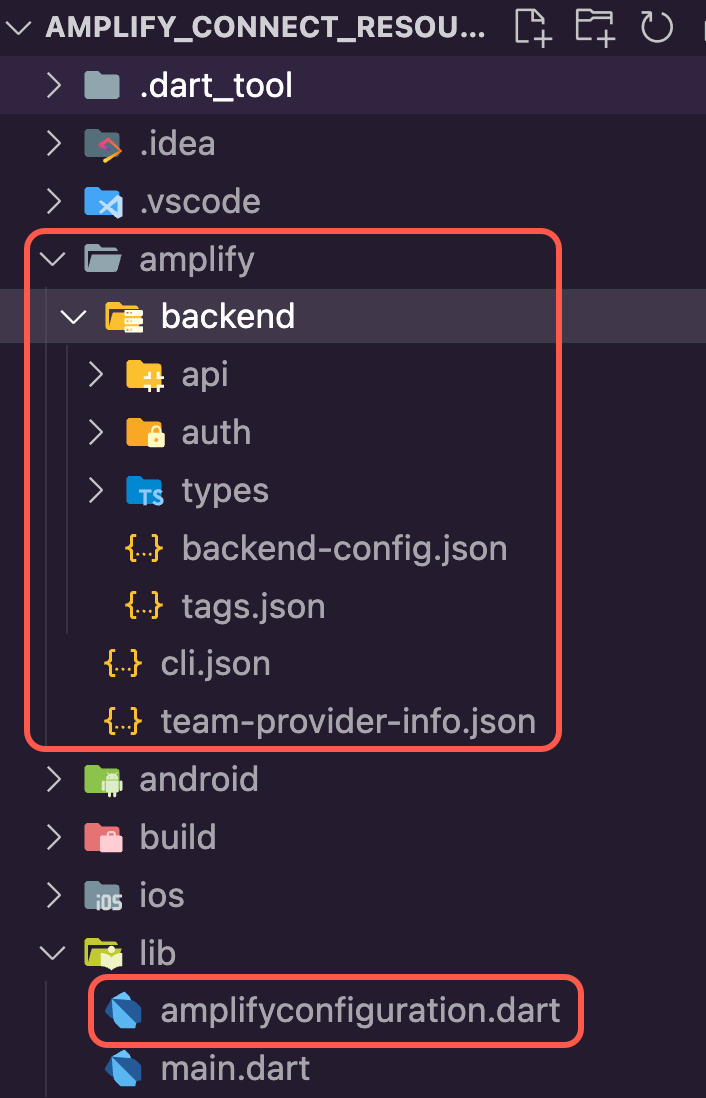
✅ Successfully pulled backend environment dev from the cloud.Run 'amplify pull' to sync future upstream changes.The Amplify CLI will add a new folder named amplify to the app's root folder, which contains the Amplify project and backend details. It will also add a new Dart file, amplifyconfiguration.dart, to the lib/ folder. The app will use this file at runtime to locate and connect to the backend resources you have provisioned.
Step 5: Update the file pubspec.yaml in the app root directory to add the required packages. In this example, we will use the same packages as the app created in this guide. To do this, update the pubspec.yaml as shown in the following.
name: budget_trackerdescription: A new Flutter project.publish_to: 'none' # Remove this line if you wish to publish to pub.devversion: 1.0.0+1
dependencies: amplify_api: ^2.0.0 amplify_auth_cognito: ^2.0.0 amplify_authenticator: ^2.0.0 amplify_flutter: ^2.0.0 flutter: sdk: flutter go_router: ^6.5.5 cupertino_icons: ^1.0.2
dev_dependencies: flutter_test: sdk: flutter flutter_lints: ^2.0.0
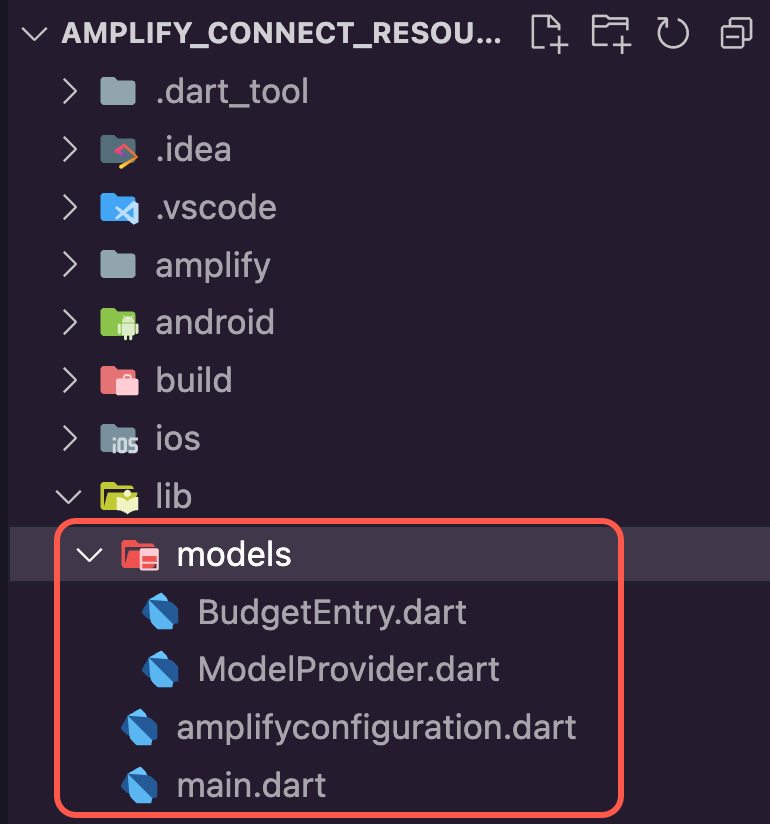
flutter: uses-material-design: trueStep 6: To enable type-safe interaction with the GraphQL schema, use this command to generate the required Dart files.
amplify codegen modelsThe Amplify CLI will generate the Dart files in the lib/models folder.
Step 7: Update the main.dart file with the following code to introduce the Amplify Authenticator and integrate Amplify API with your app to create, update, query, and delete BudgetEntry items. Typically, you would break this file up into smaller modules but we've kept it as a single file for this guide.
import 'package:amplify_api/amplify_api.dart';import 'package:amplify_auth_cognito/amplify_auth_cognito.dart';import 'package:amplify_authenticator/amplify_authenticator.dart';import 'package:amplify_flutter/amplify_flutter.dart';import 'package:flutter/material.dart';import 'package:go_router/go_router.dart';import 'amplifyconfiguration.dart';import 'models/ModelProvider.dart';
Future<void> main() async { WidgetsFlutterBinding.ensureInitialized(); await _configureAmplify(); runApp(const MyApp());}
Future<void> _configureAmplify() async {
try {
final api = AmplifyAPI(modelProvider: ModelProvider.instance); final auth = AmplifyAuthCognito(); await Amplify.addPlugins([api, auth]); await Amplify.configure(amplifyconfig);
safePrint('Successfully configured'); } on Exception catch (e) { safePrint('Error configuring Amplify: $e'); }}
class MyApp extends StatelessWidget { const MyApp({super.key});
// GoRouter configuration static final _router = GoRouter( routes: [ GoRoute( path: '/', builder: (context, state) => const HomeScreen(), ), GoRoute( path: '/manage-budget-entry', name: 'manage', builder: (context, state) => ManageBudgetEntryScreen( budgetEntry: state.extra as BudgetEntry?, ), ), ], );
@override Widget build(BuildContext context) { return Authenticator( child: MaterialApp.router( routerConfig: _router, debugShowCheckedModeBanner: false, builder: Authenticator.builder(), ), ); }}
class LoadingScreen extends StatelessWidget { const LoadingScreen({super.key});
@override Widget build(BuildContext context) { return const Scaffold( body: Center( child: CircularProgressIndicator(), ), ); }}
class HomeScreen extends StatefulWidget { const HomeScreen({super.key});
@override State<HomeScreen> createState() => _HomeScreenState();}
class _HomeScreenState extends State<HomeScreen> { var _budgetEntries = <BudgetEntry>[];
@override void initState() { super.initState(); _refreshBudgetEntries(); }
Future<void> _refreshBudgetEntries() async { try { final request = ModelQueries.list(BudgetEntry.classType); final response = await Amplify.API.query(request: request).response;
final todos = response.data?.items; if (response.hasErrors) { safePrint('errors: ${response.errors}'); return; } setState(() { _budgetEntries = todos!.whereType<BudgetEntry>().toList(); }); } on ApiException catch (e) { safePrint('Query failed: $e'); } }
Future<void> _deleteBudgetEntry(BudgetEntry budgetEntry) async { final request = ModelMutations.delete<BudgetEntry>(budgetEntry); final response = await Amplify.API.mutate(request: request).response; safePrint('Delete response: $response'); await _refreshBudgetEntries(); }
Future<void> _navigateToBudgetEntry({BudgetEntry? budgetEntry}) async { await context.pushNamed('manage', extra: budgetEntry); // Refresh the entries when returning from the // budget entry screen. await _refreshBudgetEntries(); }
double _calculateTotalBudget(List<BudgetEntry?> items) { var totalAmount = 0.0; for (final item in items) { totalAmount += item?.amount ?? 0; } return totalAmount; }
Widget _buildRow({ required String title, required String description, required String amount, TextStyle? style, }) { return Row( children: [ Expanded( child: Text( title, textAlign: TextAlign.center, style: style, ), ), Expanded( child: Text( description, textAlign: TextAlign.center, style: style, ), ), Expanded( child: Text( amount, textAlign: TextAlign.center, style: style, ), ), ], ); }
@override Widget build(BuildContext context) { return Scaffold( floatingActionButton: FloatingActionButton( // Navigate to the page to create new budget entries onPressed: _navigateToBudgetEntry, child: const Icon(Icons.add), ), appBar: AppBar( title: const Text('Budget Tracker'), ), body: Center( child: Padding( padding: const EdgeInsets.only(top: 25), child: RefreshIndicator( onRefresh: _refreshBudgetEntries, child: Column( children: [ if (_budgetEntries.isEmpty) const Text('Use the \u002b sign to add new budget entries') else Row( mainAxisAlignment: MainAxisAlignment.center, children: [ // Show total budget from the list of all BudgetEntries Text( 'Total Budget: \$ ${_calculateTotalBudget(_budgetEntries).toStringAsFixed(2)}', style: const TextStyle(fontSize: 24), ) ], ), const SizedBox(height: 30), _buildRow( title: 'Title', description: 'Description', amount: 'Amount', style: Theme.of(context).textTheme.titleMedium, ), const Divider(), Expanded( child: ListView.builder( itemCount: _budgetEntries.length, itemBuilder: (context, index) { final budgetEntry = _budgetEntries[index]; return Dismissible( key: ValueKey(budgetEntry), background: const ColoredBox( color: Colors.red, child: Padding( padding: EdgeInsets.only(right: 10), child: Align( alignment: Alignment.centerRight, child: Icon(Icons.delete, color: Colors.white), ), ), ), onDismissed: (_) => _deleteBudgetEntry(budgetEntry), child: ListTile( onTap: () => _navigateToBudgetEntry( budgetEntry: budgetEntry, ), title: _buildRow( title: budgetEntry.title, description: budgetEntry.description ?? '', amount: '\$ ${budgetEntry.amount.toStringAsFixed(2)}', ), ), ); }, ), ), ], ), ), ), ), ); }}
class ManageBudgetEntryScreen extends StatefulWidget { const ManageBudgetEntryScreen({ required this.budgetEntry, super.key, });
final BudgetEntry? budgetEntry;
@override State<ManageBudgetEntryScreen> createState() => _ManageBudgetEntryScreenState();}
class _ManageBudgetEntryScreenState extends State<ManageBudgetEntryScreen> { final _formKey = GlobalKey<FormState>(); final TextEditingController _titleController = TextEditingController(); final TextEditingController _descriptionController = TextEditingController(); final TextEditingController _amountController = TextEditingController();
late final String _titleText;
bool get _isCreate => _budgetEntry == null; BudgetEntry? get _budgetEntry => widget.budgetEntry;
@override void initState() { super.initState();
final budgetEntry = _budgetEntry; if (budgetEntry != null) { _titleController.text = budgetEntry.title; _descriptionController.text = budgetEntry.description ?? ''; _amountController.text = budgetEntry.amount.toStringAsFixed(2); _titleText = 'Update budget entry'; } else { _titleText = 'Create budget entry'; } }
@override void dispose() { _titleController.dispose(); _descriptionController.dispose(); _amountController.dispose(); super.dispose(); }
Future<void> submitForm() async { if (!_formKey.currentState!.validate()) { return; }
// If the form is valid, submit the data final title = _titleController.text; final description = _descriptionController.text; final amount = double.parse(_amountController.text);
if (_isCreate) { // Create a new budget entry final newEntry = BudgetEntry( title: title, description: description.isNotEmpty ? description : null, amount: amount, ); final request = ModelMutations.create(newEntry); final response = await Amplify.API.mutate(request: request).response; safePrint('Create result: $response'); } else { // Update budgetEntry instead final updateBudgetEntry = _budgetEntry!.copyWith( title: title, description: description.isNotEmpty ? description : null, amount: amount, ); final request = ModelMutations.update(updateBudgetEntry); final response = await Amplify.API.mutate(request: request).response; safePrint('Update result: $response'); }
// Navigate back to homepage after create/update executes if (mounted) { context.pop(); } }
@override Widget build(BuildContext context) { return Scaffold( appBar: AppBar( title: Text(_titleText), ), body: Align( alignment: Alignment.topCenter, child: ConstrainedBox( constraints: const BoxConstraints(maxWidth: 800), child: Padding( padding: const EdgeInsets.all(16), child: SingleChildScrollView( child: Form( key: _formKey, child: Column( crossAxisAlignment: CrossAxisAlignment.start, children: [ TextFormField( controller: _titleController, decoration: const InputDecoration( labelText: 'Title (required)', ), validator: (value) { if (value == null || value.isEmpty) { return 'Please enter a title'; } return null; }, ), TextFormField( controller: _descriptionController, decoration: const InputDecoration( labelText: 'Description', ), ), TextFormField( controller: _amountController, keyboardType: const TextInputType.numberWithOptions( signed: false, decimal: true, ), decoration: const InputDecoration( labelText: 'Amount (required)', ), validator: (value) { if (value == null || value.isEmpty) { return 'Please enter an amount'; } final amount = double.tryParse(value); if (amount == null || amount <= 0) { return 'Please enter a valid amount'; } return null; }, ), const SizedBox(height: 20), ElevatedButton( onPressed: submitForm, child: Text(_titleText), ), ], ), ), ), ), ), ), ); }}Step 8: Run the app using the following command, and use the authentication flow to create a user. Then create a few budget items.
flutter runConclusion
Congratulations! Your new Flutter app is now connected to AWS resources from a different app through AWS Amplify. This integration grants your app access to authentication resources for user management and a scalable GraphQL API backed by Amazon DynamoDB.
Clean up resources
Once you're finished experimenting with this demo app, we recommend deleting the backend resources to avoid incurring unexpected costs. You can do this by running the following command in the root folder of the app.
amplify deleteIf you would like to expand this demo app into a production-ready app, you may need to add additional resources, such as authorization and storage. Refer to the Build & connect backend section for guides on how to add and connect other backend resources.