Connect to the cloud
Provision backend
Now that you have DataStore persisting data locally, in the next step you'll connect it to the cloud. With a couple of commands, you'll create an AWS AppSync API and configure DataStore to synchronize its data to it.
- Configure Amplify to manage cloud resources on your behalf. Open a terminal window and run
amplify configure. This step will configure a new AWS user in your account for Amplify.
amplify configureThis command will open up a web browser to the AWS Management Console and guide you through creating a new IAM user. For step-by-step directions to set this up, refer to the CLI installation guide.
- Initialize the Amplify backend. To do this, run the command and follow the step-by-step instructions:
amplify init- Next, push your new backend to the cloud. To do this, run the command:
amplify pushAnswer No to ? Do you want to generate code for your newly created GraphQL API.
Answering Yes will generate an API.java file which is only necessary when directly using the AWSAppSync SDK. When you're using Amplify API or Amplify DataStore, you'll use the amplify codegen models command to generate Java models.
Enable cloud syncing
In order to enable cloud syncing, you need to configure your application to use the Amplify API category.
Open the MyAmplifyApp file and add the following import statement:
import com.amplifyframework.api.aws.AWSApiPlugin;import com.amplifyframework.api.aws.AWSApiPluginThen update the onCreate() function to call Amplify.addPlugin() with a reference to an AWSApiPlugin() instance:
public void onCreate() {    super.onCreate();
try { Amplify.addPlugin(AWSApiPlugin()); Amplify.addPlugin(AWSDataStorePlugin()); Amplify.configure(getApplicationContext()); Log.i("MyAmplifyApp", "Initialized Amplify"); } catch (AmplifyException error) { Log.e("MyAmplifyApp", "Could not initialize Amplify", error); }}override fun onCreate() { super.onCreate()
try { Amplify.addPlugin(AWSApiPlugin()) Amplify.addPlugin(AWSDataStorePlugin()) Amplify.configure(applicationContext) Log.i("MyAmplifyApp", "Initialized Amplify") } catch (error: AmplifyException) { Log.e("MyAmplifyApp", "Could not initialize Amplify", error) }}Now when you run your application the data will be synced to your cloud backend automatically! 🎉
Add a subscription
We will now demonstrate how to add a subscription to the application, so that we can receive any updates to the Todo model.
- Open
MainActivityand edit youronCreatemethod to remove anything related to DataStore and replace it with the following code:
Amplify.DataStore.observe(Todo.class, cancelable -> Log.i("Tutorial", "Observation began."), todoChanged -> { Todo todo = postChanged.item(); Log.i("Tutorial", "Todo: " + todo); }, failure -> Log.e("Tutorial", "Observation failed", failure), () -> Log.i("Tutorial", "Observation complete"));Amplify.DataStore.observe(Todo::class.java, { Log.i("Tutorial", "Observation began") }, { val todo = it.item() Log.i("Tutorial", "Todo: $todo") }, { Log.e("Tutorial", "Observation failed", it) }, { Log.i("Tutorial", "Observation complete") })- Build and run the application. In the logcat, you will see that we are making a web socket connection to receive updates any time there is a mutation to the Todo model.
Since this is the first time you are connecting to API, DataStore will sync any mutations that were previously made offline. If you have been following the guide, there should be one mutation that is synchronized to the backend that has a name of "Build Android application".
Query for mutations using the console
In this section, we will make a mutation using the AppSync console and have our app receive that mutation over the web socket subscription.
- Open a terminal window in your project's directory. Run the command:
amplify console apiWhen prompted, select GraphQL. This will open the AWS AppSync console.
? Please select from one of the below mentioned services: (Use arrow keys) GraphQL-
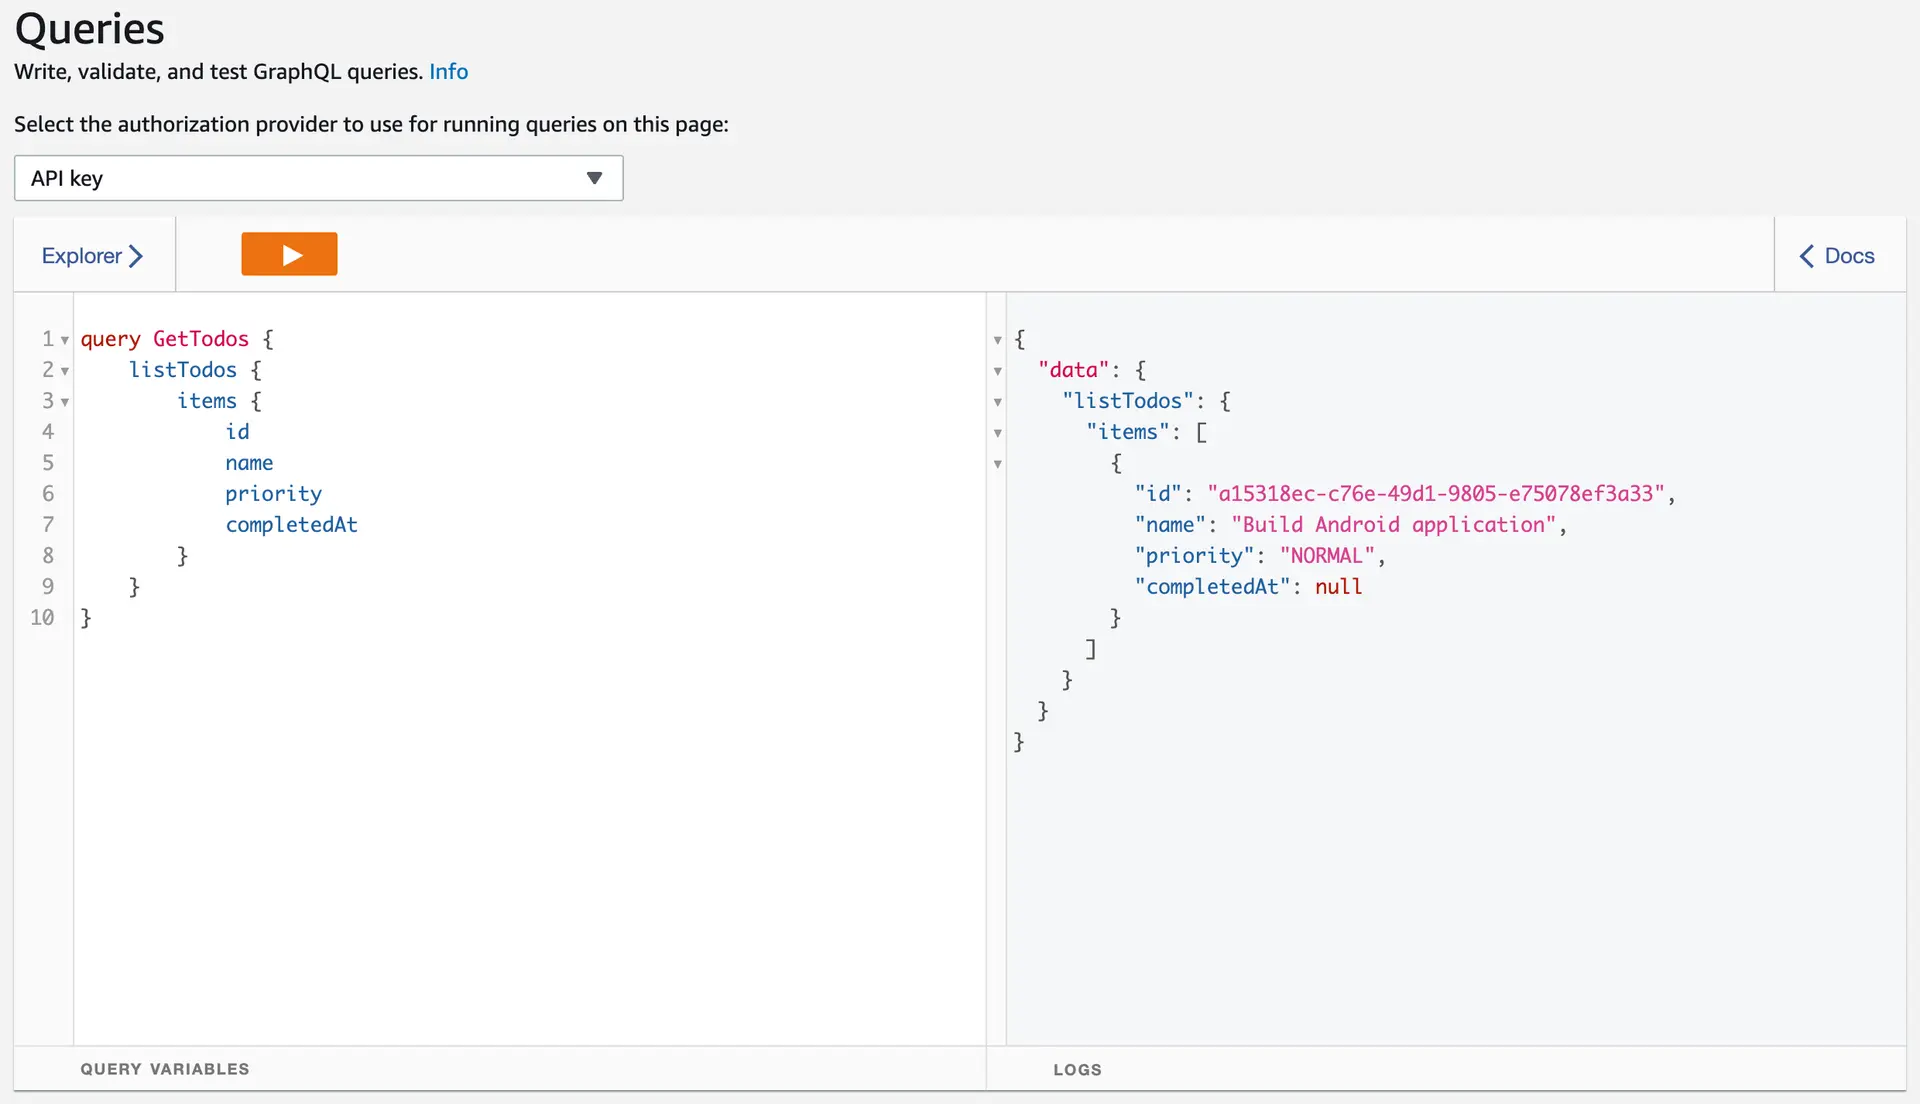
Copy and paste the following query into the left pane:
query GetTodos {listTodos {items {idnameprioritycompletedAt}}} -
Press the play button to run the query. This will return all of the synchronized Todos in the right pane:
Create a mutation
-
Synchronization will occur bi-directionally. Create an item in AWS AppSync by copying and pasting the following mutation:
mutation CreateTodo {createTodo(input: {name: "Tidy up the office",priority: NORMAL}) {id,name,priority,completedAt,_version,_lastChangedAt,createdAt,updatedAt,}}
-
In the console output of your app, you should see:
Todo: Todo {id=442c1bf3-6313-4c44-951c-81e931da2ac9, name=Tidy up the office, priority=NORMAL, completedAt=null, createdAt=Temporal.DateTime{offsetDateTime='2022-10-21T20:29:15.949Z'}, updatedAt=Temporal.DateTime{offsetDateTime='2022-10-21T20:29:15.949Z'}}