Set up Amplify CLI
Install the Amplify CLI
The Amplify Command Line Interface (CLI) is a unified toolchain to create AWS cloud services for your app. Let's go ahead and install the Amplify CLI.
npm install -g @aws-amplify/clicurl -sL https://aws-amplify.github.io/amplify-cli/install | bash && $SHELLcurl -sL https://aws-amplify.github.io/amplify-cli/install-win -o install.cmd && install.cmdPre-requisites for installation
- Install Node.js® and npm if they are not already on your machine.
- Verify that you are running at least Node.js version 12.x and npm version 6.x or greater by running
node -vandnpm -vin a terminal/console window - Create AWS Account. If you don't already have an AWS account, you'll need to create one in order to follow the steps outlined in this tutorial.
- For Apple Silicon Macs, if you don’t already have Rosetta installed, install using
softwareupdate --install-rosetta.
Configure the Amplify CLI
To set up the Amplify CLI on your local machine, you have to configure it to connect to your AWS account.
Configure Amplify by running the following command:
amplify configureamplify configure will ask you to sign into the AWS Console.
Once you're signed in, Amplify CLI will ask you to use the AWS Identity and Access Management (IAM) to create an IAM user.
Specify the AWS Region? region: # Your preferred regionFollow the instructions athttps://docs.amplify.aws/cli/start/install/#configure-the-amplify-cli
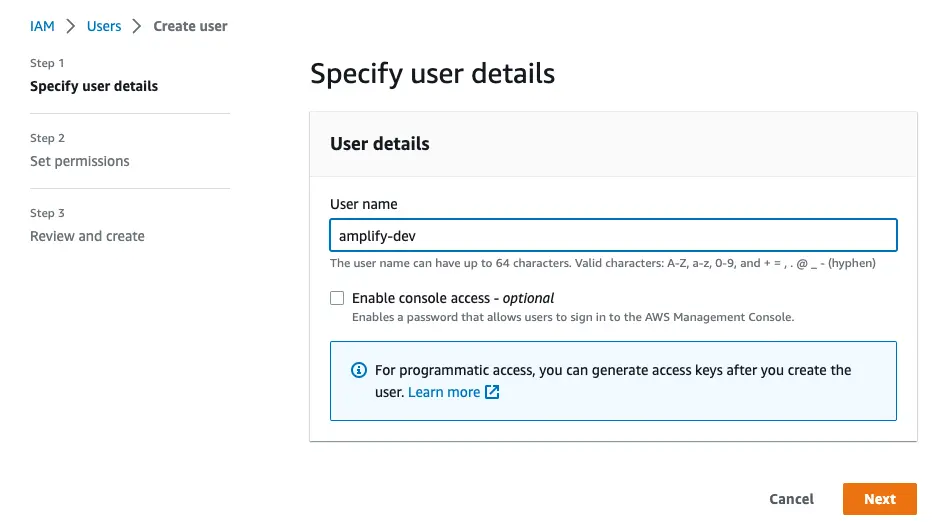
to complete the user creation in the AWS consolehttps://console.aws.amazon.com/iamv2/home#/users/createNavigate to the IAM User creation page if it's not already open.
Enter a User name and select Next. You can name the user anything but we'll call it "amplify-dev".
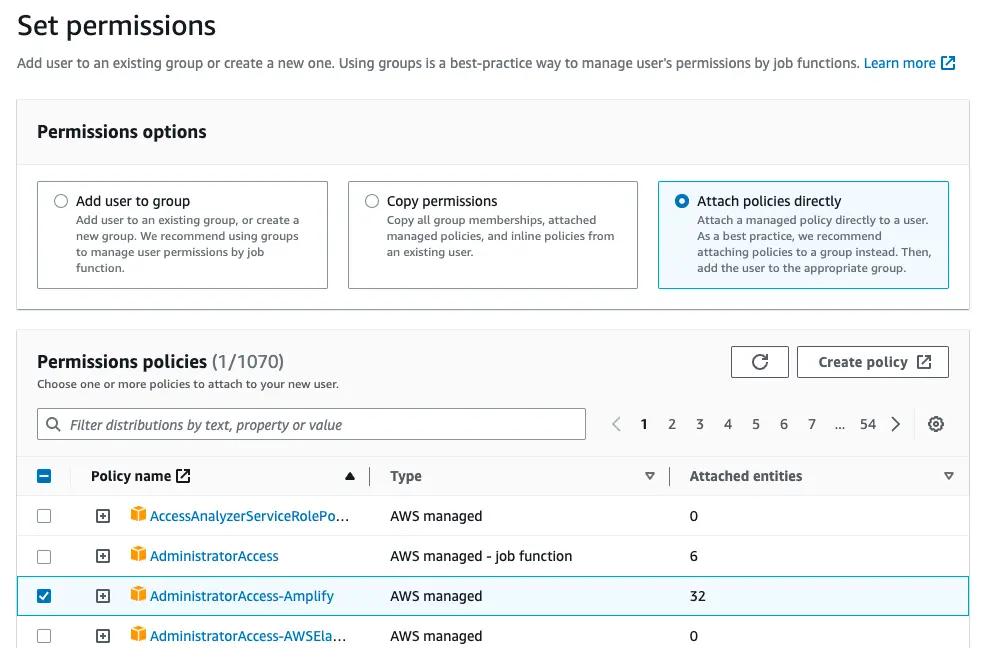
Select Attach policies directly and select AdministratorAccess-Amplify as the Permissions policy. Select Next.
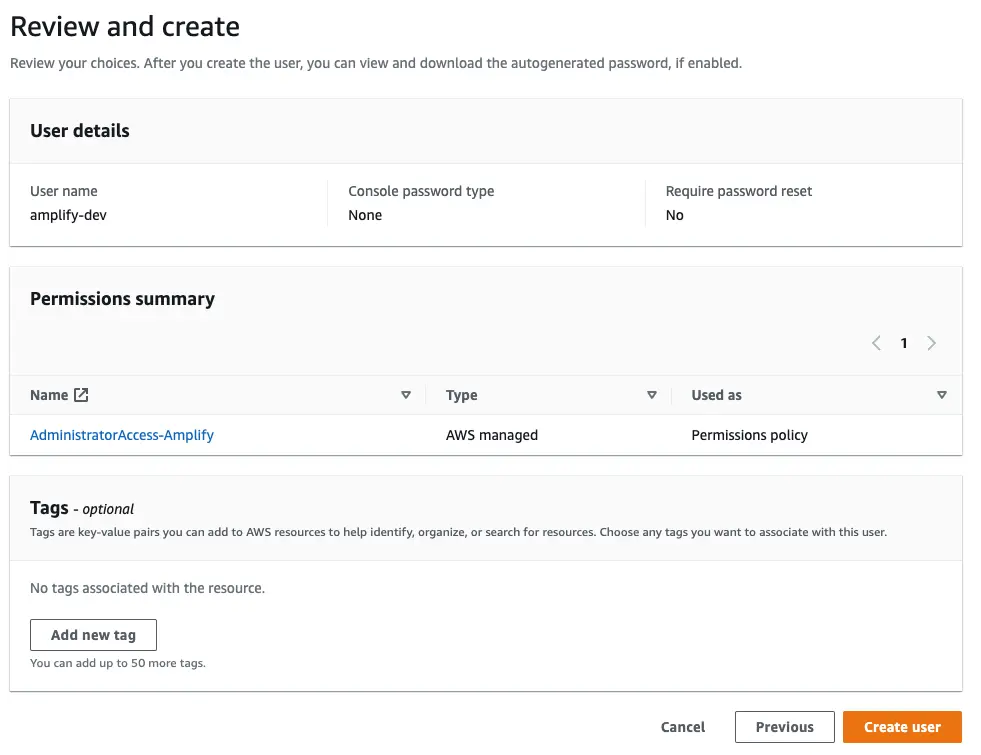
On the Review page, check that everything looks good and select Create user.
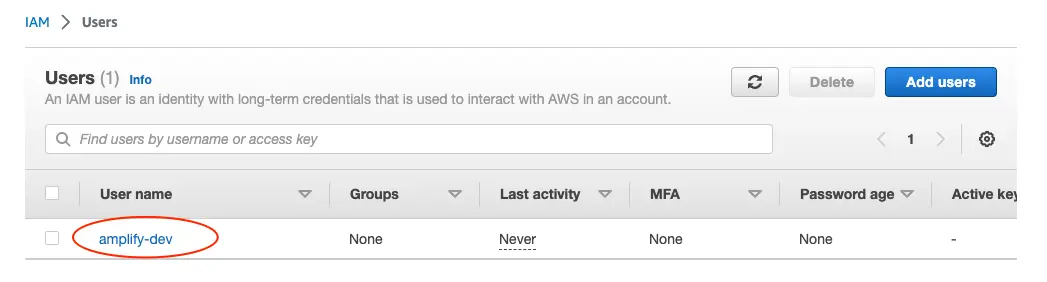
This will redirect to the users list page. Select the user you just created.
On the user details page, navigate to the Security credentials tab, scroll down to Access keys and select Create access keys.

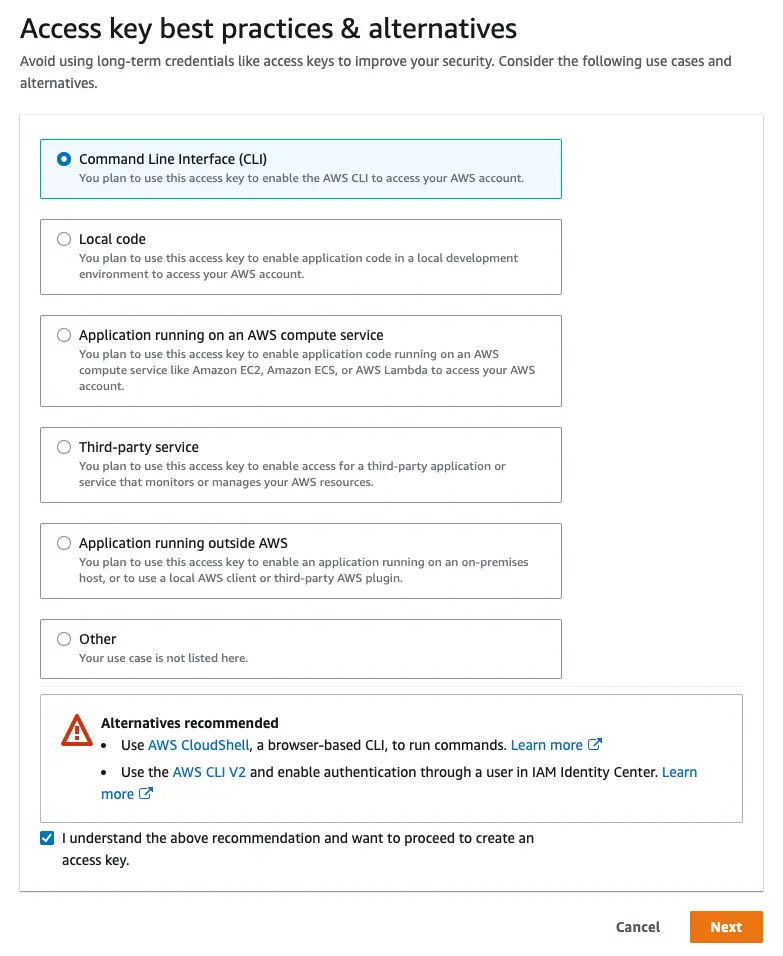
On the next page, select Command Line Interface, acknowledge the warning, and select Next.
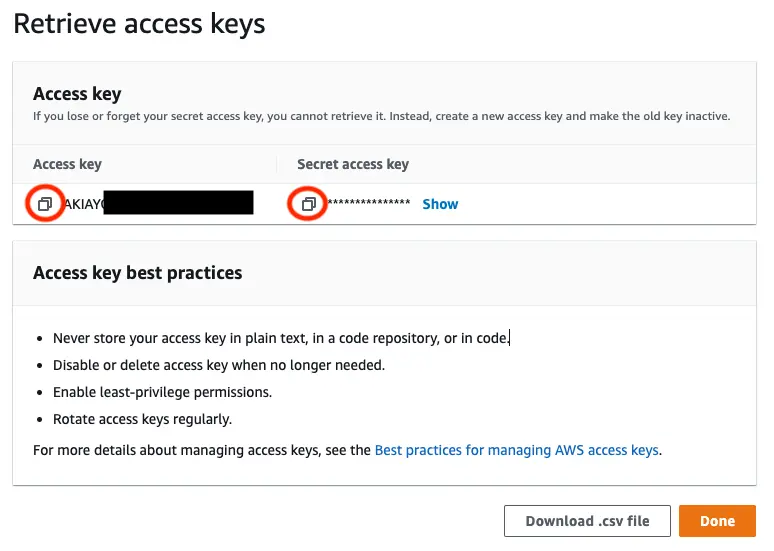
On the next page select Create access key. You'll then see a page with the access keys for the user. Use the copy icon to copy these values to your clipboard, then return to the Amplify CLI.
Enter the values you just copied into the corresponding CLI prompts.
Enter the access key of the newly created user:? accessKeyId:  # YOUR_ACCESS_KEY_ID? secretAccessKey:  # YOUR_SECRET_ACCESS_KEYThis would update/create the AWS Profile in your local machine? Profile Name:  # (default)
Successfully set up the new user.
Manually configure the Amplify CLI
If you are using an IAM role or IAM Identity Center (previously AWS SSO), you can configure your local machine for use with Amplify CLI by creating AWS profile entries manually rather than the amplify configure wizard.
To create an AWS profile locally using IAM Identity Center, you can use the AWS CLI wizard, aws configure sso, or write to ~/.aws/config directly:
[profile my-sso-profile]sso_session = my-ssosso_account_id = 123456789011sso_role_name = AdministratorAccess-Amplifyregion = us-west-2output = json
[sso-session my-sso]sso_region = us-east-1sso_start_url = https://my-sso-portal.awsapps.com/startsso_registration_scopes = sso:account:access
Currently, the Amplify CLI requires a workaround for use with IAM Identity Center due to an issue in how it resolves credentials.
[profile my-sso-profile]sso_session = my-ssosso_account_id = 123456789011sso_role_name = AdministratorAccess-Amplifyregion = us-west-2output = json+ credential_process = aws configure export-credentials --profile my-sso-profile[sso-session my-sso]sso_region = us-east-1sso_start_url = https://my-sso-portal.awsapps.com/startsso_registration_scopes = sso:account:accessUsing the example above, when creating a new app or pulling an existing app, specify my-sso-profile as the AWS profile you'd like to use with the Amplify app.
To create an AWS profile locally using an IAM role, assign the AdministratorAccess-Amplify permissions set to the role and set the role in your ~/.aws/config file:
[profile amplify-admin]role_arn = arn:aws:iam::123456789012:role/amplify-adminsource_profile = amplify-user
[profile amplify-user]region=us-east-1
Using the example above, when creating a new app or pulling an existing app, specify amplify-admin as the AWS profile you'd like to use with the Amplify app
Work within your frontend project
After you install the CLI, navigate to a JavaScript, iOS, or Android project root, initialize AWS Amplify in the new directory by running amplify init. After a few configuration questions, you can use amplify help at any time to see the overall command structure. When you’re ready to add a feature, run amplify add <category>.