Enable sign-in with web UI
Prerequisites
- An app setup according to the getting started walkthrough
Configure Auth Category
In terminal, navigate to your project, run amplify add auth (or if you've already added it, run amplify update auth), and choose the following options:
? Do you want to use the default authentication and security configuration? `Default configuration with Social Provider (Federation)`? How do you want users to be able to sign in? `Username`? Do you want to configure advanced settings? `No, I am done.`? What domain name prefix you want us to create for you? `(default)`? Enter your redirect signin URI: `myapp://`? Do you want to add another redirect signin URI `Yes`? Enter your redirect signin URI: `http://localhost:3000/`? Do you want to add another redirect signin URI `No`? Enter your redirect signout URI: `myapp://`? Do you want to add another redirect signout URI `Yes`? Enter your redirect signout URI: `http://localhost:3000/`? Do you want to add another redirect signout URI `No`? Select the social providers you want to configure for your user pool: `<hit enter>`Note that when the CLI asks for the redirect URIs that you want to use, you may need to enter multiple:
- Desktop apps require an http localhost (ex: http://localhost:3000)
- Web requires an http localhost or https URI (ex: http://localhost:3000 or https://www.yourapp.com)
- Mobile requires a custom app URI (ex: myapp://)
How It Works
Sign-in with web UI will display the sign-in UI inside a webview. After the sign-in process is complete, the sign-in UI will redirect back to your app.
Platform Setup
Web
To use Hosted UI in your Flutter web application locally, you must run the app with the --web-port=3000 argument (with the value being whichever port you assigned to localhost host when configuring your redirect URIs).
Android
Add the following queries element to the AndroidManifest.xml file in your app's android/app/src/main directory, as well as the following intent-filter to the MainActivity in the same file.
Replace myapp with your redirect URI scheme as necessary:
<queries> <intent> <action android:name= "android.support.customtabs.action.CustomTabsService" /> </intent></queries><application> ... <activity android:name=".MainActivity" android:exported="true"> <intent-filter> <action android:name="android.intent.action.VIEW" /> <category android:name="android.intent.category.DEFAULT" /> <category android:name="android.intent.category.BROWSABLE" /> <data android:scheme="myapp" /> </intent-filter> </activity> ...</application>macOS
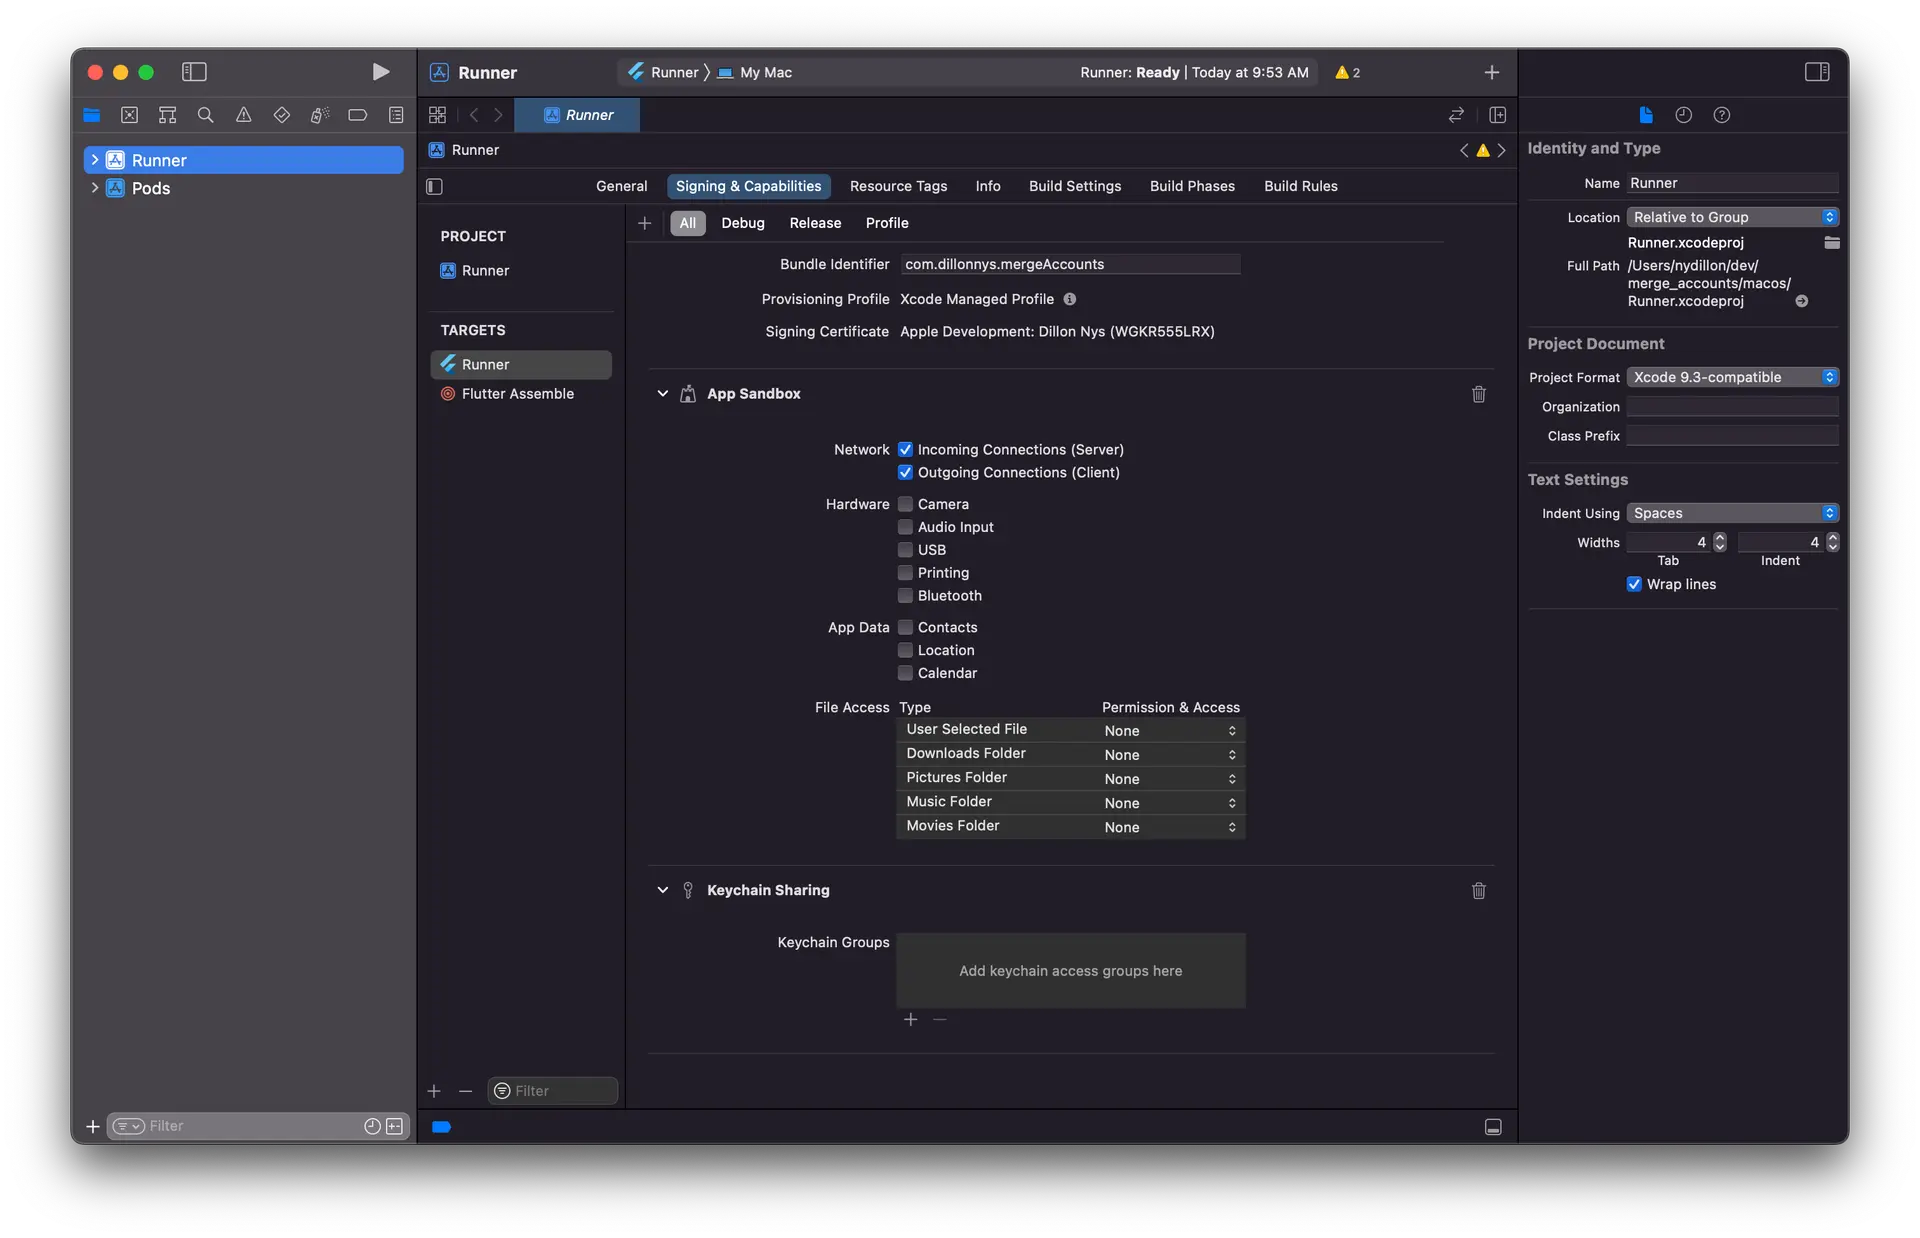
Open XCode and enable the App Sandbox capability and then select "Incoming Connections (Server)" under "Network".
iOS, Windows and Linux
No specific platform configuration is required.
Launch Web UI Sign In
Sweet! You're now ready to launch sign in with web UI.
Future<void> signInWithWebUI() async { try { final result = await Amplify.Auth.signInWithWebUI(); safePrint('Sign in result: $result'); } on AuthException catch (e) { safePrint('Error signing in: ${e.message}'); }}You can also specify a provider with the provider attribute:
Future<void> signInWithWebUIProvider() async { try { final result = await Amplify.Auth.signInWithWebUI( provider: AuthProvider.google, ); safePrint('Result: $result'); } on AuthException catch (e) { safePrint('Error signing in: ${e.message}'); }}Amplify Flutter currently supports the following social sign-in providers:
- Login With Amazon
- Apple
Prefer private session during signIn on iOS.
Amplify.Auth.signInWithWebUI uses ASWebAuthenticationSession internally for iOS. ASWebAuthenticationSession has a property, prefersEphemeralWebBrowserSession which can be used to indicate whether the session should ask the browser for a private authentication session. To set this flag to true, set preferPrivateSession to true using CognitoSignInWithWebUIPluginOptions.
This will bypass the permissions dialog that is displayed to the end user during sign in and sign out. However, it will also prevent reuse of existing sessions from the user's browser. For example, if the user is logged into Google in their browser and try to sign in using Google in your app, they would now need to re-enter their credentials.
Future<void> signInWithWebUIAndPrivateSession() async { await Amplify.Auth.signInWithWebUI( options: const SignInWithWebUIOptions( pluginOptions: CognitoSignInWithWebUIPluginOptions( isPreferPrivateSession: true, ), ), );}