Add social provider sign-in
Prerequisites
- An app setup according to the getting started walkthrough
Setup Your Auth Provider
-
Create a developer account with Facebook.
-
Sign In with your Facebook credentials.
-
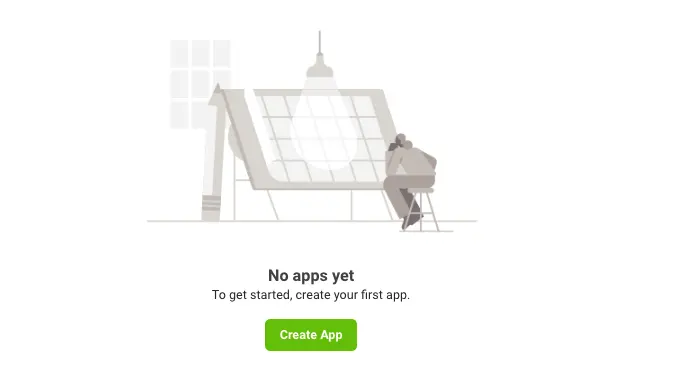
Choose My Apps from the top navigation bar, and on the page that loads choose Create App.
-
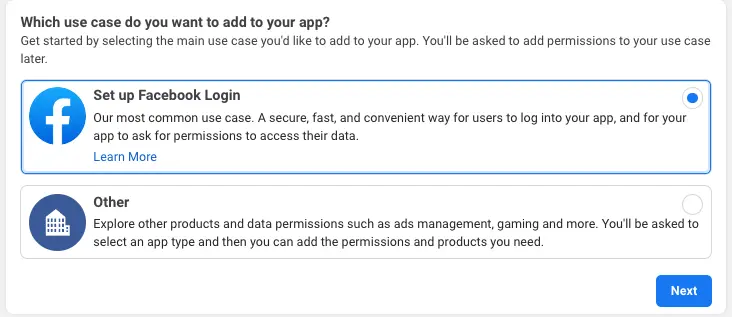
For your use case, choose Set up Facebook Login.
-
For platform, choose Website and select No, I'm not building a game.
-
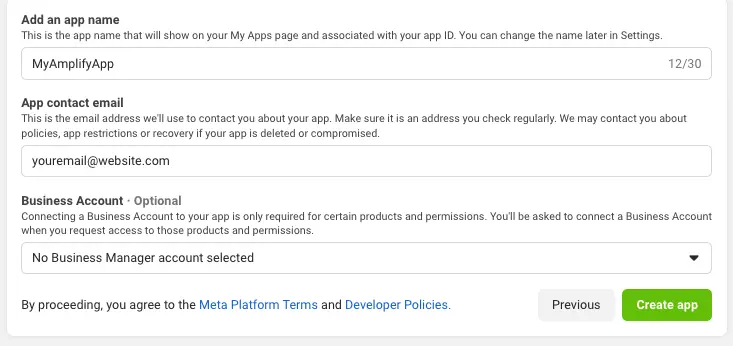
Give your Facebook app a name and choose Create app.
-
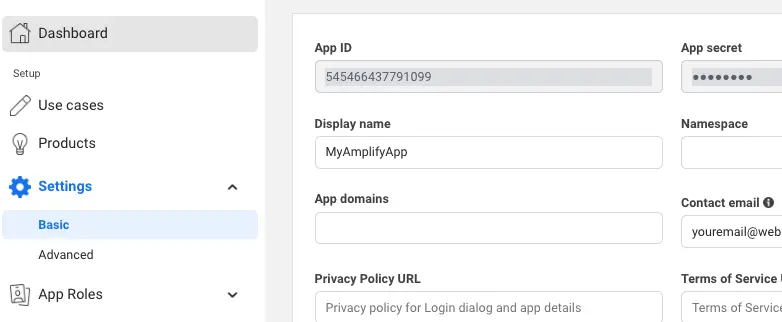
On the left navigation bar, choose Settings and then Basic.
-
Note the App ID and the App Secret. You will use them in the next section during the CLI flow.
-
Go to Google developer console.
-
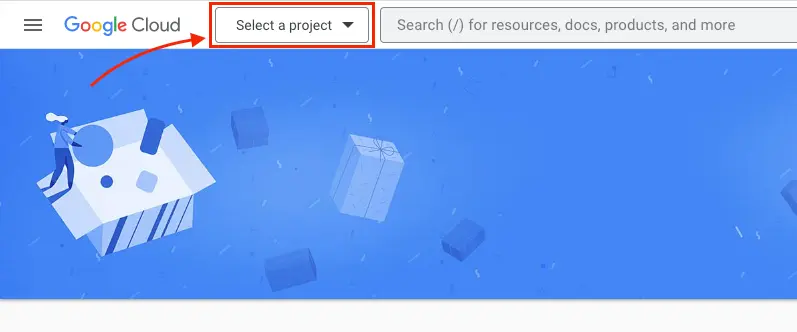
Click Select a project
-
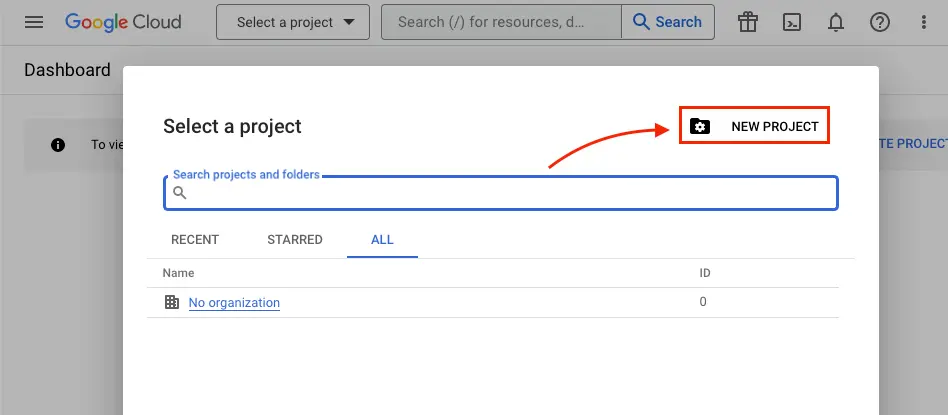
Click NEW PROJECT
-
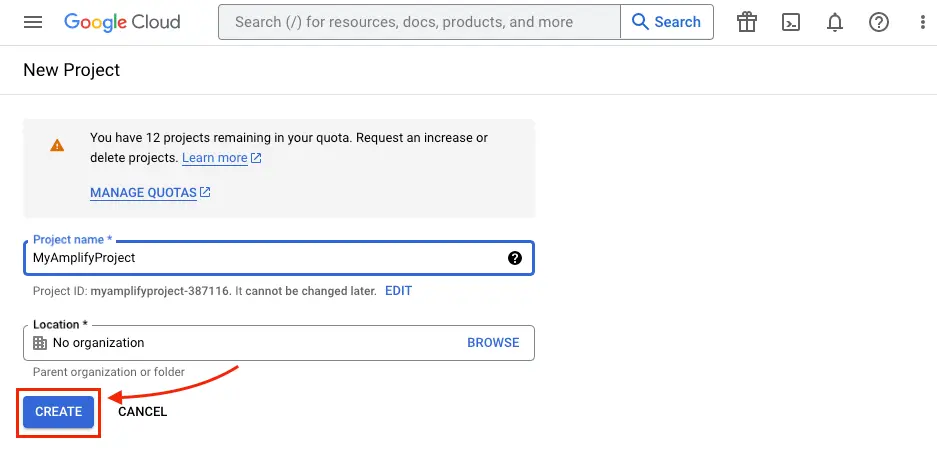
Type in project name and click CREATE
-
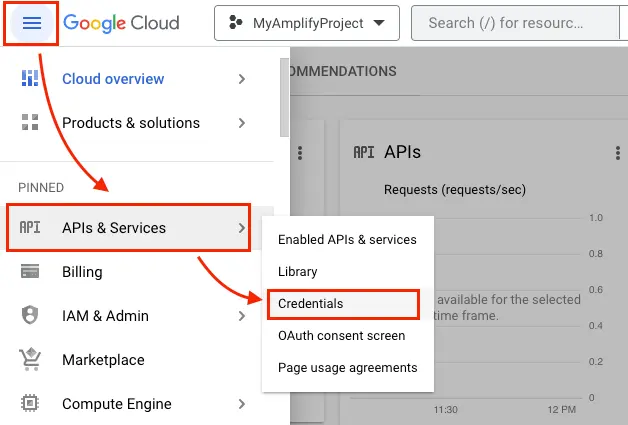
Once the project is created, from the left Navigation menu, select APIs & Services, then select Credentials
-
Click CONFIGURE CONSENT SCREEN
-
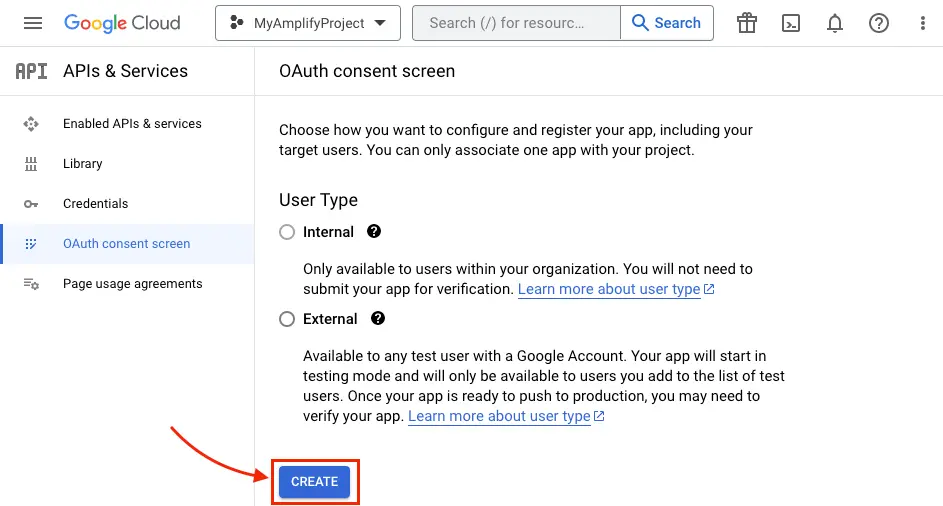
Click CREATE
-
Type in App Information and Developer contact information which are required field and click SAVE AND CONTINUE three times (OAuth consent screen -> Scopes -> Test Users) to finish setting up consent screen
-
Back to Credentials tab, Create your OAuth2.0 credentials by choosing OAuth client ID from the Create credentials drop-down list.
.
-
Choose Web application as Application type and name your OAuth Client.
-
Click Create.
-
Take note of Your client ID and Your Client Secret. You will need them for the next section in the CLI flow.
-
Choose OK.
- Create a developer account with Amazon.
- Sign in with your Amazon credentials.
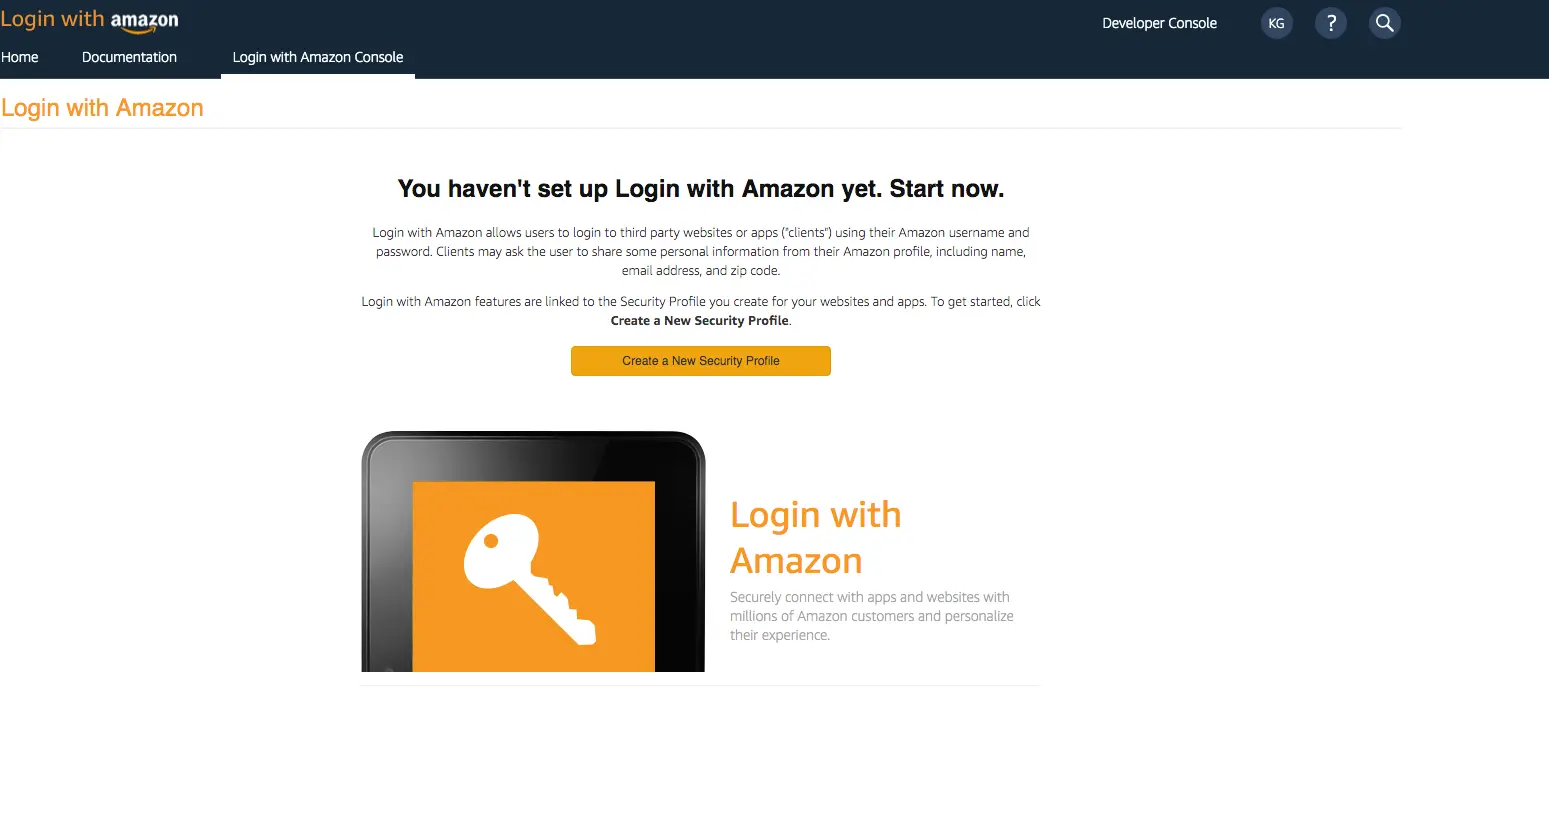
- You need to create an Amazon security profile to receive the Amazon client ID and client secret. Choose Create a Security Profile.
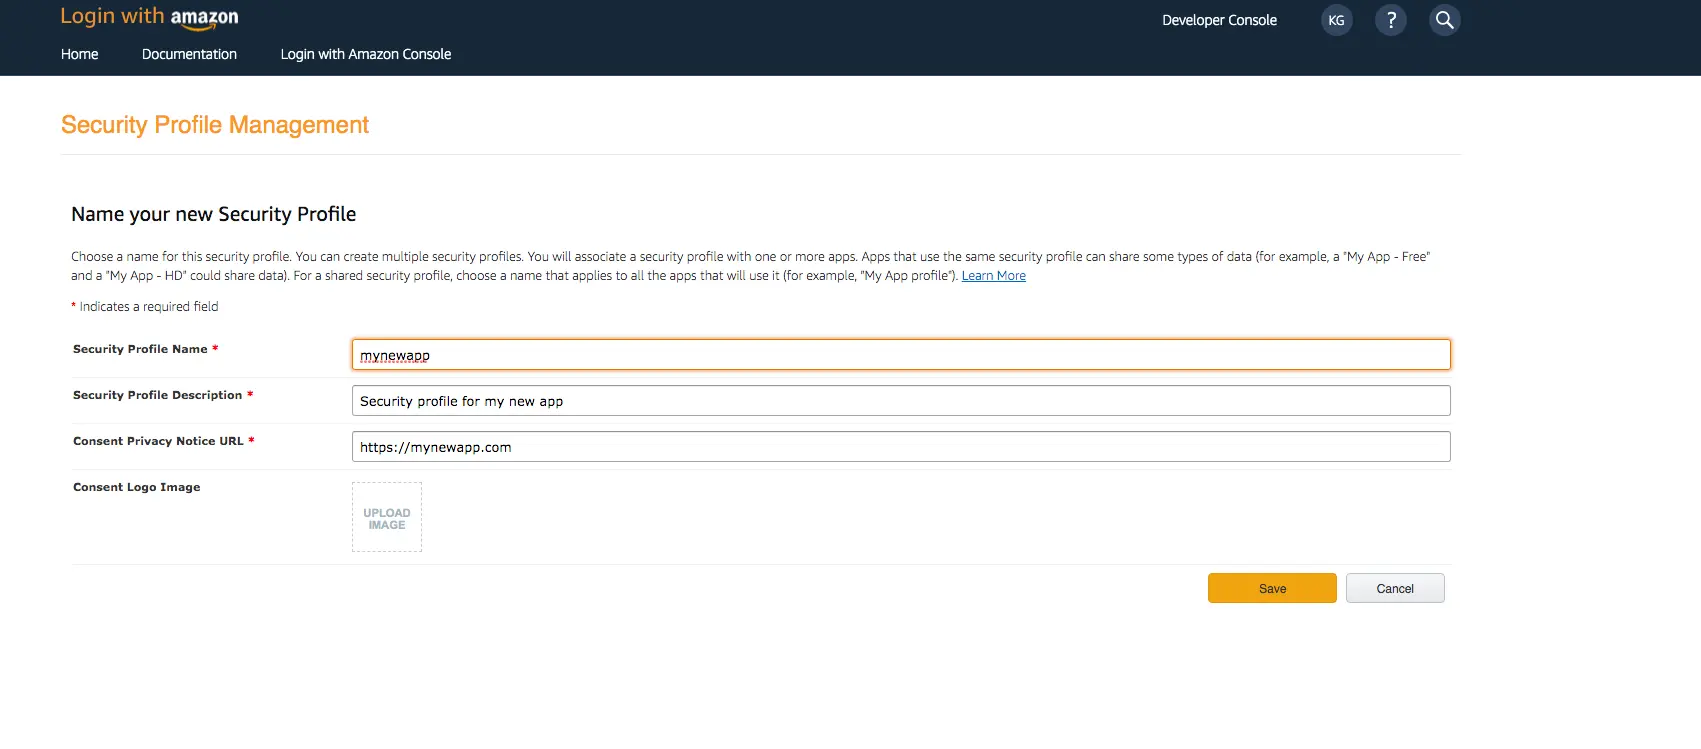
- Type in a Security Profile Name, a Security Profile Description, and a Consent Privacy Notice URL.
- Choose Save.
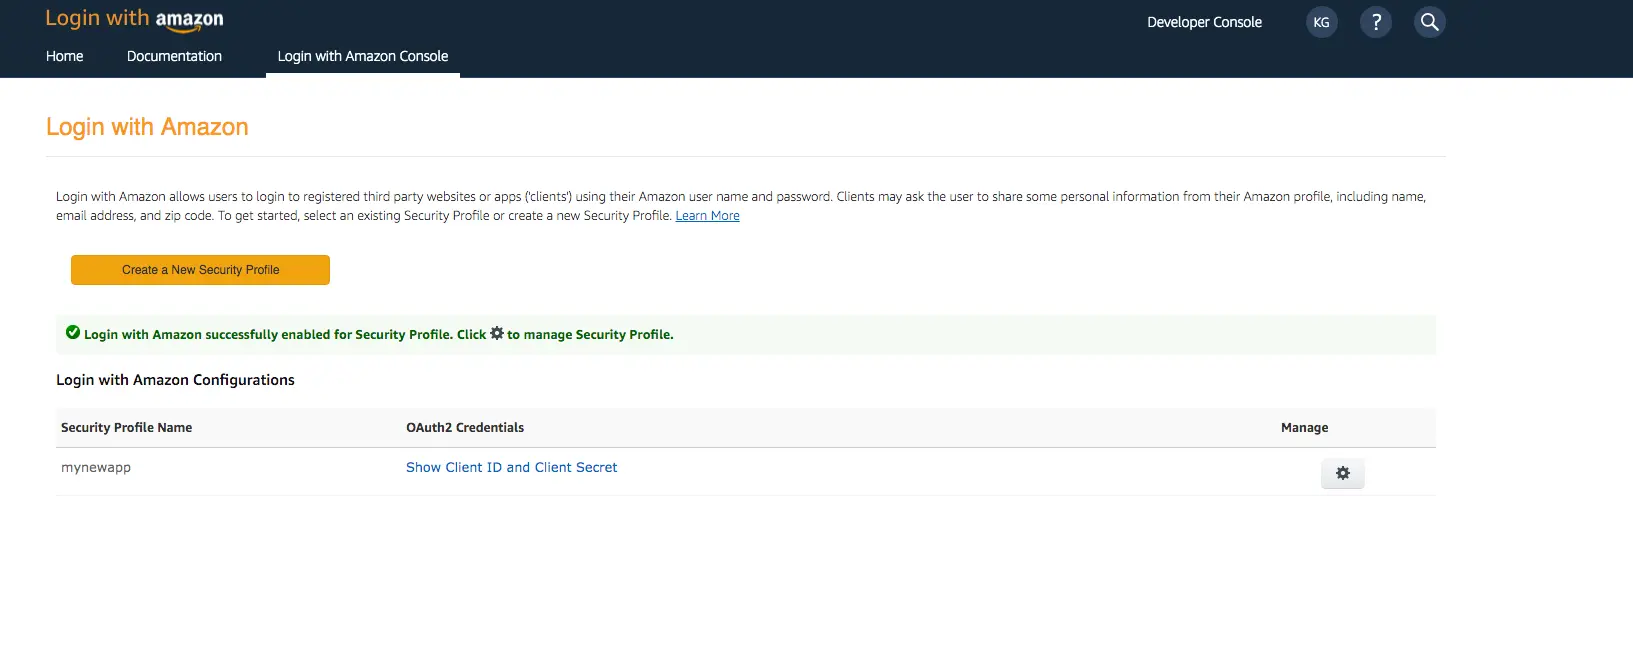
- Choose Client ID and Client Secret to show the client ID and secret. You will need them for the next section in the CLI flow.
- Sign In with your Apple developer credentials.
- On the main developer portal page, select Certificates, IDs, & Profiles.
- On the left navigation bar, select Identifier.
- On the Identifiers page, select the + icon.
- On the Register a New Identifier page, select App IDs.
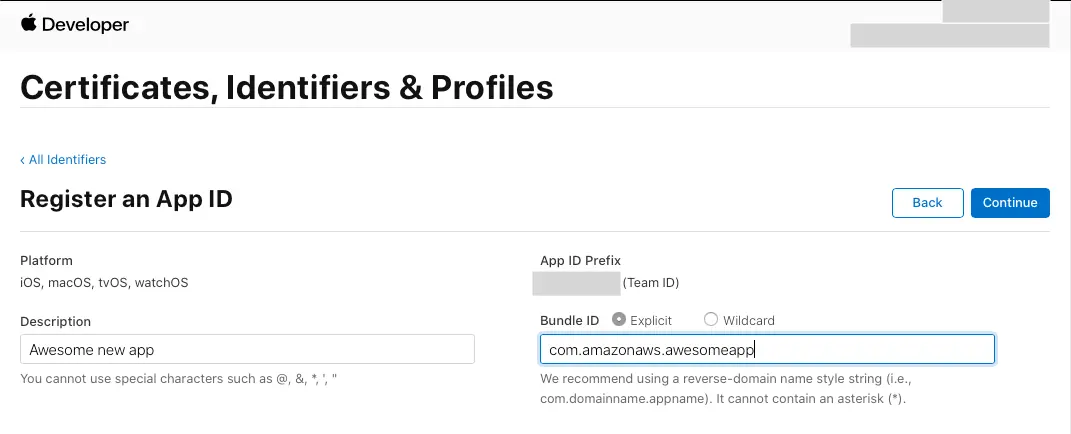
- On the Register an App ID page, under App ID Prefix, take note of the Team ID value.
- Provide a description in the Description text box and provide the bundleID of the iOS app.
- Under Capabilities, select Sign in with Apple.
- Select Continue, review the configuration, and then select Register.
- On the Identifiers page, on the right, select App IDs, and then select Services ID.
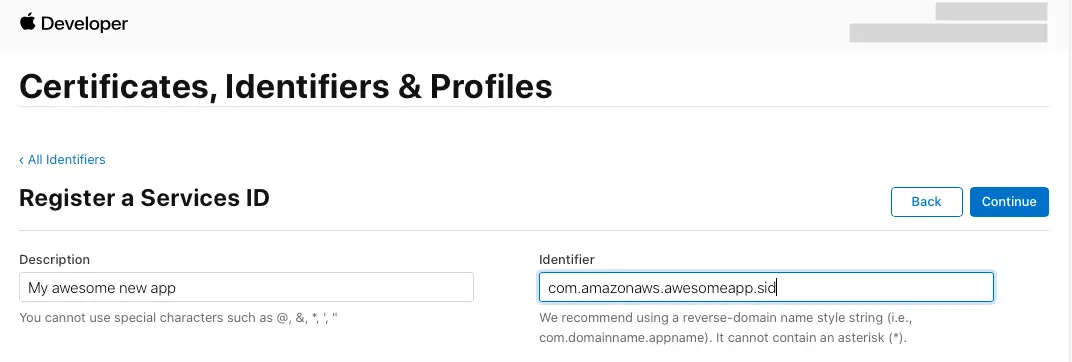
- Select the + icon and, on the Register a New Identifier page, select Services IDs.
- Provide a description in the Description text box and provide an identifier for the service id.
- Continue and register the service id.
Configure Auth Category
Once you have the social provider configured, run the following in your project’s root folder
amplify add auth ## "amplify update auth" if already configuredChoose the following options (the last steps are specific to Facebook here but are similar for other providers):
? Do you want to use the default authentication and security configuration? `Default configuration with Social Provider (Federation)`? How do you want users to be able to sign in? `Username`? Do you want to configure advanced settings? `No, I am done.`? What domain name prefix do you want to use? `(default)`? Enter your redirect signin URI: `myapp://callback/`? Do you want to add another redirect signin URI `No`? Enter your redirect signout URI: `myapp://signout/`? Do you want to add another redirect signout URI `No`? Select the social providers you want to configure for your user pool: `<choose your provider and follow the prompts to input the proper tokens>`Run amplify push to publish your changes. Once finished, it will display an auto generated URL for your web UI. You can retrieve your user pool domain URL at anytime by running amplify status using the CLI.
You need to now inform your auth provider of this URL:
-
Sign In to your Facebook developer account with your Facebook credentials.
-
Choose My Apps from the top navigation bar, and on the Apps page, choose your App you created before.
-
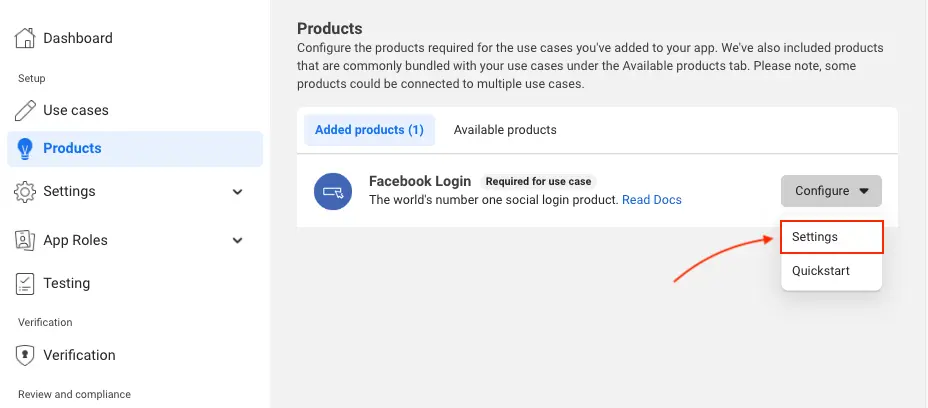
On the left navigation bar, choose Products. Add Facebook Login if it isn't already added.
-
If already added, choose Settings under the Configure dropdown.
-
Under Valid OAuth Redirect URIs type your user pool domain with the
/oauth2/idpresponseendpoint.https://<your-user-pool-domain>/oauth2/idpresponse
- Save changes.
-
Go to the Google developer console.
-
On the left navigation bar, look for APIs & Services under Pinned or under More Products if not pinned.
-
Within the APIs and Services sub menu, choose Credentials.
-
Select the client you created in the first step and click the edit button.
-
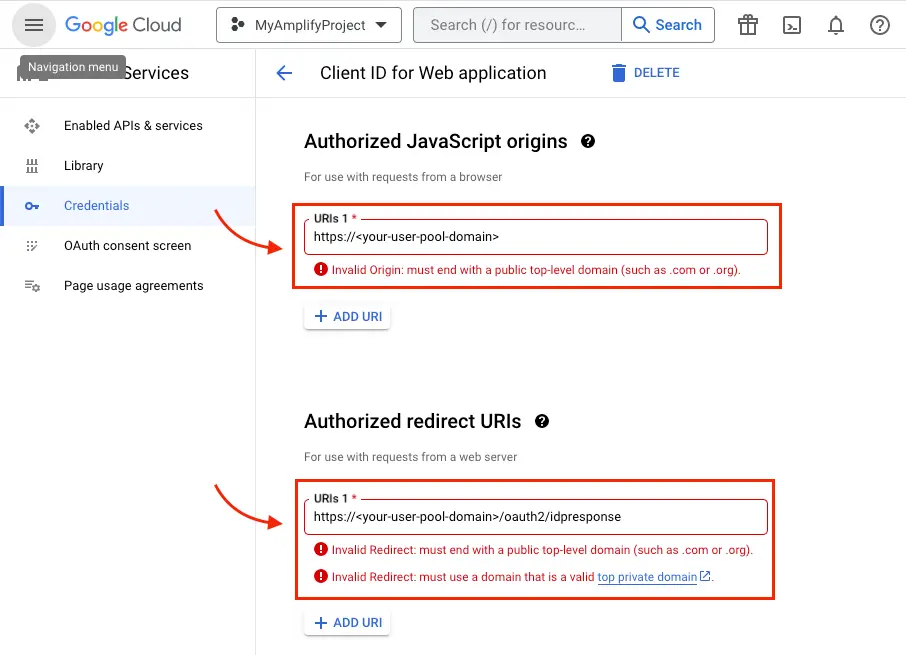
Type your user pool domain into Authorized Javascript origins.
-
Type your user pool domain with the
/oauth2/idpresponseendpoint into Authorized Redirect URIs.Note: If you saw an error message
Invalid Redirect: domain must be added to the authorized domains list before submitting.when adding the endpoint, please go to the authorized domains list and add the domain. -
Click Save.
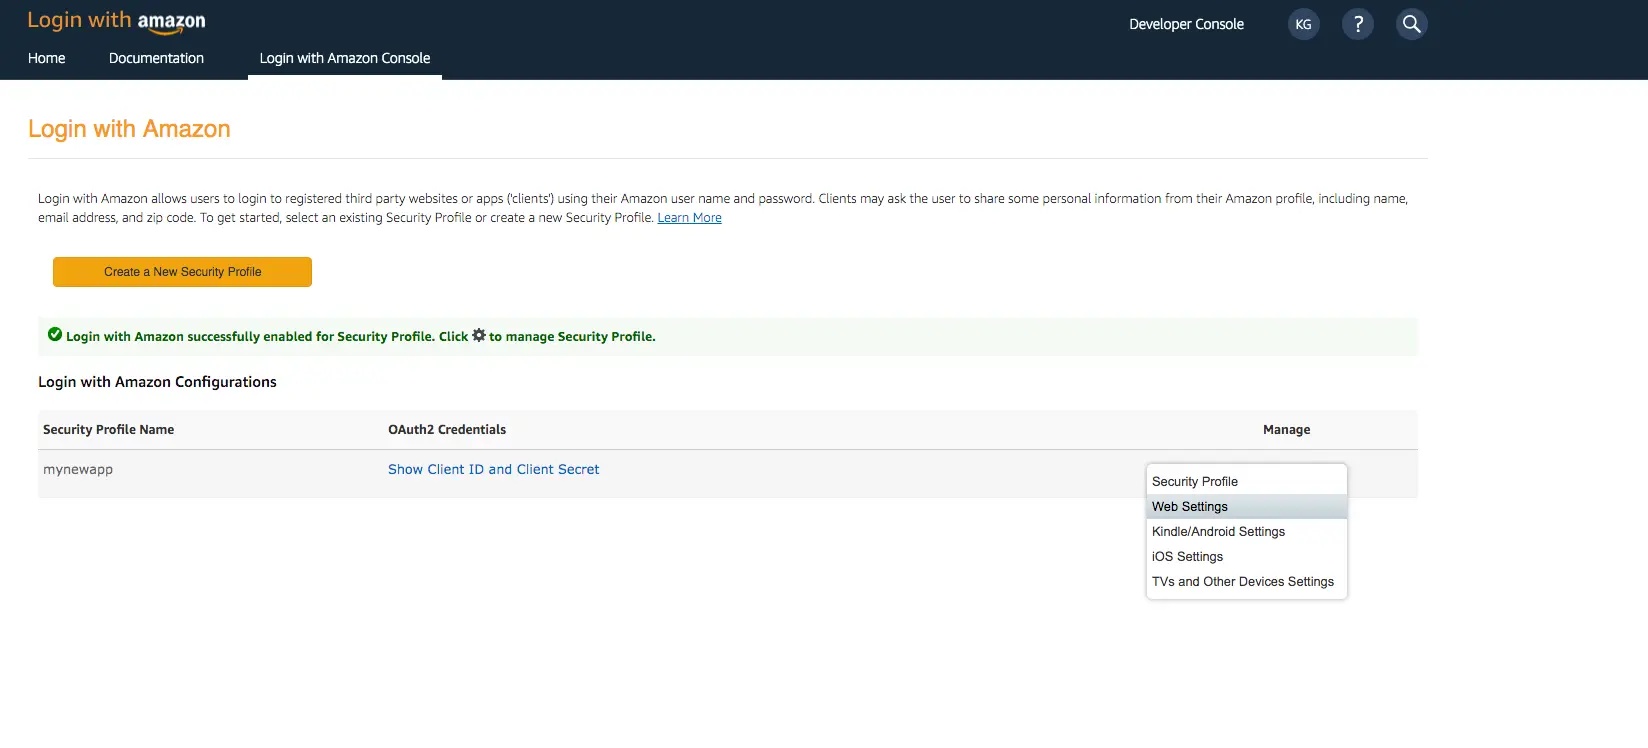
- Sign in with your Amazon credentials.
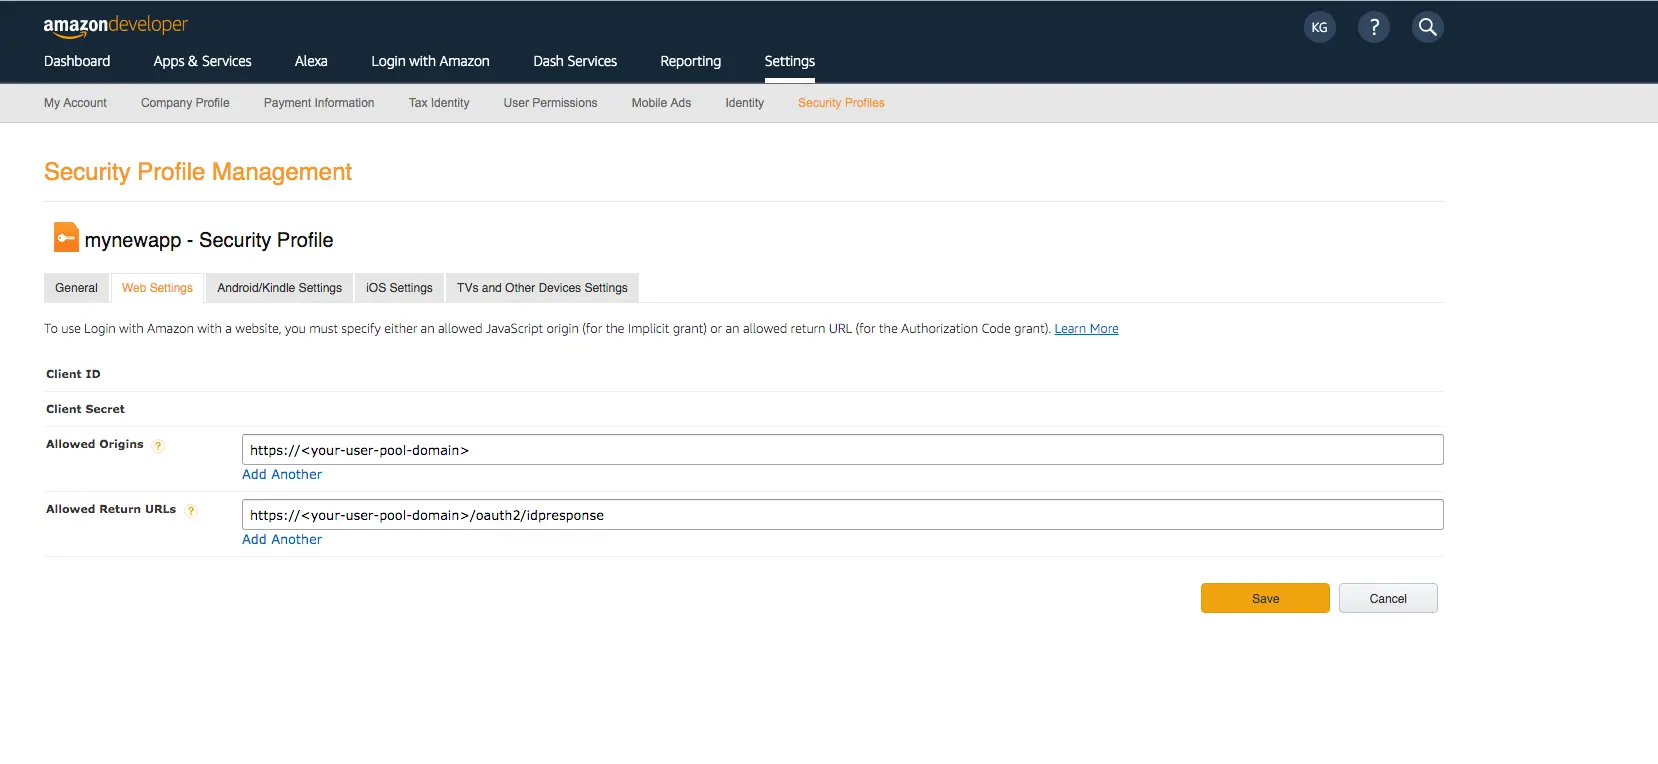
- Hover over the gear and choose Web Settings associated with the security profile you created in the previous step, and then choose Edit.
- Type your user pool domain into Allowed Origins and type your user pool domain with the /oauth2/idpresponse endpoint into Allowed Return URLs.
- Choose Save.
- Sign In with your Apple developer credentials.
- On the main developer portal page, select Certificates, IDs, & Profiles.
- On the left navigation bar, select Identifiers and then select Service IDs from the drop down list on the right.
- Select the service id created in
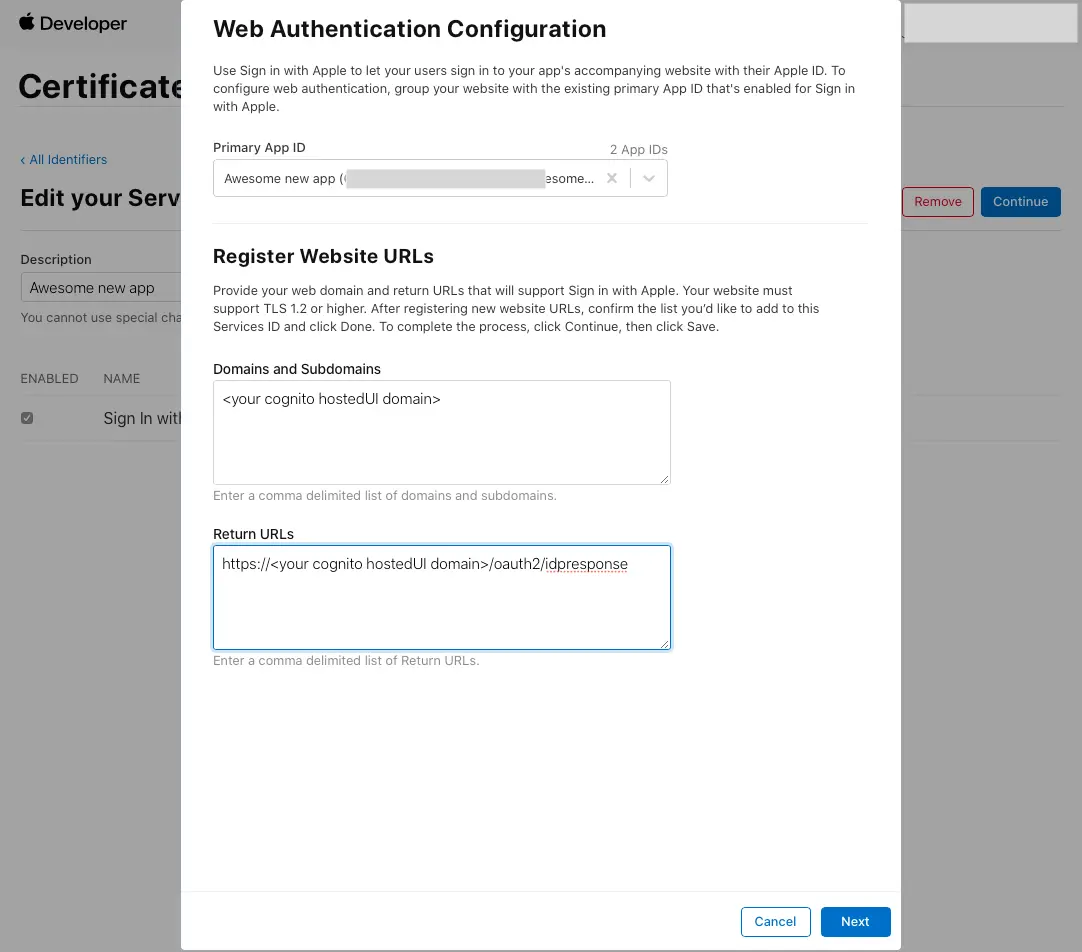
Setup your auth providerstep above. - Enabled Sign In with Apple and select Configure.
- Under Primary App ID select the app id that was created before.
- Type your user pool domain into Domains and Subdomains.
- Type your user pool domain with the
/oauth2/idpresponseendpoint into Return URLs. - Click Next, review the information, then select Done.
- On Edit your Services ID Configuration click Continue, review the information, then select Save.
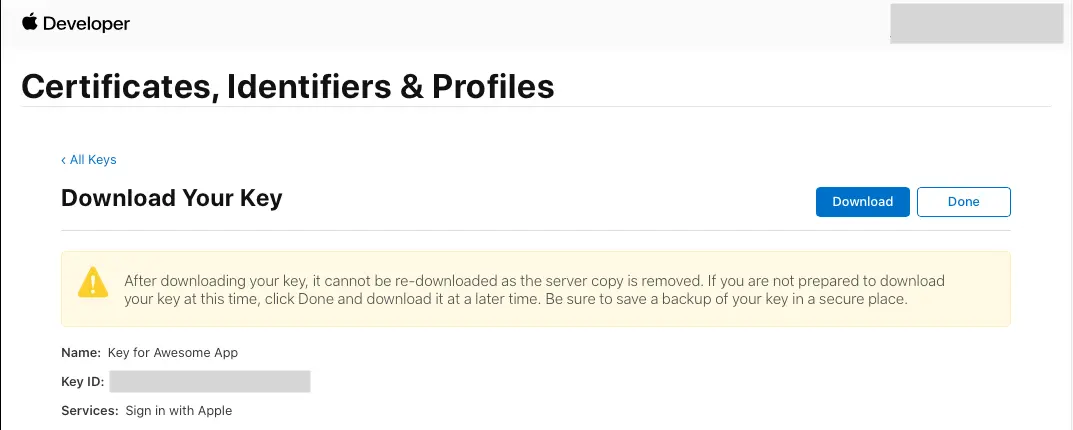
- On the main Certificates, Identifiers & Profiles, select Keys.
- On the Keys page, select the + icon.
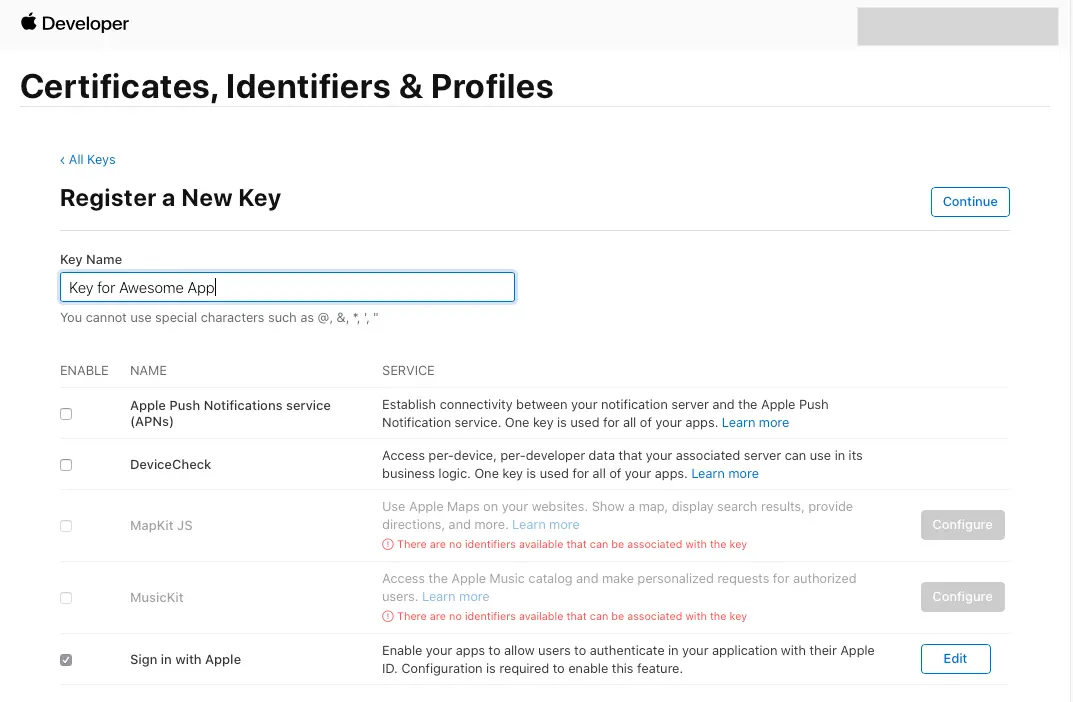
- Provide a name for the key under Key Name.
- Enable Sign in with Apple and select Configure
- Under Primary App ID select the app id that was created before.
- Click on Save
- On Register a New Key click Continue, review the information, then select Register.
- On the page you are redirected to take note of the Key ID and download the .p8 file containing the private key.
Update AndroidManifest.xml
Add the following activity and queries tag to your app's AndroidManifest.xml file, replacing myapp with
your redirect URI prefix if necessary:
<queries> <intent> <action android:name="android.intent.action.VIEW" /> <data android:scheme="https" /> </intent> <intent> <action android:name= "android.support.customtabs.action.CustomTabsService" /> </intent></queries><application ...> ... <activity android:name="com.amplifyframework.auth.cognito.activities.HostedUIRedirectActivity" android:exported="true"> <intent-filter> <action android:name="android.intent.action.VIEW" /> <category android:name="android.intent.category.DEFAULT" /> <category android:name="android.intent.category.BROWSABLE" /> <data android:scheme="myapp" /> </intent-filter> </activity> ...</application>Note: These versions have known issues with sign-out after signing in via web UI. Please update to the latest version and follow the updated instructions for best results.
Add the following activity to your app's AndroidManifest.xml file, replacing myapp with
whatever value you used for your redirect URI prefix:
<activity android:name="com.amazonaws.mobileconnectors.cognitoauth.activities.CustomTabsRedirectActivity" android:exported="true"> <intent-filter> <action android:name="android.intent.action.VIEW" /> <category android:name="android.intent.category.DEFAULT" /> <category android:name="android.intent.category.BROWSABLE" /> <data android:scheme="myapp" /> </intent-filter></activity>Add Response Handler
Add the following result handler to whichever Activity you are calling HostedUI from:
@Overrideprotected void onActivityResult(int requestCode, int resultCode, Intent data) {    super.onActivityResult(requestCode, resultCode, data);
if (requestCode == AWSCognitoAuthPlugin.WEB_UI_SIGN_IN_ACTIVITY_CODE && resultCode == Activity.RESULT_CANCELED) { Log.i("AuthQuickStart", "User canceled sign in"); }}override fun onActivityResult(requestCode: Int, resultCode: Int, data: Intent?) { super.onActivityResult(requestCode, resultCode, data)
if (requestCode == AWSCognitoAuthPlugin.WEB_UI_SIGN_IN_ACTIVITY_CODE && resultCode == Activity.RESULT_CANCELED) { Log.i("AuthQuickStart", "User canceled sign in") }}@Overrideprotected void onActivityResult(int requestCode, int resultCode, Intent data) { super.onActivityResult(requestCode, resultCode, data);
if (requestCode == AWSCognitoAuthPlugin.WEB_UI_SIGN_IN_ACTIVITY_CODE) { Amplify.Auth.handleWebUISignInResponse(data); }}override fun onActivityResult(requestCode: Int, resultCode: Int, data: Intent?) { super.onActivityResult(requestCode, resultCode, data)
if (requestCode == AWSCognitoAuthPlugin.WEB_UI_SIGN_IN_ACTIVITY_CODE) { Amplify.Auth.handleWebUISignInResponse(data) }}override fun onActivityResult(requestCode: Int, resultCode: Int, data: Intent?) { super.onActivityResult(requestCode, resultCode, data)
if (requestCode == AWSCognitoAuthPlugin.WEB_UI_SIGN_IN_ACTIVITY_CODE) { Amplify.Auth.handleWebUISignInResponse(data) }}@Overrideprotected void onActivityResult(int requestCode, int resultCode, Intent data) { super.onActivityResult(requestCode, resultCode, data);
if (requestCode == AWSCognitoAuthPlugin.WEB_UI_SIGN_IN_ACTIVITY_CODE) { RxAmplify.Auth.handleWebUISignInResponse(data); }}Launch Social Web UI Sign In
Sweet! You're now ready to launch sign in with your social provider's web UI.
For now, just add this method to the onCreate method of MainActivity with whatever provider you're using (shown with Facebook below):
Amplify.Auth.signInWithSocialWebUI(AuthProvider.facebook(), this, result -> Log.i("AuthQuickstart", result.toString()), error -> Log.e("AuthQuickstart", error.toString()));Amplify.Auth.signInWithSocialWebUI(AuthProvider.facebook(), this, { Log.i("AuthQuickstart", "Sign in OK: $it") }, { Log.e("AuthQuickstart", "Sign in failed", it) })try { val result = Amplify.Auth.signInWithSocialWebUI(AuthProvider.facebook(), this) Log.i("AuthQuickstart", "Sign in OK: $result")} catch (error: AuthException) { Log.e("AuthQuickstart", "Sign in failed", error)}RxAmplify.Auth.signInWithSocialWebUI(AuthProvider.facebook(), this) .subscribe( result -> Log.i("AuthQuickstart", result.toString()), error -> Log.e("AuthQuickstart", error.toString()) );