Set up Storage
In this guide, you will learn how to set up storage in your Amplify app. You will set up your backend resources, and enable listing, uploading, and downloading files.
If you have not yet created an Amplify app, visit the quickstart guide.
Amplify Storage seamlessly integrates file storage and management capabilities into frontend web and mobile apps, built on top of Amazon Simple Storage Service (Amazon S3). It provides intuitive APIs and UI components for core file operations, enabling developers to build scalable and secure file storage solutions without dealing with cloud service complexities.
Building your storage backend
First, create a file amplify/storage/resource.ts. This file will be the location where you configure your storage backend. Instantiate storage using the defineStorage function and providing a name for your storage bucket. This name is a friendly name to identify your bucket in your backend configuration. Amplify will generate a unique identifier for your app using a UUID, the name attribute is just for use in your app.
import { defineStorage } from '@aws-amplify/backend';
export const storage = defineStorage({  name: 'amplifyTeamDrive'});
Import your storage definition in your amplify/backend.ts file that contains your backend definition. Add storage to defineBackend.
import { defineBackend } from '@aws-amplify/backend';import { auth } from './auth/resource';
defineBackend({ auth,});Now when you run npx ampx sandbox or deploy your app on Amplify, it will configure an Amazon S3 bucket where your files will be stored. Before files can be accessed in your application, you must configure storage access rules.
To deploy these changes, commit them to git and push the changes upstream. Amplify's CI/CD system will automatically pick up the changes and build and deploy the updates.
git commit -am "add storage backend"git pushDefine File Path Access
By default, no users or other project resources have access to any files in the storage bucket. Access must be explicitly granted within defineStorage using the access callback.
The access callback returns an object where each key in the object is a file path and each value in the object is an array of access rules that apply to that path.
The following example shows you how you can set up your file storage structure for a generic photo sharing app. Here,
- Guests have access to see all profile pictures and only the users that uploaded the profile picture can replace or delete them. Users are identified by their Identity Pool ID in this case i.e. identityID.
- There's also a general pool where all users can submit pictures.
Learn more about customizing access to file path.
export const storage = defineStorage({ name: 'amplifyTeamDrive', access: (allow) => ({ 'profile-pictures/{entity_id}/*': [ allow.guest.to(['read']), allow.entity('identity').to(['read', 'write', 'delete']) ], 'picture-submissions/*': [ allow.authenticated.to(['read','write']), allow.guest.to(['read', 'write']) ], })});Connect your app code to the storage backend
The Amplify Storage library provides client APIs that connect to the backend resources you defined.
Prerequisites
-
A Flutter application targeting Flutter SDK >= 3.3.0 with Amplify libraries integrated
The following are also required, depending on which platforms you are targeting:
- An iOS configuration targeting at least iOS 13.0 and XCode version >=13.2
- An Android configuration targeting at least Android API level 24 (Android 7.0) or above
- Any browser supported by Flutter for Web (you can check the list of supported browsers here)
- Any Windows OS meeting Flutter minimums
- macOS version 10.15 or higher
- Any Ubuntu Linux distribution meeting Flutter minimums
- For a full example please follow the project setup walkthrough
Install Amplify library
Add the following dependency to your app's pubspec.yaml along with others you added above in Prerequisites:
environment:  sdk: ">=2.18.0 <4.0.0"  flutter: ">=3.3.0"
dependencies:  flutter:    sdk: flutter
  amplify_auth_cognito: ^1.0.0  amplify_flutter: ^1.0.0  amplify_storage_s3: ^1.0.0
Configure Amplify in project
To initialize the Amplify Auth and Storage categories, call Amplify.addPlugin() for each plugin or pass all the plugins in Amplify.addPlugins(). To complete initialization, call Amplify.configure().
Your code should look like this:
import 'package:amplify_auth_cognito/amplify_auth_cognito.dart';import 'package:amplify_flutter/amplify_flutter.dart';import 'package:amplify_storage_s3/amplify_storage_s3.dart';import 'package:flutter/material.dart';
import 'amplifyconfiguration.dart';
Future<void> _configureAmplify() async {  try {    final auth = AmplifyAuthCognito();    final storage = AmplifyStorageS3();    await Amplify.addPlugins([auth, storage]);
    // call Amplify.configure to use the initialized categories in your app    await Amplify.configure(outputs);  } on Exception catch (e) {    safePrint('An error occurred configuring Amplify: $e');  }}
Future<void> main() async {  WidgetsFlutterBinding.ensureInitialized();  await _configureAmplify();  runApp(const MyApp());}
class MyApp extends StatefulWidget {  const MyApp({Key? key}) : super(key: key);
  // ...}
Upload your first file
Next, let's a photo to the picture-submissions/ path.
import 'package:amplify_flutter/amplify_flutter.dart';
Future<void> uploadFile() async { try { final result = await Amplify.Storage.uploadFile( localFile: AWSFile.fromPath('/path/to/local/myPhoto.png'), path: const StoragePath.fromString('picture-submissions/myPhoto.png'), ).result; safePrint('Uploaded file: ${result.uploadedItem.path}'); } on StorageException catch (e) { safePrint(e.message); }}import 'dart:io' show File;
import 'package:amplify_flutter/amplify_flutter.dart';import 'package:aws_common/vm.dart';
Future<void> uploadFile(File file) async { try { final result = await Amplify.Storage.uploadFile( localFile: AWSFilePlatform.fromFile(file), path: const StoragePath.fromString('picture-submissions/myPhoto.png'), ).result; safePrint('Uploaded file: ${result.uploadedItem.path}'); } on StorageException catch (e) { safePrint(e.message); }}import 'dart:html' show File;
import 'package:amplify_flutter/amplify_flutter.dart';import 'package:aws_common/web.dart';
Future<void> uploadFile(File file) async { final awsFile = AWSFilePlatform.fromFile(file); try { final result = await Amplify.Storage.uploadFile( localFile: awsFile, path: const StoragePath.fromString('picture-submissions/myPhoto.png'), ).result; safePrint('Uploaded file: ${result.uploadedItem.path}'); } on StorageException catch (e) { safePrint(e.message); }}Manage files in Amplify console
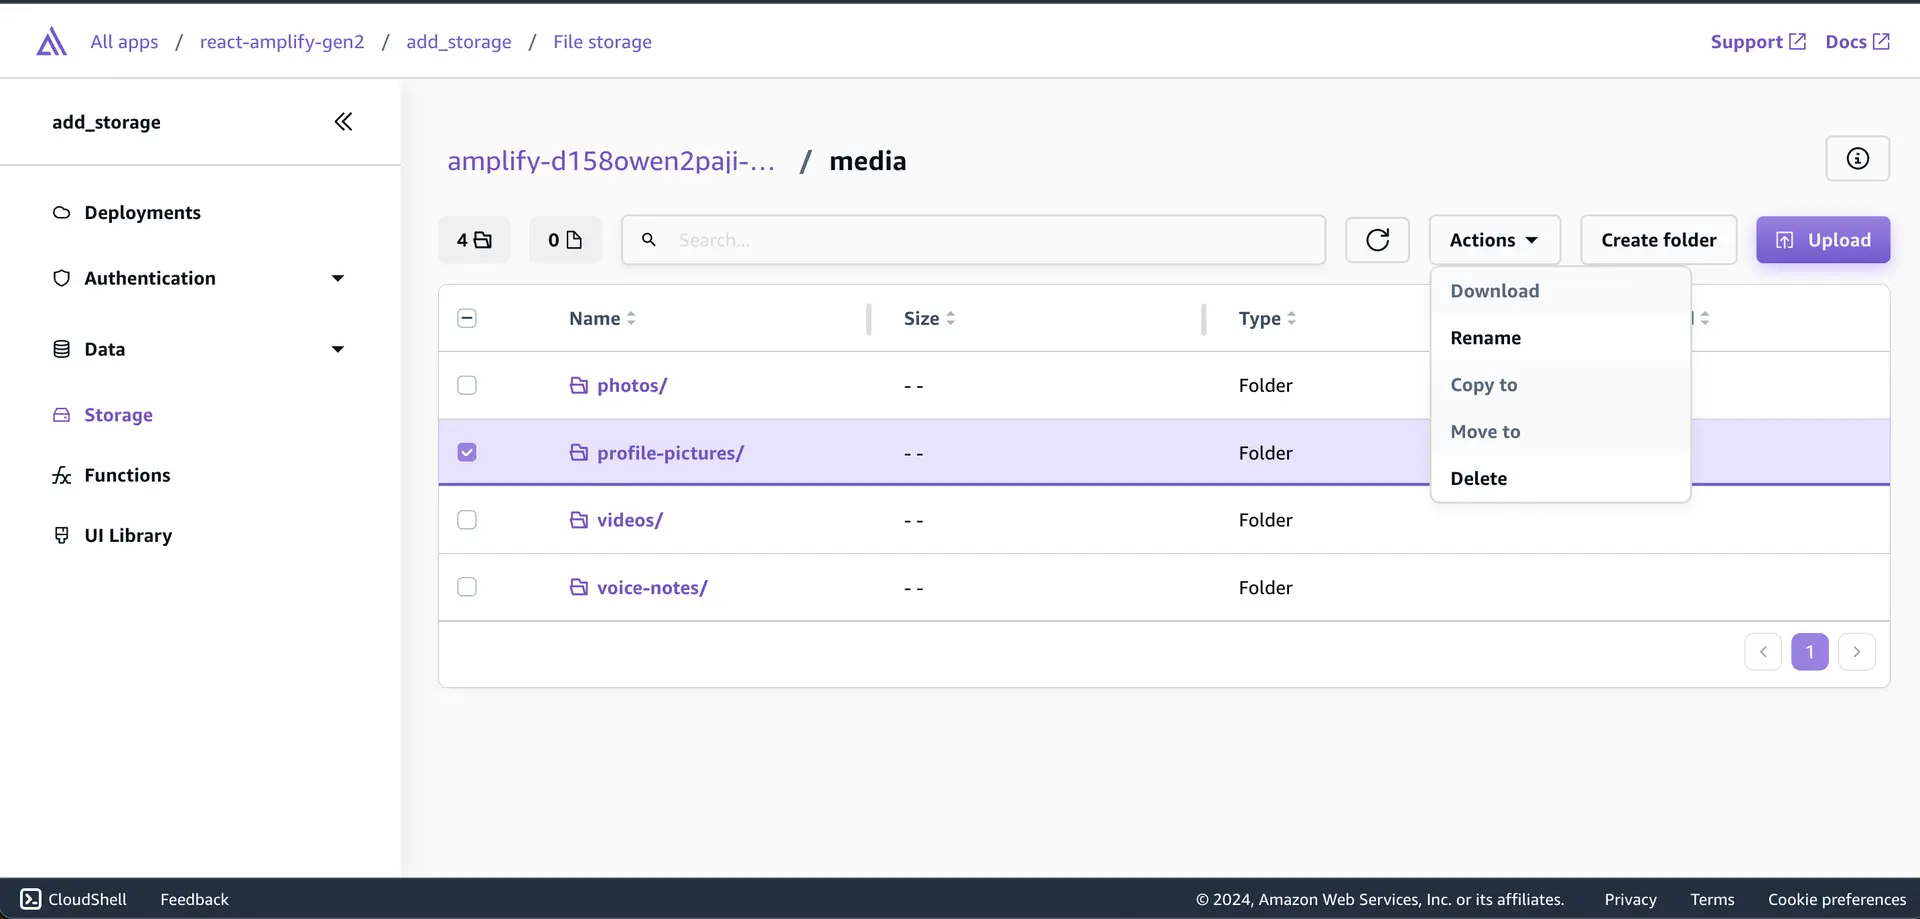
After successfully publishing your storage backend and connecting your project with client APIs, you can manage files and folders in the Amplify console. You can perform on-demand actions like upload, download, copy, and more under the Storage tab in the console.
Conclusion
Congratulations! You finished the Set up Amplify Storage guide. In this guide, you set up and connected to backend resources, customized your file paths and access definitions, and connected your application to the backend to implement features like file uploads and downloads.
Next steps
Now that you have completed setting up storage in your Amplify app, you can proceed to add file management features to your app. You can use the following guides to implement upload and download functionality, or you can access more capabilities from the side navigation.