Getting started
PubSub provides connectivity with cloud-based message-oriented middleware. You can use PubSub to pass messages between your app instances and your app's backend creating real-time interactive experiences.
PubSub is available with AWS IoT.
Installation and Configuration
AWS IoT
In the PubSub category, AWSIoTMqttManager establishes a signed connection with AWS IoT according to Signature Version 4.
Set up AWS Mobile SDK components by including the following libraries in your app/build.gradle dependencies list.
dependencies { implementation 'com.amazonaws:aws-android-sdk-iot:ANDROID_SDK_VERSION' implementation 'com.amazonaws:aws-android-sdk-mobile-client:ANDROID_SDK_VERSION'}aws-android-sdk-iotlibrary enables connecting to AWS IoT.aws-android-sdk-mobile-clientlibrary gives access to the AWS credentials provider and configurations.
To use in your app, import the following classes:
import com.amazonaws.mobileconnectors.iot.AWSIotMqttManager;import com.amazonaws.mobileconnectors.iot.AWSIotMqttNewMessageCallback;import com.amazonaws.mobileconnectors.iot.AWSIotMqttQos;Define your unique client ID and endpoint (incl. region) in your configuration:
// Initialize the AWSIotMqttManager with the configurationAWSIotMqttManager mqttManager = new AWSIotMqttManager( "<YOUR_CLIENT_ID>", "xxxxxxxxxxxxx-ats.iot.<YOUR-AWS-REGION>.amazonaws.com");Create IAM policies for AWS IoT
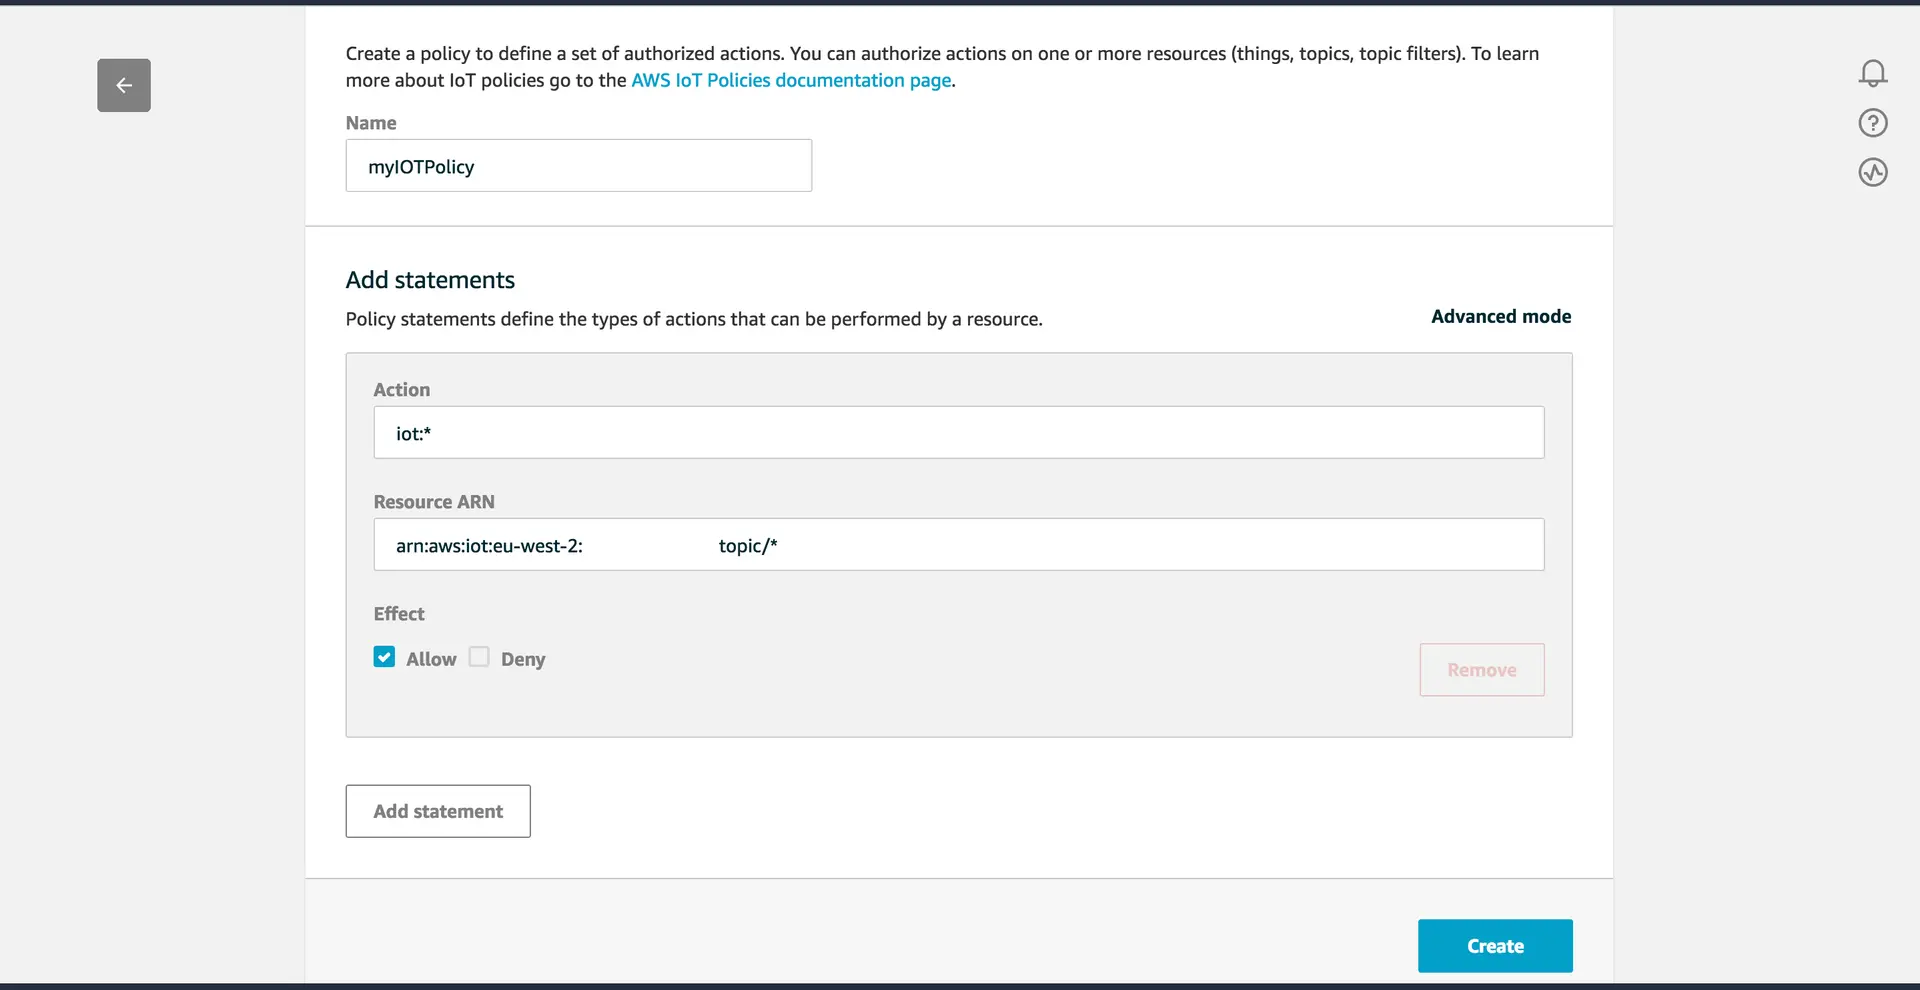
To use PubSub with AWS IoT, you will need to create the necessary IAM policies in the AWS IoT Console, and attach them to your Amazon Cognito Identity.
Go to IoT Core and choose Secure from the left navigation pane, and then Policies from the dropdown menu. Next, click Create. The following myIOTPolicy policy will allow full access to all the topics.
Attach your policy to your Amazon Cognito Identity
To attach the policy to your Cognito Identity, begin by retrieving the Cognito Identity Id from AWSMobileClient.
AWSMobileClient.getInstance().getIdentityId();Then, you need to attach the myIOTPolicy policy to the user's Cognito Identity Id with the following AWS CLI command:
aws iot attach-principal-policy --policy-name 'myIOTPolicy' --principal '<YOUR_COGNITO_IDENTITY_ID>'To programmatically attach the myIOTPolicy policy to the user's Cognito Identity Id, import the following classes:
import com.amazonaws.services.iot.AWSIotClient;import com.amazonaws.mobile.client.AWSMobileClient;import com.amazonaws.services.iot.model.AttachPolicyRequest;Next, instantiate the AttachPolicyRequest class and attach it your IoT Client as follows:
AttachPolicyRequest attachPolicyReq = new AttachPolicyRequest();attachPolicyReq.setPolicyName("myIOTPolicy"); // name of your IOT AWS policyattachPolicyReq.setTarget(AWSMobileClient.getInstance().getIdentityId());AWSIotClient mIotAndroidClient = new AWSIotClient(AWSMobileClient.getInstance());mIotAndroidClient.setRegion(Region.getRegion("<YOUR-AWS-REGION>")); // name of your IoT Region such as "us-east-1"mIotAndroidClient.attachPolicy(attachPolicyReq);