Relational databases
The Amplify CLI currently supports importing serverless Amazon Aurora MySQL 5.6 databases. The following instruction show how to create an Amazon Aurora Serverless database, import this database as a GraphQL data source and test it.
First, if you do not have an Amplify project with a GraphQL API create one using these simple commands.
amplify initamplify add apiGo to the AWS RDS console and click "Create database".
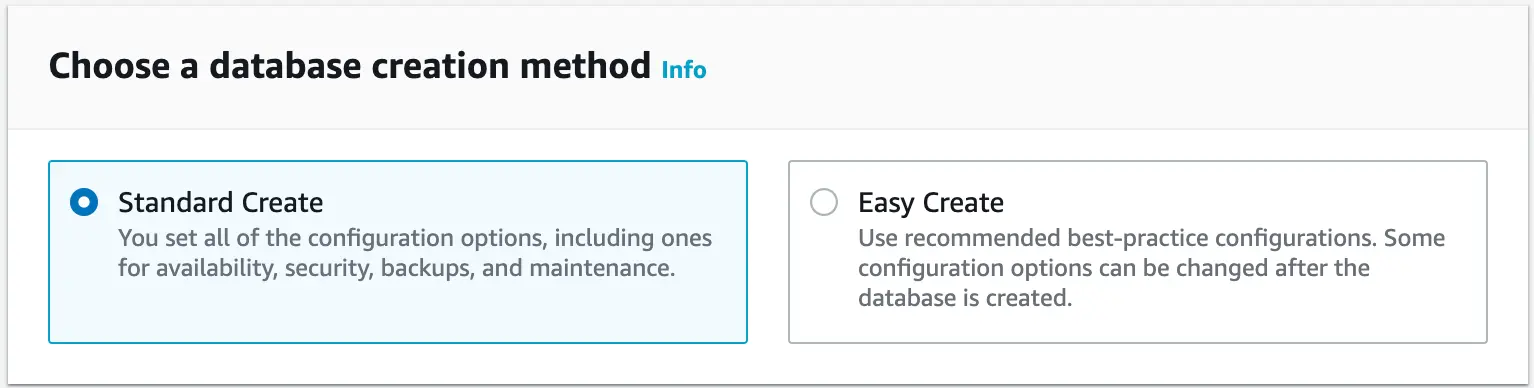
Select "Standard Create" for the database creation method
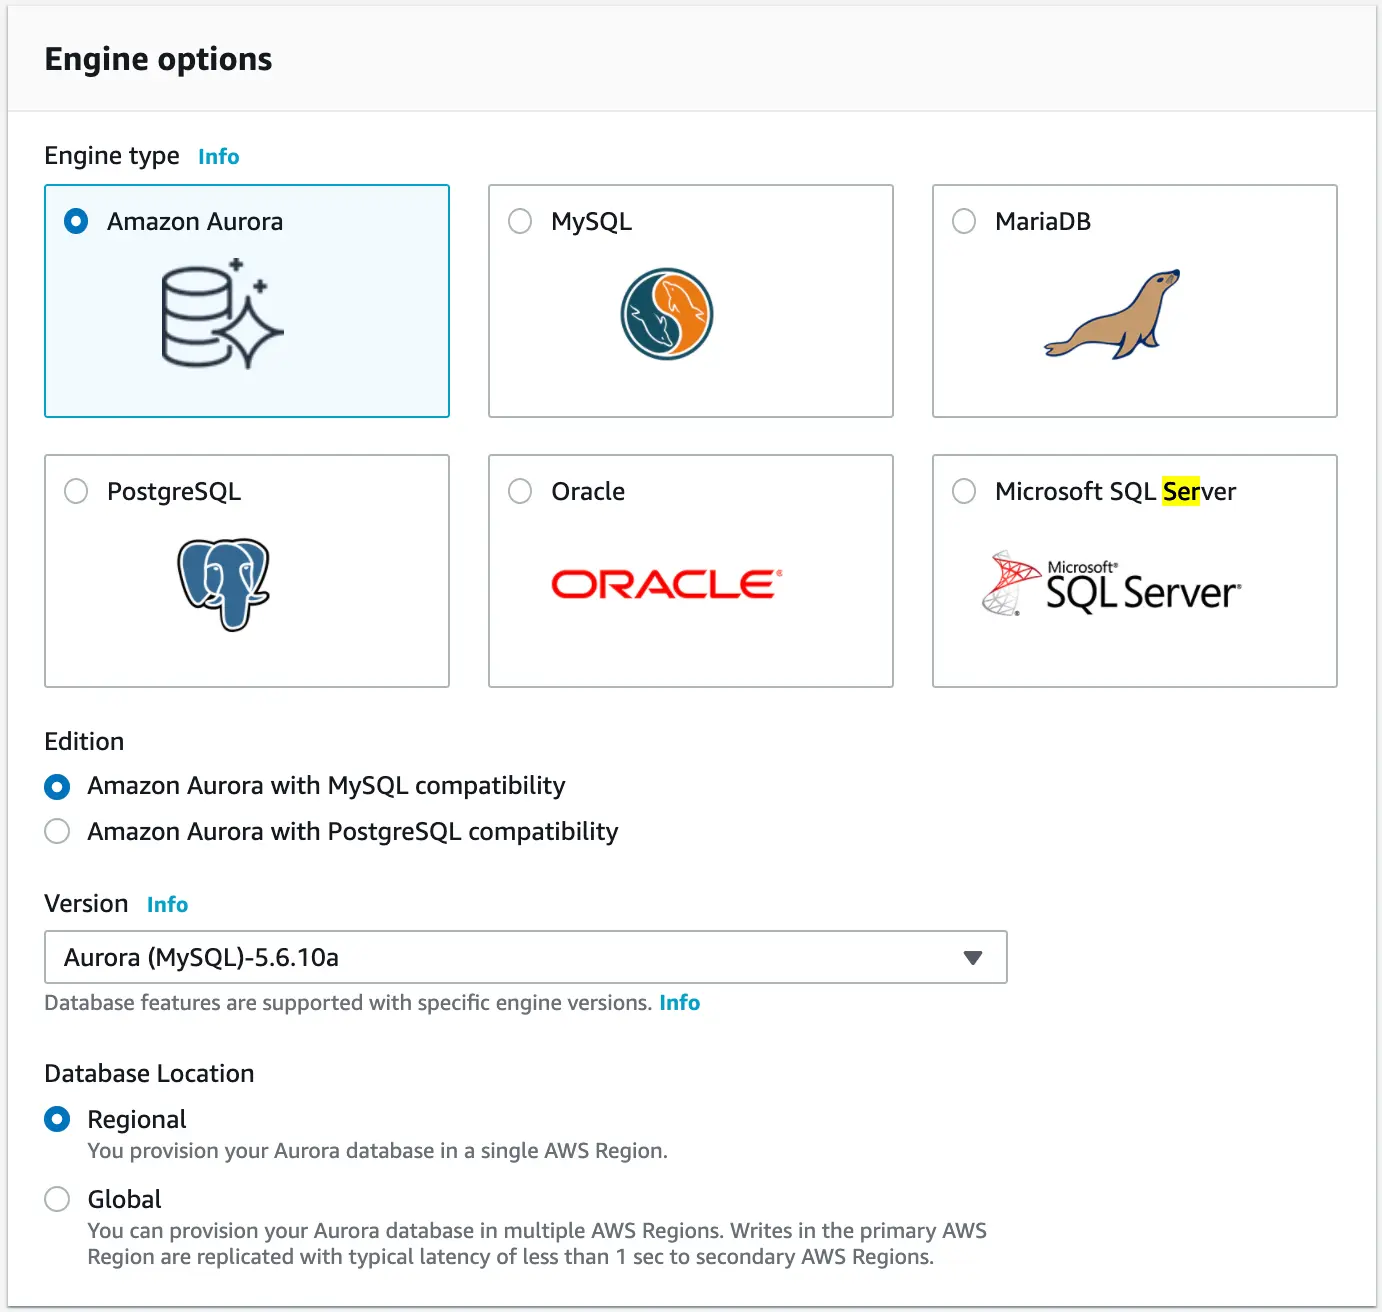
For Engine Options keep the following options
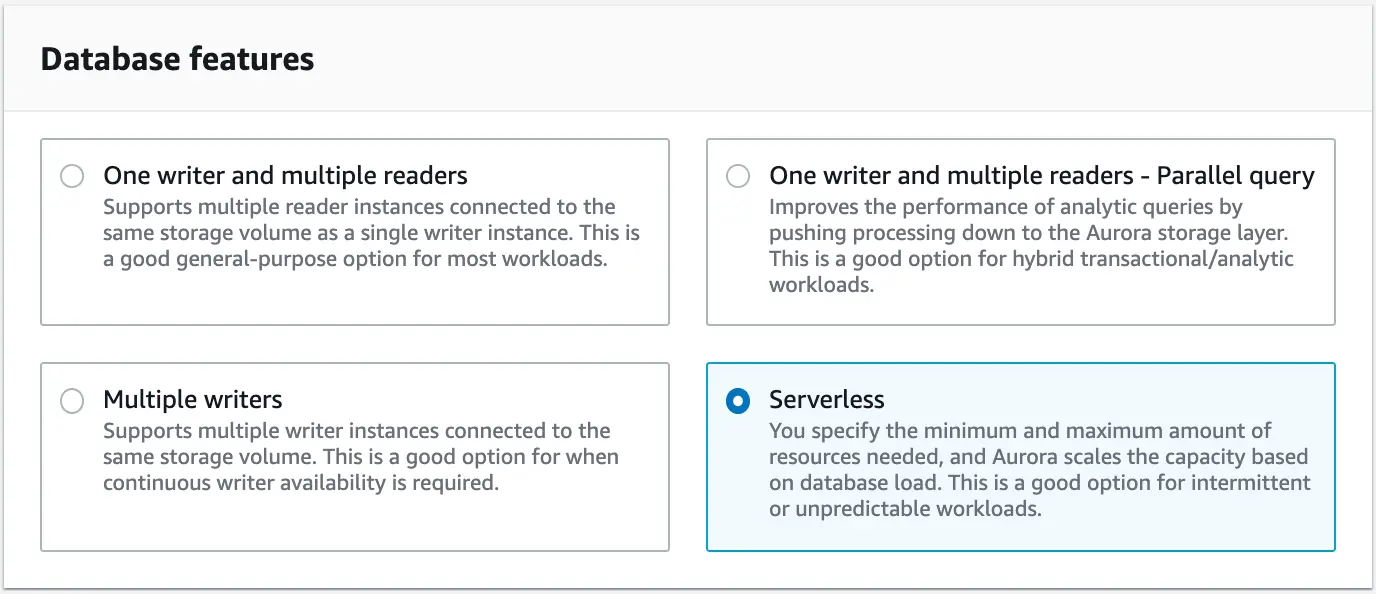
Select "Serverless" in Database Features
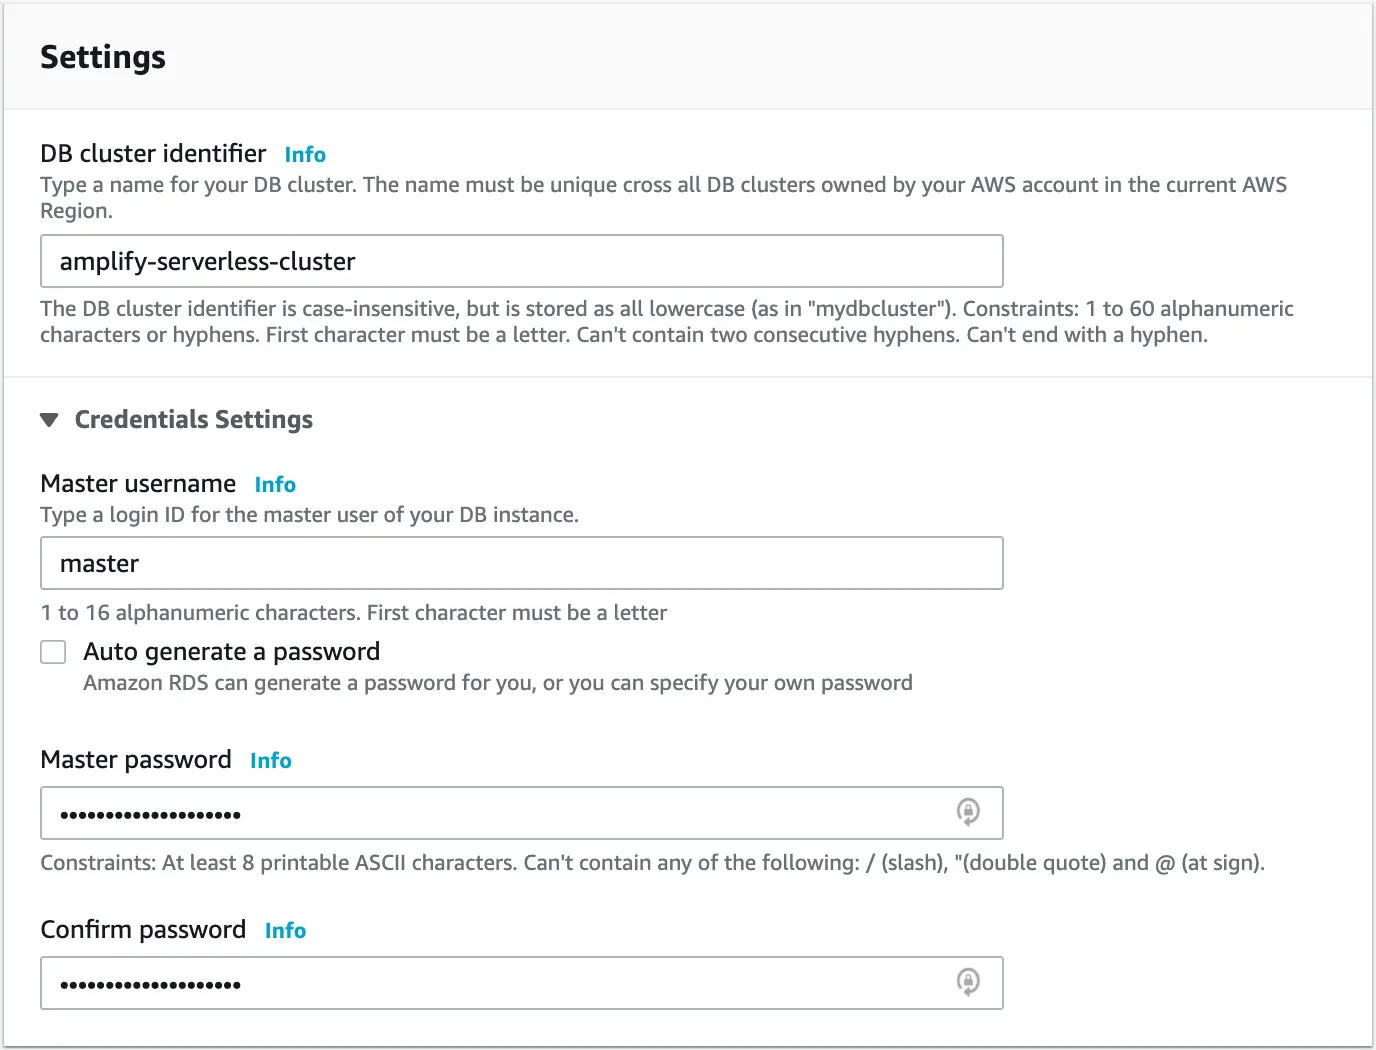
In Settings fill in the following information
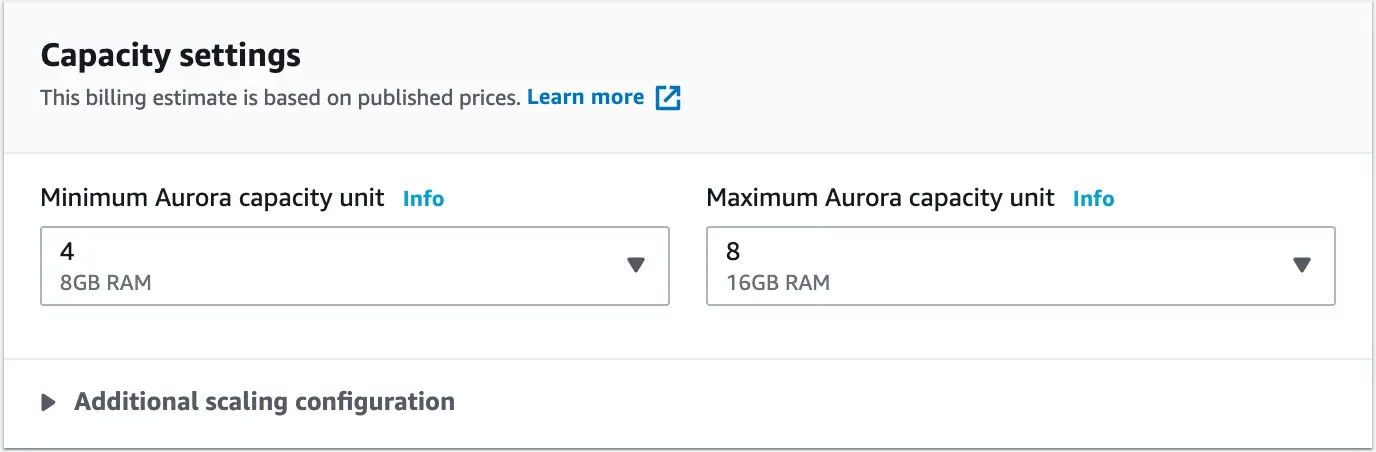
Select the Capacity Settings as shown below
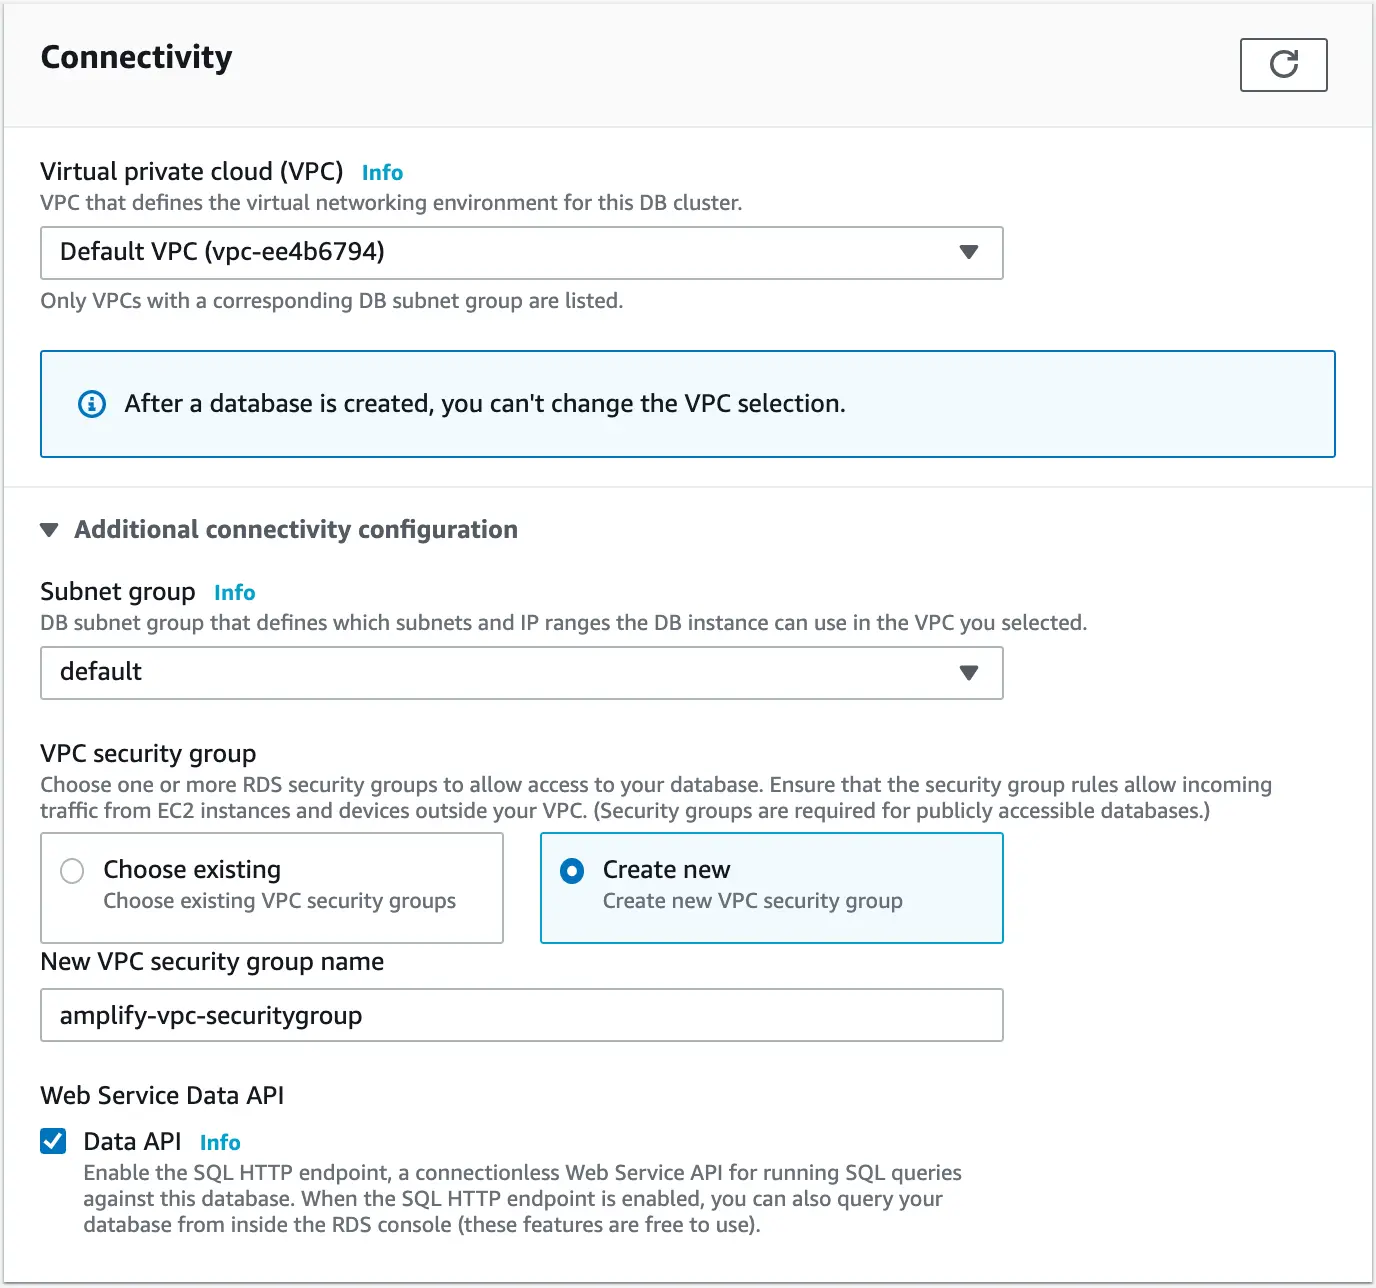
Expand the "Additional connectivity configuration" and enable "Data API" and "Create New" if you do not have a VPC security group configured
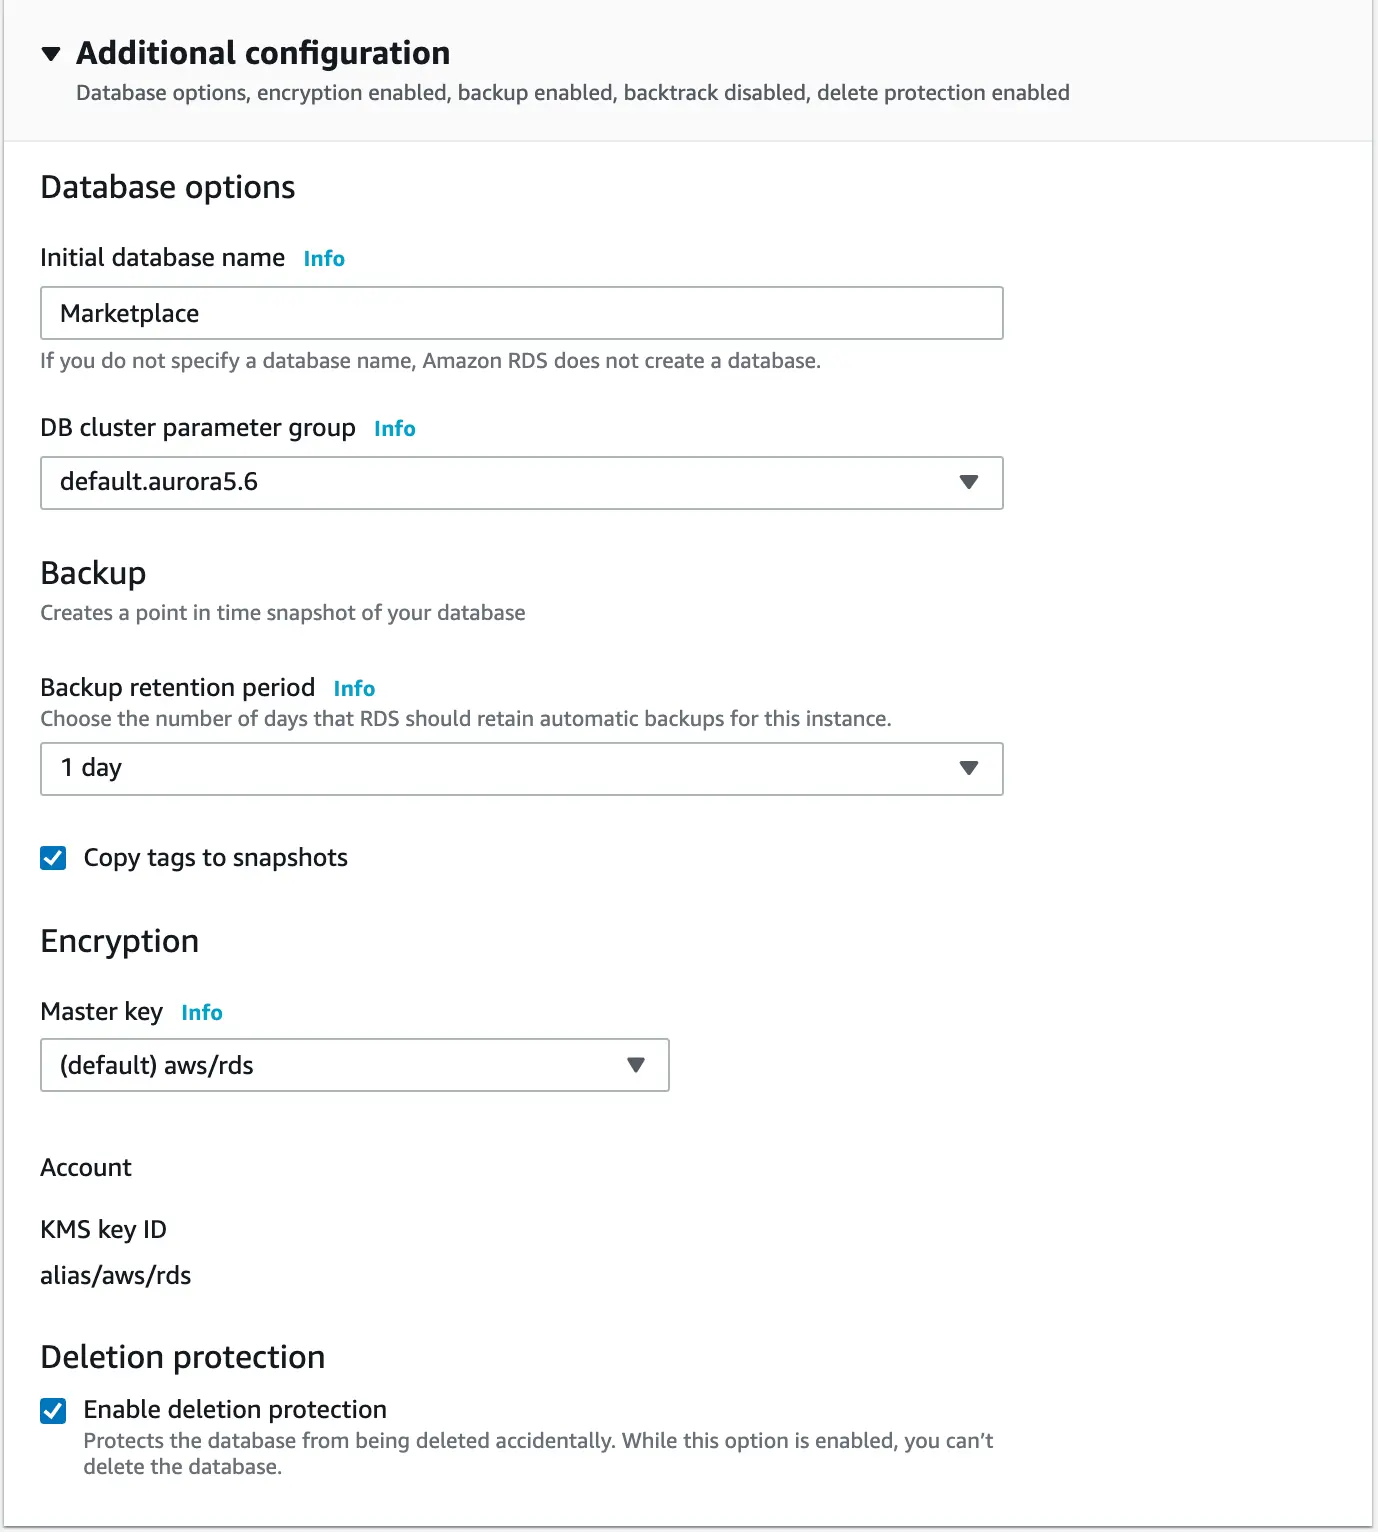
Expand "Additional Configuration" and fill in "Initial Database Name" as MarketPlace
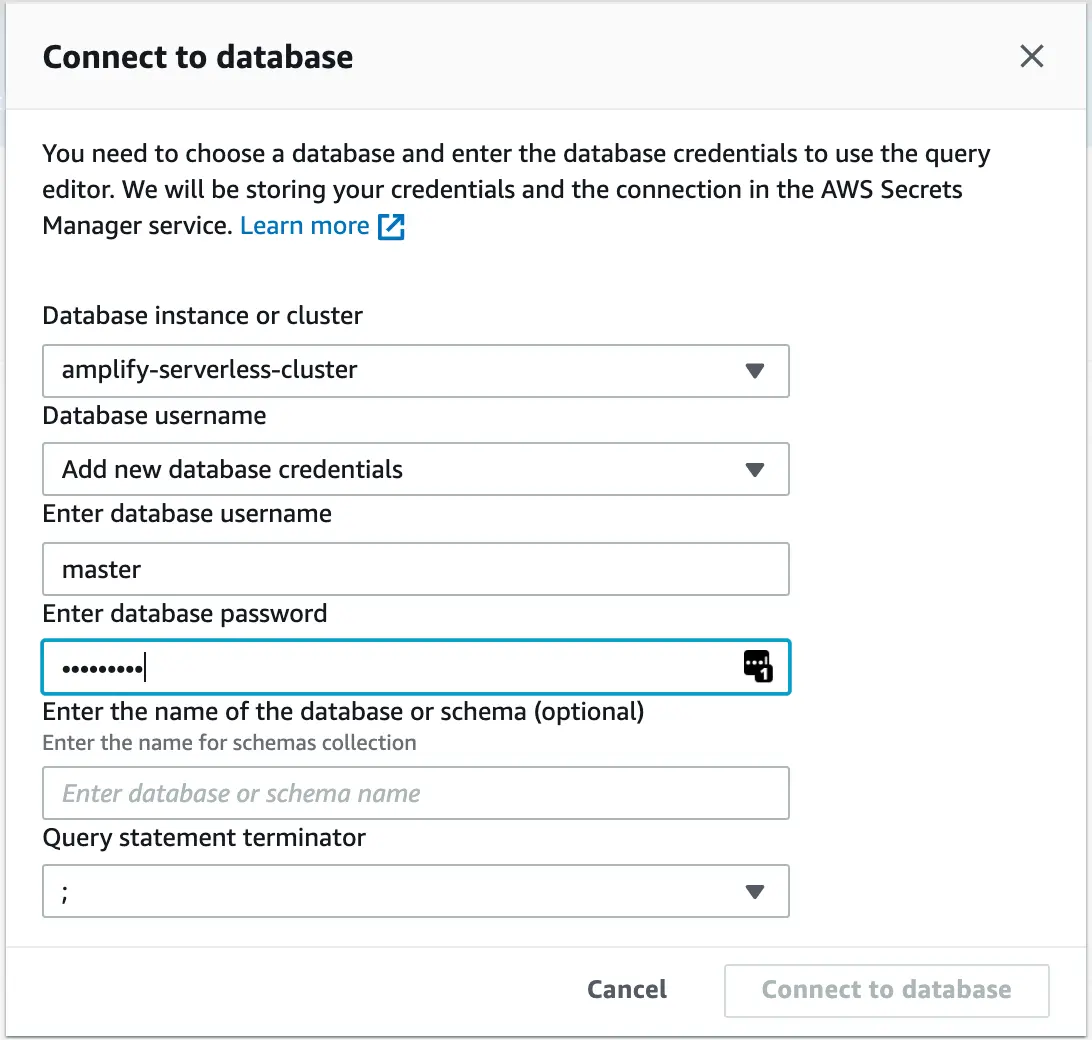
Click Create Database. Once created, click Query Editor on the side menu to open a connection prompt. To connect, select the cluster and fill in the credentials configured earlier.
After connecting, create a database and some tables.
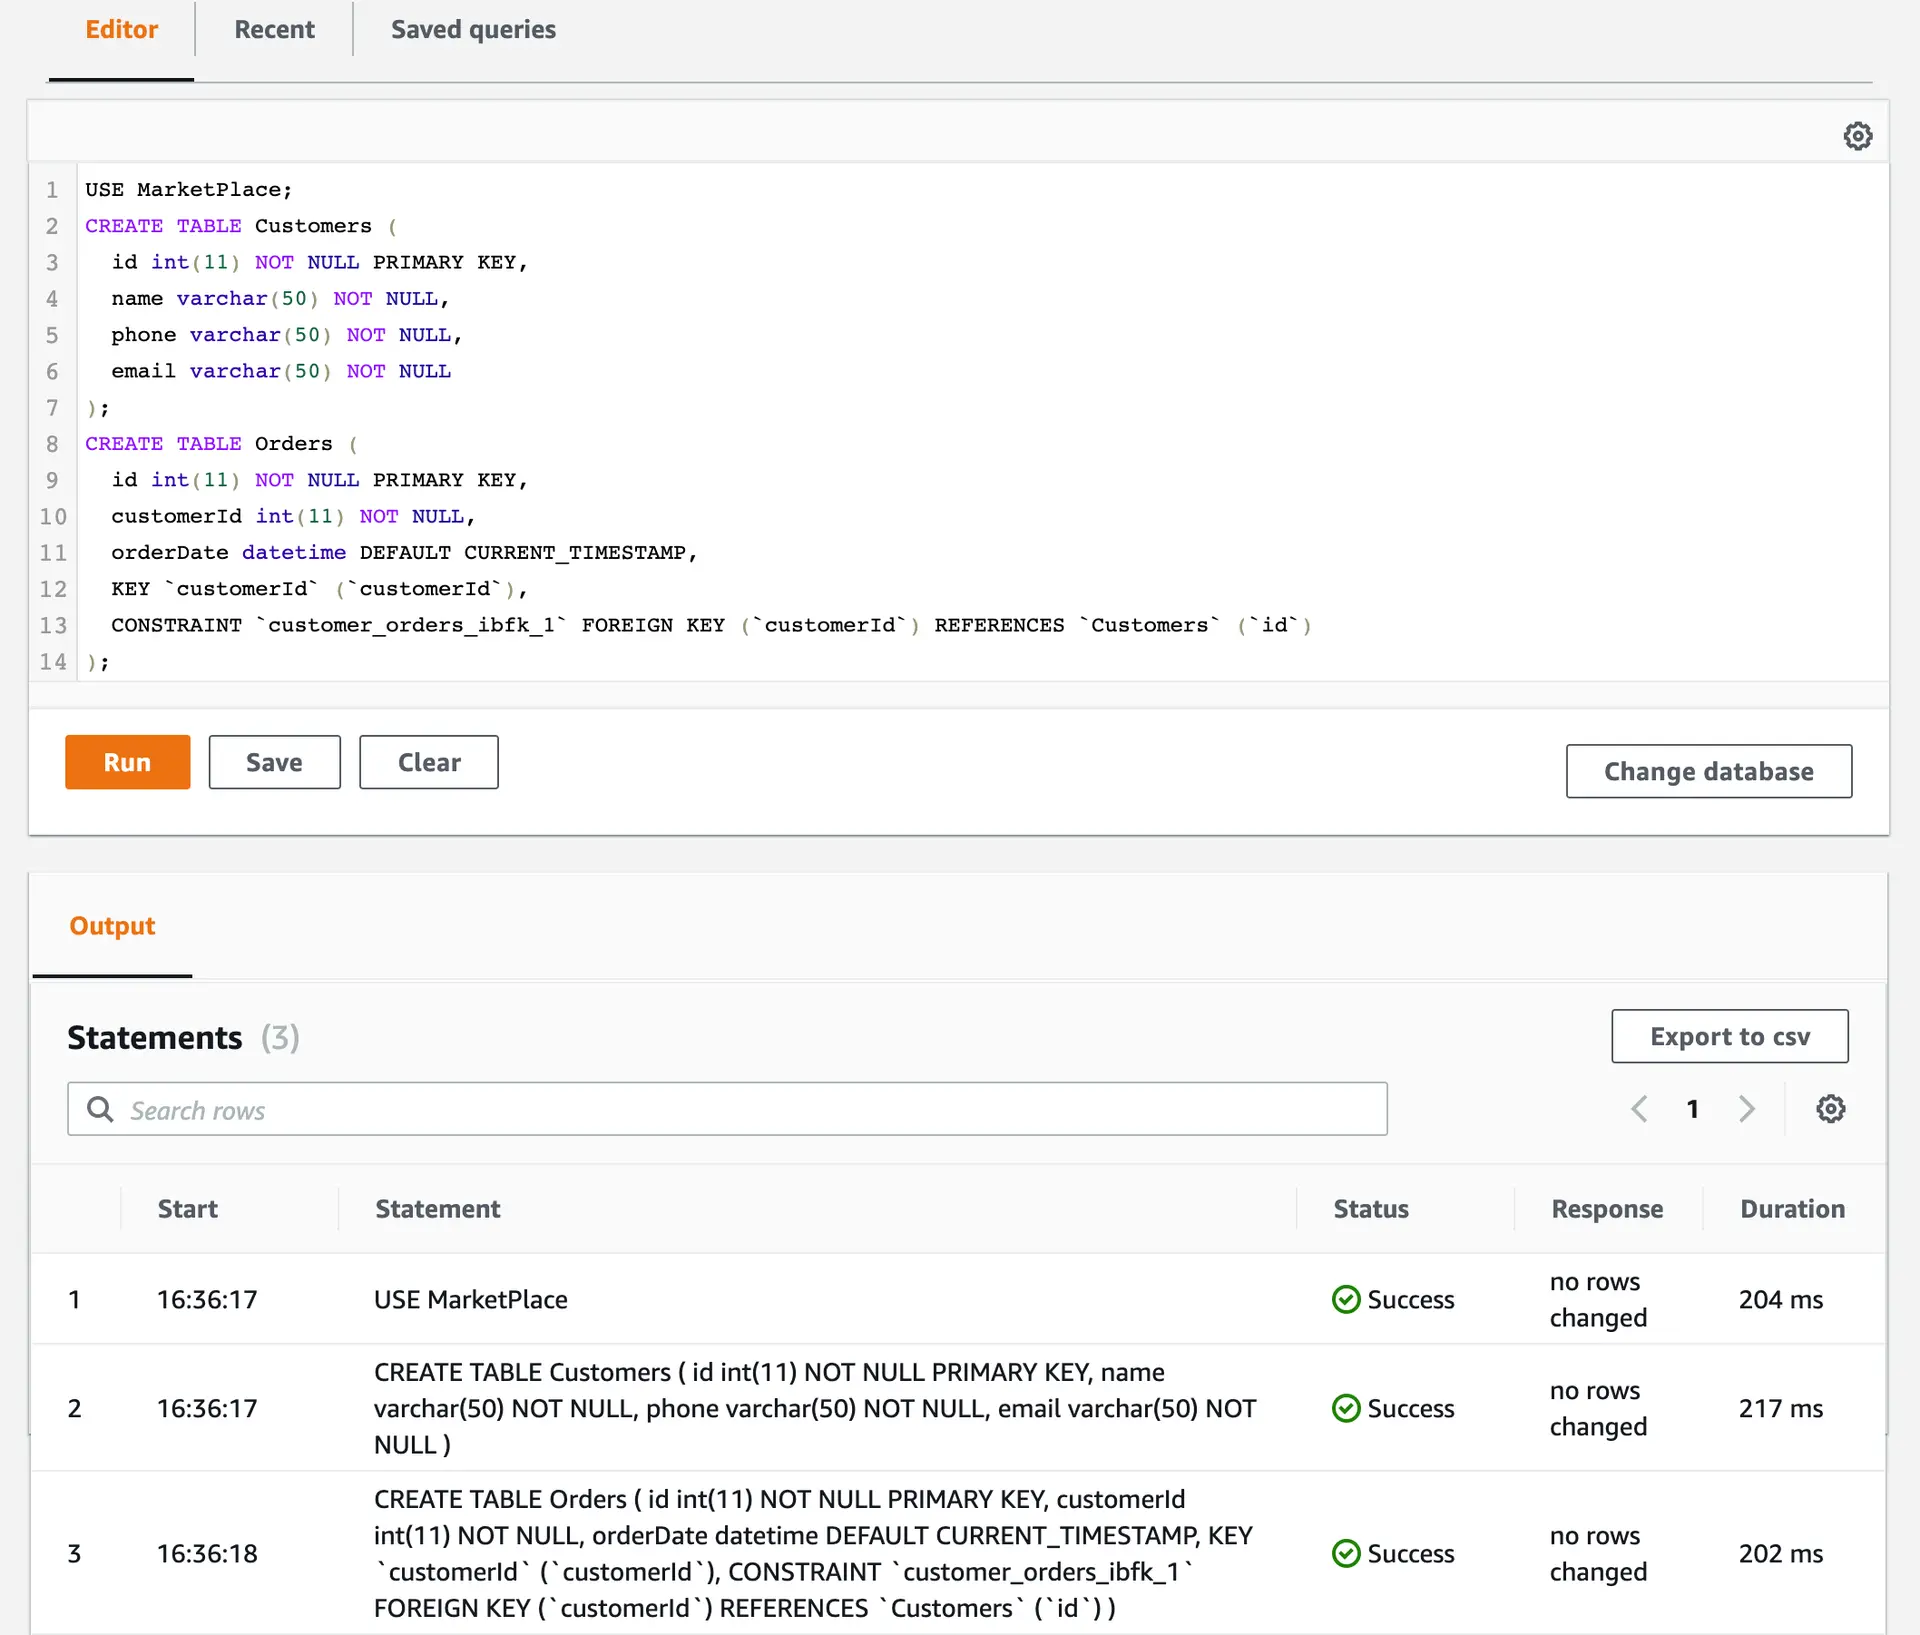
USE MarketPlace;CREATE TABLE Customers ( id int(11) NOT NULL PRIMARY KEY, name varchar(50) NOT NULL, phone varchar(50) NOT NULL, email varchar(50) NOT NULL);CREATE TABLE Orders ( id int(11) NOT NULL PRIMARY KEY, customerId int(11) NOT NULL, orderDate datetime DEFAULT CURRENT_TIMESTAMP, KEY `customerId` (`customerId`), CONSTRAINT `customer_orders_ibfk_1` FOREIGN KEY (`customerId`) REFERENCES `Customers` (`id`));Return to your command line and run amplify api add-graphql-datasource from the root of your amplify project.

Push your project to AWS with amplify push.
Run amplify push to push your project to AWS. You can then open the AppSync console with amplify api console, to try interacting with your RDS database via your GraphQL API.
Interact with your SQL database from GraphQL
Your API is now configured to work with your serverless Amazon Aurora MySQL database. Try running a mutation to create a customer from the AppSync Console and then query it from the RDS Console to double check.
Create a customer:
mutation CreateCustomer { createCustomers( createCustomersInput: { id: 1 name: "Hello" phone: "111-222-3333" email: "customer1@mydomain.com" } ) { id name phone email }}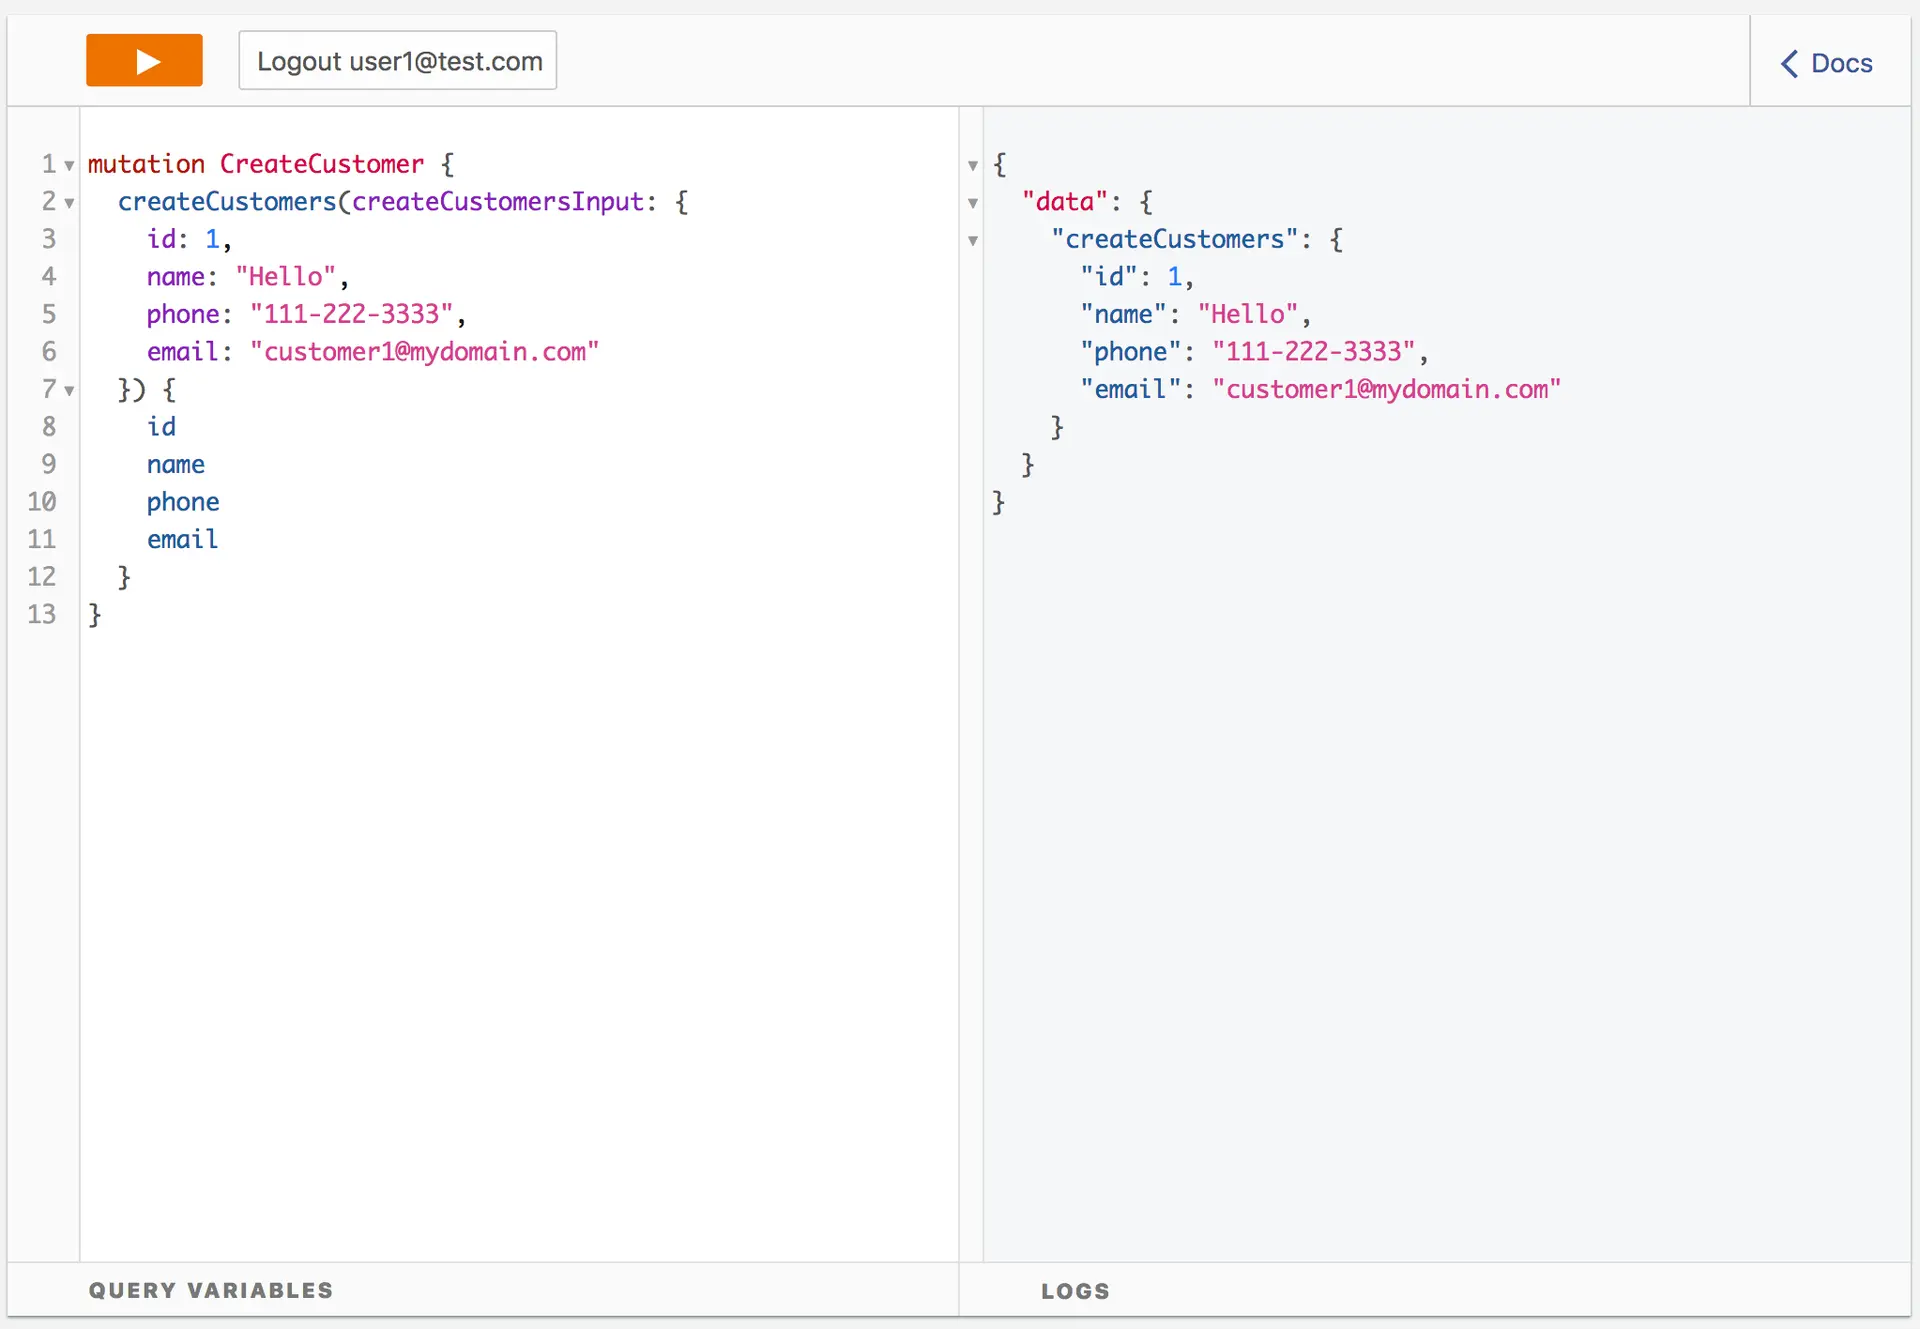
Then open the RDS console and run a simple select statement to see the new customer:
USE MarketPlace;SELECT * FROM Customers;
How does this work?
The add-graphql-datasource will add a custom stack to your project that provides a basic set of functionality for working with an existing data source. You can find the new stack in the stacks/ directory, a set of new resolvers in the resolvers/ directory, and will also find a few additions to your schema.graphql. You may edit details in the custom stack and/or resolver files without worry. You may run add-graphql-datasource again to update your project with changes in the database but be careful as these will overwrite any existing templates in the stacks/ or resolvers/ directories. When using multiple environment with the Amplify CLI, you will be asked to configure the data source once per environment.